
Whether you’re an experienced digitizer or embroidery business owner you may come across some digitizing issues such as low-quality images, file compatibility issues, color contrast inaccuracy, incorrect placement of stitches, and more.
The good news is that there are several preventative measures available that will reduce the amount of time that you spend maintaining your digitizing process and increase the efficiency of your business.
Let’s have a look at them:
Troubleshooting Common Digitizing Issues
How To Solve Digitizing Issues Occur During Embroidery Digitizing?
1. Poor Quality Image:
The most common digitizing issue occurring during the process is low-quality images. This includes pixelated, distorted, or blurred images.
but you don’t need to worry if you face this issue because here we’ll discuss how you can troubleshoot this problem.
Solutions
- Most importantly, you’ve to set the appropriate resolution of your design image because high resolution leads to high-quality embroidery design. Increasing the resolution of the design may result in a large file size but don’t worry, many software support large files for digitizing.
- Your scanner or camera lens also affects the quality of the image so you should clean them using any soft cloth like microfiber towels and remove any fingerprints or dust regularly.
- When scanning images for the digitizing process, inadequate lighting can blur or dim the image colors. So you have to use a proper lightning source to improve the clarity of the image.
Bonus Offer: EMdigitizing provides vector art services to improve the quality of the image you’re using for embroidery at the most affordable rate. So, contact us and place your order.
2. Problems With Color And Contrast:
We all know that color precision is the most important element in the embroidery process. So, if you face any incorrect color digitizing issue while digitizing any photograph or other type of design try these tips to avoid such type of issue.
Solutions:
- If your image is too cool like bullish or too warm like yellowish in color, you first need to adjust it. To match the color adjust the white balance setting on your scanner or camera whatever you use.
- If the display calibration is inappropriate it can cause color differences in digitized and original design. So, always use software or display calibration tools to adjust the correct color.
- After following the above tips, if you still face color differences then use editing software to manually set the saturation, color balance, and level of contrast of images you’re going to digitize.
Pro Tip: You can also use Pantone matching system color charts to prevent any contrast or color inaccuracy
3. File Compatibility Problem:
Some of you may face an issue during the embroidery process, that is your file is not compatible with your embroidery machine. Or, sometimes your image file is not compatible with your embroidery digitizing software.
See how you can solve this issue easily!
Solutions:
- First of all, choose the file in a popular file format like PNG, JPG, or PDF. Because they’re mostly compatible with all platforms.
- But if you have an incompatible file you need to convert it into a suitable file format by using any free online conversion tool.
Additionally, you have to make sure that your digitizing software is up to date because new versions of software usually support a wide range of files. - Don’t delete the original file because if you still face any compatibility issues you can again convert it with different conversion tools.
4. Incorrect Placement Of Stitches:
In embroidery digitizing, precision is key. A small incorrect placement of stitches results in poor quality in the end product.
When you’re digitizing, it is important to make an outline so that digitizing software fills the stitches based on these outlines. So, you’ve to make sure of the placement of the stitches.
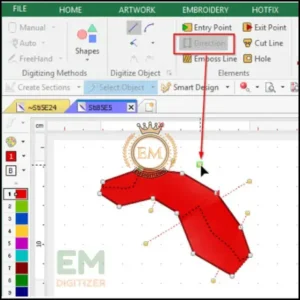
If you place stitches incorrectly, the embroidery design may look deformed after embroidery.
Solutions:
- Compare the digitized version with the original design to make sure all the stitches are placed correctly and keep their shape.
- Also, make sure the design doesn’t have extra stitches that cause misplacement.
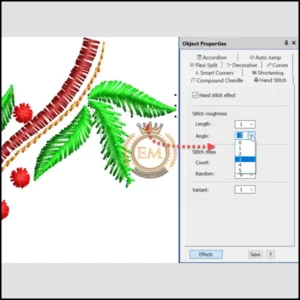
- You can experiment with adjusting stitch types like fill stitch, satin stitch, etc, stitch angles, and stitch length to enhance the accuracy of the design.
5. Errors in Sequence Of Stitches:
The sequences of stitches in embroidery designs can affect the overall appearance of the final product. You must follow proper sequence, especially for embroidering on caps or other garments.
For example, when stitching text and borders you first sew the letters and then move to borders to make sure your design comes accurately after embroidery.
Solutions:
Let’s see how you can resolve this digitizing issue:
- After completing the digitizing process review the sequence of stitches to prevent overlaps or jumps.
- Moreover, examine the skipped or missed stitches that lead to incorrect embroidery design.
- Click on the preview feature on digitizing software to check the sequence or any error.
- You can also do test stitching on extra fabric to check the proper design sequence.
6. Incorrect Use Of Digitizing Tools:
Some digitizing software has automatic digitizing features that may lead to poor quality of the end product. So, you’ve to manually digitize your design to get high results. If you use digitizing tools correctly you can get most from them.
Let’s discuss how to use these tools correctly:
Solutions:
- Get knowledge about the tools available in your application and how to use them properly.
- Ensure that you choose the right tool for the specific type of effect you want. For instance, use the appropriate type of stitch for filling, outlines, or lettering.
- Don’t just rely on automatic tools and fine-tune the digitized design manually.
- Use features like stitch editing, path adjustment, or node manipulation in software to solve the issue occurring during the embroidery process.
Final Words:
Lastly, if you’re still facing digitizing issues you need an expert digitizer. So, it’s time to introduce our company EMdigitizing. That is an experienced and reputable company offering different types of embroidery digitizing and vector art services to clients all around the world for their embroidery design and printing needs.
If you need anything digitized quickly and with high quality, EMDigitizing is a fantastic option. We offer first-time customers a 50% discount on all of our services, plus a free quote that is generated in less than 5 minutes.
You can ask any question about this article in the comments, and don’t forget to share it with people you think might find it useful.
Best of luck on your journey to making your creative visions a reality!
Frequently Asked Questions:
- Poor quality image
- Problems with color and contrast
- File compatibility problem
- Incorrect placement of stitches
- Errors in the sequence of stitches
- Incorrect use of digitizing tools
If the colors in your digitized image are accurate then use editing software to manually set the saturation, color balance, and level of contrast of the images you’re going to digitize.
You should Increase the resolution of the design which may result in a large file size. Your scanner or camera lens also affects the quality of the image so you should clean them using any soft cloth like microfiber towels and remove any fingerprints or dust regularly. Also, use a proper lightning source to improve the clarity of the image.
During digitizing, you can fix lines that are jagged or distorted by:
- The lines will be smoother if you adjust the stitch density.
- For smoother lines, increase the stitch length
- When digitizing, use the software’s manual editing options to make the lines sharper.
- Make adjustments if the embroidery machine’s tension causes distortion.
When digitizing, inconsistent thread tension can occur if the bobbin tension is set incorrectly, the tension disk is dirty or broken or the machine has mechanical problems.
To ensure consistency and accuracy in digitized designs you have to use high-quality scanning software and properly calibrate the device to ensure color accuracy. Also, use up-to-date digitizing software for optimal results.


