
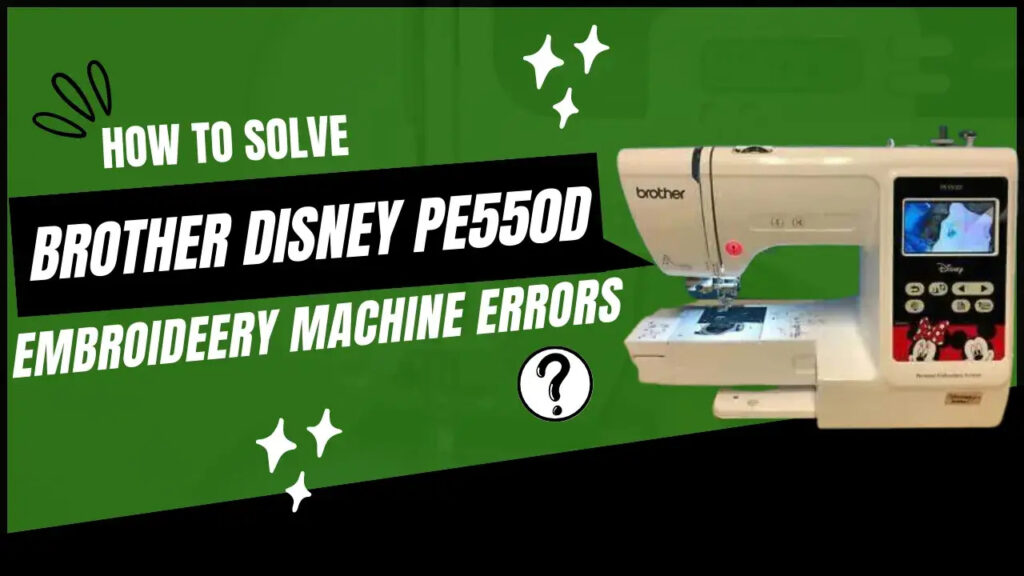
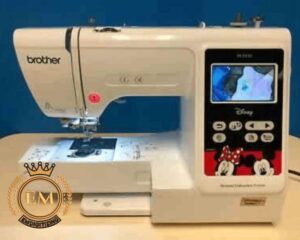
Brother Disney PE550D Embroidery Machine Errors & How To Solve It
Let’s discuss Brother Disney PE550D Embroidery Machine Errors & How To Solve It
Brother Disney PE550D Common Errors & Solution:
The issues with advanced machines are that a lot of models are now computerized. They give out error messages when something is not right, the issue is that sometimes those error messages are not right or they just don’t go away. When that happens you are in big trouble.
The common embroidery problems of brother Disney PE500D Embroidery machine could be fixed by you. All you want are the right set of tools, the right information, and the right parts. Luckily, Brother still makes spare parts and has a lot of owner’s manuals accessible to assist you to fix your machine.
Let’s discuss troubleshooting the Brother Disney PE550D embroidery machine.
The small problem that often shows up in almost all brothers and other brands of machines is the needle problem.
If the needle is not threaded, put in place rightly, bent, or broken your machine would not work right. Changing the needle is a common repair and would get you back on track again.
Other places that are a source of these common issues are the bobbin area and the machine threading. Check how you have threaded both, this will help you solve simple issues and get you working on your project rather quickly.
All you have to do is to thread again or check the tensions to resolve a lot of problems that come with these 2 sections of your machine. This applies if your machine stops sewing.
If the machine doesn’t start ensure you turned the power switch on. It is a simple issue with a simple repair but it is left off on more events than you can ever imagine.
How To Take Apart Brother Embroidery Machine?

Before you take your machine apart you better see if the warranty is still valid. If it is, then you don’t touch it but take it to a professional repairman to handle the task.
To start, ensure to remove the needle and thread after unplugging the machine. After that, you have to remove the bobbin, bobbin case, and shuttle. A basic screwdriver must loosen the 2 screws on the needle plate. Now remove the screw holding the needle housing the face plate and the three screws holding the cover on the machine. Those are placed at the back of the machine.
After that unscrew the bolts holding the motor in place and remove it. Drag the connector holding the wires to the power supply. Once that is done remove the thumb and dig the screws that hold the spring and the presser foot bar.
On the tensioner loosen the thumbscrews and use a basic screwdriver to remove the tensioner and its spring. Next, unscrew the belt guard screw and remove the belt and the guard from their positions.
Lastly, remove the screw holding the knob of the handwheel in place. Take the knob out and the washer and you are done. If you remembered all these steps and could do them in reverse when it is time to place it call back together again.
Troubleshooting Brother Bobbin:

The key to solving problems with the bobbin is to ensure you have wound it right and that you have placed it in the right position. Plus, you can’t use metal bobbins in brother machines that are not made for metal bobbins. If the machine comes with plastic on that is what you change it with!
Quick set bobbin system or top-loading on brother machines can’t get a metal bobbin at any time.
If you do they wouldn’t work fine. So, ensure to use brother-made bobbins as other brands might damage the quality or worst-case scenario ruin your machine.
Your owner’s manual would aid you to thread the bobbin rightly to ensure you don’t lose or misplace it.
Brother Machine Not Feeding Material:

If the machine you own comes with a drop feed, then check to see if that feed has been lessened. If it has, then you have to raise it to the right position. Then if you have a technical feed, check to see if the foot has been lessened to the right position. If it has not, then lessen it!
Next, check the length of your stitch. Few brother machines would not feed anything if the length of the stitch is very short.
It is as well possible that the feed dogs have been jammed with fuzz, broken threads, and dust. A fine cleaning would take care of this problem in no time.
Pay vigilant attention to the areas holding your feed dogs and bobbin case when doing your cleaning. If these areas get jammed your brother’s machine would not work as it should.
Brother Not Stitching:

There are a few causes of this issue. Initially, the top thread might not have been rightly threaded so stop what you are doing and check again to ensure it is rightly threaded.
If it is you can shift on to the next place to check and that would be the needle bar thread guide. The needle thread has to be at the back of the needle bar thread guide. Thirdly you have to check the thread to see if it is tangled or knotted. Fourthly, the thread might be very big for the needle.
Untangle the thread or change the thread to one that would fit the needle. Next, check the needle and see if it is bent or the tip is blunt. After that, check for scratches around the needle hole. Change the needle if those are present.
Lastly, check your presser foot and bobbin to see if they’re the reason for the issue. You are searching for scratches and if the bobbin has them you have to change it.
Not Picking Up The Thread:

It is possible that you are holding on to the needle thread very lightly and you would have to relax your grip to resolve this issue. Or the top thread could be tangled and you would have to stop and untangle it.
Then the needle could be twisted or threaded incorrectly. Change the needle for the former situation and thread again if the latter is the issue. If the needle is not placed rightly, then that might be the issue and you would have to insert it again for the machine to function properly.
Then the bobbin might not be rightly threaded or the bobbin area isn’t clean. Redo the bobbin and clean its area if this is where the issue lies.
Not Picking Up The Lower Thread:

The same sources found in the former section would be the major suspects here. Always ensure to check the bobbin to see if it is threaded rightly through the shuttle race and if its area is nice and clean.
After that, check the needle to see if it is twisted, broken, or not placed rightly. Change the needle for the first 2 issues and insert it again for the last one. Ensure you have the right spool cap on your thread spool. The wrong-sized cap might cause the thread to get tangled and you would have to detangle it.
When trying to find these problems ensure your owner’s manual is handy. It would aid guide you in solving a lot of these problems and also show you how to thread again the machine rightly.
Brother Machine Jammed:

One source for this issue is that the throat plate might not be clean. You have to remove it to look under to see if fuzz and other things have worked their way in and jammed the machine.
Or try resetting the presser foot with the presser foot lifter. Then you could try to cut any tangled thread wherever it might be found. Also, try to reset the tension after you have threaded your machine again.
For more ideas, head to your owner’s guide to see what it recommends to be the issue. If you can’t un-jam your machine, then take it to an expert repairman and let him tackle the task. He must have more places to look and it might be an intricate repair after all.
Repairing A Brother Machine Foot Pedal:

The best news on this issue is that all you might need is a screwdriver to repair it. There are not a lot of parts in the foot pedal so the repair must go nice and quickly.
The key here is to check the foot pedal first to ensure the wires are not loose, frayed or the pedal itself is not damaged. Then once it is done, only adjust the screw that moves the contact points to your wanted position and you must be fine.
If the foot pedal is controlled by a circuit board, then you won’t be capable to adjust it and might want to take it to a professional repairman.
Brother Handwheel Stuck:

Here is what you have to do. Move the handwheel back and forth to check if that frees it up. If not, then one of the following might be the cause. Rethread the machine and check the tension. If that doesn’t free the handwheel then remove the bobbin. If the handwheel moves then follow the manual of an owner to install the bobbin case again.
If not, then clean the machine and then turn the machine on. Once the machine is on, check to see if the handwheel freely moves. If not then your machine needs service.
Again, don’t do any repairs unless you check your warranty. Even easy ones might void the warranty so read the fine print to ensure you are enabled to do any repair while the warranty is in effect.
How To Fix E1 Error On My Brother Machine?

The E1 error code is an easy issue to resolve. It is to remind you that the presser foot has not been lowered yet. When you see the code, all you have to do is lower the presser foot and begin sewing again.
Computerized error codes are amazing as they could tell you exactly where an issue lies. The only issue is they might malfunction. When that occurs you must not try to fix the issue on your own.
Take it to an expert repairman and let him tackle the task. He must have the right tools and parts to tackle the task easily.
Closing Line:
Troubleshooting your brother’s machine is not tough. That is if the issues are common and easily fixed. Computerized brother machines might not be so easy and might require you to visit your brother repairman more often.
These were the simple guide for Brother Disney PE550D’s common errors & solutions. Now that you very well know how to maintain your machine, it is time to start embroidering. Good luck!
If you want to customize embroidery logo digitizing, EM DIGITIZING will be your best choice. At EM DIGITIZING, we deliver the best embroidery logo digitizing services with the best quality. We offer 50% off on all our services to our potential customers on their first order. So, get a free quote now and we will get in touch with you.
Hope this article will be helpful for you guys!
If there’s any question related to this article feel free to comment to us. And, thanks for reading!
The issues with advanced machines are that a lot of models are now computerized. They give out error messages when something is not right, the issue is that sometimes those error messages are not right or they just don’t go away. When that happens you are in big trouble.
The common embroidery problems of brother Disney PE500D Embroidery machine could be fixed by you. All you want are the right set of tools, the right information, and the right parts. Luckily, Brother still makes spare parts and has a lot of owner’s manuals accessible to assist you to fix your machine.
Let’s discuss troubleshooting the Brother Disney PE550D embroidery machine.
The small problem that often shows up in almost all brothers and other brands of machines is the needle problem.
If the needle is not threaded, put in place rightly, bent, or broken your machine would not work right. Changing the needle is a common repair and would get you back on track again.
Other places that are a source of these common issues are the bobbin area and the machine threading. Check how you have threaded both, this will help you solve simple issues and get you working on your project rather quickly.
All you have to do is to thread again or check the tensions to resolve a lot of problems that come with these 2 sections of your machine. This applies if your machine stops sewing.
If the machine doesn’t start ensure you turned the power switch on. It is a simple issue with a simple repair but it is left off on more events than you can ever imagine.
How To Take Apart Brother Embroidery Machine?
Before you take your machine apart you better see if the warranty is still valid. If it is, then you don’t touch it but take it to a professional repairman to handle the task.
To start, ensure to remove the needle and thread after unplugging the machine. After that, you have to remove the bobbin, bobbin case, and shuttle. A basic screwdriver must loosen the 2 screws on the needle plate. Now remove the screw holding the needle housing the face plate and the three screws holding the cover on the machine. Those are placed at the back of the machine.
After that unscrew the bolts holding the motor in place and remove it. Drag the connector holding the wires to the power supply. Once that is done remove the thumb and dig the screws that hold the spring and the presser foot bar.
On the tensioner loosen the thumbscrews and use a basic screwdriver to remove the tensioner and its spring. Next, unscrew the belt guard screw and remove the belt and the guard from their positions.
Lastly, remove the screw holding the knob of the handwheel in place. Take the knob out and the washer and you are done. If you remembered all these steps and could do them in reverse when it is time to place it call back together again.
Troubleshooting Brother Bobbin:
The key to solving problems with the bobbin is to ensure you have wound it right and that you have placed it in the right position. Plus, you can’t use metal bobbins in brother machines that are not made for metal bobbins. If the machine comes with plastic on that is what you change it with!
Quick set bobbin system or top-loading on brother machines can’t get a metal bobbin at any time. If you do they wouldn’t work fine. So, ensure to use brother-made bobbins as other brands might damage the quality or worst-case scenario ruin your machine.
Your owner’s manual would aid you to thread the bobbin rightly to ensure you don’t lose or misplace it.
Brother Machine Not Feeding Material:
If the machine you own comes with a drop feed, then check to see if that feed has been lessened. If it has, then you have to raise it to the right position. Then if you have a technical feed, check to see if the foot has been lessened to the right position. If it has not, then lessen it!
Next, check the length of your stitch. Few brother machines would not feed anything if the length of the stitch is very short. It is as well possible that the feed dogs have been jammed with fuzz, broken threads, and dust. A fine cleaning would take care of this problem in no time.
Pay vigilant attention to the areas holding your feed dogs and bobbin case when doing your cleaning. If these areas get jammed your brother’s machine would not work as it should.
Brother Not Stitching:
There are a few causes of this issue. Initially, the top thread might not have been rightly threaded so stop what you are doing and check again to ensure it is rightly threaded.
If it is you can shift on to the next place to check and that would be the needle bar thread guide. The needle thread has to be at the back of the needle bar thread guide. Thirdly you have to check the thread to see if it is tangled or knotted. Fourthly, the thread might be very big for the needle.
Untangle the thread or change the thread to one that would fit the needle. Next, check the needle and see if it is bent or the tip is blunt. After that, check for scratches around the needle hole. Change the needle if those are present.
Lastly, check your presser foot and bobbin to see if they’re the reason for the issue. You are searching for scratches and if the bobbin has them you have to change it.
Not Picking Up The Thread:
It is possible that you are holding on to the needle thread very lightly and you would have to relax your grip to resolve this issue. Or the top thread could be tangled and you would have to stop and untangle it.
Then the needle could be twisted or threaded incorrectly. Change the needle for the former situation and thread again if the latter is the issue. If the needle is not placed rightly, then that might be the issue and you would have to insert it again for the machine to function properly.
Then the bobbin might not be rightly threaded or the bobbin area isn’t clean. Redo the bobbin and clean its area if this is where the issue lies.
Not Picking Up The Lower Thread:
The same sources found in the former section would be the major suspects here. Always ensure to check the bobbin to see if it is threaded rightly through the shuttle race and if its area is nice and clean.
After that, check the needle to see if it is twisted, broken, or not placed rightly. Change the needle for the first 2 issues and insert it again for the last one. Ensure you have the right spool cap on your thread spool. The wrong-sized cap might cause the thread to get tangled and you would have to detangle it.
When trying to find these problems ensure your owner’s manual is handy. It would aid guide you in solving a lot of these problems and also show you how to thread again the machine rightly.
Brother Machine Jammed:
One source for this issue is that the throat plate might not be clean. You have to remove it to look under to see if fuzz and other things have worked their way in and jammed the machine.
Or try resetting the presser foot with the presser foot lifter. Then you could try to cut any tangled thread wherever it might be found. Also, try to reset the tension after you have threaded your machine again.
For more ideas, head to your owner’s guide to see what it recommends to be the issue. If you can’t un-jam your machine, then take it to an expert repairman and let him tackle the task. He must have more places to look and it might be an intricate repair after all.
Repairing A Brother Machine Foot Pedal:
The best news on this issue is that all you might need is a screwdriver to repair it. There are not a lot of parts in the foot pedal so the repair must go nice and quickly.
The key here is to check the foot pedal first to ensure the wires are not loose, frayed or the pedal itself is not damaged. Then once it is done, only adjust the screw that moves the contact points to your wanted position and you must be fine.
If the foot pedal is controlled by a circuit board, then you won’t be capable to adjust it and might want to take it to a professional repairman.
Brother Handwheel Stuck:
Here is what you have to do. Move the handwheel back and forth to check if that frees it up. If not, then one of the following might be the cause. Rethread the machine and check the tension. If that doesn’t free the handwheel then remove the bobbin. If the handwheel moves then follow the manual of an owner to install the bobbin case again.
If not, then clean the machine and then turn the machine on. Once the machine is on, check to see if the handwheel freely moves. If not then your machine needs service.
Again, don’t do any repairs unless you check your warranty. Even easy ones might void the warranty so read the fine print to ensure you are enabled to do any repair while the warranty is in effect.
How To Fix E1 Error On My Brother Machine?
The E1 error code is an easy issue to resolve. It is to remind you that the presser foot has not been lowered yet. When you see the code, all you have to do is lower the presser foot and begin sewing again.
Computerized error codes are amazing as they could tell you exactly where an issue lies. The only issue is they might malfunction. When that occurs you must not try to fix the issue on your own.
Take it to an expert repairman and let him tackle the task. He must have the right tools and parts to tackle the task easily.
Yes, Brother Disney PE550D is a good machine as it has a lot of Disney characters and is a simple to use machine.


