
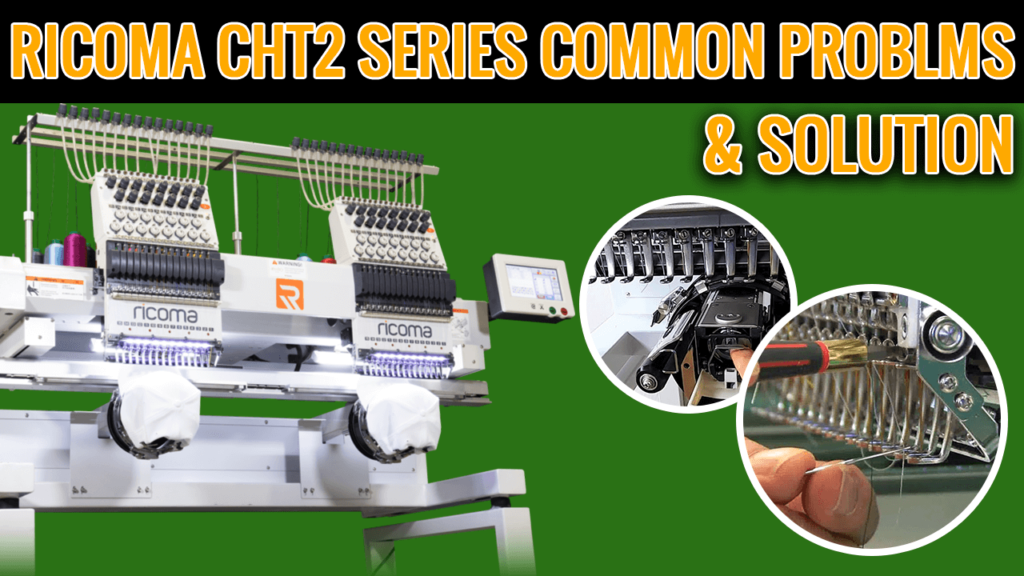
Ricoma CHT2 Series Common Problems And Solutions
Regardless of being such an amazing machine, you can still face some common errors ricoma machines have. Let’s see how to solve those Ricoma CHT2 embroidery issues.
Ricoma CHT2 Series machine embroidery hosts the best combination of quality and efficiency that each and every embroiderer wants in order to grow his or her business.
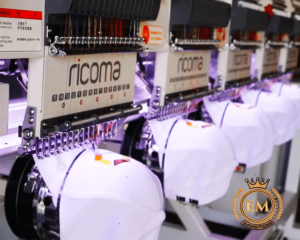
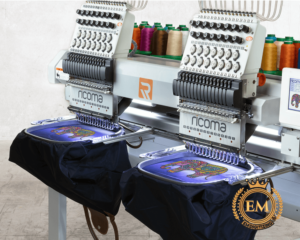
Ricoma CHT2 Series is available in 4 to 12 embroidery heads. This machine embroidery speeds through flats, caps, and ample finished garments with exactness and accuracy.
Ricoma CHT2 Series Common Errors & Solution:
1. Why Ricoma CHT2 Series Making Noises?
A lack of lubrication or incorrect lubrication can cause noise in ricoma CHT2 series. Proper lubrication is important for keeping your machine running smoothly and swiftly, and can help to prevent noise and other problems.
If your embroidery machine is making noise, one of the first things you must do is to check the lubrication and ensure that it is enough and correctly applied.
Or, you can run your machine for a few hours after lubricating it to see if the noise goes or not. If still, you are facing noise issues please contact your technician.
2. How To Do The Maintenance On The Ricoma CHT2 Series?
It is vital to properly maintain your machine to make sure it runs smoothly and swiftly. Oiling the machine at the start of every day and every four hours of constant use is an important part of this maintenance process.
3. How To Adjust The Velcro Bar?
Adjusting the Velcro bar on your machine is not that tough. Please follow these steps in order to adjust the Velcro bar:
1. Loosen the two screws on the left and right sides of the head of the machine.
2. To center the Velcro bar, move the machine to needle number one and ensure the hook placed behind the Velcro bar is in the middle of the bar.
3. Repeat the process on needle number fifteen to make sure that the Velcro bar is aligned properly on both sides of the machine.
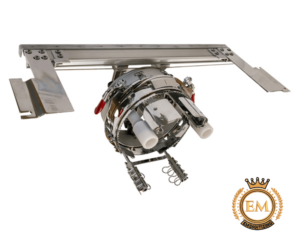
4. How To Fix The Timing On A Ricoma CHT2 Series?
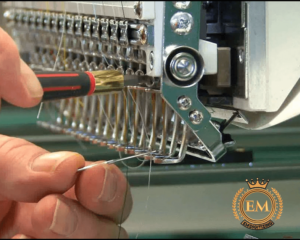
Exact timing is important because it makes sure the needle speed and other moving elements of your machine embroidery are in sync so they can perform your embroidery project amazingly.
When the timing is off, your machine can encounter problems like skipped stitches and inconsistent stitch designs which can damage your whole embroidery designs.
Follow these steps to adjust the timing in your machine:
1. Loosen the four Philip screws placed on every side of the arm to remove the side cover, and then remove the needle plate by unscrewing the two flat screws on top of the needle plate. Take off the bobbin case
2. After removing the needle plate, move your main axis shaft by moving it with an Allen key. Rotate counter-clockwise with an Allen key on the body’s left side to 201 degrees.
If the needle doesn’t come down, try doing another complete turn.
3. Now we can check to see if the timing is right.
Rotary hook timing is very early
Rotary hook timing is very late
Rotary hook timing is just right
If you verify that your timings are right you do not have to perform the adjustment.
4. To adjust it you will have to loosen the first flat-head screw on the right side of the rotary hook.
5. Rotate the main axis wheel unless the second flat head screw appears and loosen it. Then, rotate the main axis again, unless the last flat and screw appears, and loosen it also, three screws in total.
6. Now the rotary hook must be independently moving at the lower shaft.
7. Rotate the main axis and bring down the needle to the right timing degree i.e. 201.
8. Line up the hook tip with the scarf of the needle so that it hides behind it.
9. With a gap of a minimum of 0.1mm to 0.3mm between the hook and the scarf of the needle, hold the rotary hook steady and tighten the set screw on the right side.
10. Rotate the main axis and tighten the other 2 flat head screws you previously loosened.
11. Install the side cover and screw the needle plate back in place.
12. Finally, test your machine!
5. How To Lower The Cap Driver?
Follow these steps in order to lower the cap driver:
1. Place and loosen the four screws inside the driver.
2. Lower the drive ensuring that it doesn’t hit or grind the sewing arm.
6. How To Fix A Color Change Timeout On Your Machine?
To start, please ensure your machine is at hundred degrees by manually rotating the black knob on the far right side of the machine.
Rotate it one or two times just to be certain. And then, confirm if all the take-up levers are the same height.
If one of the is popped down you can go ahead and pop it back up manually and the problem must go away. If one of them is popped up there is a rapid adjustment that we can make which is ‘take up lever adjustment’.
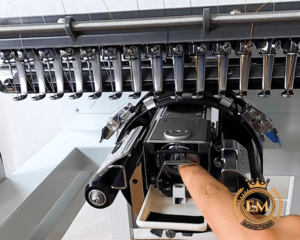
7. How To Clear 257 Errors On The Ricoma CHT2 Series?
Whenever you get a 257 error on the control panel of your machine, it means that one of your heads has nested inside. This also means that the blade wasn’t able to retract because of the thread accumulation.
Let’s see how can you fix this model:
1. Go towards the right side of the machine and toward the back.
2. Locate the cylindrical sensor that is under your machine (the sensor will have 2 blue tips on two edges each)
3. When a cutter error occurs, the black arm to the right of the sensor isn’t aligned with the blue part of the sensor placed on the right side.
4. This black arm has to be adjusted. If you cannot move it, then take all the needle plates off and ensure no thread is interrupting the blade’s path.
5. Proceed to rotate the black arm in any direction unless you get it to line up.
6. Once it is lined up amber or red light on the sensor’s left side will turn on.
7. The light shows that your cutter error is resolved.
Closing Line:
So, this was Ricoma CHT2 Series common errors & solution, ricoma chT2 maintenance, and the troubleshooting ricoma CHT2 series. We hope you enjoyed reading this article as we did in writing.
If you want to customize embroidery logo digitizing, EM DIGITIZING will be your best choice. At EM DIGITIZING, we deliver the best embroidery logo digitizing services with the best quality. We offer 50% off on all our services to our potential customers on their first order. So, get a free quote now and we will get in touch with you.
Hope this article will be helpful for you guys!
If there’s any question related to this article feel free to comment to us. And, thanks for reading!
You can solve noises problems easily in ricoma. A lack of lubrication or incorrect lubrication can cause noise in ricoma CHT2 series. Proper lubrication is important for keeping your machine running smoothly and swiftly, and can help to prevent noise and other problems.
If your embroidery machine is making noise, one of the first things you must do is to check the lubrication and ensure that it is enough and correctly applied.
Or, you can run your machine for a few hours after lubricating it to see if the noise goes or not. If still, you are facing noise issues please contact your technician.
- Why Ricoma Cht2 Series Making Noises?
- How To Do The Maintenance On Ricoma Cht2 Series?
- How To Adjust The Velcro Bar?
- How To Fix The Timing On A Ricoma Cht2 Series?
- How To Lower The Cap Driver?
- How To Fix A Color Change Timeout On Your Machine?
- How To Clear 257 Errors On Ricoma Cht2 Series?
1. Why Ricoma Cht2 Series Making Noises?
A lack of lubrication or incorrect lubrication can cause noise in ricoma CHT2 series. Proper lubrication is important for keeping your machine running smoothly and swiftly, and can help to prevent noise and other problems.
If your embroidery machine is making noise, one of the first things you must do is to check the lubrication and ensure that it is enough and correctly applied.
Or, you can run your machine for a few hours after lubricating it to see if the noise goes or not. If still, you are facing noise issues please contact your technician.
2. How To Do The Maintenance On Ricoma Cht2 Series?
It is vital to properly maintain your machine to make sure it runs smoothly and swiftly. Oiling the machine at the start of every day and every four hours of constant use is an important part of this maintenance process.
3. How To Adjust The Velcro Bar?
Adjusting the Velcro bar on your machine is not that tough. Please follow these steps in order to adjust the Velcro bar:
1. Loosen the two screws on the left and right sides of the head of the machine.
2. To center the Velcro bar, move the machine to needle number one and ensure the hook placed behind the Velcro bar is in the middle of the bar.
3. Repeat the process on needle number fifteen to make sure that the Velcro bar is aligned properly on both sides of the machine.
4. How To Fix The Timing On A Ricoma Cht2 Series?
Exact timing is important because it makes sure the needle speed and other moving elements of your machine embroidery are in sync so they can perform your embroidery project amazingly.
When the timing is off, your machine can encounter problems like skipped stitches and inconsistent stitch designs which can damage your whole embroidery designs.
Follow these steps to adjust the timing in your machine:
1. Loosen the four Philip screws placed on every side of the arm to remove the side cover, and then remove the needle plate by unscrewing the two flat screws on top of the needle plate. Take off the bobbin case.
2. After removing the needle plate, move your main axis shaft by moving it with an Allen key. Rotate counter-clockwise with an Allen key on the body’s left side to 201 degrees.
If the needle doesn’t come down, try doing another complete turn.
3. Now we can check to see if the timing is right.
Rotary hook timing is very early
Rotary hook timing is very late
Rotary hook timing is just right
If you verify that your timings are right you do not have to perform the adjustment.
4. To adjust it you will have to loosen the first flat-head screw on the right side of the rotary hook.
5. Rotate the main axis wheel unless the second flat head screw appears and loosen it. Then, rotate the main axis again, unless the last flat and screw appears, and loosen it also, three screws in total.
6. Now the rotary hook must be independently moving at the lower shaft.
7. Rotate the main axis and bring down the needle to the right timing degree i.e. 201.
8. Line up the hook tip with the scarf of the needle so that it hides behind it.
9. With a gap of a minimum of 0.1mm to 0.3mm between the hook and the scarf of the needle, hold the rotary hook steady and tighten the set screw on the right side.
10. Rotate the main axis and tighten the other 2 flat head screws you previously loosened.
11. Install the side cover and screw the needle plate back in place.
12. Finally, test your machine!
5. How To Lower The Cap Driver?
Follow these steps in order to lower the cap driver:
1. Place and loosen the four screws inside the driver.
2. Lower the drive ensuring that it doesn’t hit or grind the sewing arm.


