
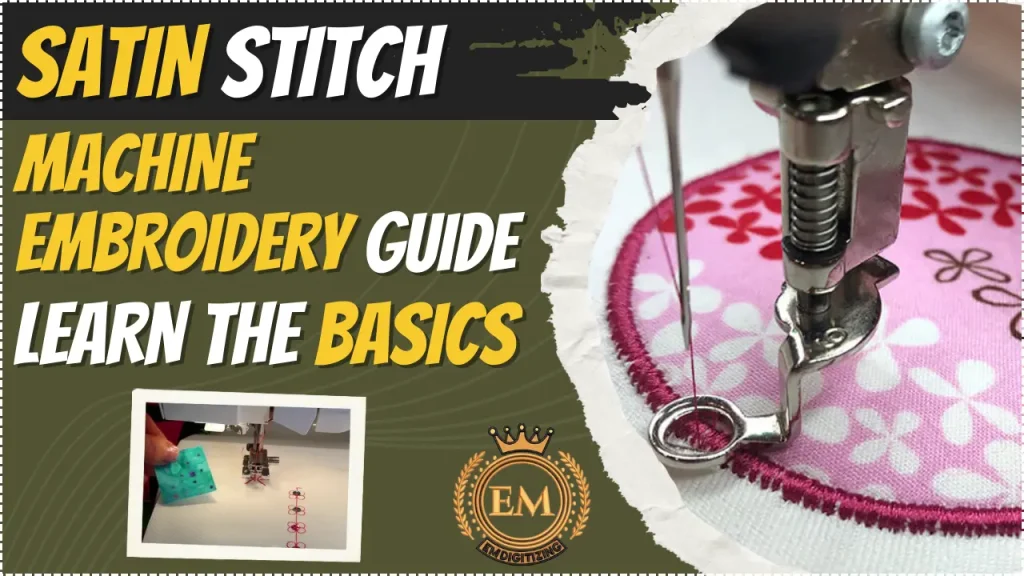
Machine embroidery is a fascinating craft that allows for the creation of intricate and beautiful designs on fabric. One of the fundamental stitches used in machine embroidery is the satin stitch.
This embroidery stitch type is a versatile technique that can be used to fill areas with solid, smooth, and shiny stitches, giving a polished and professional appearance to the embroidered design.
In this article, we will explore the world of satin stitching, from its definition and history to the materials and tools required, step-by-step instructions to master the technique, tips for success, and creative applications that will inspire your embroidery projects.
Satin Stitch Machine Embroidery Guide: Learn The Basics
What is Satin Stitch?
If you’ve ever admired the smooth, glossy finish of a beautifully embroidered design, chances are you were marveling at this stitch type. This stitch is a fundamental technique in machine embroidery that creates a solid, smooth surface by closely spaced parallel lines of stitching.
It’s a go-to stitch for creating bold outlines, filling large areas, and adding intricate details to your embroidery projects.
Importance of Satin Stitch in Machine Embroidery
This is like the MVP (Most Valuable Player) of machine embroidery. It provides the opportunity to add depth, texture, and dimension to your designs. Whether you’re adding vibrant flowers to a dress, personalizing a baby blanket, or embellishing a home decor item, it can elevate your embroidery to a whole new level.
Understanding it and mastering its execution is essential for any machine embroiderer looking to create eye-catching and professional-looking designs.
Understanding the Satin Stitch Technique
Understanding the Satin basic is a valuable step in exploring the art of needlework
Anatomy of the satin embroidery stitch
Imagine your machine needle, creating a row of closely spaced stitches side by side, building layer upon layer until the desired width is achieved.
That’s the essence of this embroidery stitch type. The stitches should be parallel, with no gaps or overlaps, resulting in a smooth and polished appearance. The key to a successful satin embroidery stitch lies in maintaining consistent stitch tension and stitch width.
Types of Designs Suitable for This Stitch
The beauty of it lies in its versatility. It can be used for a wide range of designs, from intricate floral patterns to bold lettering and everything in between. Appliques, monograms, borders, and intricate details that require a solid fill are all perfect candidates for this stitch.
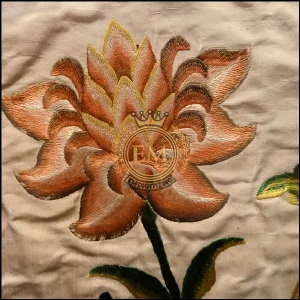
With its ability to create smooth curves and sharp corners, this stitch lends itself well to creating realistic and visually appealing embroidery designs.
Materials and Tools for Satin Stitch
With just these few items, you’re well on your way to creating beautiful designs that pop with texture and color.
Choosing the Right Fabric
When it comes to satin embroidery stitch, the fabric is like the canvas for your artwork. To achieve the best results, opt for tightly woven fabrics like cotton, linen, or even silk. These fabrics provide a smooth surface for the stitches to glide across, resulting in a neat and polished finish.
Stay away from loosely woven fabrics like burlap or terry cloth, unless you enjoy the challenge of a bumpy embroidery adventure.
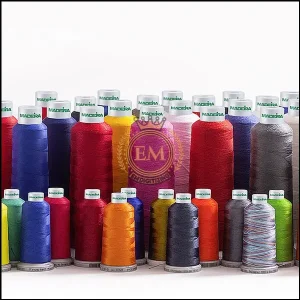
Selecting Thread and Needles
Thread choice is crucial for a successful stitch. Polyester or rayon embroidery thread is a popular choice, thanks to its lustrous sheen and wide range of available colors. When it comes to needles, a sharp or embroidery needle with a fine point is your best buddy.
It will effortlessly pierce through the fabric and help you create those smooth and envy-inducing stitches.
Other Essential Tools for This Stitching
Besides fabric, thread, and needles, there are a few more tools that can make your satin machine embroidery stitch journey a breeze.
A good pair of embroidery scissors will ensure clean and precise cuts, while an embroidery hoop will keep your fabric taut and prevent puckering.
Oh, and don’t forget that an iron—pressed fabric makes for a happy stitch and an even happier embroiderer.
So, grab your tools and get ready for some magic!
Step-by-Step Guide to Creating Satin Stitch
Let’s dive in and learn how to make your embroidery projects shine with this stitch!
Preparing the Design and Fabric
Choose a design that is suitable for stitch, typically one that has solid areas to fill in. Smooth and tightly woven fabrics like cotton or linen work best for achieving clean and precise stitches.
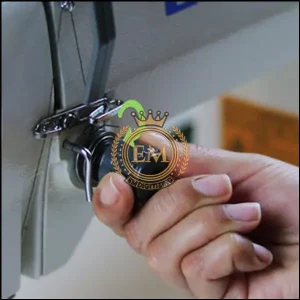
Setting Up the Machine and Thread
Once you have your design and fabric ready, it’s time to set up your trusty embroidery machine. Select the appropriate needle and thread for your project.
Remember, thicker threads will result in a bolder satin embroidery stitch, while thinner threads will create a more delicate look. Load the chosen thread into the machine and make sure it is threaded correctly.
Adjusting stitch length and density
To achieve the desired stitch effect, you’ll need to adjust your machine settings. First, set your stitch length to a shorter length, typically between 0.5mm to 2mm, depending on the size of the design.

Additionally, you may need to adjust the density of your stitch. Experiment with different settings to achieve the desired coverage and smoothness in you embroidery software.
Stabilizing the Fabric
To ensure your fabric stays wrinkle-free and taut during the stitching process, it’s crucial to stabilize it. This can be done using stabilizers such as tear-away or cut-away stabilizers, depending on the complexity of your design. Hoop the fabric and stabilizer together, making sure they are securely held in place.
Executing the Satin Embroidery Stitch
Now comes the exciting part – stitching your stitch! Select the satin embroidery stitch function on your machine, which is usually a zigzag stitch with a close stitch length.
Begin stitching along the edges of the design, carefully following the shape and filling in the desired area with multiple passes of this stitch. Take it slow and steady, ensuring smooth and even stitches throughout.
Tips and Tricks for Achieving a Flawless Satin Stitch
While this may seem straightforward, a few tips and tricks can make a world of difference in achieving a flawless result. Here are some pointers to keep in mind:
Maintaining a steady sewing speed
When executing this stitch, maintaining a steady sewing speed is crucial. Rapid movement can result in uneven stitches, while sewing too slowly may cause excessive thread buildup.
Find a speed that allows you to smoothly guide the fabric through the machine while achieving consistent stitch coverage.
Ensuring even thread tension
Uneven thread tension can lead to unsightly gaps or puckering in your stitch. Make sure your machine’s tension is properly adjusted for the chosen thread and fabric combination.
Pulling the thread gently before starting can also help ensure the tension is even throughout your stitching.
Dealing with intricate or complex designs
For intricate or complex designs, this stitch can be a bit challenging. To achieve clean lines and prevent thread buildup in tight areas, consider using a smaller hoop or stabilizer.
You can also try using a narrower satin embroidery stitch width or breaking down the design into smaller sections to stitch
Conclusion
Satin stitch opens up a world of possibilities in machine embroidery. With a little practice, patience, and a sprinkle of creativity, you can achieve beautiful and professional-looking satin stitches.
Whether you’re embellishing clothing, personalizing home decor, or exploring artistic expression, it is a versatile technique that adds a touch of elegance and charm to any project.
So go forth, stitch with confidence, and let your satin embroidery stitches shine!
EMdigitizing: Your Go-To Embroidery Digitizing Specialist
Looking for top-notch embroidery digitizing? Look no further than EMdigitizing!
We specialize in both embroidery digitizing and vector art services, ensuring a swift turnaround for all your projects. Feel free to explore our website to discover our premium services.
Plus, we’re thrilled to extend a special 50% discount to all our first-time customers across our range of services. Interested in a free quote? We’ve got you covered with quick, 5-minute quote generation.
Don’t miss out on this limited-time offer to elevate your embroidery project with EMdigitizing. If you have any questions or need further information, please don’t hesitate to reach out.
Thank you for considering EMdigitizing for your embroidery needs.
Frequently Asked Questions:
Yes, you can machine embroider on satin. It’s important to use a stabilizer to prevent puckering and to choose the right needle and thread for a smooth finish.
The number of threads used for a satin stitch depends on the desired thickness and the fabric. Typically, 2-3 strands of embroidery floss are used for a balanced satin stitch on most fabrics.
A small, sharp embroidery needle is best for satin stitch. Sizes 7, 8, or 9 are commonly used as they allow for smooth stitching without damaging the fabric.
The size of a satin stitch can vary depending on the design and fabric. Generally, it ranges from 1/8 inch to 1/2 inch in length, ensuring full coverage without pulling or puckering the fabric.


