
Embroidery is a versatile and creative way to add intricate designs and patterns to fabric. When it comes to enhancing the neckline of a garment, neckline embroidery can truly elevate its overall appearance.
With the advancement in technology, embroidery machines make it easier than ever to achieve professional-level results.
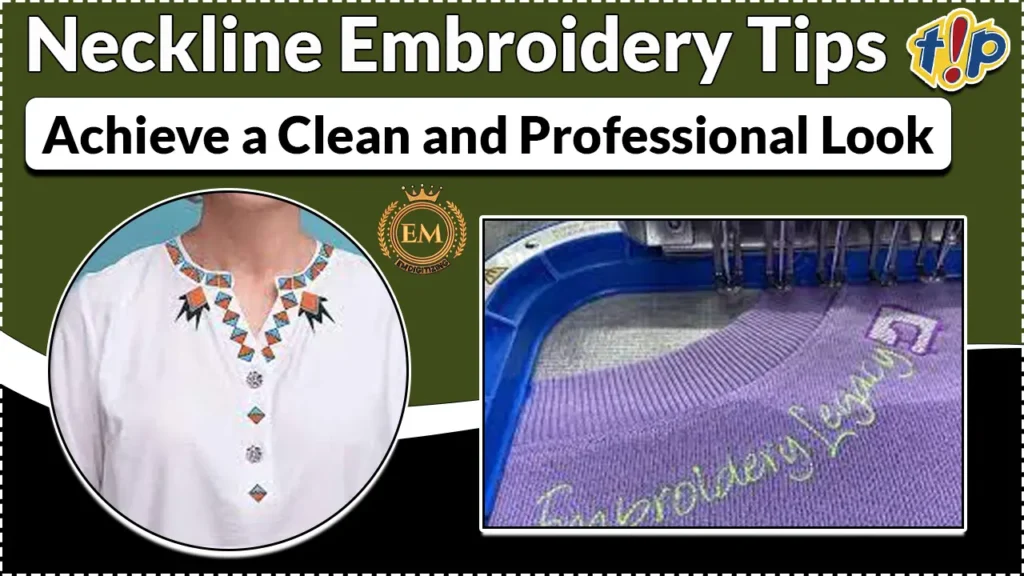
In this article, we will guide you through the step-by-step process of doing embroidery on the neckline using an embroidery machine.
So, let’s dive in!
Neckline Embroidery Tips: Achieve A Clean And Professional Look
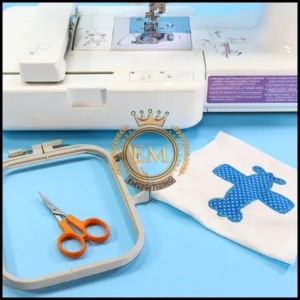
Required Materials and Equipment for Neckline Embroidery:
- Fabric (Opt for lightweight fabrics like cotton or linen, as they are easier to embroider and provide a smooth surface for the design to shine)
- Embroidery threads in your desired colors
- Embroidery hoop to hold the fabric taut
- Embroidery machine needles
- Embroidery stabilizer to reinforce the fabric
- Scissors
Make sure to gather these essentials before diving into your embroidery project.
Professional Neckline Embroidery: Step-By-Step Process:
Let’s have a look at how to do embroidery on the neckline:
Step 1: Preparing the Fabric for Embroidery
Before we begin the embroidery process, it’s crucial to prep the fabric properly. Start by washing and ironing the fabric to remove any wrinkles or creases.
This will ensure a smooth and flawless embroidery surface. Additionally, consider using a stabilizer on the back of the fabric to prevent puckering and distortion during stitching.
Step 2: Properly Stabilizing the Fabric
To avoid fabric distortion during stitching, it’s vital to choose the right stabilizer. For lightweight fabrics, use a tear-away stabilizer for easy removal after embroidery.
For heavier fabrics, a cut-away stabilizer provides long-lasting stability. Position the stabilizer underneath the fabric and hoop as a single unit, ensuring the entire embroidery area is adequately supported.
Step 3: Hooping the Fabric
Hooping is a crucial step in ensuring precise and accurate embroidery. For embroidery on the neckline, hoop the fabric and stabilizer together, making sure the neckline is centered within the hoop.
Use clips or pins to secure any excess fabric to the outer part of the hoop, ensuring it doesn’t interfere with the embroidery process. This way, you can achieve a flawless and professional finish.
Step 4: Selecting and Preparing the Embroidery Design
When selecting an embroidery design for your neckline, take into consideration the style, size, and shape of the garment. Opt for designs that complement the neckline’s curve and enhance the overall aesthetic.
Whether you prefer floral motifs, geometric patterns, or even personalized monograms, there’s a plethora of designs out there to suit every taste and occasion.

To ensure a perfect fit and alignment, it’s essential to adapt the chosen embroidery design to the shape and size of the neckline.
Use software or apps specifically designed for embroidery to adjust the design accordingly. This will guarantee that the embroidery looks seamless and professional once it’s stitched onto your garment.
Bonus Tip: If you can’t digitize your design yourself, you can hire us. We manually digitize your design and guarantee high-quality results with quick delivery.
Step 5: Transferring the Design to the Embroidery Machine
Now that you have your design ready, it’s time to transfer it to your embroidery machine. Most machines allow you to load designs via USB or direct connection.
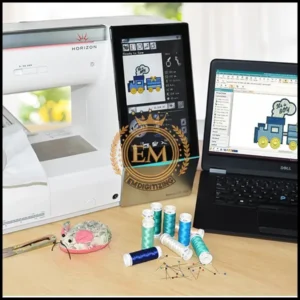
Follow the instructions provided by the manufacturer to transfer the design files to your machine. Double-check that the design is properly positioned on the embroidery hoop, ensuring it will align perfectly with your neckline.
Step 6: Setting up the Embroidery Machine for Neckline Embroidery
Thread Selection and Preparation
When it comes to selecting the thread for embroidery on the neckline, you want to choose something that complements your fabric and design.
Think of it as picking the perfect accessory for your outfit. Once you’ve chosen your thread, make sure it’s properly wound onto the spool and threaded through the machine.
Adjusting Tension and Needle Position
Tension is like the Goldilocks of embroidery – it needs to be just right.
Too tight and your stitches might pucker, too loose and they’ll look sloppy. Check your machine’s manual for instructions on adjusting tension. And while you’re at it, don’t forget to position the needle properly.
Setting Embroidery Machine Parameters
Now it’s time to get down to business and set the embroidery machine parameters. This includes selecting the appropriate stitch pattern and adjusting the speed.
You want to find the right balance between “snail’s pace” and “speed demon.” Remember, slow and steady wins the embroidery race.
Step 7: Starting the Embroidery Process
It’s showtime!
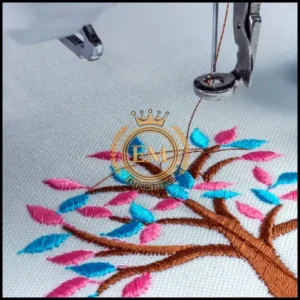
While the machine is busy stitching away, you need to be an attentive supervisor. Keep an eye out for any potential mishaps, like tangled threads or fabric snags.
It’s your job to prevent any embroidery disaster from happening. And remember, a little pep talk never hurts – tell your machine it’s doing a fabulous job!
Finishing and Care Tips for Neckline Embroidery:
After completing the embroidery process, you have to give your neckline design a finishing touch:
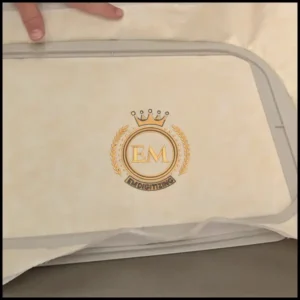
Removing the Fabric from the Hoop
Congratulations, you’ve reached the finish line!
Carefully remove the fabric from the hoop, making sure not to accidentally unravel all your hard work. Think of it like taking off a delicate piece of jewelry – slow and gentle wins the day.
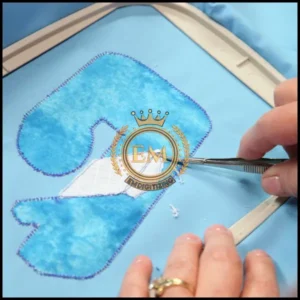
Trimming and Cleaning Embroidery Stitches
Just like you trim those split ends or pluck those stray eyebrow hairs, your embroidery stitches sometimes need a little grooming too. Trim any loose threads and clean up any stray stitches to give your neckline that polished look.
Voila, you’re a stitching superstar!
Caring for the Embroidered Neckline
Your embroidered neckline deserves some TLC to keep it looking fabulous. Be gentle when washing, preferably by hand or on a delicate cycle.
Avoid using harsh detergents or bleach, unless you want your masterpiece to go through an unwanted fashion crisis. And remember, always air dry to avoid any unexpected shrinkage.
Bottom Line:
In conclusion, neckline embroidery with an embroidery machine opens up a world of possibilities for adding intricate and beautiful designs to your garments.
By following the step-by-step process outlined in this article, you can achieve professional-looking results and personalize your clothing in unique ways.
Remember to take your time, experiment with different designs and fabrics, and have fun with the creative process. With practice and patience, you’ll soon become adept at creating stunning neckline embroidery that will make your garments truly stand out.
EMdigitizing: #1 Embroidery Digitizing Service Provider:
Need to turn your embroidery designs into digital form?
Check out EMDigitizing. We’re providing embroidery digitizing and vector art services worldwide.
Right now, you can get 50% off your first order. Just tell us about your project, and we’ll give you a free quote quickly. Click here to get your quote in less than 5 minutes, so you can plan and budget easily.
Isn’t that great?
Don’t miss this chance to get quality services at a lower price. But hurry this special deal won’t last forever.
Contact us today for your free quote and let us help make your designs come to life.
Remember, if you need any help, just give us a call. We’re here to make things easier and cheaper for you!
Frequently Asked Questions:
The basic steps in embroidery include selecting a design, transferring it onto fabric, setting up the fabric in an embroidery hoop, and then using various stitches to complete the design.
To do embroidery stitches, you need a needle and thread. You create stitches by pushing the needle through the fabric and pulling the thread to the desired length, following patterns like running stitch, backstitch, or satin stitch.
Neckline embroidery often uses techniques like mirror work, applique, or intricate stitches like chain stitch and satin stitch to create decorative patterns around the neckline of garments.


