
Introduction:
Embroidery is a beautiful and versatile art form that can be used to decorate a wide variety of items. However, the most common question that embroiderers face is “How to properly resize embroidery designs?” And “How can we achieve this without compromising the quality and integrity of the design?”
This article is your comprehensive guide to mastering the art of resizing machine embroidery designs.
Stays with us till the end because we have something exciting for you.
Let’s get started!
How To Properly Resize Embroidery Designs?
Basic Rules For Resizing Machine Embroidery Designs
To successfully resize embroidered designs, a number of critical aspects must be taken into account. Before we go any further, it’s important to understand that not all designs are the same.
The stitch count, the stitch density, and the recommended fabric for each pattern are all unique. These things determine how much a design can be resized without losing any of its quality.
- Maintain stitch density: It’s crucial to keep the stitch density the same when resizing a design. If you resize a design too much, the stitch density can get too low or too high, which would compromise the quality and overall look of the pattern. A lack of consideration in this aspect can result in an uneven, unsightly design.
- Maintain the aspect ratio: The relationship between the design’s height and width is known as the aspect ratio. It is essential to keep this proportion while resizing to avoid distorting the design.
- Minimum and Maximum Stitch Length: There are minimum and maximum stitch lengths that embroidery machines can use. Any resizing you do should keep within those ranges so that your embroidery machine doesn’t have any problems.
- Preview the design: A trial run on some scrap fabric is a must before committing to a resized design. This method makes sure that the design not only meets your needs but also embroiders correctly and looks great.
Not All Embroidery Designs Are Created Equal
The complexity of designs varies greatly. Some of them have a lot of detail, like a high stitch count, complicated stitch patterns, and stitch density. It can be hard to resize these kinds of patterns, and the quality may change. Less complex patterns with fewer stitches are easier to resize.
Think about the kinds of stitches and underlay methods that were used in the original pattern. Some designs may not be easy to resize, while others can be changed more easily. Before beginning the resizing process, it is crucial to assess the particular design and its limits.
There are some ways to resize embroidery designs, which will be discussed below. So keep on reading.
At EMdigitizing, we can create complex embroidery designs without affecting their qualities. Also, our experts can resize your design according to your choice while keeping in mind the complexity of the design.
Methods For Resizing Machine Embroidery Designs
There are three main ways to adjust the size of embroidered designs:
- Software Resizing: This is the simplest and most usual way to do it, especially for designs with simple structures. You can change the size of the design with just one click on special embroidery software.
- Manual Changes: For plans with more details, you may need to make changes by hand. To do this, we need to adjust each component of the design separately.
- Redigitizing: Sometimes, you have to start from scratch to get the design to the right size. This process requires a lot of work, but it’s often necessary for very complicated patterns.
Your personal preferences and the features of the design will determine which way you use it.
How To Resize Embroidery Designs: Step-By-Step Guide
Resizing embroidery designs can be a bit tricky, but it’s not impossible. To correctly resize embroidered designs, follow these steps:
Step 1: Determine The Size Of The Design
Choosing the size of the pattern is the first step in resizing machine embroidered designs. To do this, either measure the image on your computer screen or print it out and use a ruler to measure it. Once you know what size the design is, you can figure out how much you need to change it.
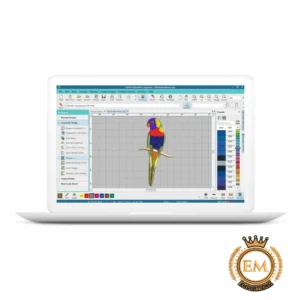
Step 2: Choose The Right Software
You need the appropriate software in order to resize embroidery designs. Some examples of embroidery software are Embird, Wilcom, and Hatch. With these programs, it’s easy and accurate to change the size of embroidery designs.
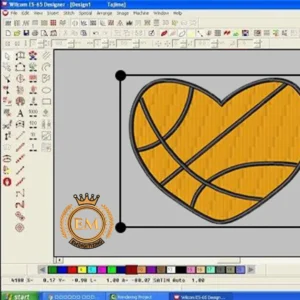
Step 3: Open The Design In The Software
After picking out the right program, you need to open the embroidery design in it. Most embroidery design systems support various embroidery formats, including DST, PES, and JEF.
Step 4: Resize The Design
Once you’ve opened the design in the program, you can change its size. You can usually change the size of the pattern by a certain percentage or by a fixed size in most embroidery software. If you want to resize a design without distorting it, you should keep the original aspect ratio.
Step 5: Check The Design
You need to check the design to make sure it looks good after you’ve changed its size. You can achieve this in two ways: either by previewing the design in the software or by physically stitching it. If you like the layout, you can download it and use it in your work.
Bonus Offer: Some of you may find resizing machine embroidery designs difficult. So don’t need to worry! Your embroidery digitizing partner is here. We manually resize your design and adjust every single detail separately. Consequently, you do not have to spend many hours just resizing it.
Role Of Stitch Length In Embroidery
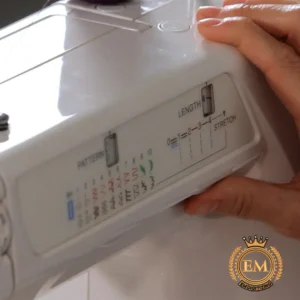
When embroidering, stitch length is crucial. It determines the final product’s appearance and quality. It is important to know the right length of the running stitch.
- Too Long: If the stitch length is too long, the pattern might look messy and loose.
- Too Short: On the other hand, if the stitch length is too short, the design may become excessively dense and difficult to detect.
The ideal running stitch rules vary depending on factors like fabric type, thread thickness, and the design itself. If you want to do perfect embroidery, you must stick to the right stitch length.
Conclusion: Properly Resizing Machine Embroidery Designs Need Focus
Resizing machine embroidery designs is a very careful process that needs close attention to detail and knowledge of how the design works. Carefully consider things like aspect ratio, stitch density, and stitch length to make sure your changed design meets your needs.
You can change the size with resizing software, but you should always test the pattern first before stitching it out. It is important to keep in mind that not all designs are created equal and that the resizing method should be selected accordingly.
Understanding digitizing theory in depth is necessary to become an expert at resizing embroidery designs. You may easily adjust your embroidery designs without sacrificing their quality or aesthetic appeal if you have the necessary information and resources.
Exciting Offer!
EMdigitizing is an experienced and reputable embroidery digitizing company, offering full embroidery digitizing and vector editing services to clients all over the world.
For anyone who wants anything digitized quickly and with high quality, EMDigitizing is a fantastic option. We offer first-time customers a 50% discount on all of our services, plus a free quote that is generated in less than 5 minutes.
Contact us right now and don’t forget to share it with people you think might find it useful.
Best of luck to you! Thank you so much for reading!
- Option 1: Use a free online embroidery design resizing tool, such as BuzzSize or Resize Embroidery.
- Option 2: Import your embroidery design into free vector editing software, such as Inkscape or GIMP, and resize it manually.
To change the size of your embroidery design, you can use embroidery software that offers resizing options, ensuring accurate and proportional adjustments]. You can also click and drag corner nodes to proportionally size the design or use middle nodes to adjust height or width independently.
To resize a design in Hatch embroidery, open your design in Hatch, select it, and use the “Scale” or “Resize” tool to adjust its size proportionally or as desired. Remember to maintain the aspect ratio for accurate resizing.
To resize an embroidery design in Embird, open the design in the Editor, go to “Edit” then “Resize,” and enter the desired dimensions or percentage for resizing. Then save the resized design.


