Embroidery on nylon fabric can add a touch of elegance and uniqueness to your projects. Whether you’re embellishing a nylon jacket or adding embroidery to a nylon bag, using an embroidery machine can make the process easier and more efficient.

In this step-by-step guide, we will walk you through the process of nylon embroidery with an embroidery machine, from choosing the right materials to setting up your machine for optimal results.
Embroidery on Nylon: The Ultimate Guide
Choosing The Right Materials And Equipment For Embroidery On Nylon:
Selecting The Appropriate Embroidery Thread:
When it comes to embroidery on nylon, choosing the right embroidery thread is crucial. Nylon is a slick and slippery fabric, so using a thread specifically designed for nylon is recommended.
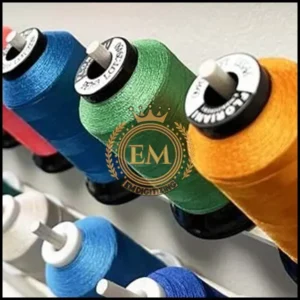
Look for polyester threads, as they have a higher resistance to friction, which helps prevent fraying and breakage during the embroidery process.
Additionally, polyester threads offer vibrant colors and excellent wash-ability, making them ideal for nylon fabrics.
Understanding The Right Type Of Stabilizer For Nylon:
Stabilizer plays a key role in ensuring a successful embroidery on nylon. Nylon is a lightweight fabric prone to shifting and puckering, so using the right stabilizer is essential for keeping the fabric stable during embroidery.
Tear-away stabilizers are commonly used for nylon, as they provide temporary support and can be easily removed after embroidery.
However, if you’re working with very delicate or sheer nylon, you may opt for a water-soluble stabilizer, which dissolves completely after embroidering.
Step-By-Step Process Of Embroidery On Nylon:
Step # 1: Cleaning And Pre-Washing The Nylon Fabric
Before embroidering on nylon, it’s important to clean and pre-wash the fabric. This helps eliminate any dirt, oils, or chemicals that may be present, ensuring a clean and smooth surface for embroidery.
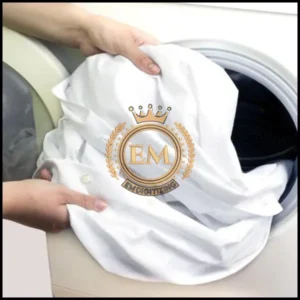
Avoid using fabric softeners, as they can leave a residue that may interfere with the adhesion of stabilizers and the embroidery process itself.
Step # 2: Stabilize Nylon
Now, nylon tends to be stretchy, which can cause the fabric to shift and pucker during embroidery. To prevent this, you’ll need to use embroidery stabilizers.
Choose a lightweight water-soluble stabilizer and hoop it along with your fabric. This will provide stability and support, making your embroidery experience a whole lot smoother.
Step # 3: Hooping The Nylon Fabric Securely
Hooping the nylon fabric securely is crucial to prevent fabric shifting and ensure accurate embroidery placement. Start by selecting an appropriate hoop size that fits your design.
Place the outer hoop on a flat surface, position the nylon fabric on top, and gently press the inner hoop down, sandwiching the fabric between the two hoops.
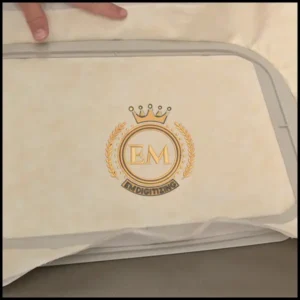
Make sure the fabric is taut but not stretched, as excessive tension can distort the design. Tighten the hoop screw firmly, ensuring the fabric is securely held in place.
Step # 4: Adjusting Machine Tension Settings For Nylon
To achieve optimal stitch quality when nylon embroidery, it’s crucial to adjust the tension settings on your embroidery machine. Nylon is typically more slippery than other threads, so loosening the tension slightly can help prevent thread breakage and puckering.
However, be cautious not to loosen it too much, as it can result in loose stitches. Experiment with the tension settings on scrap fabric to find the perfect balance for your machine and thread combination.
Step # 5: Choosing The Appropriate Needle Size And Type
Using the right needle is essential for smooth and precise embroidery on nylon. Opt for a sharp embroidery needle, preferably with a small eye, as this will reduce the risk of snagging or damaging the delicate fabric.
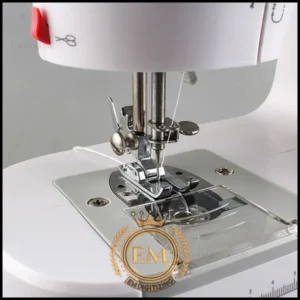
The needle size should be appropriate for the thickness of your nylon fabric. Smaller needle sizes, such as 70/10 or 75/11, are commonly used for lightweight nylon, while heavier nylon may require larger needle sizes.
Reminder: Remember to change the needle regularly to maintain optimal performance.
Step # 6: Selecting And Digitizing The Embroidery Design
When it comes to embroidering on nylon fabric, it’s important to choose designs that are suitable for this type of material. Nylon fabric has its own unique properties, so opt for designs that are not too intricate or dense, as they may not stitch well on nylon.
Once you’ve found the perfect design, it’s time to digitize it for optimal stitching on nylon. Digitizing is the process of converting a design into a format that an embroidery machine can read.
When digitizing for nylon, consider using slightly wider stitches and reducing the density of the design to prevent puckering and distortion.
Step # 7: Embroidery Process
Insert the embroidery file and start the embroidery, watching the fabric behavior. Nylon may shift or pucker, so be prepared to pause and readjust as needed. Keep an eye on the thread tension throughout the process to ensure smooth stitches.
Step # 8: Finishing And Caring For Embroidered Nylon Projects
After completing your embroidered nylon project, it’s essential to give it a proper finishing touch. Trim any loose threads carefully to ensure a clean appearance. Secure any loose ends using a dab of fabric glue or by hand-stitching them.
When it comes to washing and ironing embroidered nylon fabric, it’s advisable to follow the care instructions that come with the fabric.
Generally, it’s best to hand wash nylon garments or use the gentle cycle on the washing machine. To avoid damaging the embroidery, iron on a low heat setting or use a pressing cloth to protect the stitches.
Troubleshooting Common Issues In Nylon Embroidery:
Despite your best efforts, you may still encounter some challenges when embroidering on nylon:
- If you experience thread breaks or fraying, try using a quality embroidery thread and adjusting the tension on your machine. Sometimes, using a lubricant specifically designed for embroidery thread can also help.
- Design distortion or misalignment can be frustrating, but there are ways to address these issues. Check that your fabric is securely hooped and that your design is properly centered. If you notice distortion during stitching, stop the machine and make adjustments to the tension, stabilizer, or design digitization.
Bottom Line:
Remember, practice makes perfect when it comes to embroidering on nylon. Don’t be discouraged if your first attempts aren’t flawless.
With time, patience, and a bit of troubleshooting, you’ll soon be creating stunning embroidered projects on nylon fabric.
Happy embroidering!
EMdigitizing: The Digitizing Partner You Can Trust:
EMdigitizing is your trusted partner in embroidery digitizing and vector art services, serving clients worldwide.
What’s great about EMdigitizing is they’re really fast and do a super job. You can get a free quote in less than 5 minutes. And guess what? If you’re a new customer, you’ll get a huge 50% discount on all their services.
Don’t miss out on this amazing offer. Click the link, and EMdigitizing will make your embroidery designs look awesome. It’s a fun and easy way to make your embroidery projects even better!
Frequently Asked Questions:
Yes, nylon can be embroidered, but it requires specific techniques and settings due to its slippery and heat-sensitive nature.
Yes, you can embroider on 100% nylon, using a suitable stabilizer, proper needle, and adjusting machine settings appropriately.
Embroidering on ripstop nylon is possible, but careful handling is essential due to its lightweight and durable weave.
Nylon can be sewn, but it requires sharp needles and appropriate thread tension to prevent puckering and runs.
Nylon is not entirely rip-proof but is highly resistant to tears and rips, especially in weaves like ripstop nylon.
