
Underlay Stitches For Embroidery & Digitizing
In this article, we will discuss everything you need to know about underlay stitches for embroidery and digitizing. So, without any further due, let’s dive deep into this topic.
What Are Underlay Stitches In Embroidery Digitizing?

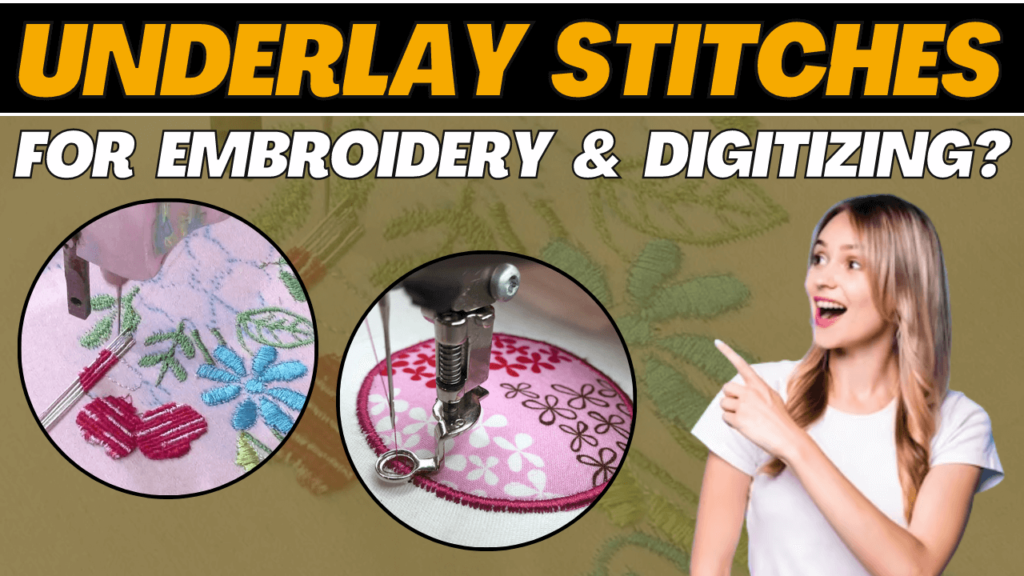
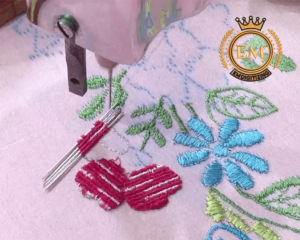
Underlay stitches in embroidery digitizing are the first stitches sewn into the fabric to prepare it for the top layer of stitching, also known as the design stitches. The purpose of underlay stitches is to provide stability and support to the fabric and to ensure that the design stitches sit properly on the surface. Underlay stitches can be done in different stitch types, lengths, and directions, depending on the specific design and the type of fabric being embroidered.
Importance of Underlay Stitches In Embroidery:

Underlay stitches play a crucial role in the quality and durability of an embroidered design. Some of the main benefits of underlay stitches include:
1. Providing stability:
The underlay stitches help to stabilize the fabric and prevent it from stretching or distorting as the design stitches are sewn.
2. Supporting the design:
It also act as a foundation for the design stitches, helping to keep the design looking neat and tidy, even after repeated washings or wear and tear.
3. Improving stitch definition:
These stitches can help to define the design and make the stitching look more crisp and professional.
4. Enhancing durability:
It also helps to reinforce the fabric and make the embroidered design more durable and long-lasting.
In short, underlay stitches are an important aspect of the embroidery digitizing process and help to ensure the final product is of high quality and looks great for years to come.
Different Types of Embroidery Underlay Stitches:
There are several different types of underlay stitches used in embroidery digitizing, including:
1. Running Stitch:
This is the most basic type of underlay stitch and is used for simple designs and lightweight fabrics.
2. Stem Stitch:
Stem stitch is commonly used for designs that require more stability, such as lettering or outlines.
3. Box Stitch:
Box stitch creates a series of box shapes and is used to provide additional support and stability to the fabric.
4. Cross Stitch:
Cross stitch is often used for designs that require a lot of coverage and stability, such as fill patterns.
5. Satin Stitch:
Satin stitch is used for smooth, flowing designs and provides a stable foundation for the design stitches to lie on.
6. Zigzag Stitch:
Zigzag stitch is used for designs that require more flexibility, such as curved or circular shapes.
The choice of underlay stitch depends on the specific design and the type of fabric being embroidered. The digitizing software will often have options for different types of underlay stitches, and the digitizer can choose the most appropriate stitch for each design.
Using Underlay Techniques for Quick Fixes:
Underlay techniques can be used for quick fixes in embroidery digitizing.
Here are a few examples:
1. Correcting fabric puckering:
If the fabric is puckering during the embroidery process, adjusting the underlay stitch type or length can help to correct this issue.
2. Improving stitch definition:
If the design stitches are looking loose or blurry, adding an underlay stitch can help to improve the stitch definition and create a more crisp and professional look.
3. Fixing stitch skipping:
If certain stitches in the design are skipping, adjusting the underlay stitch type or length can help to prevent the fabric from stretching and causing skipped stitches.
4. Enhancing coverage:
If the design is not covering the fabric evenly, adjusting the underlay stitch type or length can help to ensure that the fabric is covered properly and the design looks uniform.
These are just a few examples of how underlay techniques can be used for quick fixes in embroidery digitizing. With a good understanding of underlay techniques and how to use them, digitizers can quickly and easily make adjustments to improve the final result.
Using Underlay in Your Embroidery Software:

Using underlay in your embroidery software is an important aspect of the embroidery digitizing process. Here are the steps to use underlay in your embroidery software:
Load your design into the software:
Start by loading your design into the software, either by creating it from scratch or by importing it from another source.
Choose your underlay stitch type:
Most embroidery software will have a variety of underlay stitch types to choose from, such as running stitch, stem stitch, box stitch, cross stitch, satin stitch, and zigzag stitch. Choose the type of underlay stitch that is appropriate for your design and the type of fabric you will be embroidering on.
Set the underlay stitch parameters:
Once you have chosen your underlay stitch type, set the stitch parameters such as stitch length, spacing, and direction. This will determine how the underlay stitches will look and how they will interact with the design stitches.
Preview the underlay stitches:
Before you sew your design, preview the underlay stitches to ensure that they look the way you want them to. This will give you the opportunity to make any necessary adjustments before you start the embroidery process.
Sew your design:
Once you are satisfied with the underlay stitches, sew your design as you normally would. The underlay stitches will be sewn into the fabric first, providing a stable foundation for the design stitches.
These are the basic steps to use underlay in your embroidery software. The specific steps may vary slightly depending on the software you are using, but the basic concept is the same. By using underlay in your embroidery software, you can create high-quality, professional-looking embroidery designs that will last for years to come!
Closing line:
Understanding underlay is essential to quality embroidery designs. The underlay stitch is a crucial part of the digitizing process and provides a stable foundation for the design stitches to lie on. Without a proper underlay, the design stitches can become distorted, uneven, or even skipped. By understanding the importance of underlay and how to use it effectively, you can create high-quality, professional-looking embroidery designs that are durable and long-lasting.
Additionally, understanding underlay can also help you to troubleshoot issues that may arise during the embroidery process. For example, if the fabric is puckering or the design stitches are looking loose or blurry, adjusting the underlay stitch type or length can help to correct these issues and improve the overall quality of the embroidery design.
We hope you enjoyed reading this article as we did in writing.
If you want to customize embroidery logo digitizing, EM DIGITIZING will be your best choice. At EM DIGITIZING, we deliver the best embroidery logo digitizing services with the best quality. We offer 50% off on all our services to our potential customers on their first order. So, get a free quote now and we will get in touch with you.
Hope this article will be helpful for you guys!
If there’s any question related to this article feel free to comment to us. And, thanks for reading!
Underlay is a stitching technique used in embroidery digitizing to provide a stable foundation for the design stitches. Its role is to prevent the fabric from stretching or distorting as the design stitches are sewn, which can result in a more consistent, high-quality embroidery design.
In digitizing, the underlay stitch is
usually sewn into the fabric before the design stitches are sewn. The underlay
stitch type and parameters, such as stitch length, spacing, and direction, are
set in the embroidery software, and then the design is sewn.
There are several different types of
underlay stitches, each with a specific purpose. For example, running stitch
underlay is used to provide a basic foundation for the design, while stem
stitch underlay can help to improve the stitch definition. Cross stitch
underlay is used to enhance coverage, while satin stitch underlay can be used
to create a smooth, polished look.
By understanding the role of underlay in
embroidery and digitizing, digitizers can make informed decisions about which
underlay stitch type and parameters to use in order to achieve the desired
results. This knowledge can help to improve the overall quality of the
embroidery design and ensure that it will look great for years to come.
- Running Stitch:
This is the most basic type of underlay stitch and is used for simple designs and lightweight fabrics.
- Stem Stitch:
This type of underlay stitch is commonly used for designs that require more stability, such as lettering or outlines.
- Box Stitch:
This type of underlay stitch creates a series of box shapes and is used to provide additional support and stability to the fabric.
- Cross Stitch:
This type of underlay stitch is often used for designs that require a lot of coverage and stability, such as fill patterns.
- Satin Stitch:
This type of underlay stitch is used for smooth, flowing designs and provides a stable foundation for the design stitches to lie on.
- Zigzag Stitch:
This type of underlay stitch is used for designs that require more flexibility, such as curved or circular shapes.
Underlay can be used to fix errors in embroidered projects by addressing issues such as fabric distortion, skipped stitches, and stitch definition. Here are a few ways that underlay can be used to fix errors:
Fabric distortion: If the fabric is puckering or the design stitches are becoming distorted as the design is sewn, adjusting the underlay stitch type or length can help to prevent this from happening. For example, using a heavier or denser underlay stitch can help to provide more stability to the fabric.
Skipped stitches: If the design stitches are skipping or coming loose, this can be caused by a lack of stability in the fabric. By using an underlay stitch that is closer together or a tighter stitch type, the design stitches will be less likely to skip or become loose.
Stitch definition: If the design stitches are looking blurry or indistinct, using a different underlay stitch type or adjusting the underlay parameters can help to improve stitch definition. For example, using a stem stitch underlay can help to create a clearer, more defined look.
By understanding how underlay works in
fixing errors in embroidered projects, you can address issues as they arise and
improve the overall quality of your embroidery designs. Additionally, if you
are digitizing your own designs, incorporating the right underlay techniques
can help you to avoid errors in the first place and ensure that your designs
look great from start to finish.
Wilcom Hatch is a digitizing software that is known for its advanced features and capabilities. Here are a few factors that make Wilcom Hatch more advanced than other digitizing software:
User-friendly interface: Wilcom Hatch has a user-friendly interface that is intuitive and easy to navigate, even for users with limited digitizing experience. The software includes a wide range of tools and features that are easy to access and use, making it a popular choice among digitizers.
Advanced underlay tools: Wilcom Hatch includes advanced underlay tools that allow digitizers to control the stitch type, length, spacing, and direction of their underlay stitches. This level of control helps to ensure that the underlay stitch provides the necessary stability to the fabric and prevents issues such as fabric distortion and skipped stitches.
Stitch editing tools: Wilcom Hatch includes a range of stitch editing tools that allow digitizers to make precise adjustments to their design stitches. These tools can be used to modify the stitch type, length, and spacing, and can be used to correct errors or improve the overall quality of the design.
Design automation: Wilcom Hatch includes a range of design automation tools that can help digitizers to save time and increase efficiency. For example, the software includes tools for automatic layout and placement, automatic color changes, and automatic digitizing of simple designs.
Compatibility with a range of formats: Wilcom Hatch is compatible with a range of embroidery machine formats, making it easy for digitizers to use the software with their preferred embroidery machine.


