
Rules For Resizing Machine Embroidery Designs
Resizing machine embroidery designs can be a useful technique for adjusting the size of an existing design to fit different projects or garments. In this article, we’ll explore some of the key rules to keep in mind when resizing machine embroidery designs.
Basic Rules For Resizing Machine Embroidery Designs:
When resizing machine embroidery designs, it’s important to follow these basic rules:
Maintain aspect ratio:
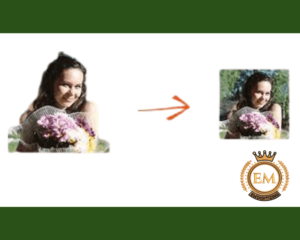
To keep the design proportional, it’s important to maintain the aspect ratio of the design when resizing. This means that if you’re increasing the size of the design, you should increase both the height and width by the same percentage.
Check stitch density:
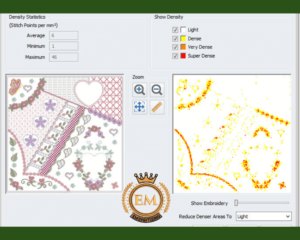
The stitch count of an embroidery design can impact the final look of the design. When resizing, be sure to check the stitch density of the design to ensure that it’s appropriate for the new size.
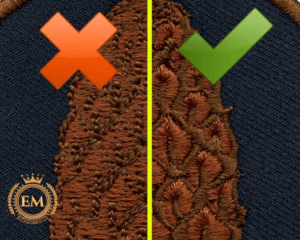
Avoid overstretching:
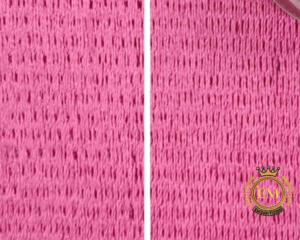
Over-stretching a design can result in distorted or broken stitches. When resizing, be mindful of the maximum stitch length and avoid stretching the design beyond its limits.
Test the resizing designs:
Before stitching the resizing designs, it’s important to test it on a scrap piece of fabric to ensure that the design looks and stitches as desired.
Consider design elements:
Some design elements, such as lettering or small details, may not resize well. Be mindful of these elements and consider adjusting or redrawing them as needed when resizing the design.
How To Resize Embroidery Designs?
To resize an embroidery design, you will need embroidery software. Most modern embroidery machines come with their own software, but there are also many third-party software options available.
Here are general steps in order to resize an embroidery design:
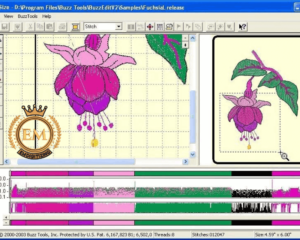
- Open the design in the editing software.
- Locate the resize or scale feature in the software.
- Enter the new dimensions for the design or adjust the scale percentage.
- Save the resized design to your machine or as a new file.
Please Note: Resizing machine embroidery designs can impact the stitch count and the overall look of the design. It’s important to test the resized design before stitching it on fabric to ensure that the design looks and stitches as desired.
Not All Embroidery Designs Are Created Equal:
Not all embroidery designs are created equal because different designs have different stitch counts, stitch types, design elements, and other factors that can impact how they look and stitch on the fabric. This is why it’s important to consider the specific design you’re working with when resizing, as well as any limitations or requirements that the design may have.
For example, some designs may have a maximum stitch length or a minimum stitch density that must be maintained in order to look and stitch well on fabric. Other designs may have intricate details or lettering that may not resize well. Understanding these factors and following the suitable guidelines for resizing can help ensure that the final result is a high-quality, attractive embroidery design.
Digitizing Theory to Properly Resize Embroidery Designs:
Digitizing plays an important role in properly resizing machine embroidery designs. Digitizing refers to the process of converting a design into a machine readable format that can be stitched on an embroidery machine.
When digitizing a design, it’s important to consider the stitch types and stitch density, as these factors can impact how the design will look and stitch on the fabric.
When resizing an embroidery design, it’s important to follow the basic rules mentioned above and consider the digitizing theory that was used to create the design. For example, if the original design was digitized with a high stitch density, you may need to adjust the stitch density of the resized design to ensure that it looks and stitches well on the fabric. On the other hand, if the original design was digitized with a lower stitch density, you may be able to increase the size of the design without having to adjust the stitch density.
In general, it’s best to work with a professional embroidery digitizing company when resizing a machine embroidery design like EM Digitizing. A professional digitizing company can review the original design, assess any limitations or requirements, and use its expertise in digitizing theory to create a high-quality, properly resized version of the design.
Winding up:
In conclusion, resizing machine embroidery designs can impact the final look and quality of the design. To ensure that the resized design is of high quality, it’s important to follow basic rules such as maintaining the aspect ratio, checking stitch density, avoiding over-stretching, testing the resized design, and considering design elements.
By following these guidelines, you can ensure that the resized design looks and stitches beautifully on the fabric.
We hope you now understand the rules for resizing machine embroidery designs.
If you want to customize embroidery logo digitizing, EM DIGITIZING will be your best choice. At EM DIGITIZING, we deliver the best embroidery logo digitizing services with the best quality. We offer 50% off on all our services to our potential customers on their first order. So, get a free quote now and we will get in touch with you.
Hope this article will be helpful for you guys!
If there’s any question related to this article feel free to comment to us. And, thanks for reading!
To change the size of an embroidery design, you will need to use embroidery design editing software. Most modern embroidery machines come with their own software, but there are also many third-party software options available. The steps to change the size of an embroidery design will vary depending on the software you’re using, but here are the general steps:
- Open the design in the editing software.
- Locate the resize or scale feature in the software.
- Enter the new dimensions for the design or adjust the scale percentage.
- Save the resized design to your machine or as a new file.
- Divide the design into sections: Depending on the size of your hoop, divide the design into sections that can fit within the hoop. Make sure that each section covers the entire design and that there is enough overlap between sections to ensure a seamless final result.
- Hoop the first section: Place the first section of the design in the hoop and tighten the screw or clip to secure the fabric in place.
- Stitch the first section: Stitch the first section of the design according to the machine’s instructions.
- Repeat for each section: Repeat the hooping and stitching process for each section of the design. When stitching each section, be careful not to stitch over the previous stitches, as this can cause the fabric to pucker or the stitches to become distorted.
- Trim the excess fabric: Once all sections have been stitched, remove the hoop and trim the excess fabric around the design, taking care not to cut any of the stitches.
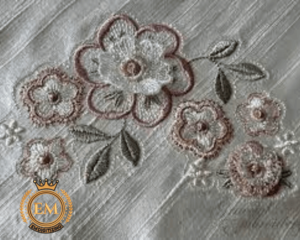
To embroider a design that is smaller than the hoop, you can use a technique called “free-standing embroidery” or “free-standing lace.” This involves creating a design that stands on its own, without being attached to any fabric or backing. Here are the general steps:
- Choose the right stabilizer: Choose a stabilizer that is suitable for free-standing embroideries, such as a water-soluble or tear-away stabilizer.
- Hoop the stabilizer: Hoop the stabilizer in the embroidery hoop and tighten the screw or clip to secure it in place.
- Stitch the design: Stitch the design on the hooped stabilizer, following the machine’s instructions. Make sure to use a dense stitch pattern to ensure the design will stand on its own.
- Trim the stabilizer: Once the design is complete, carefully trim away the excess stabilizer around the design, taking care not to cut any of the stitches.
- Rinse the stabilizer (if necessary): If you used a water-soluble stabilizer, rinse the design under running water until the stabilizer dissolves and the design is free-standing.
Running stitch length in embroidery refers to the distance between each stitch in a running stitch pattern. It is the length of the stitches on the fabric that defines the look and feel of the embroidery. The running stitch length can vary depending on the design and the desired effect. A longer stitch length will create a looser, more open look, while a shorter stitch length will create a denser, more solid look.
In machine embroidery, the running stitch length is usually adjustable and can be set in the machine’s software or through the machine’s control panel. It is important to set the stitch length correctly to ensure that the design stitches properly and has the desired look.
In hand embroidery, the running stitch length is determined by the stitch length you choose to take, and it can vary depending on your preference and the look you want to achieve. A longer stitch length will typically be easier and quicker to work with, while a shorter stitch length will create a more solid, dense look.
You can iron on the following patches:
- Heat-seal patches
- Twill patches
- Felt patches
- Vinyl patches


