When it comes to embroidery digitizing, achieving impeccable stitch quality and accuracy is of utmost importance. One crucial aspect that ensures this level of precision is push and pull compensation.
Understanding and implementing these compensation can greatly enhance the final embroidery results, producing clean, well-defined designs.
In this article, we will delve into the significance of them in embroidery digitizing.
Embroidery Digitizing Compensation Guide: Push And Pull Compensation
What is push and pull compensation?
Embroidery digitizing is like a delicate dance between your needle and the fabric. But sometimes, the fabric can’t keep up with your smooth moves, causing unsightly puckering, stretching, or misalignment. That’s where push and pull compensation comes in.
It is all about making sure your embroidered design stays in perfect harmony with the fabric.
It’s a clever technique that adjusts the stitch placement to accommodate any fabric movement during the embroidery process.
By doing so, it prevents any unwanted distortion and ensures a professional-looking finished product.
Importance of push and pull compensation in embroidery digitizing
Imagine spending hours digitizing a fabulous design, only to have it turn out wonky or distorted on the fabric.
Not cool, right?
That’s why push and pull compensation is a vital part of the embroidery digitizing process.
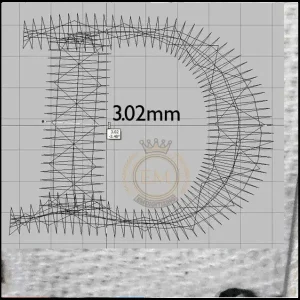
By incorporating push and pull compensation techniques, you can create designs that stay true to their intended shape and size, no matter the fabric’s behavior.
It’s the secret ingredient that helps you maintain stitch density, prevent puckering, and achieve crisp and clean lines in your embroidery work. Consider it your trusty sidekick in keeping your designs looking top-notch.
Techniques for push and pull compensation in embroidery digitizing
Explore the techniques for push and pull compensation in embroidery digitizing, essential for achieving flawless designs on any fabric.
These methods ensure your embroidery stays precise and beautiful, regardless of the material’s stretch or stiffness
Push compensation techniques
When the fabric tries to push your design out of alignment, it’s time to whip out some push compensation techniques. Common methods include adjusting the stitch direction and stitch density in the areas where fabric movement might occur.
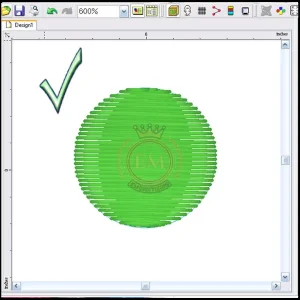
By strategically pushing the stitches, you can counteract any unwanted distortion and maintain the integrity of your design.
Pull compensation techniques
Just like push compensation, pull compensation techniques help counteract the fabric’s stubborn tendencies. When the fabric pulls or stretches, you can fine-tune your digitized design by adjusting stitch angles or adding extra stitches to anchor the design in place.
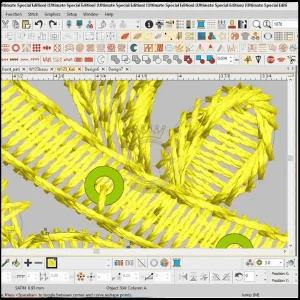
Think of it as a digital elastic band, keeping everything in check and preventing any unwanted stretching or misalignment.
Common challenges and solutions in push and pull compensation
Now, explore the common hurdles and fixes in managing push and pull compensation in embroidery, ensuring your designs stay sharp and aligned.
Dealing with distortion and misalignment
Embroidery digitizing is no walk in the park. Sometimes, despite our best efforts, distortion and misalignment can rear their ugly heads.
It’s like trying to wrangle a herd of cats—it can be a real challenge.
But fear not, my embroidery enthusiast!
There are a couple of solutions to help you deal with this frustrating issue.
- First, ensure that your design is properly aligned and centered within the embroidery hoop. The more accurate the starting point, the better chance you have of avoiding distortions.
- Additionally, consider using lightweight stabilizers or adding extra layers of stabilizer to minimize distortion.
- And if all else fails, take a deep breath and remind yourself that imperfections can add character. Embrace the wonkiness!
Overcoming thread tension issues
Ah, thread tension issues – a true thorn in the side of many embroiderers. It’s like trying to find the perfect balance between being too loose and too tight. It’s a delicate art, my friend.
Consider using a tension tester or adjusting the upper thread tension manually until you achieve that sweet spot.
And if you’re still having trouble, don’t be afraid to seek help from us. There’s no shame in needing a helping hand! Just contact us on our website, we’re here to help you.
Best practices for achieving optimal push and pull compensation
Discover the best practices for perfect push and pull compensation to ensure your embroidery looks sharp and stays in place.
Proper selection of stitch types
Ah, the world of stitch types – a place where creativity and practicality collide. When it comes to push and pull compensation, choosing the right stitch type can make all the difference.
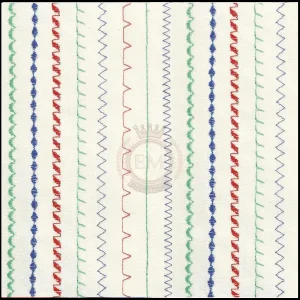
On the other hand, for larger areas that require more stability, fill stitches are the way to go. They offer better coverage and structural support.
So, my embroidery virtuoso, take a moment to consider the purpose and intricacy of your design and choose your stitch type wisely. Your design will thank you!
Adjusting density and underlay
Density and underlay—two secret weapons in the world of push and pull compensation. These powerful elements can help you achieve that perfect balance between too floppy and too stiff.
When adjusting density, keep in mind that heavier fabrics may require lower density to avoid excessive stretching and distortion. Lighter fabrics, on the other hand, may benefit from higher density to ensure proper coverage.
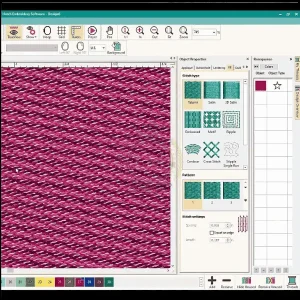
And let’s not forget about underlay, the unsung hero of embroidery digitizing. Experiment with different types and weights of underlay to provide the necessary support without overpowering the design.
Benefits of proper push and pull compensation in embroidery digitizing
Proper push and pull compensation may sound like a dull topic, but oh, the wonders it can do!
Let me paint you a vivid picture of the delightful benefits that await you.
First and foremost, achieving optimal push and pull compensation ensures that your design retains its intended shape and appearance. No more wonky letters or misshapen objects—just a beautifully executed embroidery piece that’s sure to turn heads.
Moreover, proper compensation enhances the overall durability of your embroidery. It prevents excessive wear and tear, ensuring that your masterpiece stands the test of time.
So, while others may have to deal with unraveling threads and distorted designs, you can bask in the glory of your perfectly compensated creation.
But wait, there’s more!
When your push and pull compensation is on point, your embroidery will be smoother and more professional-looking. Your friends will be in awe of your attention to detail and the impeccable finish of your work.
You’ll be the embroidery rock star of your social circle. Now, who wouldn’t want that?
Conclusion
In conclusion, push and pull compensation in embroidery digitizing may seem like a daunting task, but fear not, my fellow stitching enthusiasts.
With a bit of practice, patience, and a dash of creativity, you can overcome the common challenges and achieve optimal results.
So, my embroidery virtuosos, go forth and conquer the world of push and pull compensation. Unleash your creativity, stitch by stitch, and let your embroidered masterpieces shine with the perfect balance of wit and precision.
Happy stitching!
EMdigitizing: Your Go-To embroidery digitizing expert
Looking for help with an embroidery project?
EMdigitizing stands as the premier choice. We specialize in providing top-notch embroidery digitizing and vector art services, all delivered with swift turnaround times. We invite you to explore our website and discover the array of services we offer.
As a special welcome to our new clients, we’re excited to offer an exclusive 50% discount across all our services. Additionally, we provide free quotes in just 5 minutes, ensuring you can quickly and easily plan your project.
Don’t miss out on this fantastic opportunity to elevate your embroidery project with the expertise of EMdigitizing.
If you have any questions about our services or this offer, please feel free to reach out. Thank you for considering us for your embroidery needs.
Frequently Asked Questions:
It’s called “compensation” in various crafting and stitching contexts because it involves making adjustments or corrections to ensure that a design or pattern lines up, fits correctly, or compensates for any irregularities in the stitching process.
Stitch compensation refers to the practice of making minor adjustments in the placement or size of individual stitches in embroidery or needlework to account for design changes, fabric variations, or irregularities, ensuring the final result looks consistent and balanced.
“Stitch” refers to a single unit of sewing or embroidery, while “stitches” is the plural form, indicating multiple units of sewing or embroidery in a given area or design.
The principle of a stitch involves passing a threaded needle through a fabric to create a secure loop or knot, which can be repeated to form various decorative patterns or functional seams in sewing and embroidery.
In needlepoint, compensation refers to the technique of adjusting the placement or size of stitches to ensure a design looks symmetrical or aligns correctly when stitched on a canvas with different thread or yarn thicknesses. This technique is used to maintain the design’s overall integrity.
