
Stickmotive können Ihren Projekten den perfekten Touch verleihen, but if they’;Sie sind nicht richtig zentriert, Sie können den gesamten Look beeinträchtigen. Center embroidery designs are crucial for achieving a professional finish that catches the eye and elevates your work. ;
Let’;Werfen wir einen genaueren Blick darauf, warum die Zentrierung so wichtig ist und welche Vorteile sie mit sich bringt.
Die besten Tipps für Stickmotive in der Mitte
Warum zentrierte Stickmotive für ein professionelles Finish entscheidend sind?
Stellen Sie sich vor: a wunderschön gesticktes Design that’;Es ist etwas außermittig.
It’;Es ist, als würde man ungleiche Socken oder eine schiefe Krawatte tragen – es sieht einfach nicht gut aus.
Durch die Zentrierung Ihrer Maschinenstickmotive wird sichergestellt, dass der Schwerpunkt perfekt positioniert ist, Aufmerksamkeit erregen und eine optisch ansprechende Balance schaffen. It’;Es geht um die symmetrische Anmutung, die einen Hauch von Professionalität ausstrahlt.
Vorbereiten des Stoffes und des Stickrahmens
Bereiten Sie Ihren Stoff und Stickrahmen mit diesen einfachen Tipps für Stickdesigns in der Mitte vor, Dadurch wird Ihr Bastelvorgang reibungsloser und präziser.
Auswahl des geeigneten Stoffes zum Sticken
Den richtigen Stoff auswählen für Ihr Stickprojekt ist der Schlüssel zum Erreichen eines perfekt zentrierten Designs. Go for a fabric that’s stable and doesn’;Es lässt sich nicht leicht ausdehnen oder verformen.

Wenn Sie sich für etwas wie dehnbares Spandex entscheiden, Ihr Design könnte am Ende eher wie ein Picasso-Gemälde aussehen als wie ein klares und zentriertes Meisterwerk.
Entscheiden Sie sich für Stoffe wie Baumwolle oder Leinen, die robust sind und bereit sind, mit Ihren Stickkünsten geschmückt zu werden.
Auswahl des richtigen Stickrahmens
Das Stickrahmen für die Maschine ist wie der Rahmen für Ihr Design, so it’;Es ist wichtig, das Richtige auszuwählen. Stellen Sie sicher, dass der Rahmen groß genug ist, um bequem auf Ihren Stoff zu passen und an den Rändern etwas mehr Platz lässt.
Dadurch können Sie Ihren Stoff manövrieren, ohne den Zentriervorgang einzuschränken. Erinnern, Sie möchten Stickmagie erschaffen, keine Wrestling-Moves.
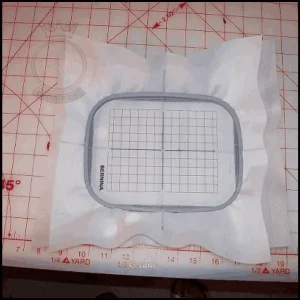
Markieren des Mittelpunkts auf dem Stoff
Markieren Sie nun den Mittelpunkt auf Ihrem Stoff:
Die Mitte des Stoffes finden
Finding the center of your fabric is like finding the center of attention at a party –; it’;Bei uns dreht sich alles um Präzision und Vertrauen (und ein bisschen Instinkt).
Falten Sie Ihren Stoff der Länge nach und der Breite nach in zwei Hälften, Stellen Sie sicher, dass die Ecken perfekt zusammenpassen. Der Schnittpunkt dieser Falten markiert die Mitte Ihres Stoffes. Voila! You’;Sie haben den Volltreffer für Ihr Stickerei-Meisterwerk gefunden.
Techniken zum Markieren des Mittelpunkts
Now that you’;Sie haben die Mitte Ihres Stoffes gefunden, it’;Es ist an der Zeit, es mit einigen Markierungen offiziell zu machen. Sie können verwenden verschiedene Werkzeuge wie Stoffmarker, Kreide, oder sogar eine kleine Stickmaschinen-Hoop-Dance-Routine (nur ein Scherz, Halten Sie sich an die Markierungen).
Machen Sie einen kleinen Punkt oder ein Kreuz in der Mitte, um später bei der Platzierung Orientierung zu geben. It’;Es ist ein bisschen, als würde man Semmelbrösel zurücklassen, aber viel nützlicher und lockt weniger hungrige Waldbewohner an.
Anpassen des Stickmusters zur Zentrierung
Sobald Sie das Design markiert haben, Es ist an der Zeit, das Design für das richtige Stickdesign in der Mitte anzupassen:
Ändern Sie die Größe des Designs nach Bedarf
Bevor Sie mit dem Nähen beginnen, Sehen Sie sich Ihr Design genau an und nehmen Sie gegebenenfalls Anpassungen vor. Wenn Ihr Design zu groß ist, um in den Rahmen Ihres Rahmens zu passen, it’;Es ist Zeit dafür Nehmen Sie eine Größenänderung vor.
Mit der Hilfe von Ihnen Sticksoftware oder Maschine, Schrumpfen Sie das Design, bis es genau in den Stickrahmen passt.
You don’;Sie möchten nicht, dass Ihr Design einen Wutanfall bekommt und mehr Platz beansprucht, als es benötigt.
Zentrieren des Stickmusters im Stickrahmen
Now comes the fun part –; Zentrieren Sie Ihr Design im Rahmen. Orientieren Sie sich dabei an den Markierungen, die Sie auf Ihrem Stoff gemacht haben. Richten Sie die Mitte Ihres Designs am Mittelpunkt des Stoffes aus.
Passen Sie es mit der Präzision eines Chirurgen an, bis es genau richtig aussieht. Treten Sie einen Schritt zurück und bewundern Sie Ihre Arbeit. You’;re like the Michelangelo of machine embroidery –; Gut, vielleicht nicht ganz, aber nah genug.
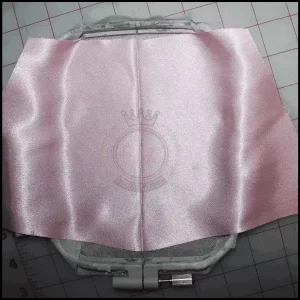
Den Stoff einspannen und stabilisieren
Wenn es darum geht Maschinenstickerei, Das Einspannen des Stoffes ist wie ein großer Wurf, kuschelige Umarmung. It’;Es ist wichtig, es richtig zu machen, um ein schön zentriertes Design zu gewährleisten.
Anfangen, Positionieren Sie Ihren Stoff im Stickrahmen, Stellen Sie sicher, dass es straff und faltenfrei ist. Think of it as getting your favorite t-shirt ready for a night out –; glatt und stilvoll.
Den Stoff richtig im Stickrahmen befestigen
Genau wie ein gutes Haargummi, Sie möchten sicherstellen, dass Ihr Stoff sicher im Stickrahmen befestigt ist.
Ziehen Sie die Rahmenschrauben fest genug an, um den Stoff an Ort und Stelle zu halten, but not so tight that it’;schnappt nach Luft. We don’;Ich möchte keine Ohnmachtsanfälle aus Stoff haben, tun wir?
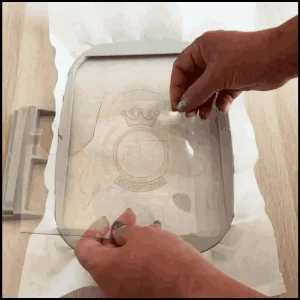
Hinzufügen eines Stabilisators zur Unterstützung
Jetzt ist Ihr Stoff verriegelt und in den Stickrahmen geladen, it’;Es ist an der Zeit, es mit etwas Stabilisator zu verstärken. Stellen Sie sich einen Stabilisator als zuverlässigen Helfer für Ihren Stoff vor, Bietet Halt und beugt unschönen Falten vor.
Wählen Sie den richtigen Stabilisator Passend zu Ihrem Stofftyp und spannen Sie es neben Ihrem Stoff ein. It’;Es ist, als würde man einen Superheldenumhang anziehen Ihr Stickprojekt.
Maschinenstickprozess für Stickmotive in der Mitte
Jetzt ist alles am richtigen Platz, it’;s time for the main event –; der maschinelle Stickvorgang. Bereiten Sie sich vor, Lieber Sticker, für etwas ernsthafte Magie.
Einrichten der Stickmaschine
Machen Sie Ihre Maschine betriebsbereit, indem Sie den Stickrahmen sicher befestigen.
Stellen Sie sicher, dass Ihre Maschine auf die richtigen Einstellungen für Ihr Design eingestellt ist, wie Garnfarbe, Maschendichte, und Stichlänge. We’;Hier wird nicht nur genäht; we’;Wir schaffen ein Meisterwerk!
Ausführen des Stickvorgangs
Drücken Sie den Startknopf und beobachten Sie, wie Ihre Maschine übernimmt, Verwandeln Sie Ihr markiertes Design in eine atemberaubende gestickte Kreation.
It’;Es ist, als hätten Sie Ihren ganz persönlichen Assistenten, sondern einer, der näht, statt Kaffee zu holen. Zurücklehnen, entspannen, und genießen Sie die Show, während Ihr Design Stich für Stich zum Leben erwacht.
Endgültiges Urteil
Da haben Sie es also, Schritt-für-Schritt-Anleitung zum Zentrieren von Stickmustern beim Maschinensticken.
Mit etwas Raffinesse, Fähigkeit zur Designausrichtung, und etwas Maschinenstickmagie, you’;So werden Sie im Handumdrehen perfekt zentrierte Meisterwerke schaffen.
Viel Spaß beim Nähen!
EMdigitalisieren: Führender Experte für die Digitalisierung von Stickereien
Wenn Sie an einem Stickprojekt jeglicher Art interessiert sind, Dann ist EMdigitizing die beste Option für Sie. Wir bieten Stickerei digitalisieren und Vektorkunstdienste mit einer schnellen Bearbeitungszeit. Sie können es auch besuchen und überprüfen unsere Website sowie unsere besten Dienstleistungen.
Wir bieten auch ein tolles 50% Rabatt auf alle unsere Dienstleistungen für unsere angesehenen Erstkunden. Wir bieten auch an kostenlose Angebote in gerade erzeugt 5 Protokoll.
Schnappen Sie sich dieses zeitlich begrenzte Angebot und bringen Sie Ihr Stickprojekt mit EMdigitizing auf die nächste Stufe.
Wenn Sie Fragen zu diesem Thema haben, du kannst sie fragen. Vielen Dank, dass Sie sich die Zeit genommen haben, diesen Artikel zu lesen.
Häufig gestellte Fragen:
Zur Verbesserung der Stickqualität, ensure you’;Verwenden Sie die richtige Nadel und den richtigen Faden für Ihren Stoff, Halten Sie die richtige Spannung im Faden aufrecht, und verwenden Sie einen Stabilisator, um den Stoff beim Sticken straff und stabil zu halten.
Für ein gutes Stickdesign müssen die richtigen Farben und Garntypen ausgewählt werden, understanding the fabric’;s Eigenschaften, und die Verwendung eines gut digitalisierten Designs, das zum Material und Zweck der Stickerei passt.
Zur Behebung von Maschinenstickfehlern, Entfernen Sie die fehlerhaften Stiche vorsichtig mit einem Nahttrenner oder einer kleinen Schere, Achten Sie darauf, den Stoff nicht zu beschädigen. Dann, Spannen Sie den Stoff erneut ein und sticken Sie das korrigierte Motiv erneut.
Aufgrund von Problemen wie einer falschen Fadenspannung ist die Stickerei möglicherweise nicht gleichmäßig, Verwendung der falschen Nadel oder des falschen Fadens, unsachgemäße Stabilisierung des Stoffes, or a problem with the embroidery machine’;s-Einstellungen.


