
Les motifs de broderie peuvent ajouter la touche parfaite à vos projets, but if they’;je ne suis pas bien centré, ils peuvent gâcher tout le look. Center embroidery designs are crucial for achieving a professional finish that catches the eye and elevates your work. ;
Let’;Examinons de plus près pourquoi le centrage est si important et les avantages qu'il apporte.
Centre de motifs de broderie, meilleurs conseils
Pourquoi les motifs de broderie centrale sont cruciaux pour une finition professionnelle?
Imaginez un motif magnifiquement brodé that’;est légèrement décentré.
It’;C'est comme porter des chaussettes dépareillées ou une cravate tordue – ça n'a pas l'air bien.
Centrer vos motifs de broderie machine garantit que le point focal est parfaitement positionné, attirer l'attention et créer un équilibre visuellement agréable. It’;il s'agit de cet attrait symétrique qui dégage un air de professionnalisme.
Préparation du tissu et du cercle à broder
Préparez votre tissu et votre cerceau avec ces conseils simples pour les motifs de broderie au centre, rendant votre artisanat plus fluide et plus précis.
Choisir le tissu approprié pour la broderie
Choisir le bon tissu pour votre projet de broderie est la clé pour obtenir un motif parfaitement centré. Go for a fabric that’s stable and doesn’;ne s'étire pas ou ne se déforme pas facilement.
Si vous choisissez quelque chose comme du spandex extensible, votre design pourrait finir par ressembler davantage à une peinture de Picasso qu’à un chef-d’œuvre propre et centré.
Optez pour des tissus comme le coton ou le lin qui sont résistants et prêts à être ornés de vos prouesses en broderie..
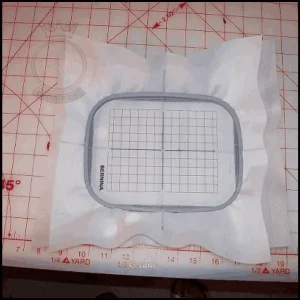
Choisir le bon cercle de broderie
La cerceau pour machine à broder est comme le cadre de votre design, so it’;il est essentiel de choisir le bon. Assurez-vous que le cerceau est suffisamment grand pour s'adapter confortablement à votre tissu avec un peu d'espace supplémentaire sur les bords..
Cela vous permet de manœuvrer votre tissu sans restreindre le processus de centrage. Rappelles toi, vous voulez créer la magie de la broderie, pas de mouvements de lutte.
Marquage du point central sur le tissu
Marquez maintenant le point central sur votre tissu:
Trouver le centre du tissu
Finding the center of your fabric is like finding the center of attention at a party –; it’;tout est question de précision et de confiance (et un peu d'instinct).
Pliez votre tissu en deux dans le sens de la longueur et dans le sens de la largeur, en s'assurant que les coins correspondent parfaitement. L'intersection de ces plis marque le centre de votre tissu. Voilà! You’;J'ai trouvé la cible de votre chef-d'œuvre de broderie.
Techniques pour marquer le point central
Now that you’;J'ai trouvé le centre de ton tissu, it’;Il est temps de le rendre officiel avec quelques marquages. Vous pouvez utiliser divers outils comme des marqueurs de tissu, craie, ou même une petite routine de danse du cerceau à la machine à broder (je rigole, s'en tenir aux marqueurs).
Faites un petit point ou une croix au centre pour guider votre placement plus tard. It’;c'est un peu comme laisser du fil d'Ariane, mais bien plus utile et moins susceptible d'attirer les créatures affamées des bois.
Ajuster le motif de broderie pour le centrage
Une fois que vous avez marqué le dessin, il est temps d'ajuster le motif pour obtenir un motif de broderie central approprié:
Redimensionner la conception selon les besoins
Avant de commencer à coudre, examinez attentivement votre conception et effectuez les ajustements nécessaires. Si votre dessin est trop grand pour tenir dans les limites de votre cerceau, it’;il est temps de faire un redimensionnement.
Avec l'aide de votre logiciel de broderie ou une machine, rétrécissez le motif jusqu'à ce qu'il soit bien ajusté dans le cerceau.
You don’;Je ne veux pas que votre conception fasse une crise de colère et exige plus d'espace que nécessaire.
Centrage du motif de broderie dans le cerceau
Now comes the fun part –; centrer votre dessin dans le cerceau. Utilisez les marques que vous avez faites sur votre tissu comme guide. Alignez le centre de votre motif avec le point central du tissu.
Ajustez-le avec la précision d'un chirurgien jusqu'à ce qu'il soit parfait. Prenez du recul et admirez votre travail. You’;re like the Michelangelo of machine embroidery –; bien, peut-être pas exactement, mais assez proche.
Cerclage du tissu et stabilisation
Quand cela vient à broderie à la machine, encercler le tissu, c'est comme lui donner un gros, câlin. It’;Il est important de bien le faire pour garantir un design joliment centré..
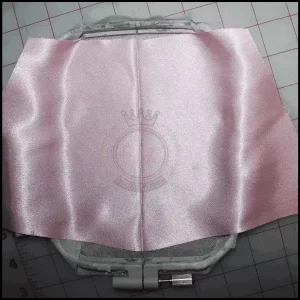
Commencer, positionnez votre tissu dans le cercle à broder, en s'assurant qu'il est tendu et sans plis. Think of it as getting your favorite t-shirt ready for a night out –; lisse et élégant.
Fixer correctement le tissu dans le cerceau
Tout comme un bon élastique à cheveux, vous voulez vous assurer que votre tissu est solidement fixé dans le cerceau.
Serrez les vis du cercle suffisamment fermement pour maintenir le tissu en place., but not so tight that it’;je suis à bout de souffle. We don’;Je ne veux pas d'évanouissement des tissus, est-ce que nous?
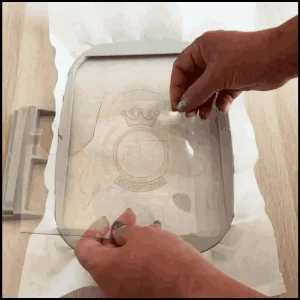
Ajout d'un stabilisateur pour le support
Maintenant que votre tissu est verrouillé et chargé dans le cerceau, it’;il est temps de le renforcer avec un peu de stabilisateur. Considérez un stabilisateur comme le fidèle compagnon de votre tissu., fournissant un soutien et empêchant tout plissement disgracieux.
Choisissez le bon stabilisateur en fonction de votre type de tissu et attachez-le à côté de votre tissu. It’;c'est comme mettre une cape de super-héros votre projet de broderie.
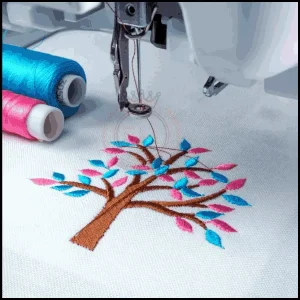
Processus de broderie à la machine pour les motifs de broderie centrale
Maintenant que tout est à sa place, it’;s time for the main event –; le processus de broderie machine. Préparez-vous, chère brodeuse, pour un peu de magie sérieuse.
Configuration de la machine à broder
Préparez votre machine à gronder en attachant solidement le cercle à broder.
Assurez-vous que votre machine est réglée sur les paramètres appropriés pour votre conception, comme couleur de fil, densité de points, et longueur de point. We’;je ne fais pas que coudre ici; we’;je crée un chef-d'œuvre!
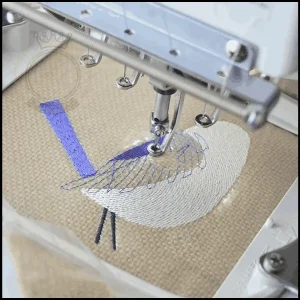
Exécution du processus de broderie
Appuyez sur ce bouton de démarrage et regardez votre machine prendre le relais, transformer votre motif marqué en une superbe création brodée.
It’;c'est comme avoir son propre assistant personnel, mais celui qui coud au lieu d'aller chercher du café. Asseyez-vous, se détendre, et profitez du spectacle pendant que votre design prend vie point par point.
Verdict final
Alors voilà, le processus étape par étape pour centrer les motifs de broderie lors de la broderie machine.
Avec un peu de finesse de cerclage, prouesses en matière d'alignement de conception, et un peu de magie de la broderie machine, you’;Je créerai des chefs-d'œuvre parfaitement centrés en un rien de temps.
Bonne couture!
EMnumérisation: Expert leader en numérisation de broderie
Si vous êtes intéressé par tout type de projet de broderie, alors EMdigitizing est la meilleure option pour vous. Nous offrons numérisation de broderie et des services d'art vectoriel avec un délai d'exécution rapide. Vous pouvez également visiter et vérifier notre site internet ainsi que nos meilleurs services.
Nous offrons également un excellent 50% réduction sur tous nos services pour nos nouveaux clients respectés. Nous proposons également devis gratuits généré en seulement 5 minutes.
Vous devriez profiter de cette offre à durée limitée et faire passer votre projet de broderie au niveau supérieur avec EMdigitizing.
Si vous avez des questions concernant ce sujet, tu peux leur demander. Merci d'avoir pris le temps de lire cet article.
Questions fréquemment posées:
Pour améliorer la qualité de la broderie, ensure you’;vous utilisez la bonne aiguille et le bon fil pour votre tissu, maintenir une bonne tension dans le fil, et utilisez un stabilisateur pour maintenir le tissu tendu et stable pendant la broderie.
Un bon motif de broderie nécessite de sélectionner les bonnes couleurs et les bons types de fils., understanding the fabric’;propriétés, et en utilisant un motif bien numérisé qui convient au matériau et au but de la broderie.
Pour corriger les erreurs de broderie machine, retirez soigneusement les points erronés avec un découseur ou des petits ciseaux, en faisant attention à ne pas endommager le tissu. Alors, renouvelez le tissu et rebrodez le motif corrigé.
La broderie peut ne pas être fluide en raison de problèmes tels qu'une tension de fil incorrecte, utiliser la mauvaise aiguille ou le mauvais fil, mauvaise stabilisation du tissu, or a problem with the embroidery machine’;paramètres.


