
I disegni da ricamo possono aggiungere quel tocco perfetto ai tuoi progetti, but if they’;non sei centrato correttamente, possono buttare via l'intero look. Center embroidery designs are crucial for achieving a professional finish that catches the eye and elevates your work. ;
Let’;Diamo un'occhiata più da vicino al motivo per cui la centratura è così importante e ai vantaggi che comporta.
I migliori consigli per i disegni di ricamo centrale
Perché i disegni da ricamo centrali sono fondamentali per una finitura professionale?
Immagina a disegno splendidamente ricamato that’;è leggermente decentrato.
It’;È come indossare calzini spaiati o una cravatta storta: sembra semplicemente strano.
Centrare i disegni da ricamo a macchina garantisce che il punto focale sia posizionato perfettamente, attirare l'attenzione e creare un equilibrio visivamente piacevole. It’;È tutta una questione di quell'appello simmetrico che emana un'aria di professionalità.
Preparazione del tessuto e del telaio da ricamo
Prepara il tessuto e il telaio con questi semplici consigli per realizzare ricami centrali, rendendo la tua lavorazione più fluida e precisa.
Selezione del tessuto appropriato per il ricamo
Scegliere il tessuto giusto per il tuo progetto di ricamo è fondamentale per ottenere un disegno perfettamente centrato. Go for a fabric that’s stable and doesn’;t allungarsi o deformarsi facilmente.

Se scegli qualcosa come lo spandex elastico, il tuo disegno potrebbe assomigliare più a un dipinto di Picasso che a un capolavoro pulito e centrato.
Scegli tessuti come il cotone o il lino che siano robusti e pronti per essere decorati con la tua abilità nel ricamo.
Scegliere il telaio da ricamo giusto
Il telaio della macchina da ricamo è come la cornice per il tuo design, so it’;È essenziale scegliere quello giusto. Assicurati che il telaio sia abbastanza grande da adattarsi comodamente al tessuto, con un po' di spazio in più attorno ai bordi.
Ciò ti consente di manovrare il tessuto senza limitare il processo di centratura. Ricorda, vuoi creare la magia del ricamo, non mosse di wrestling.
Segnare il punto centrale sul tessuto
Ora segna il punto centrale sul tessuto:
Trovare il centro del tessuto
Finding the center of your fabric is like finding the center of attention at a party –; it’;È tutta una questione di precisione e sicurezza (e un po' di istinto).
Piega il tessuto a metà nel senso della lunghezza e nel senso della larghezza, assicurandosi che gli angoli combacino perfettamente. L'intersezione di queste pieghe segna il centro del tessuto. Voilà! You’;Ho trovato il centro per il tuo capolavoro di ricamo.
Tecniche per contrassegnare il punto centrale
Now that you’;Ho trovato il centro del tuo tessuto, it’;È ora di renderlo ufficiale con alcune indicazioni. Puoi usare vari strumenti come i pennarelli per tessuti, gesso, o anche una piccola routine di danza con il telaio della macchina da ricamo (stavo solo scherzando, attenersi ai marcatori).
Crea un piccolo punto o una croce al centro per guidare il posizionamento in seguito. It’;È un po' come lasciare il pangrattato, ma molto più utile e meno probabile che attiri le creature affamate dei boschi.
Regolazione del disegno da ricamo per la centratura
Una volta contrassegnato il disegno, è il momento di adattare il disegno per un corretto disegno del ricamo centrale:
Ridimensionare il disegno secondo necessità
Prima di iniziare a cucire, dai un'occhiata al tuo design e apporta le modifiche necessarie. Se il tuo disegno è troppo grande per rientrare nei limiti del telaio, it’;è ora di fare un po' di ridimensionamento.
Con l'aiuto del tuo software di ricamo o macchina, restringere il disegno finché non si adatta perfettamente al telaio.
You don’;Non voglio che il tuo progetto faccia i capricci e richieda più spazio del necessario.
Centratura del disegno da ricamo all'interno del telaio
Now comes the fun part –; centrando il disegno all'interno del telaio. Usa i segni che hai fatto sul tessuto come guida. Allinea il centro del tuo disegno con il punto centrale sul tessuto.
Regolalo con la precisione di un chirurgo finché non sembra perfetto. Fai un passo indietro e ammira il tuo lavoro. You’;re like the Michelangelo of machine embroidery –; BENE, forse non esattamente, ma abbastanza vicino.
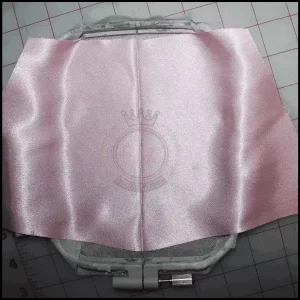
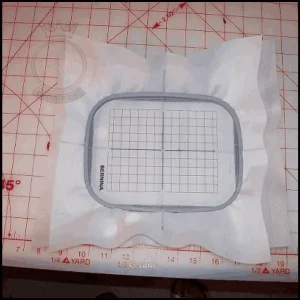
Inserimento del tessuto e stabilizzazione
Quando si tratta di ricamo a macchina, intelaiare il tessuto è come dargli un grande, un forte abbraccio. It’;È importante farlo nel modo giusto per garantire un design splendidamente centrato.
Iniziare, posiziona il tessuto nel telaio da ricamo, assicurandosi che sia teso e senza pieghe. Think of it as getting your favorite t-shirt ready for a night out –; liscio ed elegante.
Fissare correttamente il tessuto nel telaio
Proprio come un buon elastico per capelli, vuoi assicurarti che il tessuto sia fissato saldamente nel telaio.
Stringere le viti del telaio abbastanza saldamente da mantenere il tessuto in posizione, but not so tight that it’;è senza fiato. We don’;Non voglio svenimenti del tessuto, facciamo noi?
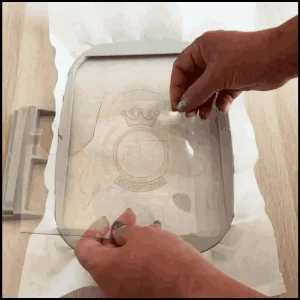
Aggiunta di stabilizzatore per supporto
Ora che il tessuto è bloccato e caricato nel telaio, it’;È ora di rafforzarlo con qualche stabilizzatore. Pensa a uno stabilizzatore come al fidato compagno del tuo tessuto, fornendo supporto e prevenendo eventuali antiestetiche grinze.
Scegli lo stabilizzatore giusto in base al tipo di tessuto e intelaiarlo accanto al tessuto. It’;È come indossare un mantello da supereroe il tuo progetto di ricamo.
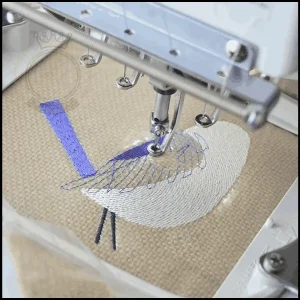
Processo di ricamo a macchina per disegni di ricamo centrale
Adesso che tutto è al posto giusto, it’;s time for the main event –; il processo di ricamo a macchina. Preparati, caro ricamatore, per una magia seria.
Impostazione della macchina da ricamo
Prepara la tua macchina a rimbombare fissando saldamente il telaio da ricamo.
Assicurati che la tua macchina sia impostata sulle impostazioni appropriate per il tuo progetto, Piace colore del filo, densità del punto, e la lunghezza del punto. We’;Non stai solo cucendo qui; we’;stai creando un capolavoro!
Esecuzione del processo di ricamo
Premi il pulsante di avvio e osserva come la tua macchina prende il sopravvento, trasformando il tuo disegno marcato in una splendida creazione ricamata.
It’;È come avere il tuo assistente personale, ma uno che cuce invece di andare a prendere il caffè. Siediti, relax, e goditi lo spettacolo mentre il tuo disegno prende vita punto dopo punto.
Verdetto finale
Quindi ecco qua, il processo passo passo su come centrare i disegni da ricamo durante il ricamo a macchina.
Con un po' di finezza nel telaio, capacità di allineamento del progetto, e un po' di magia del ricamo a macchina, you’;Creerai capolavori perfettamente centrati in pochissimo tempo.
Cuciture felici!
EMDigitalizzazione: Esperto leader nella digitalizzazione del ricamo
Se sei interessato a qualsiasi tipo di progetto di ricamo, allora EMdigitizing è la soluzione migliore per te. Noi offriamo digitalizzazione del ricamo e servizi di arte vettoriale con tempi di consegna rapidi. Puoi anche visitare e controllare il nostro sito web così come i nostri migliori servizi.
Offriamo anche un ottimo 50% sconto su tutti i nostri servizi per i nostri stimati clienti per la prima volta. Offriamo anche preventivi gratuiti generato in appena 5 minuti.
Dovresti approfittare di questa offerta a tempo limitato e portare il tuo progetto di ricamo al livello successivo con EMdigitizing.
Se hai domande su questo argomento, puoi chiedere a loro. Grazie per aver dedicato del tempo a leggere questo articolo.
Domande frequenti:
Per migliorare la qualità del ricamo, ensure you’;stai utilizzando l'ago e il filo giusti per il tuo tessuto, mantenere la corretta tensione del filo, e utilizzare uno stabilizzatore per mantenere il tessuto teso e stabile durante il ricamo.
Un buon disegno di ricamo richiede la selezione dei colori e dei tipi di filo giusti, understanding the fabric’;proprietà, e utilizzando un disegno ben digitalizzato che si adatti al materiale e allo scopo del ricamo.
Per correggere gli errori di ricamo a macchina, rimuovere con attenzione i punti errati con un taglia asole o piccole forbici, facendo attenzione a non danneggiare il tessuto. Quindi, inserire nuovamente il tessuto nel telaio e ricamare nuovamente il disegno corretto.
Il ricamo potrebbe non essere fluido a causa di problemi come la tensione errata del filo, utilizzando l'ago o il filo sbagliati, stabilizzazione impropria del tessuto, or a problem with the embroidery machine’;impostazioni di s.


