
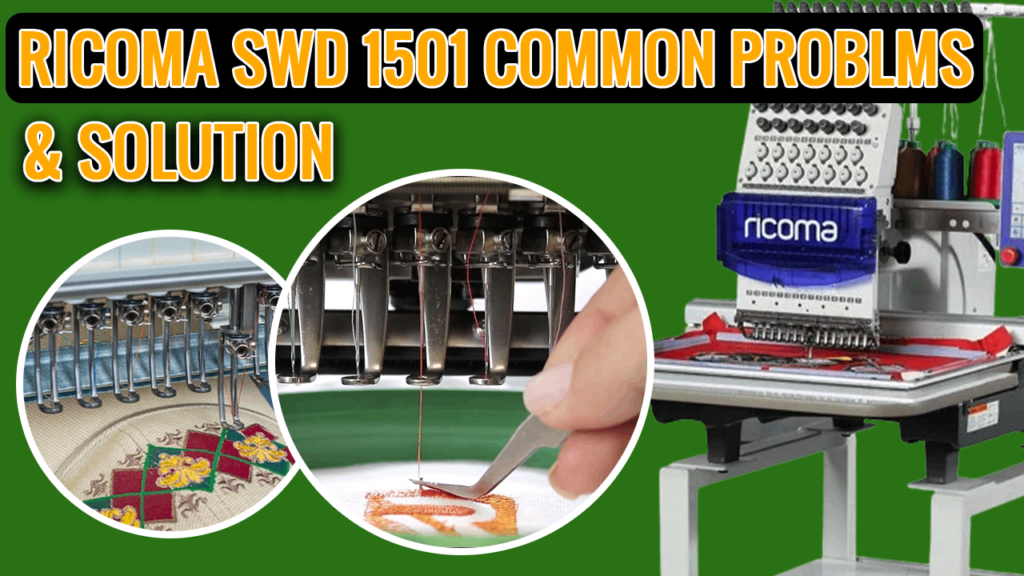
Ricoma SWD-1501 problems & solution
Let’s Discuss Ricoma SWD-1501 Common Problems & Solutions
1. Why Do Needles Keep On Breaking While Embroidering Flats?
Needle breaks can be very exhausting and time-taking. But, if you know the common causes of why needle break happens, you can take rapid steps to avoid them from happening and make sure your projects are finished without disruption.
So, one of the most common causes for needle breaks is using a needle that is not suitable for the type of material you are working on. If the fabric is very thick, the needle might not be able to properly pierce it and that result in breaks.
To fix this issue, ensure to use needles that are particularly designed for the thickness of the material you are working with.
Another common reason is an incorrect needle installment. To fix this, just uninstall the needle and reinstall it properly. There might also be an issue of build-up or debris in the bobbin area or rotary hook area that results in needle breaks. To fix this, cautiously clean the area of any debris and pieces of thread.
Another possible cause can be the bobbin case is not correctly set in your Ricoma SWD-1501 embroidery machine or that the bobbin thread is not rightly wound. To fix this, replace the bobbin and ensure it snaps into place properly.
2. Why Do Needles Keep On Breaking While Embroidering Caps?
So, there can be many reasons why needle break happens while embroidering caps. Let’s see those reasons and know how you can avoid them:
1. Running your Ricoma SWD-15011501 embroidery machine at a high speed can cause needle breaks. Lower the speed when working with structured caps or intricate designs (600 spm). Always remember that embroidering at a slower speed might take a long time, but it will result in a high-quality finished product and extend your needle’s life.
2. The embroidery designs might have a lot of stitches in a given area. To fix this issue, increase the stitch density of your embroidery designs using chroma digitizing software. Simply click on the hoop icon in the toolbar and choose the hoop you are using. If your embroidery designs touch or boost beyond the hoop anywhere, resize your embroidery designs to make sure it falls within your hooping area.
3. It can also be that your embroidery designs are not digitized properly or optimized for caps. Always remember that the digitization of your embroidery designs gives the instructions for your machine, so it is very significant to ensure it is rightly done. To fix this, try using embroidery designs that you have formerly run successfully. Embroidery designs that run well on flat surfaces might not work well on caps, because cap embroidery typically begins at the center.
4. The material is very thick for the type of needle you’re using. To fix this, use a thick needle that is suitable for the fabric you are working with. We suggest using 80/12 titanium needles for structured caps.
5. Lowering your cap driver can as well help prevent needle breaks. By bringing the cap drive closer to the sewing arm, you can lessen the bounciness of the bap during the embroidery procedure.
3. Why Is The Ricoma SWD-1501 Embroidery Machine Not Cutting Embroidery Designs?
Troubleshooting Ricoma SWD 1501 Embroidery Machine:
If you are facing problems with the blade or your machine displays the TRIM NOT IN POSITION error message, kindly follow the steps below to troubleshoot and fix the issue.
- Remove the needle plate on the sewing arm while exposing the blade.
- Ensure that the area is clean and there is no thread build-up. Then, try pressing the TRIM button to see if the blades move.
If the blades do move, ensure that the blades are rightly placed.
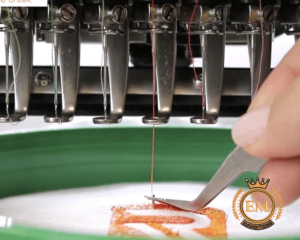
4. Why Is The Ricoma SWD-1501 Embroidery Machine Leaving Tails On Embroidery Designs?
If you are facing excess thread or tails in your embroidery designs, it could be a sign that your machine’s trimming mechanism is not cutting early enough. This problem can be exhausting; especially when working on more complex embroidery designs, as the excess thread can make a mess and disrupt the overall look of your project. While manually cutting the tails with the help of scissors might provide a temporary solution, it is significant to identify the root cause of the problem and take steps to avoid it from happening in the future.
There are a few possible causes why excess thread might be happening on your Ricoma SWD-1501 embroidery machine:
- The feed length might be set too long. This refers to the number of stitches before the trimming mechanism kicks in! If the feed length is set very long, it can result in the excess thread being left behind after trimming.
- The trimming timing might be off. If the trimming mechanism is not cutting at the right time, it can result in the excess thread being left behind.
- Your thread might be wrapped around the thread break sensor a lot of times. This can cause the machine to move very rapidly for the tails to be pulled through, resulting in the excess thread.
- The thread break sensor might be set to TOO HIGH or TOO LOW sensitivity. This can as well cause the mechanism to move too rapidly for the tails to be pulled through, resulting in the excess thread.
To resolve this problem, there are several steps you can take:
- Firstly, try to detect if the problem is happening with all needles or only one. This can help narrow down the potential causes.
- Check the path of the thread to make sure that it is clear and free of any knots or tangles.
- Check the thread tension, it must not be very loose or very tight.
- Adjust the Velcro bar if required.
- Adjust the spring lever.
- Check the picker manually and with the pick test function.
- On the control panel, adjust the length after the trim parameter.
- To reduce the tail length, adjust the trim start angle.
- Check your machine timing.
If the issue is happening with only one needle, you can begin by pulling the thread and feeling its tension. It must be similar to the tension of the needles that are properly working. To check the tension you can try the H or I test. During the I test, you must follow the one-third rule, which involves having one-third of the bobbin thread in the center and one-third of the top thread on both sides. If the column is even, your tension is correct.
Winding Up:
In this article, we have covered some of the common errors ricoma machines can have. We have tried to solve the basic Ricoma SWD 1501 embroidery issues. We hope you enjoyed reading this article as we did in writing.
If you want to customize embroidery logo digitizing, EM DIGITIZING will be your best choice. At EM DIGITIZING, we deliver the best embroidery logo digitizing services with the best quality. We offer 50% off on all our services to our potential customers on their first order. So, get a free quote now and we will get in touch with you.
Hope this article will be helpful for you guys!
If there’s any question related to this article feel free to comment to us. And, thanks for reading!
FAQ:
Needle breaks can be very exhausting and time-taking. But, if you know the common causes of why needle break happens, you can take rapid steps to avoid them from happening and make sure your projects are finished without disruption.
So, one of the most common causes for needle breaks is using a needle that is not suitable for the type of material you are working on. If the fabric is very thick, the needle might not be able to properly pierce it and that results in breaks. To fix this issue, ensure to use needles that are particularly designed for the thickness of the material you are working with.
Another common reason is an incorrect needle installment. To fix this, just uninstall the needle and reinstall it properly. There might also be an issue of build-up or debris in the bobbin area or rotary hook area that results in needle breaks. To fix this, cautiously clean the area of any debris and pieces of thread.
Another possible cause can be the bobbin case is not correctly set in your Ricoma SWD-1501 embroidery machine or that the bobbin thread is not rightly wound. To fix this, replace the bobbin and ensure it snaps into place properly.
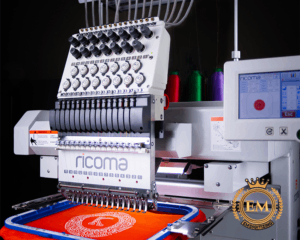
Go exceptional with Ricoma SWD-1501. Ricoma SWD-1501 has the biggest embroidery area in the industry and is perfect for embroidery on big items such as jackets and tablecloths as well as regular items such as caps and Polos.
Regardless of being such an amazing machine, you can still face some of Ricoma SWD problems and we are here to give you its solution!
So, there can be many reasons why needle break happens while embroidering caps. Let’s see those reasons and know how you can avoid them:
- Running your Ricoma SWD-15011501 embroidery machine at a high speed can cause needle breaks. Lower the speed when working with structured caps or intricate designs (600 spm). Always remember that embroidering at a slower speed might take a long time, but it will result in a high-quality finished product and extend your needle’s life.
- The embroidery designs might have a lot of stitches in a given area. To fix this issue, increase the stitch density of your embroidery designs using chroma digitizing software. Simply click on the hoop icon in the toolbar and choose the hoop you are using. If your embroidery designs touch or boost beyond the hoop anywhere, resize your embroidery designs to make sure it falls within your hooping area.
- It can also be that your embroidery designs are not digitized properly or optimized for caps. Always remember that the digitization of your embroidery designs gives the instructions for your machine, so it is very significant to ensure it is rightly done. To fix this, try using embroidery designs that you have formerly run successfully. Embroidery designs that run well on flat surfaces might not work well on caps, because cap embroidery typically begins at the center.
- The material is very thick for the type of needle you’re using. To fix this, use a thick needle that is suitable for the fabric you are working with. We suggest using 80/12 titanium needles for structured caps.
- Lowering your cap driver can as well help prevent needle breaks. By bringing the cap drive closer to the sewing arm, you can lessen the bounciness of the bap during the embroidery procedure.
The common problems of ricoma SWD 5101 embroidery machine are:
- Needle breaks
- Tensioning of thread
- Needle breaks on structured caps
- Why do needles keep on breaking while embroidery flats?
Needle breaks can be very exhausting and time-taking. But, if you know the common causes of why needle break happens, you can take rapid steps to avoid them from happening and make sure your projects are finished without disruption.
So, one of the most common causes for needle breaks is using a needle that is not suitable for the type of material you are working on. If the fabric is very thick, the needle might not be able to properly pierce it and that results in breaks. To fix this issue, ensure to use needles that are particularly designed for the thickness of the material you are working with.
Another common reason is an incorrect needle installment. To fix this, just uninstall the needle and reinstall it properly. There might also be an issue of build-up or debris in the bobbin area or rotary hook area that results in needle breaks. To fix this, cautiously clean the area of any debris and pieces of thread.
Another possible cause can be the bobbin case is not correctly set in your Ricoma SWD-1501 embroidery machine or that the bobbin thread is not rightly wound. To fix this, replace the bobbin and ensure it snaps into place properly.
- Why do needles keep on breaking while embroidery caps?
So, there can be many reasons why needle break happens while embroidering caps. Let’s see those reasons and know how you can avoid them:
- Running your Ricoma SWD-15011501 embroidery machine at a high speed can cause needle breaks. Lower the speed when working with structured caps or intricate designs (600 spm). Always remember that embroidering at a slower speed might take a long time, but it will result in a high-quality finished product and extend your needle’s life.
- The embroidery designs might have a lot of stitches in a given area. To fix this issue, increase the stitch density of your embroidery designs using chroma digitizing software. Simply click on the hoop icon in the toolbar and choose the hoop you are using. If your embroidery designs touch or boost beyond the hoop anywhere, resize your embroidery designs to make sure it falls within your hooping area.
- It can also be that your embroidery designs are not digitized properly or optimized for caps. Always remember that the digitization of your embroidery designs gives the instructions for your machine, so it is very significant to ensure it is rightly done. To fix this, try using embroidery designs that you have formerly run successfully. Embroidery designs that run well on flat surfaces might not work well on caps, because cap embroidery typically begins at the center.
- The material is very thick for the type of needle you’re using. To fix this, use a thick needle that is suitable for the fabric you are working with. We suggest using 80/12 titanium needles for structured caps.
- Lowering your cap driver can as well help prevent needle breaks. By bringing the cap drive closer to the sewing arm, you can lessen the bounciness of the bap during the embroidery procedure.
3. Why ricoma SWD-1501 embroidery machine not cutting embroidery designs?
Troubleshooting Ricoma SWD 1501 Embroidery Machine:
If you are facing problems with the blade or your machine displays the TRIM NOT IN POSITION error message, kindly follow the steps below to troubleshoot and fix the issue.
- Remove the needle plate on the sewing arm while exposing the blade.
- Ensure that the area is clean and there is no thread build-up. Then, try pressing the TRIM button to see if the blades move.
If the blades do move, ensure that the blades are rightly placed.
- Why ricoma SWD-1501 embroidery machine leave tails on embroidery designs?
If you are facing excess thread or tails in your embroidery designs, it could be a sign that your machine’s trimming mechanism is not cutting early enough. This problem can be exhausting; especially when working on more complex embroidery designs, as the excess thread can make a mess and disrupt the overall look of your project. While manually cutting the tails with the help of scissors might provide a temporary solution, it is significant to identify the root cause of the problem and take steps to avoid it from happening in the future.
There are a few possible causes why excess thread might be happening on your Ricoma SWD-1501 embroidery machine:
- The feed length might be set too long. This refers to the number of stitches before the trimming mechanism kicks in! If the feed length is set very long, it can result in the excess thread being left behind after trimming.
- The trimming timing might be off. If the trimming mechanism is not cutting at the right time, it can outcome in the excess thread being left behind.
- Your thread might be wrapped around the thread break sensor a lot of times. This can cause the machine to move very rapidly for the tails to be pulled through, resulting in the excess thread.
- The thread break sensor might be set to TOO HIGH or TOO LOW sensitivity. This can as well cause the mechanism to move too rapidly for the tails to be pulled through, resulting in the excess thread.
To resolve this problem, there are several steps you can take:
- Firstly, try to detect if the problem is happening with all needles or only one. This can help narrow down the potential causes.
- Check the path of the thread to make sure that it is clear and free of any knots or tangles.
- Check the thread tension, it must not be very loose or very tight.
- Adjust the Velcro bar if required.
- Adjust the spring lever.
- Check the picker manually and with the pick test function.
- On the control panel, adjust the length after the trim parameter.
- To reduce the tail length, adjust the trim start angle.
- Check your machine timing.
If the issue is happening with only one needle, you can begin by pulling the thread and feeling its tension. It must be similar to the tension of the needles that are properly working. To check the tension you can try the H or I test. During the I test, you must follow the one-third rule, which involves having one-third of the bobbin thread in the center and one-third of the top thread on both sides. If the column is even, your tension is correct.


