
If you’;Rimase stanco degli stessi vecchi modelli di ricamo e stanno cercando di aggiungere un tocco di eleganza e creatività ai tuoi progetti, Quindi il ricamo Cutwork potrebbe essere proprio quello di cui hai bisogno.
Questo ricamo è una tecnica che prevede lo ritaglio di sezioni di tessuto e quindi la cucitura di design intricati attorno ai bordi.
Il risultato è un'opera d'arte magnificamente strutturata e dimensionale che farà risaltare il tuo ricamo dalla folla. Questo tutorial completo ti guiderà attraverso ogni fase del processo di taglio creativo.
Così, let’;Iniziamo:
Tutorial per ricamo creativo a intaglio: Scopri il processo completo
Strumenti e materiali necessari per il ricamo tagliato:
Prima, Raccogli tutto strumenti essenziali e materiali necessari per questo processo:
Strumenti essenziali:
Per iniziare con questo ricamo, you’;Avranno bisogno di alcuni strumenti essenziali.
Questi includono un Macchina da ricamo capace di esecuzione di tagli, forbici da ricamo, aghi da ricamo, e filo da ricamo. Puoi anche richiedere un telaio o un telaio per fissare il tessuto, così come un stabilizzante idrosolubile per sostenere il tessuto durante la cucitura.
Scegliere il tessuto giusto:
Non tutto I tessuti sono adatti per il design di taglio. You’;Voglio scegliere un tessuto che abbia una trama stretta ed è abbastanza robusta da resistere al processo di taglio.
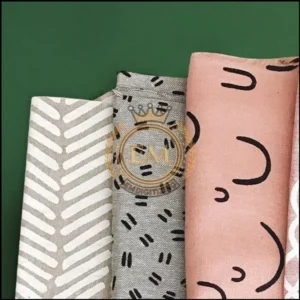
Tessuti come il cotone, biancheria, E la seta sono eccellenti opzioni. Evita tessuti troppo elastici o inclini a sfilacciare, poiché potrebbero non reggere bene durante il processo di taglio.
Selezione dei thread e degli aghi giusti:
Quando si tratta di tipi di filo e aghi, optare per Fili da ricamo di alta qualità che abbinano il tuo tessuto e il tuo design. I fili metallici e variegati possono creare effetti sbalorditivi, ma assicurati che siano compatibili con la tua macchina da ricamo.
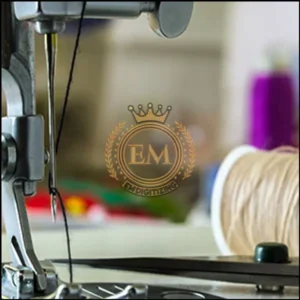
Per quanto riguarda gli aghi, scegli aghi affilati e sottili che scivolano facilmente attraverso il tessuto, senza andarsene buchi evidenti.
Processo passo dopo passo del ricamo a intaglio:
Intraprendi un progetto di intaglio con la tua fidata macchina da ricamo? Fantastico!
Here’;C'è una guida passo passo che ti aiuterà a muoverti facilmente attraverso il processo.
Fare un passo 1 –; Lavare e stirare il tessuto:
Prima iniziare il tuo progetto, it’;È essenziale lavarsi e stirare il tessuto. Questo passaggio garantisce che qualsiasi restringimento o sanguinamento del colore si verifica prima di ricamare sul tessuto.
La stiratura aiuta anche a creare una superficie liscia e senza pieghe per la cucitura, che è vitale per un taglio preciso.
Fare un passo 2 - Stabilizzare il tessuto:
Per stabilizzare il tessuto durante il processo di intaglio, you’;Dovrò utilizzare uno stabilizzatore solubile in acqua. Questo lo stabilizzatore fornisce supporto temporaneo per impedire al tessuto di spostare o allungare durante le cuciture.
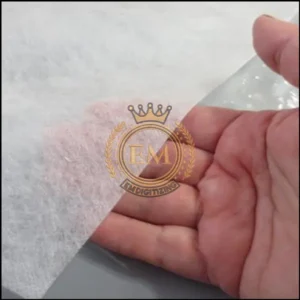
Si dissolve facilmente in acqua, lasciando dietro di sé solo il tuo design di taglio magnificamente cucito. Segui le istruzioni fornite con lo stabilizzatore per i migliori risultati.
Fare un passo 3 –; Selezione del design:
Ci sono innumerevoli fonti di ispirazione per il taglio disegni da ricamo. Sfoglia i libri di design da ricamo, riviste, o piattaforme online per trovare modelli che attirano la tua attenzione.
Se trovi un design da ricamo esistente che ami ma che vuoi incorporare Cutwork, don’;abbi paura di adattarlo.
Con l'aiuto di un software di ricamo programma, È possibile modificare il design aggiungendo elementi di taglio. Ciò ti consente di personalizzare e personalizzare il design per adattarsi perfettamente al tuo progetto.
Nel caso in cui non lo sai come digitalizzare Design Cutwork che puoi assumerci. Lo digitalizziamo per te con la promessa di alta qualità al prezzo più conveniente possibile.
Fare un passo 4 –; Impostazione della macchina da ricamo:
Let’;Prepara la tua macchina da ricamo per un po' di magia dell'intaglio! Make sure it’;sia correttamente collegato e acceso.
Scegli l'ago appropriato e thread per il tuo progetto, e collegarli alla macchina. Don’;Non dimenticare di controllare anche le impostazioni della tensione, poiché possono influenzare il risultato del ricamo.
Fare un passo 5 - Trasferimento del disegno alla macchina:
Ora che la tua macchina è pronta, it’;È ora di trasferire il design scelto. Puoi scaricare un file file di progettazione online o creane uno tuo utilizzando il software di ricamo.
Una volta ottenuto il file, collega la macchina al computer o utilizza un'unità USB per trasferire il disegno. Accedi al menu di progettazione sulla tua macchina, Seleziona il file, e voilà! Il tuo design è pronto per essere ricamato.
Fare un passo 6 –; Processo di ricamo:
Premere il pulsante di avvio, e lascia che la macchina funzioni la sua magia. Man mano che il ricamo avanza, Potrebbe essere necessario tagliare il tessuto in eccesso di tanto in tanto, Seguendo lo schema del design di taglio.
Listen to the machine’;s implica e segui il suo vantaggio. Una volta completato il disegno, Rimuovi il cerchio e meravigliati della tua bellissima creazione di ricami Cutwork!
Tocco finale al tuo pezzo di ricamo a taglio:
Congratulazioni, you’;Ve ha completato il tuo progetto di taglio!
Now it’;è il momento di dargli gli ultimi tocchi che merita e assicurarsi che duri una vita.
Rimozione di tessuto e fili in eccesso:
Una volta che il tuo ricamo è completo, it’;S è ora di ripulire qualsiasi tessuto in eccesso o fili sciolti.
Taglia con cura qualsiasi tessuto in eccesso attorno ai bordi del design usando forbici ricami affilati. Controlla eventuali fili randagi e tagliarli via per dare al tuo pezzo un look lucido.
Blocco e inquadratura del design a taglio finito:
Per garantire che il tuo ricamo rimanga in forma e sembra al meglio, Considera di bloccarlo. Il blocco comporta delicatamente smorzamento del tessuto e allungarlo alla forma e alle dimensioni desiderate.
Lascialo asciugare completamente prima di inquadrarlo. A proposito di inquadratura, Scegli una cornice che completa il tuo design e lo metta in mostra magnificamente.
Pensieri finali:
Padroneggiando le tecniche e seguendo il processo passo-passo delineato in questo tutorial, Puoi creare straordinari pezzi di taglio che sicuramente impressiranno.
Whether you’;REGLI ABBILITÀ CHE, oggetti di arredamento per la casa, o regali personalizzati, L'arte del ricamo a taglio ti consente di elevare le tue creazioni a un livello completamente nuovo.
Così, Prendi la tua macchina da ricamo, sperimentare con design diversi, E lascia che la tua immaginazione si alzi mentre esplori l'arte del design del taglio.
EMDigitalizzazione: Esperto di digitalizzazione del ricamo al tuo servizio:
Stai cercando aiuto per trasformare i tuoi disegni in ricami?
Dai un'occhiata a EMdigitizing! Siamo specializzati in digitalizzazione del ricamo e ho molto per te. If you’;sei un cliente per la prima volta, ottieni un enorme 50% sconto su tutti i nostri servizi.
Il nostro team è esperto nella digitalizzazione, prendono il tuo disegno e lo digitalizzano attentamente, making sure it’;È pronto rapidamente e senza costarti molto.
Ho qualche domanda? Basta contattarci.
Il nostro team è sempre qui per aiutarti e ti risponderà velocemente. E se ritieni che queste informazioni siano utili, sentiti libero di condividerlo con i tuoi amici.
Grazie per aver letto, e cuciture felici!
Domande frequenti:
Ricamare su organza richiede l'uso di uno stabilizzatore per evitare di arricchirsi e scegliere bene, aghi affilati e filo leggero.
Il miglior tessuto per il taglio è in genere un tessuto strettamente intrecciato come il lino o il cotone, which holds shapes well and doesn’;t Fray eccessivamente.
I punti comuni utilizzati per il ricamo a taglio includono il punto del bottone, punto pieno, e correre il punto.
Per fare un taglio a casa, Inizia trasferendo il tuo design sul tessuto, fissando il tessuto in un telaio da ricamo, e poi tagliare attentamente le aree di progettazione prima di ricamare attorno ai ritagli per migliorare e proteggere i bordi.


