
If you’;Vous en avez assez des mêmes vieux motifs de broderie et vous cherchez à ajouter une touche d'élégance et de créativité à vos projets., alors la broderie découpée pourrait être exactement ce dont vous avez besoin.
Cette broderie est une technique qui consiste à découper des sections de tissu puis à coudre des motifs complexes sur les bords..
Le résultat est une œuvre d'art magnifiquement texturée et dimensionnelle qui permettra à votre broderie de se démarquer de la foule.. Ce tutoriel complet vous guidera à travers chaque étape du processus de création de découpe..
Alors$£€¥789/456*123-0.=+_çàiopjkln,;:! ذ ضِ ئ, let’;s commencer:
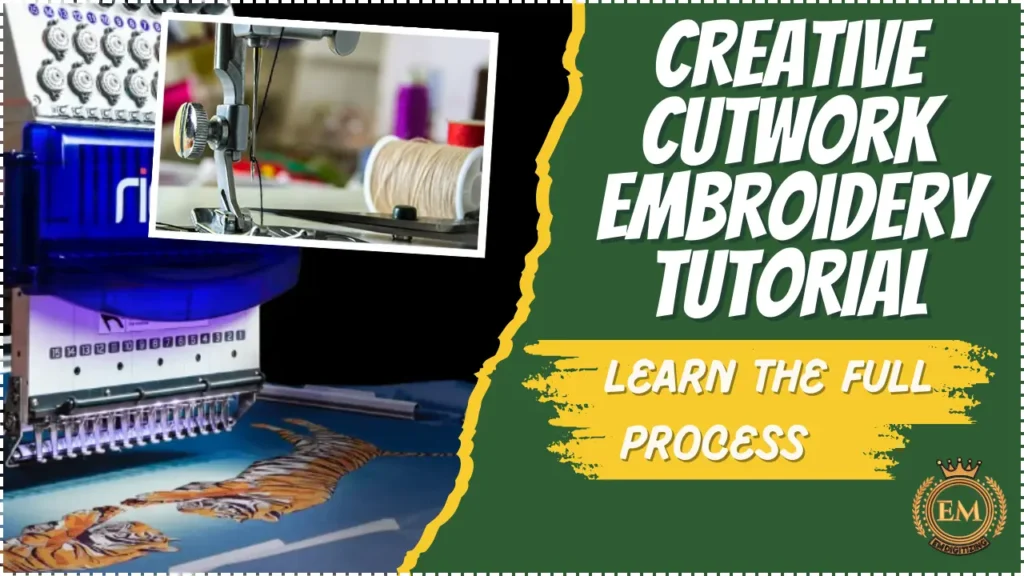
Tutoriel de broderie créative: Apprenez le processus complet
Outils et matériaux nécessaires à la broderie découpée:
Première, rassembler tout outils essentiels et les matériaux nécessaires à ce processus:
Outils essentiels:
Pour débuter cette broderie, you’;j'aurai besoin de quelques outils essentiels.
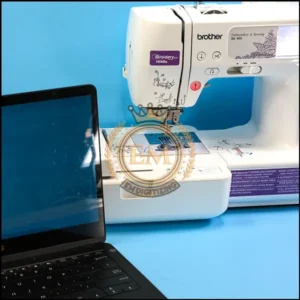
Ceux-ci incluent un machine à broder capable de réaliser des travaux de découpe, ciseaux à broder, aiguilles à broder, et fil à broder. Vous pouvez également avoir besoin d'un cerceau ou d'un cadre pour fixer votre tissu, ainsi qu'un stabilisant soluble dans l'eau pour soutenir le tissu pendant la couture.
Choisir le bon tissu:
Pas tous les tissus conviennent pour la conception de découpes. You’;Je veux choisir un tissu au tissage serré et suffisamment solide pour résister au processus de coupe..
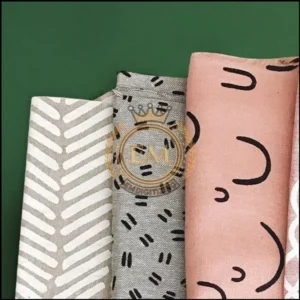
Des tissus comme le coton, lin, et la soie sont d'excellentes options. Évitez les tissus trop extensibles ou susceptibles de s'effilocher, car ils peuvent ne pas bien résister pendant le processus de découpe.
Choisir les bons fils et aiguilles:
En ce qui concerne les types de fils et les aiguilles, opter pour fils à broder de haute qualité qui correspondent à votre tissu et à votre design. Les fils métalliques et panachés peuvent créer des effets époustouflants, mais assurez-vous qu'ils sont compatibles avec votre machine à broder.
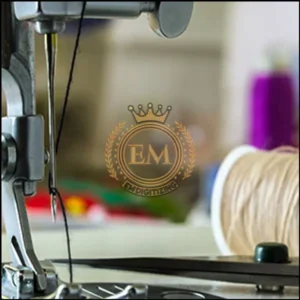
Quant aux aiguilles, choisissez des aiguilles pointues et fines qui glissent facilement à travers le tissu, sans partir trous visibles.
Processus étape par étape de broderie découpée:
Se lancer dans un projet de découpe avec votre fidèle machine à broder? Fantastique!
Here’;est un guide étape par étape pour vous aider à naviguer facilement dans le processus.
Marcher 1 –; Laver et repasser le tissu:
Avant démarrer votre projet, it’;est essentiel de se laver et repasser le tissu. Cette étape garantit que tout retrait ou saignement de couleur se produit avant de broder sur le tissu.
Le repassage aide également à créer une surface lisse et sans plis pour les coutures, ce qui est vital pour un travail de découpe précis.
Marcher 2 - Stabiliser le tissu:
Pour stabiliser le tissu pendant le processus de découpe, you’;Je devrai utiliser un stabilisant soluble dans l’eau. Cette le stabilisateur fournit support temporaire pour empêcher le tissu de bouger ou de s'étirer pendant la couture.
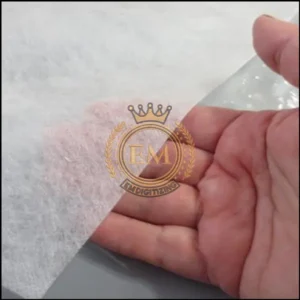
Il se dissout facilement dans l'eau, ne laissant derrière vous que votre motif découpé magnifiquement cousu. Suivez les instructions fournies avec votre stabilisateur pour obtenir les meilleurs résultats.
Marcher 3 –; Sélection de conception:
Il existe d’innombrables sources d’inspiration pour le cutwork motifs de broderie. Parcourez les livres de dessins de broderie, les magazines, ou des plateformes en ligne pour trouver des modèles qui attirent votre attention.
Si vous trouvez un motif de broderie existant que vous aimez mais que vous souhaitez incorporer des découpes, don’;n'ayez pas peur de l'adapter.
Avec l'aide d'un logiciel de broderie programme, vous pouvez modifier le design en ajoutant des éléments de découpe. Cela vous permet de personnaliser et d'adapter parfaitement le design à votre projet..
Au cas où tu ne le sais pas comment numériser conception de découpe, vous pouvez nous embaucher. Nous le numérisons pour vous avec la promesse d'une haute qualité au prix le plus abordable possible.
Marcher 4 –; Configuration de votre machine à broder:
Let’;Préparez votre machine à broder pour un peu de magie du cutwork! Make sure it’;est correctement branché et allumé.
Choisissez l'aiguille appropriée et fil de discussion pour votre projet, et attachez-les à la machine. Don’;n'oublie pas de vérifier aussi les réglages de tension, car ils peuvent affecter le résultat de votre broderie.
Marcher 5 - Transfert de la conception vers la machine:
Maintenant que votre machine est prête, it’;Il est temps de transférer le design que vous avez choisi. Vous pouvez soit télécharger un fichier de conception en ligne ou créez le vôtre à l'aide d'un logiciel de broderie.
Une fois que vous avez le fichier, connectez votre machine à votre ordinateur ou utilisez une clé USB pour transférer le motif. Accédez au menu de conception sur votre machine, sélectionnez le fichier, et voilà! Votre dessin est prêt à être brodé.
Marcher 6 –; Processus de broderie:
Appuyez sur le bouton de démarrage, et laisse la machine opérer sa magie. Au fur et à mesure de l'avancement de la broderie, vous devrez peut-être couper l'excédent de tissu de temps en temps, en suivant les grandes lignes du dessin découpé.
Listen to the machine’;s vous invite et suivez son exemple. Une fois la conception terminée, retirez le cerceau et émerveillez-vous devant votre magnifique création de broderie découpée!
Touche finale à votre pièce de broderie découpée:
Toutes nos félicitations, you’;J'ai terminé votre projet de découpe!
Now it’;Il est temps de lui donner la touche finale qu'il mérite et de s'assurer qu'il dure toute une vie..
Enlever l'excédent de tissu et de fils:
Une fois votre broderie terminée, it’;Il est temps de nettoyer tout excédent de tissu ou tout fil lâche..
Coupez soigneusement tout excédent de tissu sur les bords du motif à l'aide de ciseaux à broder pointus.. Vérifiez les fils parasites et coupez-les pour donner à votre pièce un aspect soigné.
Blocage et encadrement du motif découpé fini:
Pour garantir que votre broderie reste en forme et soit à son meilleur, pensez à le bloquer. Le blocage consiste à humidifier doucement le tissu et à l'étirer jusqu'à la forme et la taille souhaitées..
Laissez-le sécher complètement avant de l’encadrer. En parlant de cadrage, choisissez un cadre qui complète votre design et le met magnifiquement en valeur.
Dernières pensées:
En maîtrisant les techniques et en suivant le processus étape par étape décrit dans ce tutoriel, vous pouvez créer de superbes pièces découpées qui ne manqueront pas d'impressionner.
Whether you’;embellir les vêtements, articles de décoration pour la maison, ou cadeaux personnalisés, l'art de la broderie découpée vous permet d'élever vos créations à un tout autre niveau.
Alors$£€¥789/456*123-0.=+_çàiopjkln,;:! ذ ضِ ئ, prends ta machine à broder, expérimenter différents modèles, et laissez libre cours à votre imagination en explorant l'art du design découpé..
EMnumérisation: Expert en numérisation de broderie à votre service:
Cherchez-vous de l'aide pour transformer vos créations en broderie?
Découvrez EMdigitizing! Nous sommes spécialisés dans numérisation de broderie et j'ai beaucoup de choses pour toi. If you’;vous êtes un premier client, tu as un énorme 50% de réduction sur tous nos services.
Notre équipe est experte en digitalisation, ils prennent votre design et le numérisent soigneusement, making sure it’;est prêt rapidement et sans vous coûter cher.
J'ai des questions? Contactez-nous simplement.
Notre équipe est toujours là pour vous aider et vous répondra rapidement. Et si vous pensez que cette information est utile, n'hésitez pas à le partager avec vos amis.
Merci d'avoir lu, et bonne couture!
Questions fréquemment posées:
La broderie sur organza nécessite l'utilisation d'un entoilage pour éviter les plis et un choix fin., aiguilles pointues et fil léger.
Le meilleur tissu pour les découpes est généralement un tissu étroitement tissé comme le lin ou le coton., which holds shapes well and doesn’;ne s'effiloche pas excessivement.
Les points courants utilisés pour la broderie découpée incluent le point de boutonnière, plumetis, et point courant.
Faire du découpage à la maison, commencez par transférer votre motif sur le tissu, fixer le tissu dans un cercle à broder, puis découpez soigneusement les zones de motif avant de broder autour des découpes pour rehausser et sécuriser les bords..


