
If you’;Sie haben genug von den immer gleichen Stickmustern und möchten Ihren Projekten einen Hauch von Eleganz und Kreativität verleihen, Dann könnte Cutwork-Stickerei genau das Richtige für Sie sein.
Bei dieser Stickerei handelt es sich um eine Technik, bei der Stoffabschnitte ausgeschnitten und dann an den Rändern komplizierte Muster angenäht werden.
Das Ergebnis ist ein wunderschön strukturiertes und dimensionales Kunstwerk, das Ihre Stickerei aus der Masse hervorstechen lässt. Dieses umfassende Tutorial führt Sie durch jeden Schritt des kreativen Cutwork-Prozesses.
So, let’;Fangen Sie an:
Anleitung zum kreativen Cutwork-Sticken: Erfahren Sie den gesamten Prozess
Benötigte Werkzeuge und Materialien für Cutwork-Stickereien:
Zuerst, alle versammeln wesentliche Werkzeuge und Materialien, die für diesen Prozess benötigt werden:
Wesentliche Werkzeuge:
Um mit dieser Stickerei zu beginnen, you’;Ich brauche ein paar wichtige Werkzeuge.
Dazu gehört ein Stickmaschinentauglich Cutwork auszuführen, Stickschere, Sticknadeln, und Stickgarn. Möglicherweise benötigen Sie auch einen Rahmen oder Rahmen, um Ihren Stoff zu befestigen, sowie ein wasserlöslicher Stabilisator um den Stoff beim Nähen zu stützen.
Den richtigen Stoff auswählen:
Nicht alle Stoffe sind geeignet für Cutwork-Design. You’;Sie möchten einen Stoff wählen, der dicht gewebt und robust genug ist, um dem Schneidvorgang standzuhalten.
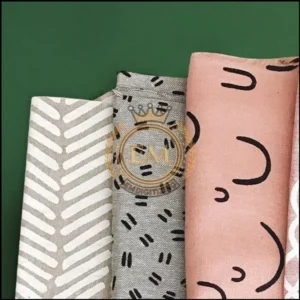
Stoffe wie Baumwolle, Leinen, und Seide sind ausgezeichnete Optionen. Vermeiden Sie Stoffe, die zu dehnbar sind oder zum Ausfransen neigen, da sie während des Cutwork-Prozesses möglicherweise nicht gut halten.
Auswahl der richtigen Fäden und Nadeln:
Wenn es um Garnarten und Nadeln geht, entscheiden Sie sich dafür hochwertige Stickgarne die zu Ihrem Stoff und Design passen. Metallische und bunte Fäden können atemberaubende Effekte erzeugen, Stellen Sie jedoch sicher, dass sie mit Ihrer Stickmaschine kompatibel sind.
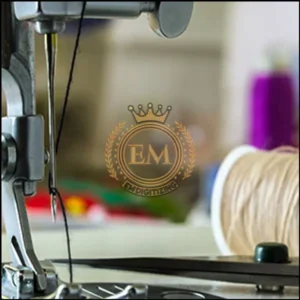
Was Nadeln betrifft, Wählen Sie scharfe und dünne Nadeln, die leicht durch den Stoff gleiten, ohne zu gehen auffällige Löcher.
Schritt-für-Schritt-Anleitung für die Cutwork-Stickerei:
Beginnen Sie ein Cutwork-Projekt mit Ihrer treuen Stickmaschine? Fantastisch!
Here’;Es gibt eine Schritt-für-Schritt-Anleitung, die Ihnen dabei hilft, sich mühelos durch den Prozess zu navigieren.
Schritt 1 –; Waschen und Bügeln des Stoffes:
Vor Starten Sie Ihr Projekt, it’;Es ist wichtig zu waschen und Bügeln Sie den Stoff. Durch diesen Schritt wird sichergestellt, dass eventuelle Schrumpfungen bzw Farbbluten tritt auf, bevor Sie den Stoff besticken.
Durch Bügeln entsteht außerdem eine glatte und faltenfreie Oberfläche zum Nähen, was für präzise Schnittarbeiten unerlässlich ist.
Schritt 2 - Stabilisierung des Stoffes:
Zur Stabilisierung des Stoffes während des Cutwork-Prozesses, you’;Sie müssen einen wasserlöslichen Stabilisator verwenden. Diese Stabilisator sorgt vorübergehende Unterstützung, um zu verhindern, dass sich der Stoff beim Nähen verschiebt oder dehnt.
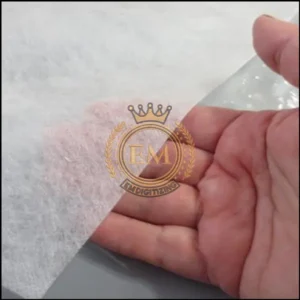
Es löst sich leicht in Wasser, Zurück bleibt nur Ihr wunderschön gesticktes Cutwork-Design. Befolgen Sie die mit Ihrem Stabilisator gelieferten Anweisungen, um die besten Ergebnisse zu erzielen.
Schritt 3 –; Designauswahl:
Es gibt unzählige Inspirationsquellen für Cutwork Stickmotive. Stöbern Sie in Büchern zum Sticken, Zeitschriften, oder Online-Plattformen, um Muster zu finden, die Ihre Aufmerksamkeit erregen.
Wenn Sie ein vorhandenes Stickdesign finden, das Ihnen gefällt, Sie aber Cutwork integrieren möchten, don’;Scheuen Sie sich nicht, es anzupassen.
Mit Hilfe eines Sticksoftware Programm, Sie können das Design ändern, indem Sie Cutwork-Elemente hinzufügen. Dadurch können Sie das Design personalisieren und perfekt an Ihr Projekt anpassen.
Falls Sie es nicht wissen wie man digitalisiert Cutwork-Design können Sie bei uns beauftragen. Wir digitalisieren es für Sie mit dem Versprechen hoher Qualität zum möglichst günstigen Preis.
Schritt 4 –; Einrichten Ihrer Stickmaschine:
Let’;Machen Sie Ihre Stickmaschine bereit für etwas Cutwork-Magie! Make sure it’;Es ist ordnungsgemäß angeschlossen und eingeschaltet.
Wählen Sie die passende Nadel und Thread für Ihr Projekt, und befestigen Sie sie an der Maschine. Don’;Vergessen Sie nicht, auch die Spannungseinstellungen zu überprüfen, da sie das Ergebnis Ihrer Stickerei beeinträchtigen können.
Schritt 5 - Übertragen des Designs auf die Maschine:
Jetzt ist Ihre Maschine fertig, it’;Jetzt ist es an der Zeit, Ihr ausgewähltes Design zu übertragen. Sie können entweder eine herunterladen Designdatei online oder erstellen Sie Ihr eigenes Stickmuster mit einer Sticksoftware.
Sobald Sie die Datei haben, Schließen Sie Ihre Maschine an Ihren Computer an oder verwenden Sie ein USB-Laufwerk, um das Design zu übertragen. Navigieren Sie zum Designmenü auf Ihrer Maschine, Wählen Sie die Datei aus, und voilà! Ihr Design ist bereit zum Sticken.
Schritt 6 –; Stickprozess:
Drücken Sie die Starttaste, und lassen Sie die Maschine ihre Magie wirken. Während die Stickerei voranschreitet, Möglicherweise müssen Sie von Zeit zu Zeit überschüssigen Stoff abschneiden, Folgen Sie dem Umriss des Cutwork-Designs.
Listen to the machine’;Beachten Sie die Aufforderungen des Benutzers und folgen Sie seinem Beispiel. Sobald das Design fertig ist, Nehmen Sie den Rahmen ab und bestaunen Sie Ihre wunderschöne Cutwork-Stickerei!
Der letzte Schliff für Ihr Cutwork-Stickstück:
Herzliche Glückwünsche, you’;Sie haben Ihr Cutwork-Projekt abgeschlossen!
Now it’;Es ist an der Zeit, ihm den letzten Schliff zu geben, den es verdient, und sicherzustellen, dass es ein Leben lang hält.
Entfernen von überschüssigem Stoff und Fäden:
Sobald Ihre Stickerei fertig ist, it’;Jetzt ist es an der Zeit, überschüssigen Stoff oder lose Fäden zu entfernen.
Schneiden Sie überschüssigen Stoff an den Kanten des Motivs vorsichtig mit einer scharfen Stickschere ab. Suchen Sie nach vereinzelten Fäden und schneiden Sie diese ab, um Ihrem Stück ein poliertes Aussehen zu verleihen.
Blockieren und Einrahmen des fertigen Cutwork-Designs:
Damit Ihre Stickerei ihre Form behält und optimal aussieht, Erwägen Sie, es zu blockieren. Beim Blockieren wird der Stoff sanft angefeuchtet und in die gewünschte Form und Größe gedehnt.
Lassen Sie es vollständig trocknen, bevor Sie es einrahmen. Apropos Rahmung, Wählen Sie einen Rahmen, der zu Ihrem Design passt und es wunderschön zur Geltung bringt.
Abschließende Gedanken:
Indem Sie die Techniken beherrschen und den in diesem Tutorial beschriebenen Schritt-für-Schritt-Prozess befolgen, Sie können atemberaubende Cutwork-Stücke erstellen, die Sie mit Sicherheit beeindrucken werden.
Whether you’;Kleidungsstücke neu verschönern, Wohnaccessoires, oder personalisierte Geschenke, Die Kunst der Cutwork-Stickerei ermöglicht es Ihnen, Ihre Kreationen auf ein ganz neues Niveau zu heben.
So, Schnappen Sie sich Ihre Stickmaschine, Experimentieren Sie mit verschiedenen Designs, Lassen Sie Ihrer Fantasie freien Lauf, während Sie die Kunst des Cutwork-Designs erkunden.
EMdigitalisieren: Experte für die Digitalisierung von Stickereien zu Ihren Diensten:
Suchen Sie Hilfe bei der Umsetzung Ihrer Designs in Stickereien??
Schauen Sie sich EMdigitizing an! Wir sind spezialisiert auf Stickerei digitalisieren und habe ein tolles Angebot für Sie. If you’;Ich bin Erstkunde, Du bekommst ein riesiges 50% Rabatt auf alle unsere Dienstleistungen.
Unser Team ist Experte für Digitalisierung, Sie nehmen Ihren Entwurf und digitalisieren ihn sorgfältig, making sure it’;Es ist schnell und ohne große Kosten fertig.
Habe Fragen? Kontaktieren Sie uns einfach.
Unser Team ist immer für Sie da und wird sich schnell bei Ihnen melden. Und wenn Sie denken, dass diese Informationen hilfreich sind, Teilen Sie es gerne mit Ihren Freunden.
Danke fürs Lesen, und viel Spaß beim Nähen!
Häufig gestellte Fragen:
Beim Besticken von Organza ist die Verwendung eines Stabilisators erforderlich, um Faltenbildung zu verhindern, und die Auswahl ist fein, scharfe Nadeln und leichter Faden.
Der beste Stoff für Cutwork-Arbeiten ist normalerweise ein dicht gewebter Stoff wie Leinen oder Baumwolle, which holds shapes well and doesn’;Es darf nicht übermäßig ausfransen.
Zu den gängigen Stichen für Cutwork-Stickereien gehört der Knopflochstich, Plattstich, und Laufstich.
Cutwork zu Hause machen, Beginnen Sie mit der Übertragung Ihres Designs auf den Stoff, Befestigen des Stoffes in einem Stickrahmen, Schneiden Sie dann die Designbereiche sorgfältig aus, bevor Sie um die Ausschnitte herum sticken, um die Kanten hervorzuheben und zu sichern.


