Embroider on napkins with an embroidery machine might sound fancy, but it’s actually a fun and accessible way to add a personal touch to your dining experience.
Whether you want to impress guests or simply elevate your own table-setting game, this tutorial will guide you through the process like a boss.
Embroider On Napkins Tutorial: Mastering The Art Like A Boss
Essential Tools and Materials for Embroider on Napkins
First, gather all the materials you need:
Choosing the Right Embroidery Machine
First things first, you’ll need a trusty embroidery machine to make your napkin dreams come true. There are plenty of options out there, so choose one that suits your budget and requirements.
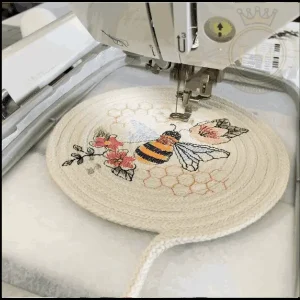
Make sure to consider factors like hoop size, stitching speed, and built-in designs. Ah, the wonders of technology – we’re living in a time where even napkins can be adorned with intricate embroidery!
Necessary Tools for Napkin Embroidery
Apart from your embroidery machine, you’ll need a few other tools to get started. These include embroidery thread in various colors, embroidery needles, stabilizer, embroidery scissors, and, of course, the star of the show – napkins!
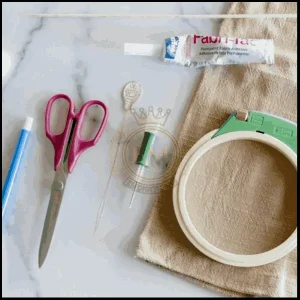
While your creativity can’t be measured in tools, having the right ones definitely makes the process smoother.
So gather your supplies and let’s get ready to rock those napkins!
Preparing the Napkin: Proper Washing, Ironing, and Stabilizing Techniques
Before diving into the embroidery process, it’s crucial to prepare both your napkins.
Pre-Washing and Ironing the Napkins
Before diving into embroidery, it’s crucial to prep your napkins properly. Give them a good wash to remove any dirt or sizing that might interfere with your stitches.
Once clean, don’t forget to give them a good ironing. Smooth napkins not only make the embroidery process easier but also give that polished, professional look. Plus, you’ll feel like Martha Stewart while doing it – who doesn’t want that?
Stabilizing Methods for Napkin Embroidery
Now, let’s talk stabilization – not the emotional kind, but the embroidery kind.
A stabilizer is like the backbone of your embroidery project, helping to keep the fabric taut and prevent puckering. There are different types of stabilizers, such as tear-away and cut-away, each with its own advantages.
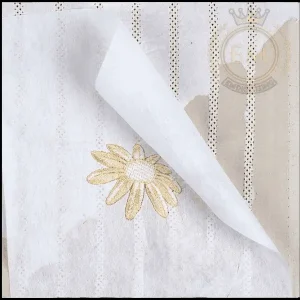
Experiment with different methods to find the one that works best for you. Remember, napkins deserve a solid foundation just like any good meal.
Design Selection: Choosing the Perfect Embroidery Patterns for Napkins
To ensure embroidery success, it’s important to choose the right design for your project.
Considering the Napkin Size and Shape
When it comes to choosing embroidery designs for your napkins, size and shape matter. Consider the dimensions of your napkins and select a design that fits well within the available space.
You don’t want your beautiful embroidery to get lost in a sea of fabric, or worse, hang off the edge like a clumsy dinner guest.
Exploring Different Design Styles
Now, let your creativity soar and explore different design styles. From delicate floral patterns to cheeky quotes or even monograms, there’s a design out there for every napkin occasion.
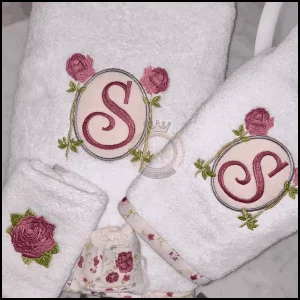
Let your personality shine through your stitches and have fun with it. After all, napkin embroidery is an art form, and you’re the master artist.
Setting Up the Embroidery Machine: Tips for Optimal Stitching Results
Now that your napkins and machine are ready, it’s time to set up for embroidery.
Threading and Tension Adjustment
Threading your embroidery machine might seem like a daunting task, but fear not! Just follow the manufacturer’s instructions and take it one step at a time. Make sure all threads are properly seated in their respective guides and tension disks.
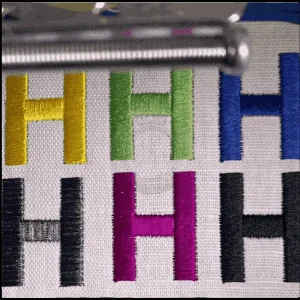
Speaking of tension, it’s crucial to adjust it correctly for smooth stitching. Too tight and your thread might break, too loose and you’ll end up with messy loops.
Remember, finding the right tension is like finding the perfect balance between French fries and ketchup – a little trial and error is involved, but totally worth it.
Selecting the Right Needle and Thread
Choosing the right needle and thread combo can make or break your embroidery project. For napkin embroidery, it’s best to use a sharp needle with a small eye to minimize damage to the delicate fabric.
As for the thread, opt for a high-quality embroidery thread that matches your design’s color scheme. Don’t be afraid to experiment with different thread types like polyester or rayon to achieve different effects.
Remember, embroidery is like pizza – everyone has their own preference, and there’s no right or wrong as long as it tastes good (or looks good, in this case).
Step-by-Step Guide to Embroidering on Napkins with an Embroidery Machine
Now, let’s start embroidery:
Hooping the Napkin Properly
Hooping might sound like a circus act, but when it comes to napkin embroidery, it’s all about achieving stability. Start by placing your embroidery stabilizer underneath the napkin, ensuring it covers the entire design area.
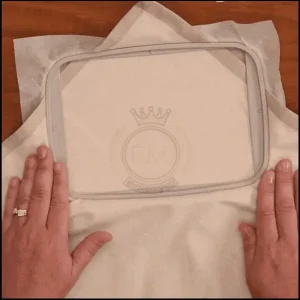
Next, gently hoop a napkin, making sure it’s taut but not overly stretched. Remember, a well-hooped napkin is like a perfectly fitted pair of jeans – it provides support without leaving unsightly marks.
Embroidery Process
Attach your napkin securely to the machine’s hoop, ensuring it’s taut and wrinkle-free. Then, let your embroidery machine work its magic, stitching your design onto the napkin with precision and speed.
Managing Thread Changes and Trims
Depending on the complexity of your design, you may need to change the colors of the thread throughout the embroidery process.
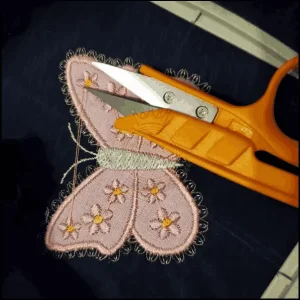
Pay close attention to the machine’s instructions for thread changes, and make sure to trim any excess threads as you go. This will keep your embroidery looking clean and professional.
Finishing Touches and Care Instructions for Embroidered Napkins
It’s time to give your embroidered napkin the finishing touch:
Removing the Stabilizer and Trimming Excess Threads
Congratulations, you’ve successfully embroidered your napkins!
Now it’s time to give them the finishing touches. Start by removing the stabilizer from the back of the embroidery.
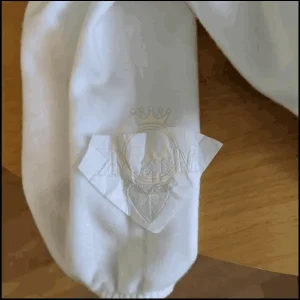
Cut away any excess stabilizer, being careful not to snip your stitches.
Just like trimming split ends, this step ensures a clean and polished result.
Proper Washing and Drying Techniques
Before you proudly display your newly embroidered napkins, make sure to give them a gentle wash. Use a mild detergent and cold water to preserve the colors and prevent any potential shrinkage.
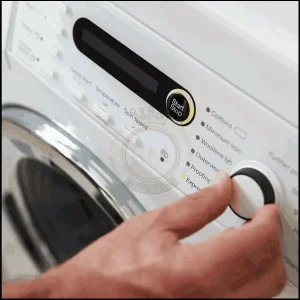
When it comes to drying, air drying is the gentlest option, but if you’re short on time, a low heat setting in the dryer should do the trick. Remember, we’re not baking these napkins – we just want them fresh and crisp.
Pressing and Folding the Embroidered Napkins
Finally, let’s put the “press” in impressive!
Once your napkins are dry, give them a quick press with an iron on a low heat setting. Make sure to place a clean cloth between the iron and the embroidery to protect your stitches.
And voila! Your napkins are ready to dazzle your guests. Fold them neatly, like origami but less complicated, and prepare for some serious table-setting envy.
Bottom Line
In conclusion, embroider on napkins with an embroidery machine opens up a world of creative possibilities for enhancing your table settings.
With the right techniques and attention to detail, you can achieve professional-looking results that will impress your guests and elevate any dining experience.
So, grab your embroidery machine and let your creativity soar as you embark on this exciting journey of transforming ordinary napkins into stunning works of art.
Happy embroidering!
EMdigitizing: Embroidery Digitizing Expert At Your Service
Are you looking for help with turning your designs into embroidery?
Check out EMdigitizing! We specialize in embroidery digitizing and have a great deal for you. If you’re a first-time customer, you get a huge 50% off on all our services.
Our team is an expert in digitizing, they take your design and carefully digitize it, making sure it’s ready quickly and without costing you a lot.
Got any questions? Just contact us.
Our team is always here to help and will get back to you fast. And if you think this info is helpful, feel free to share it with your friends.
Thanks for reading, and happy stitching!
Frequently Asked Questions:
For embroidering napkins, a lightweight, water-soluble stabilizer is ideal, as it provides the necessary support during embroidery and can be easily removed without leaving residues.
Linen and high-quality cotton are the best materials for embroidery on napkins, due to their durability, smooth texture, and ability to hold embroidery stitches well.
To stencil a napkin, first choose a stencil design, then secure it on the napkin using tape. Apply fabric paint or ink over the stencil with a brush or sponge, remove the stencil carefully, and allow the napkin to dry.
There are several types of napkins, including cloth napkins (linen, cotton), paper napkins, and decorative napkins, each varying in material and intended use, ranging from daily dining to formal occasions.
