

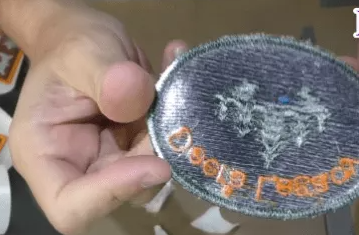
Have you ever thought about why embroidery patches are so popular and widely used? And also, how to make yourself from an embroidery machine? If so, keep reading! This complete guide will show you how to easily create custom patches.

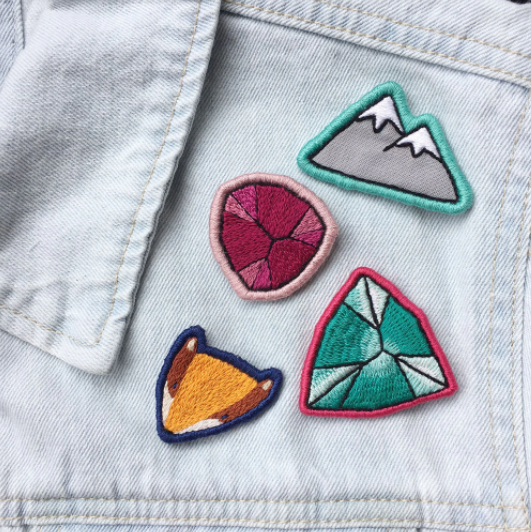
Embroidery patches are one of the most useful and beautiful products you can make using an embroidery machine. Many beautiful embroidery designs, brand names, logos, and themes can be designed as embroidery patches.
Embroidery patches are an artistic way to share yourself with the world. They can be easily attached to a hat, bag, or jacket. Custom embroidery patches are a creative way to express your interests while also humbly highlighting your embroidery skills.
These embroidery patches can be easily sewn and affixed to various products such as bags, pockets, pants, and many textile products.
2 Ways to Make Embroidery Patches
Considering our history and today’s technology, we have come up with two new ways to make custom embroidery patches. The quality of our design and the process that we have developed to produce them is revolutionary.
As manufacturers with over 60 years of experience in the embroidery industry, our foundation will give you both quality and product-friendly results. Each file is manually digitized and tested. They are not created using an automated software process that shows modest results.
We’ve developed two innovative layouts tailored to your needs to give you a choice. DIY Patches and Ready-Made Patches.
DIY Embroidery Patches
These expertly digitized embroidery designs allow you to insert your designs or letters into the outline of the patch. Whether you want to make a single patch on a single needle machine or multiple patches on a multi-needle machine, these designs allow you to easily create custom patches with any material of your choice at the push of a button!
These DIY embroidery design files mimic the professional results of trade frontiers, created using a special machine. This copy will give a clean and crisp edge to your patch. A feature for which commercial border machines are famous.
These expertly digitized embroidery designs allow you to insert your designs or letters into the outline of the patch. With the push of a button, easily create custom patches with any content of your choice!
Please note that we do not include EMB files with any of our DIY patches as the files are not to be resized and will embroider exactly the size for which they were digitized. We include SVG files for those who have any kind of planner so you can pre-cut your patch to the right size.
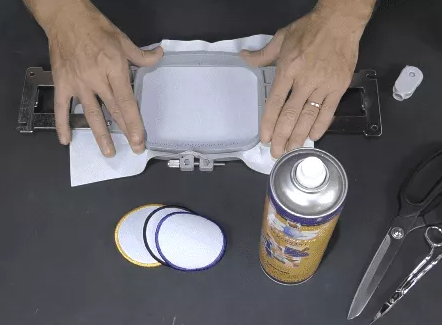
Step 1: Prep your patch
It is important to prepare your patch. You can use any fabric you want from your fabric station. Felt, cotton, poly, etc.

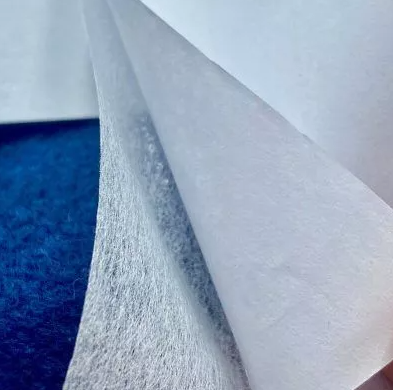
You will need to back up your patch using one of these stabilizers. Just remember that whatever you use will change how you proceed with the steps below:
- A no show mesh product (with fusible interfacing on one side) or
- A two-way feasible (such as tacky patch feasible stabilizer)
You can easily apply the stabilizer with a household iron or heat press using a temperature of 260F for about 12 seconds.
- When using the Nine Show Mesh Stabiliser product, take a Teflon sheet, and place it at the very bottom, so that it does not stick. Then take your fabric, and no-show mesh is feasible, and line them up so that the shiny side is under the fabric. Then place another Teflon sheet on top. Both the fabric and the tacky patches will be like sandwiches between the Teflon sheets. Hold it under the heat press for 12 seconds.
- When using a tacky patch fusible stabilizer, it’s basically the same thing. Apply your tacky patch to the fabric, then place a piece of Teflon on top, line them all up and place them under the heat press for 12 seconds. Then hop or cut as hard as you want to return a hard patch.
I recommend using tacky patch Fusible in your patch-making process for a number of reasons. First of all, it has a double adhesive, so when you put it down, it is tacky to one side and sticks to the other. This eliminates the use of “spray adhesives” during the patch-making process.
Second, the use of a tacky patch fusible will give your patch more stability while using only no-show mesh products. Third, there is a piece of paper on the reverse side that is perfect when using your plotter.
Preparing your patch this way will help your patch reduce collisions. Once it is fixed to the original fabric and you cut it, there will be no bumps on the edges, which will take you one step closer to making this perfect patch.
Step 2: Cutting your patch design
How you proceed with this next step will depend on whether you have a cutting machine.

- Use of Cutter Machine: With our DIY Patches Made Easy design files, we include the SVG file. Just insert your patch SVG file into your cutter and place your clothes on your mat with the stabilizer. Cut out the shapes of your perfect match with your cutter machine.
- If you do not have a cutter machine: Run the sewing file received in your DIY Patch Made Easy design file on your fabric and stabilizer. Once finished, cut along the sewing outline. If you want to cut straight on the seam outline, do not leave any of it hanging. This patch is sized to fit perfectly inside the design files.
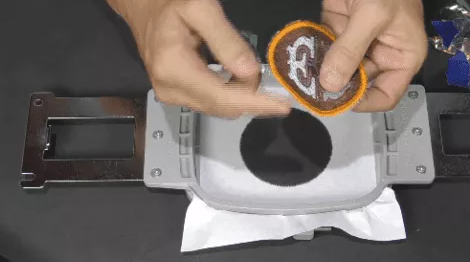
Step 3: Adhesive Backing
Which stabilizer you use depends on how your patch will look.

- If you do not use a no-show mesh stabilizer, you should use a spray adhesive (such as 505) to stick to the back of the patch.
- If you use a tacky patch stabilizer, you will easily peel off the back, and there will be an adhesive, which will give you a tacky back (hence the name).
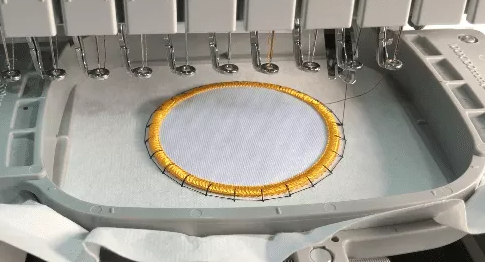
Step 4: Embroidering Your Patch
When embroidering on your patch, you can use 3 different types of stabilizers, one of which has more advantages over the other.
Depending on which stabilizer you use for your custom embroidery patch, this will change the way you follow the process. You can use one of the following:
- DIY Tear Away Patches
- DIY Wash Away Patches
- Prep Patch Film
Tear Away Stabiliser is probably my least favorite product to use, although it may be functional.
When using a Tier A stabilizer for your DIY patch, follow these steps.
- Hoop your tears away stabilizer.
- Run your placement stitch.
- Stick to your patch.
- If you have used no-show mesh feasible, spray 505 or KK to stick it.
- If you use hard screws, just peel off the paper to expose the adhesive side.
- Adjust your shape perfectly with the sewn outline.
- Put the hoop back on your machine, and it will sew a double run where it will rotate twice for strength, and then sew the zig-zag and remove the outer side.
- If you want to use mylar, add it to this step and save it using Painter’s tape (don’t forget to reduce the sewing density of your design when using mylar!)
- You can customize the characters for your patches inside your hatch software using ESA fonts (or of course other embroidery software).
- Sew the rest of your design.
- Remove your hoop. Your design will start to loosen as you have already removed the tears. When you tear your patch, there are some small fluffs left on the outside of the patch. I usually take a soldering iron to try to burn some extra stabilizer.
Wash Away Stabilizer will help you improve your results faster.
When using a wash-away stabilizer for your DIY patch, follow these steps.
Wrap your wash away the stabilizer.
- Run your placement stitch.
- Stick to your patch.
- If you have used no-show mesh feasible, spray 505 or KK to stick it.
- If you use hard screws, just peel off the paper to expose the adhesive side.
- Adjust your shape perfectly with the sewn outline.
- Put the hoop back on your machine, and it will sew a double run where it will go twice for strength, and then sew the zig-zag and remove the outer side.
- If you want to use mylar, add it to this step and save it using Painter’s tape (don’t forget to reduce the density of your sewing when using mylar!)
- You can customize the characters for your patches inside your hatch software using ESA fonts (or of course other embroidery software).
- Sew the rest of your design.
- Remove your hoop. Cut near the edge of your patch, dip your fingers in water and press the outside of your patch to melt the excess stabilizer. This will give you better results with cleaner products.
Prep Patch Film is my preferred method and it will give you the best professional-looking results possible. This is for patch-making purposes. It is heat resistant and is specially made for poly material, although you can use other materials with it.
When using prep patch film for your DIY patch, follow these steps.
- Wrap your prep patch film.
- One side is smooth, and the other side is messy. The smooth side should be tilted upwards, while the rough side should be downward.
- Run your placement stitch.
- Stick to your patch.
- If you have used no-show mesh feasible, spray 505 or KK to stick it.
- If you use hard screws, just peel off the paper to expose the adhesive side.
- Adjust your shape perfectly with the sewn outline.
- Put the hoop back on your machine, and it will sew a double run where it will go twice for strength, and then sew the zig-zag and remove the outer side.
- If you want to use mylar, add it to this step and save it using Painter’s tape (don’t forget to reduce the density of your sewing when using mylar!)
- You can customize the characters for your patches inside your hatch software using ESA fonts (or of course other embroidery software).
- Sew the rest of your design.
- Remove your hoop. Just pull the film away from the patch, and it will give you a better ready edge. Prep patch film is the safest of the three options.
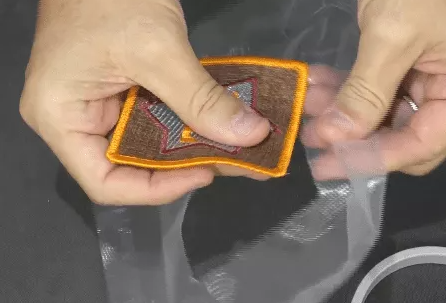
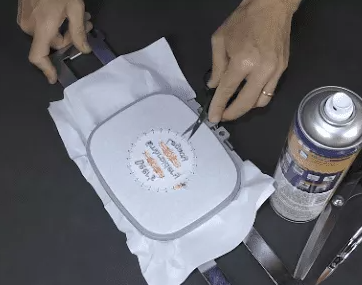
Step 5: Post Patch Sealing
You’re almost done! You may want to seal your patch using Post Patch Iron on Cell.
Post-patch iron-on cell is a two-way heat-activated seal that is applied to the back of your finished patch for a clean, shiny result. It will hide all your jumps and cuts and give your patch a professional feel and look at its incomplete aspect.

To use the post-patch iron on the cell, you just cut a piece of it to the size of your patch. Place the post-patch cell on top of your patch and sandwich it between two pieces of Teflon. Place it under your hot press or iron at 380 ° F for 15 seconds.

Take off your top piece of Teflon and let it cool down a bit. Be careful not to overheat it when you peel it, or you’ll leave residue on the bottom Teflon.
Once it cools down a bit, peel off the post-patch seal and tear off the outer exposed seal of the patch while it is still hot. Peel off the paper portion of the post-patch cell from the design (you may need to use tweezers for these small leftover pieces).
Once it cools down a bit, peel off the post-patch seal and tear off the outer exposed seal of the patch while it is still hot. Peel off the paper portion of the post-patch cell from the design (you may need to use tweezers for these small leftover pieces).
Now you have a professional-looking DIY patch with a clean backing.
Ready-Made Embroidery Patches

Simply insert your logo/characters into our “Perfect Placement” embroidery files, grab the patch (we’ll show you with the byte-sized video tutorials), and press the Start button.
Step 1: Hoop your stabilizer
Recommend using the Tear Away stabilizer when using our ready-made patches.
Step 2: Embroider your placement stitch

Run this sketch where you will insert your ready-made patch.
Step 3: Adhesive backing

Apply some adhesive spray to the back of your ready-made patch. Place it inside your placement seam and pull it back on your machine.
Step 4: Blanket stitch
The seam of a loose blanket will run over your finished patch to hold the patch in place with some stitches. Your patch is safe when you run the custom embroidery design from the inside.
Step 5: Remove blanket stitch from the back
Step 6: Post patch sealing

Conclusion
Patch designing has been the foundation of our business for decades, and we’ve produced millions of patches. Our extensive history and experience make us experts in patch-making, and we are proud to share our knowledge and new techniques with you.
To create the perfect professional custom embroidered patch, we recommend using one of two methods. To make things easier, our DIY embroidery patches include design files that you should load into your embroidery machine, which mimics a merrow border patch.
These were not created using automated software that can sometimes give bad results but were manually digitized each time for flawless results.


