Embroidery is a lovely and satisfying hobby, but sometimes, even the most skilled embroiderers make mistakes. The good news is that the majority of errors made in embroidery can be corrected with a little bit of patience and care.
In this article, we’ll go over the most typical errors that people make when embroidering and guide you how to correct them. Additionally, we will talk about some ideas and tricks that will assist you in staying away from mistakes.
How to Fix Embroidery Mistakes? Complete Guide
Tool Need To Fix Embroidery Mistakes
Let’s see what we need to fix embroidery mistakes:
Seam ripper
Small scissors
Permanent marker pen
Stain remover
Stitch eraser
Razor
Embroidery machine
Ways to Fix Embroidery Mistakes
Once you have the right tools for fixing mistakes during embroidery, it is time to move toward the ways:
Way # 1: Remove Stitching In Embroidery
You can rip out stitches in two ways:
1. Use a Seam Ripper
Use a Seam Ripper
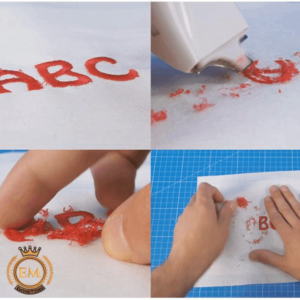
The fastest and cheapest way to get rid of embroidery is with a seam ripper. Simply turn your needlework project over to see the back of the fabric. To rip through the stitches, slide the seam ripper under them and lift it up at an angle. Be careful to only do this a few centimeters or inches at a time.
Start to remove satin stitches if you are working with an embroidery item that has multiple layers. Go back to the fabric’s front. Take the stitches from the front of the fabric and pull them out. Do this again and again until all of the embroidery is gone.
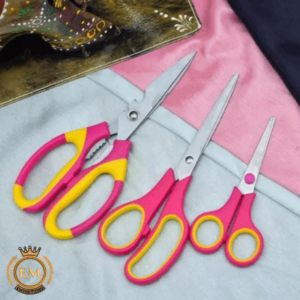
2. Use Small Scissors
Use Small Scissors
If the embroidery is too thick to remove using a seam ripper, you can cut the threads with little scissors. Don’t cut the fabric with your scissors.
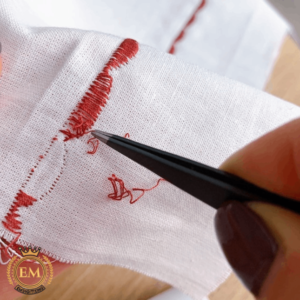
3. Use a Stitch Eraser
Use a Stitch Eraser
A stitch eraser is a specialized instrument used by professionals to safely and easily remove machine-embroidered stitches from fabric. It is a faster and more effective method of removing embroidery from fabric.
4. Use a Razor
Use a Razor
Removing embroidery stitching can be done using a razor. Flip the fabric inside out and trim the embroidery with the razor. Ensure you do not cut the fabric.
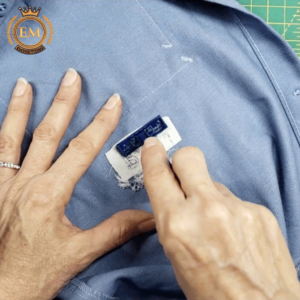
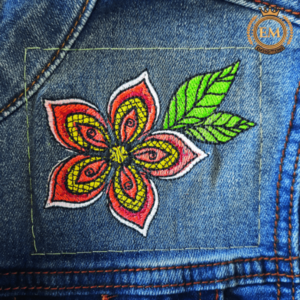
Way # 2: Cover The Mistake With A Patch
Cover The Mistake With A Patch
Using a patch is one way to fix a mistake in your embroidery project. The procedure is as follows:
Pick a patch that goes with the embroidery pattern and fabric.
Adjust the size and shape of the patch so it can hide the error.
Cover the mistake with the patch and secure it with a pin.
Attach the patch to the fabric by sewing it on by hand or with a sewing machine. Be sure to stitch around the patch’s edges to keep it in place.
Cut away any extra threads or fabric.
Remember that this strategy will only work in particular conditions. As a patch can be stiff, it wouldn’t look good on too thin fabrics. Furthermore, it would be tough to find a patch large enough to cover a mistake that is quite noticeable. If the error is too big or obvious, you might have to start over or try something else.
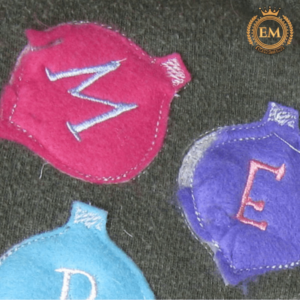
Way # 3: Add A New Design Element
Add A New Design Element
Another way to cover up embroidery mistakes is by adding a new design element. The steps are as follows:
Pick a new design feature that goes well with your embroidery design.
Use an embroidery machine to add a new design element to the fabric. Make sure it fits in with the embroidery design that is already there.
Once the design is finished, cut off any extra threads or fabric.
Remember that this method needs some imagination and skill. You need an excellent sense of design and the skill to incorporate the new feature into the old embroidered pattern.
Also, ensure the design element you chose fits well with the rest of the embroidery and doesn’t stand out too much. If you are unsure of your design abilities, hiring a professional embroidery designer is preferable.
You can hire EMdigitizing for your embroidery digitizing designs. Our digitizers provide a design that can blend into your old embroidery design to fix its mistakes. So click here to book your designs with fast turnover.
What To Do If You Can’t Fix Embroidery Mistake?
Sometimes you can’t be able to fix embroidery mistakes in the above-mentioned ways.
Do you get frustrated? Right?
We’ve other solutions for you, so keep on reading!
Use The Garment For Small Projects
Use The Garment For Small Projects
You tried everything: seam ripper, scissors, razor, etc, but can’t fix the mistakes during embroidery. You can use that fabric for smaller projects. For instance, you can make a small bag or pouch, make hair accessories like hair bands, and many other things.
It’s time to use your creativity and think outside the box when faced with the challenge of reusing fabric that has embroidery mistakes. Another thing you can do with the fabric scraps is make a patchwork pillow or turn them into new fabric.
Make A New Piece For The Garment And Redo The Embroidery
Make A New Piece For The Garment And Redo The Embroidery
If you are lucky and mess up on a part of the garment that can be easily removed, you can always start over. For instance, if the name is on a dress collar, you could take it off and put on a new collar instead.
This seems like a lot of work to me, but if the item is very important to you financially or emotionally, it might be the right thing to do.
Bonus Offer: If you use our digital embroidery designs, you can use them again and again without compromising quality. Your embroidery machine can read them easily and complete your project without any hassle. Contact us right now.
Tips For Stain Removal In Embroidery
Oil stain: This commonly happens. Absorbing the oil is the main objective here. Never rub! We recommended putting an absorbent material over the oil and letting it sit for 30 minutes. Suitable absorbent materials include baby powder, baking soda, talcum powder, chalk, cornflour, and waterless mechanic’s soap. Take a spoon and carefully scrape the oil and powder from the clothes.
Stabilizer stain: If it’s water-soluble, soak it in cold water. Please do not try to iron it any further if it is an iron stain. For easier removal, weaken the adhesive by ironing the fabric for a few seconds before peeling off the stabilizer. To get rid of the glue even more, put a damp piece of fabric over it, press it, and then remove it immediately. Do this again and again until it’s done.
How To Avoid Embroidery Problems?
Here are some tips to help you avoid embroidering mistakes:
Good quality embroidery designs: In our opinion, this is one of the best ways to guarantee success! Always buy designs from a reputable digitizer that has a solid reputation and sells error-free embroidery designs.
Bonus Tip: Want to get embroidery digitizing services at affordable rates without compromising quality? Then EM Digitizing is the best choice. We offer embroidery digitizing services with the promise that your embroidery machine will function flawlessly during the entire project.
Use a stabilizer: A stabilizer is used to keep the cloth from stretching and puckering.
Use the correct thread tension: If you need to know how to change the thread tension on your machine, look in the instruction manual that comes with your embroidery machine.
Hoop the fabric correctly: It’s important to keep the fabric as taut as possible in the hoop without tearing it.
Check your design placement before you start stitching: Check that the design is in the middle and lined up properly.
Take your time: Working with embroidery takes a lot of time and patience. Don’t be in such a hurry. Otherwise, you can end up making a silly mistake.
Final Words: Best Ways to Fix Embroidery Mistakes
Please don’t stress if you make a mistake!
With careful attention and time, most embroidery mistakes may be fixed. If you carefully follow the instructions in this article, you should be able to save your embroidery creation.
EM DIGITIZING: YOUR EMBROIDERY DIGITIZING PARTNER
EMDigitizing is an experienced and reputable company offering full digitizing and vector art services to clients all around the world for their embroidery design and printing needs.
If you need anything digitized quickly and with high quality, EMDigitizing is a fantastic option. We offer first-time customers a 50% discount on all of our services, plus a free quote that is generated in less than 5 minutes.
You can ask any question about this article in the comments, and don’t forget to share it with people you think might find it useful.

 Your cart is empty

