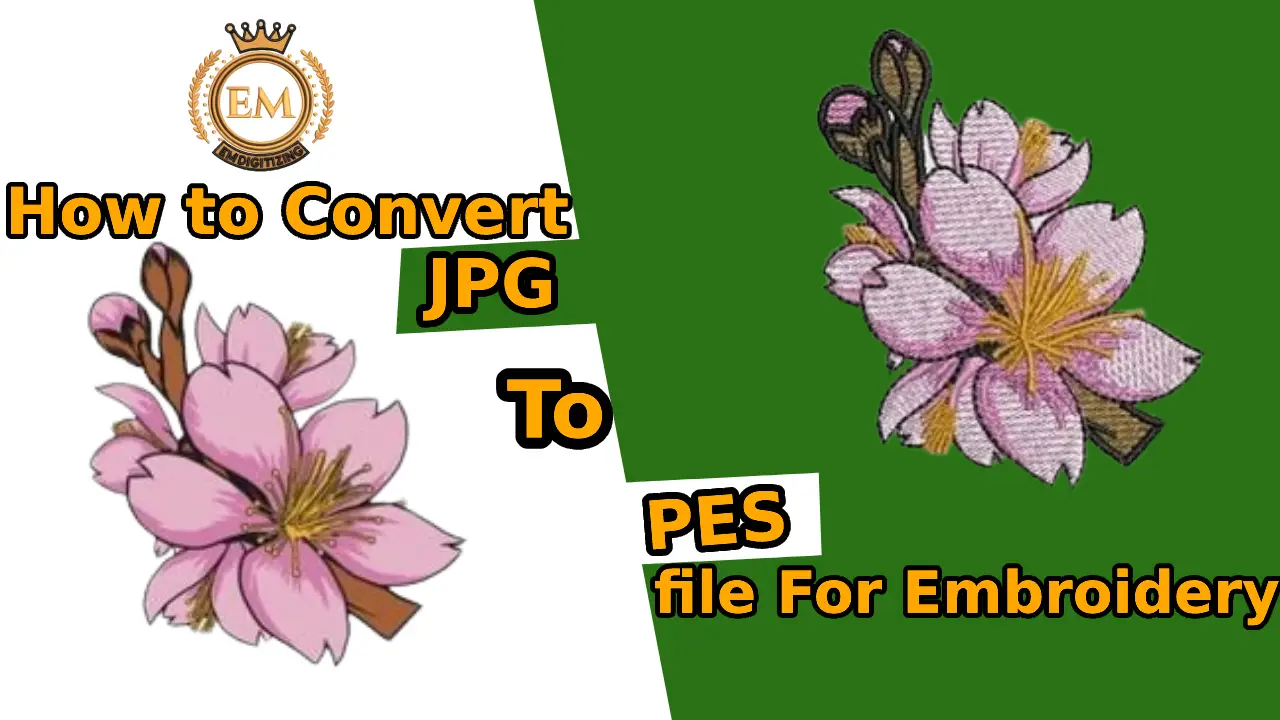
Whether you want to hone your digitizing skills, or are just interested in learning to sew, you will need to convert JPG to PES. Now, while some of you may be familiar with the basics of the embroidery digitizing process and the PES format, some are certainly unfamiliar with these terms. That’s why instead of starting directly with the process of converting JPG to PES, we will start with the basics of this process.
JPG or JPEG format is one of the most common formats for bitmap images. In fact, almost all of the images we see in your daily life are JPG or JPEG and I guess you should know how frustrating they can be with scalability issues. The PES format, on the other hand, may not be very popular with many people, especially if you are not very interested in digitizing.
Well, don’t worry because we’re here to tell you everything you need to know about PES format and how you can convert JPG to PES format.
So, let’s start our blog by looking at the details of the PES format and what it really is.
What Is PES File Format?
PES is the most popular and well-known digitizing design format for embroidery machines. PES is an embroidery digitizing format that belongs to Brother Embroidery machines and means that it is compatible with the basic machine for digitizing.
In other words, just for those who can’t understand the whole picture, the PES format is the “design file” used in our daily lives (like any other image format). The difference is that the PES file contains the correct digitization instructions that are used to sew the design.
Brother PE Machine is a parent embroidery machine of PES data files that can be used locally. It is the brother PE that manufactures embroidery machines to digitize domestic and semi-commercial digitization needs. But most of the time, these are home-based digitizers that come in PES format.
The most important thing to consider is this: The PES format is not generally used for trading settings or commercial use.
Embroidery Digitizing Services
Let’s clarify the situation. Although we have identified the PES file with the term “design file”, it is not technically one. A PES file is, in fact, a digital format (raster in a vector) created by design files (raster document).
In essence, the PES format is very different from the design file. The only reason to compare was to make it easier for you to understand the basics of the files. In fact, it is clear that the PES format is a vector format not built on the concept of pixels (which are the basic units of a raster file). Vector formats are built on mathematical equations and therefore have unlimited scalability options. PES files are primarily instructions for sewing through digitizing machines for embroidery designs on fabrics or other surfaces. Some of the parameters stored in the PES file are stitch density, underlay settings, stitch length, and others.
If you want to hone your digitizing skills, or just learn how to sew, you’ll need to convert JPG / PNG images to PES. Now, while some of you will probably know the basics of the embroidery digitizing process and PES format, there will certainly be people who are not very familiar with these words. So instead of rushing through the process of converting JPG to PES, we will start with the basics of the procedure.
Major PES File Issues And Their Solutions
The PES file type is associated with the manufacturing process that is supported by computer-aided software. Embroidery designs and images such as Brother, Baby Lock, or Bernina Home Embroidery formats are created with its help. These files can be easily created using embroidery digitizing software or any other similar software that is compatible with the file format.
Troubleshooting The Error
When you deal with clients or work on your personal project, you may come across various PES file issues. One of the most common problems users face is opening the PES file. There is an error in the file when you try to open it with the help of embroidery software. The format is also not readable through the embroidery file. Although, there is no need to worry about it. This is often done in embroidery digitizing.
This problem is not as easy to solve as ABC. All you need to do is open the local file. Use the same software on which the file was created to open the file. There are various methods to fix this problem. However, we will talk about some of the best and easiest ways to solve this problem.
Check The File Extension
See file extension. Yes, we often overlook the correct file extension format. The extension we use for PES files is ‘.pes.’ We, in a hurry, often forget to check the correct spelling. In many cases, we’ve seen users write ‘.pes’ instead of ‘.pes’. This can save you a lot of time if you make it a habit to check and write the correct PES file extension format. These small details don’t seem to matter, but as a normal user, you need to avoid such mistakes.
Check The Hoop Size
Hope size is another big issue when you deal with a PES file. It is important to keep the dimensions clear and concise. One small mistake can ruin your embroidery design. No matter how efficient your embroidery machine is, you need to give the machine the right details to get the best results.
Your machine’s hoop size must be larger than the file size. To show you how it works, if your embroidery machine is 4 x 4 inches in size, your design size should be 3.90 x 3.90 inches or less. If the size of the design is larger than the size of the embroidery machine, the machine will not be able to load the design. Plus, it won’t even open in the software. The problem is very common. If you are new to the digitizing industry, you probably have a lot of experience.
Consumers often make the mistake of giving the digitizing company a 4 x 4-inch design size. When digitizers have a given design size, it ends up in a mess. The moment they try to open the file in PES format, the size either expands or gets smaller. Thus, it is suggested to keep the machine larger than the design size to avoid problems.
Version Issues
Along with all the other major issues, machine versions can also be a hindrance and appear in front of you in the form of a hindrance. This problem is common in the process of digitizing embroidery. No need to worry about that.
If the version of the machine you are using for embroidery is outdated, it is important to inform the digitizing company. The digitizer will then use the older version of the software to create the PES file. Likely, if you have a new version of the embroidery machine, you need to tell the digitizing company about it.
This may seem like an unnecessary or minor issue, but it can be a problem for you. So, this is a great way to share every detail of your project with the digitizing company.
Thread Showing Issues
Another PES file issue you may have to deal with is the thread display issue. It often happens that the machine file you receive from the digitizing company shows thread problems. You will see threads in file format. Even if the digitizer keeps them off, there is still room for error. Don’t worry because fixing the problem is not a big deal. The only thing you may need to do is create a file in any new version of software such as Embroidery Studio E2. That way, you can easily solve the problem of showing the thread.
What do you need when converting JPG to PES?
When it comes to change, action is not what most people think. This is a more complex technique that often requires a professional to perform. The process of transformation is known as embroidery digitizing. However, don’t worry because today you will learn how to convert images to PES.
One thing you should consider before digitizing is to make sure you get proper permission to do so. Otherwise, you may have to spend a lot of money and it may take a long time to resolve the legal issues you are facing.
Return to our discussion! An embroidery digitizer performs the process of digitizing embroidery. It is basically a creation of a digitized format that embroidery machines can understand. This process requires software that acts as a digitizer.
But, it doesn’t happen automatically. To get the digital file manually you must work with software. Now you understand why you need a professional to work with.
Convert .JPG to PES Embroidery File
Step 1: Know about digitizing software you are using
Learning how to navigate the software that you will use to convert JPG to PES is an essential step. This is not an option, mainly when you are specializing in embroidery as a career.
This can be difficult to learn and can take a long time. One such software is Wellcome’s Embroidery Studio software.
Step 2: Import Jpg into the software
When your design is automatically digitized, it will automatically convert from graphics to stitches when you import it. The software will decide the type of seam to use, the bottom, the angle, and the other instructions that need to be changed.
Step 3: Arrange the colors
Well, in some cases, you may find some colors that you did not imagine in your design. So, choose from the result what you want to sew.
Step 4: Import the image into a new file
Once your configuration is complete, import the image into a new file in the software. You can follow the graphic design to taste your sewing design and then sew it.
Step 5: Stitch
Once you have the sewing design you want, you can apply your sewing settings. Set the direction, start, stop, and any other directions you need for your design. Then start sewing. Finally, save your photo.
Convert an image to an embroidery file
Almost every embroidery digitizing software has some capability to convert an image into an embroidery design, but SewArt and Inkstitch are the least expensive and free options.
Method 1: Convert JPG to PES using SewArt
SewArt is a low price program that allows you to create embroidery designs from both pixel-based and vector-based graphics.
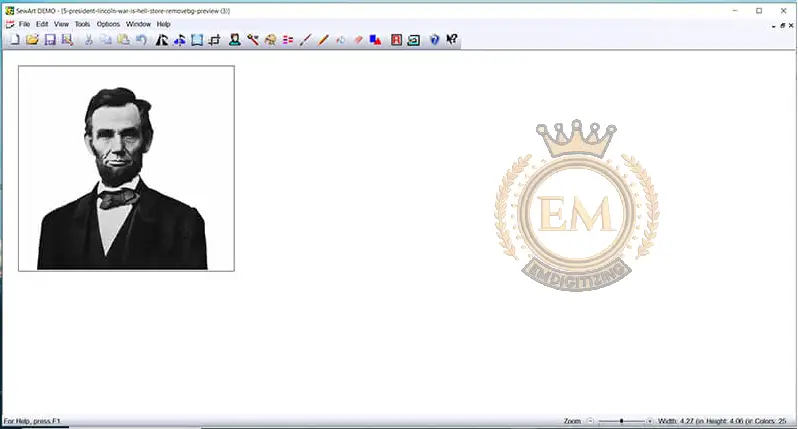
- Open image:
Before you get too far from the process, you may want to copy the image you intend to work with. This is because SewArt saves the image as well as the embroidery design. Therefore, any changes you make to reduce the number of colors in the image can be written to the original image. It’s always a good idea to make a copy before you start.
- Sort Out the Colors:
Sewart provides a number of tools that allow you to reduce the number of colors in your image. I would suggest starting with the posters so that the spots can really be removed and your image can be made up of flat parts of color.
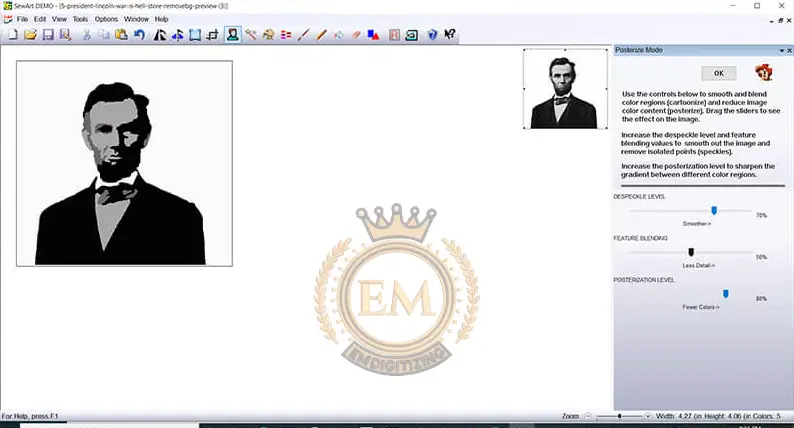
After reducing the number of colors in your image, you may need to further reduce the number of colors. Use the merge color feature to combine color areas.
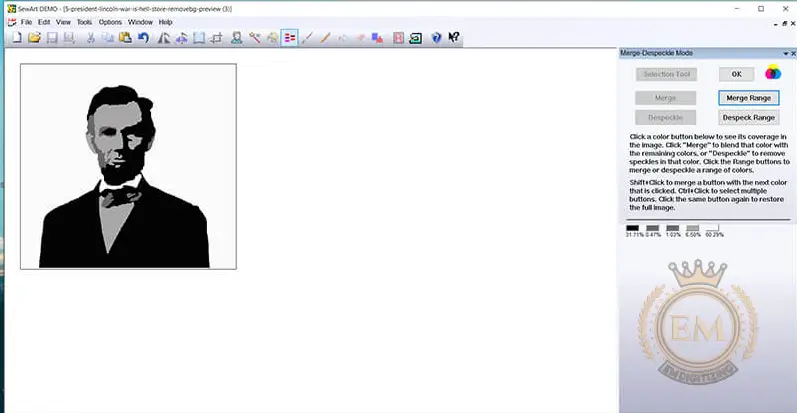
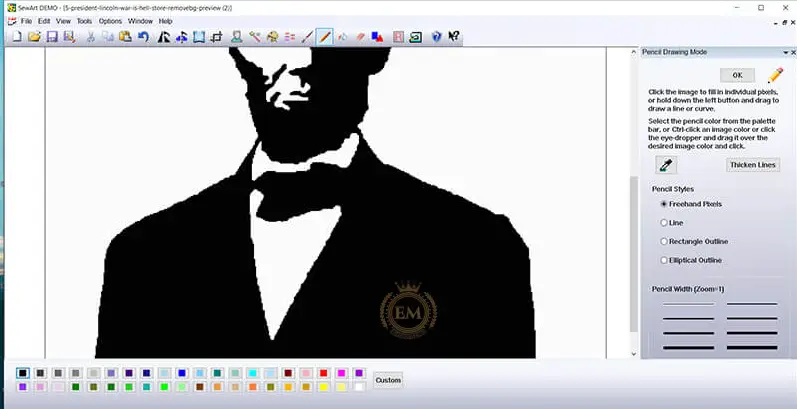
Connect your shapes using the pencil tool. In my photo, the color was attached to the white background so I dyed the jacket a little too much in black up to the beard.
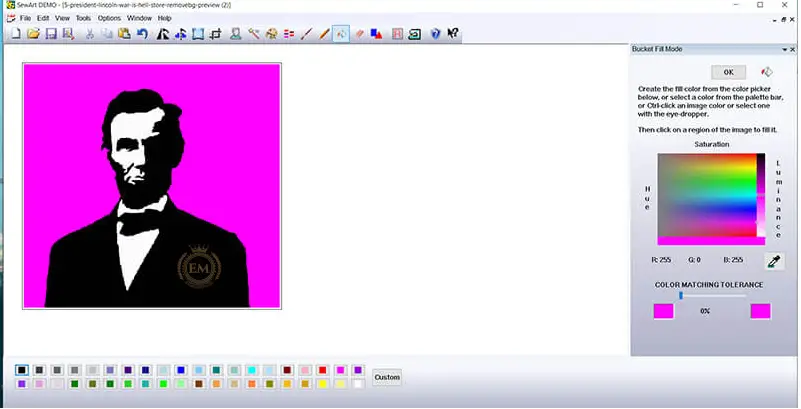
I then used the paint bucket tool to paint the background in contrasting solid colors. Making the background bright pink allowed me to clearly distinguish the background from the rest of the image.
I went into sewing mode and started defining different sewing areas based on the colors I described.
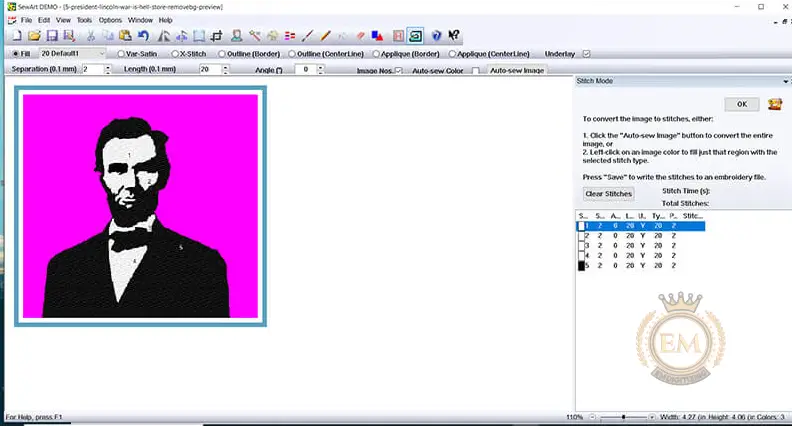
Finally, I saved my project as an embroidery file(PES).
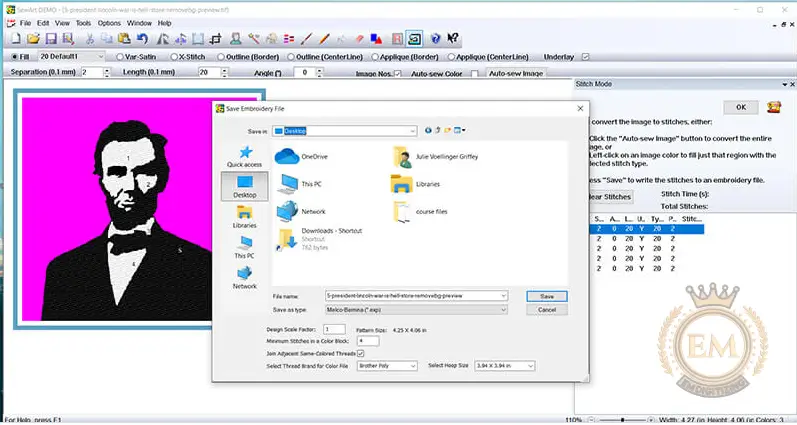
Method 2: Use Inkstitch to convert JPG to PES
Inkstitch is a plugin for a free vector-based drawing program called Inkscape that converts vector-based files into embroidery designs. I’ve played with Inkstitch for a long time and I find it a bit difficult. But, after a little trial and error, I was able to successfully transform my image into an embroidery design. I didn’t have almost the control I had in Sewart, but I managed to convert my image into an embroidery file with the help of some other free resources online using this software.
- Step 1 – Convert JPG to PNG:
Use remove.bg to remove the JPG background and save it as a PNG file.
- Step 2 – Convert PNG to SVG:
Since Inkstitch is a vector-based program, the first step you need to take is to convert a pixel-based image into a vector-based image. I did this by importing my PNG file (with background removed) into a free web-based utility in Vectorizer.
By selecting the “Drawing” layout on the original image, I was able to reduce the number of colors to two. Then I selected “Single” below the loaded layers. And finally, I downloaded the modified SVG file.
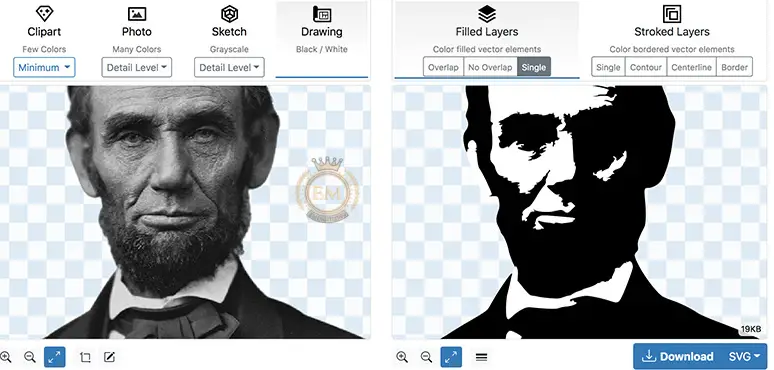
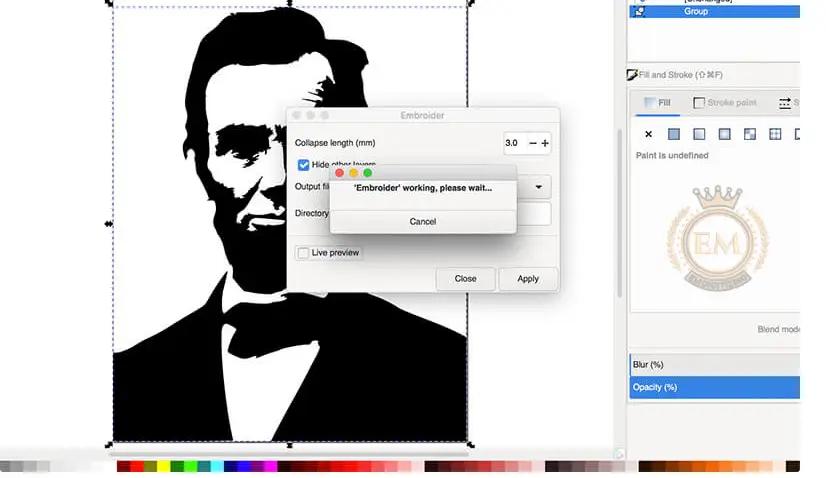
- Step 3 – Import SVG into Inkscape, preview and save it as an embroidery file.
After converting the file into an SVG file opened in Inkscape.
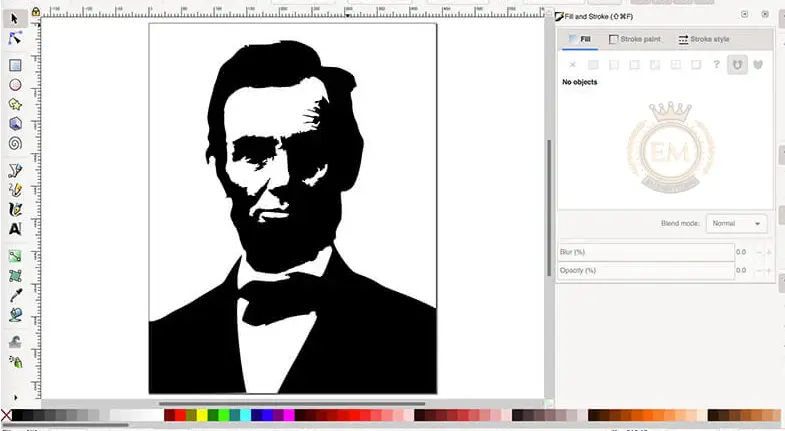
If you want to see how Inkstitch will convert your image into an embroidery file, go to Extensions -> Inkstitch -> Simulate.
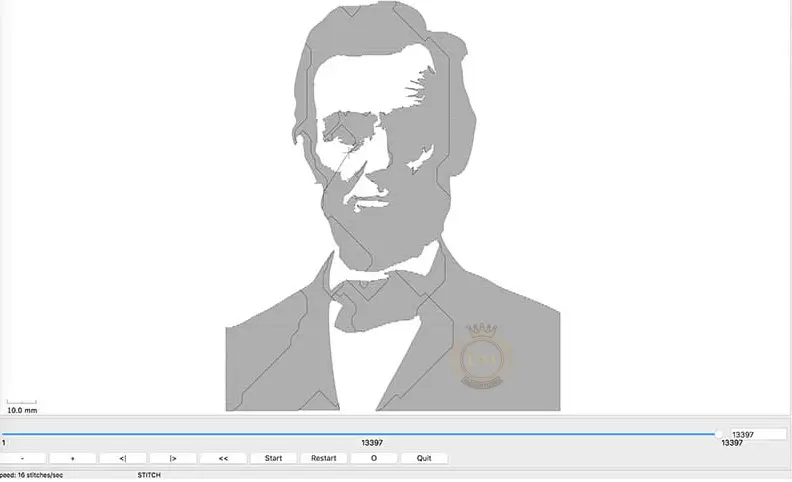
To save the embroidery file, go to Extensions -> Inkstatch -> Embroider. Then just choose the embroidery file format you want. I was able to create a PES file so I could sew my result design on my brother’s embroidery machine.
The PES format is a hybrid embroidery design and embroidery command file format for the embroidery machines of Brother Industries and Bernina International Series, among others. PES files have two main components for two completely different purposes.
Just save your Illustrator file. Open your illustrator file in the converter program, select the PES format and click Convert. This will create a new file that is ready for embroidery. Save this file and test it by opening the file in your brother’s software program.
Yes. SVG is a common graphic file format, while PES is a widely used embroidery digitizing file format. The two formats are interchangeable and are commonly used in the embroidery industry.
PES files are specialist files that contain instructions for embroidery machines. They are not directly supported in Photoshop.
PES – A sewing-based file format used by Brother and BabyLock embroidery home sewing machines.
