
Comment repasser vos patchs de broderie personnalisés
Dans cet article, nous discuterons du processus de repassage de vos patchs de broderie personnalisés. Les patchs de broderie sont un moyen populaire d'ajouter de la personnalité et du style aux vêtements., Sacs, Chapeaux, et plus. En suivant les étapes simples décrites ci-dessous, vous pouvez facilement appliquer vos patchs personnalisés sur n'importe quelle surface de tissu en utilisant simplement un fer à repasser. Ce guide vous aidera à obtenir un résultat professionnel et durable, garantissant que votre fer à broder personnalisé sur les patchs reste en place et reste superbe pour les années à venir.
Comment repasser vos patchs de broderie personnalisés
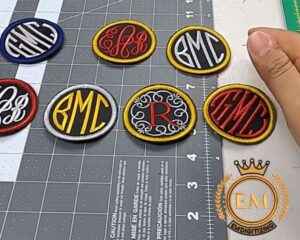
Patchs de broderie personnalisés

Les patchs de broderie existent depuis de nombreuses années, et ils continuent d'être un moyen populaire de personnaliser les vêtements, Sacs, Chapeaux, et autres articles en tissu. Si vous avez récemment acquis des patchs brodés thermocollants personnalisés et que vous souhaitez les attacher à votre article préféré, tu te demandes peut-être comment faire.
Heureusement, repasser un patch est un processus simple que vous pouvez effectuer à la maison en utilisant seulement quelques outils simples.. Jetons un coup d'œil à certaines des étapes nécessaires pour repasser votre personnalisation patchs de broderie, pour que vous puissiez porter votre nouvel accessoire avec fierté!
Ce dont vous aurez besoin pour personnaliser les patchs de logo:
- Un article en tissu sur lequel vous souhaitez fixer le patch
- Patchs de broderie personnalisés
- Un fer à repasser
- Une planche à repasser
- Une serviette ou un chiffon fin
- Une surface dure
Marcher 1: Préparation de votre article en tissu et de votre patch
Avant de commencer, it’;Il est important de s'assurer que l'article en tissu sur lequel vous souhaitez fixer le patch est propre et sec.. Si ce n'est pas le cas, lavez-le et séchez-le avant de continuer. Cela garantira que le patch adhère correctement au tissu et reste en place pendant longtemps..
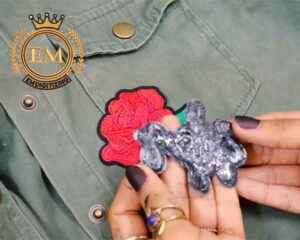
Une fois votre article en tissu propre et sec, placez le patch de broderie personnalisé sur la zone où vous souhaitez qu'il soit attaché. Vous pouvez utiliser une épingle pour le fixer temporairement, en s'assurant qu'il est centré et droit.
Marcher 2: Chauffer le fer
Now it’;il est temps de chauffer le fer. Branchez-le et réglez-le à la température requise pour l'article en tissu sur lequel vous attachez le patch. Si vous n'êtes pas sûr, consult the fabric’;étiquette d'entretien. Attendez que le fer chauffe avant de continuer.
Marcher 3: Préparation de la serviette
Placez une fine serviette ou un chiffon sur le patch. Cela protégera l'écusson de la chaleur du fer et évitera tout dommage au tissu.. It’;Il est important de choisir une serviette ou un chiffon fin afin que la chaleur puisse toujours pénétrer jusqu'au patch..
Marcher 4: Repassage du patch
Placez le fer à repasser sur la serviette et appuyez fermement pendant environ 15 secondes. Assurez-vous d'appliquer une pression uniforme sur l'ensemble du patch, y compris les bords. The amount of time required to iron on the patch may vary depending on the manufacturer’;les instructions, alors assurez-vous de vérifier avant de commencer.
Once you’;J'ai repassé le patch pendant le temps requis, soulevez délicatement le fer et la serviette pour vérifier que le patch a bien adhéré. If it hasn’;t, vous pouvez répéter le processus, en veillant à appliquer plus de pression ou de chaleur si nécessaire.
Marcher 5: Repassage du dos de l'article en tissu
Une fois l'écusson fixé sur le devant de l'article en tissu, it’;Il est temps de repasser le dos pour assurer un lien solide. Retournez l'article en tissu et placez à nouveau la serviette sur le patch.. Appuyez fermement avec le fer pour un 15 secondes.
Marcher 6: Vérification du correctif
Après avoir repassé le patch, retirez la serviette et vérifiez si le patch est fermement attaché.. Si ce n'est pas le cas, répéter le processus, en veillant à appliquer plus de pression ou de chaleur si nécessaire. Si le patch semble bon, laissez-le refroidir quelques minutes avant de porter ou de laver l'article en tissu.
Marcher 7: Touches finales
Toutes nos félicitations, vous avez repassé avec succès votre personnalisé pièce de broderie! Selon votre préférence, vous pouvez choisir d'ajouter des points supplémentaires sur les bords du patch pour le sécuriser davantage. Alternativement, vous voudrez peut-être le laisser tel quel pour un look plus décontracté.
Comment nettoyer les patchs brodés?
Les patchs brodés peuvent ajouter beaucoup de personnalité et de style à vos vêtements ou accessoires, mais ils peuvent aussi se salir ou se tacher avec le temps. Voici comment nettoyer les patchs brodés:
Nettoyage des taches:
Si votre patch présente une petite tache ou marque, vous pouvez essayer de le nettoyer avec un chiffon ou une éponge humide. Utilisez un savon ou un détergent doux et évitez de frotter trop fort sur le patch, car cela pourrait endommager la broderie.
Lavage des mains:
Pour les zones plus grandes ou plus délicates, se laver les mains est souvent la meilleure option. Remplissez un évier/bassin avec de l'eau légèrement chaude et ajoutez un détergent. Agiter doucement l'eau pour créer de la mousse, puis ajoutez le patch et faites-le tourner dans l'eau. Rincez soigneusement le patch à l'eau froide et essorez doucement tout excès d'eau..
Lavage en machine:
Certains patchs de broderie personnalisés peuvent être lavés en machine, but it’;Il est important de vérifier l'étiquette d'entretien et les instructions avant d'essayer cela.. Utilisez un cycle délicat et un détergent doux, et assurez-vous de placer le patch dans un sac à linge en filet pour le protéger des frottements contre d'autres vêtements ou accessoires..
Séchage à l'air:
Après avoir lavé votre patch, évitez d'utiliser un sèche-linge ou un fer à repasser pour le sécher. Plutôt, posez-le à plat sur une serviette ou un séchoir et laissez-le sécher complètement à l'air libre.. Évitez d'accrocher le patch, car cela pourrait l'étirer ou le déformer.
Nettoyage professionnel:
Pour les patchs brodés très délicats ou précieux, it’;il est souvent préférable de les faire nettoyer par un professionnel. Recherchez un nettoyeur à sec ou un service de blanchisserie expérimenté dans le domaine de la broderie et assurez-vous de leur faire part de toute instruction ou préoccupation particulière en matière d'entretien..
Conseils pour repasser vos patchs de broderie personnalisés:

Jetons un coup d'œil à quelques conseils sur vos patchs thermocollants personnalisés.:
Testez la chaleur:
Avant de repasser le patch, testez la chaleur de votre fer sur un petit, zone peu visible de l'article en tissu. Cela vous aidera à éviter d'endommager accidentellement le tissu avec trop de chaleur..
Utilisez une surface plane:
Assurez-vous de repasser à plat, surface stable. Cela vous aidera à appliquer une pression uniforme sur le patch et à garantir qu'il adhère correctement au tissu..
Évitez la vapeur:
Lors du repassage sur l'écusson, assurez-vous d'éteindre la fonction vapeur de votre fer. Steam peut provoquer le déplacement ou le déplacement du patch, ce qui rend difficile sa fixation correcte au tissu.
Couper les fils lâches:
Avant de repasser le patch, assurez-vous de couper tous les fils lâches sur les bords du patch. Cela aidera à éviter que les fils ne se coincent sous le patch et ne le fassent se soulever avec le temps..
Évitez de tirer sur le tissu:
Lors de la fixation du patch sur le tissu, évitez de trop tirer sur le tissu. Cela pourrait étirer ou déformer le tissu., ce qui peut affecter l’apparence du patch.
Pensez à coudre le patch:
Si vous voulez vous assurer que vos patchs de broderie personnalisés restent en place pendant longtemps, vous voudrez peut-être envisager de le coudre sur l'article en tissu en plus de le repasser. Cela peut aider à fournir un soutien supplémentaire et à empêcher le patch de se détacher..
Liquidation:
Ceci était un guide simple sur la façon de repasser vos patchs de broderie personnalisés.. N'oubliez pas de suivre attentivement les étapes et de prendre note des conseils pour garantir une candidature réussie!
If you’;je recherche une broderie professionnelle services de numérisation de logos, NUMÉRISATION EM est une excellente option à considérer. Nous offrons des services de haute qualité et offrons même une réduction aux nouveaux clients.. N'hésitez pas à nous contacter pour un devis gratuit.
Nous espérons que vous avez trouvé cet article informatif et utile.
Oui, les patchs sont moins chers que la broderie car ils sont fabriqués selon un processus différent et peuvent être produits en plus grande quantité à moindre coût. Cependant, cela dépend en fin de compte du spécifique conception de broderie et procédé de fabrication utilisé.
Le coût des correctifs personnalisés dépendra de divers facteurs, comme la taille, motif, quantité, et matériaux utilisés. Généralement, plus la conception est complexe et plus la quantité est petite, plus le coût est élevé. Les prix peuvent varier de quelques dollars par patch pour des conceptions simples et de grandes quantités, à plusieurs dollars par patch pour des designs plus complexes et de plus petites quantités.
Oui, vous pouvez coller des patchs brodés sur le tissu à l'aide de colle à tissu ou d'adhésif.
Le meilleur point pour les patchs de broderie dépend du motif et de l'effet souhaité. Certains points populaires pour les patchs incluent le point satin, ce qui crée un remplissage lisse et solide, et point de contour, qui souligne le design et crée un effet de relief. Autres points tels que le point de chaînette, point courant, et les nœuds français peuvent être utilisés pour ajouter de la texture et des détails..
Les patchs brodés peuvent rester longtemps s'ils sont correctement fixés au tissu par couture ou repassage.. La couture est la méthode la plus sûre, mais le repassage peut aussi bien fonctionner pour de nombreux patchs.


