Headwear embroidery allows you to showcase your individuality and make a statement. It’;s like wearing a piece of art on your head, and who doesn’;t want to be a walking masterpiece?
But before you can create stunning embroidered headwear, it’;s important to master the basics and understand the Embroidery Techniques For Headwear involved.
Embroidery is not just for grandma’;s tea towels anymore. It has evolved into a trendy and creative way to add personality to clothing and accessories.
One area where embroidery truly shines is in headwear. Whether it’;Es ist eine Baseballkappe, Mütze, or bucket hat, adding embroidered designs can take your headwear game to a whole new level.
Sticktechniken für Kopfbedeckungen: Beherrschen Sie die Grundlagen, um Ihre Fähigkeiten zu verbessern
Basic Machine Embroidery Techniques for Headwear:
Embroidery on headwear can seem intimidating at first, aber keine Angst!
Once you understand basic techniques, you’;ll be well on your way to creating beautiful headwear designs.
Preparing the Headwear for Embroidery:
Bevor Sie mit dem Sticken beginnen, make sure your headwear is clean and free from any wrinkles or creases. It’;s best to press it beforehand to ensure a smooth surface.
If the hat has seams or any embellishments, take them into consideration when positioning your design.
Hooping Techniques for Headwear:
Proper hooping is essential to achieve accurate and well-aligned embroidery. Use the appropriate hoop Größe or cap frame that matches the size of your headwear.
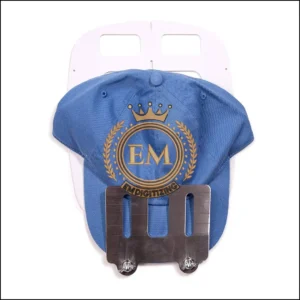
Hoop the stabilizer and backing together, making sure they are taut but not overly tightened. This ensures stability and prevents shifting during the embroidery process.
Design Placement and Alignment:
Consider the size and shape of your headwear when positioning your design. You can use a temporary marking tool or templates to help with alignment.
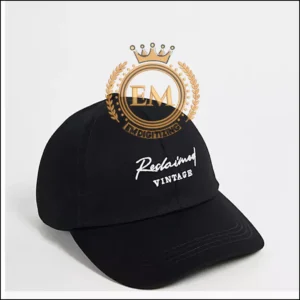
Take into account the front, sides, or back of the hat depending on your desired placement. Double-check the positioning before stitching to avoid any mishaps.
Stitching Basic Embroidery Designs on Headwear:
When it’;s time to stitch, start with a test run on a scrap piece of fabric to ensure the design looks and fits well on your headwear.
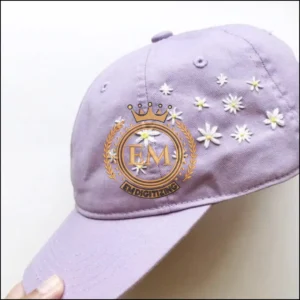
Once you’;re satisfied, begin embroidering your design, following the instructions of your machine and design software. Take your time and enjoy the process as your design comes to life on the headwear.
Advanced Embroidery Techniques for Headwear:
Embroidery is not just about simple stitches and basic designs. Once you’;Ich habe die Grundlagen gemeistert, it’;s time to dive into the world of advanced headwear embroidery techniques.
Mit diesen Techniken, you can take your hat embroidery to a whole new level.
Creating Intricate Designs and Patterns:
Create more complex designs and patterns. Experiment with different stitch types, Garnfarben, and layering techniques to add depth and texture to your headwear embroidery.
Let your creativity run wild and push the boundaries of what you can achieve with Maschinenstickerei.
Using Applique and Embossing Techniques on Headwear:
Appliqué is a technique where fabric pieces are layered and stitched onto the headwear, creating a dimensional effect. This technique allows you to incorporate different textures and materials into your designs.
Embossing, auf der anderen Seite, involves raising parts of the embroidery, giving it a raised and tactile appearance.
Layering and Dimensional Embroidery on Headwear:
Layering and dimensional embroidery can take your headwear Stickmotive zum nächsten Level. By adding elements like foam or specialized materials, you can create raised and 3D effects.
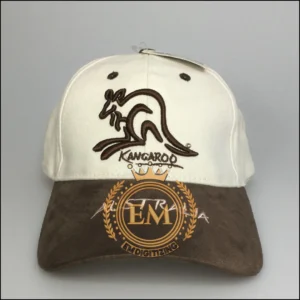
This technique adds depth and visual interest to your embroidery, making your headwear truly stand out.
Troubleshooting Common Challenges in Headwear Embroidery:
Embroidery may be a fun and rewarding hobby, but it’;s not without its challenges. Don’;t let these hurdles discourage you.
Stattdessen, equip yourself with the knowledge to troubleshoot common issues that may arise during headwear embroidery.
Thread Breaks and Tension Problems:
Embroidering on headwear can sometimes be a tricky task, and one common issue you may encounter is Faden reißt and tension problems.
Nothing is more frustrating than having your machine stop mid-stitch due to a thread break. Um es zu umgehen, make sure you’;wieder verwenden hochwertiges Stickgarn suitable for hats and adjust the tension according to your machine’;s-Spezifikationen.
If you’;re still experiencing thread breaks, try rethreading the machine and checking for any obstructions or snags.
Misalignment and Design Distortion:
Another issue you might face is misalignment and design distortion.
When embroidering on curved surfaces like hats, it’;s essential to hoop them correctly. Improper hooping can lead to the design shifting or distorting during the stitching process.
Ensure that the hat is securely hooped and that the design is centered and aligned correctly before starting the embroidery.
Faulty Hooping and Stabilizer Issues
Faulty hooping and stabilizer problems can also plague your embroidered headwear. If the hat is not properly hooped, the fabric may pull or pucker during stitching, resulting in an unsightly finished product.
Zusätzlich, using the wrong stabilizer or not using enough can cause similar issues. Experiment with different hooping techniques and stabilizer types to find the best combination for your headwear embroidery projects.
Fazit:
Embroidered headwear is not only functional but also a fashion statement. Stay up-to-date with the latest fashion and style trends in the world of embroidered headwear.
Whether it’;s intricate floral designs, bold geometric patterns, or minimalist logos, draw inspiration from current trends and incorporate them into your own embroidery projects.
With the right combination of style and skill, you’;ll be able to showcase your machine embroidery skills through fashionable headwear creations.
EMdigitalisieren: Experte für die Digitalisierung von Stickereien zu Ihren Diensten:
Suchen Sie Hilfe bei der Umsetzung Ihrer Designs in Stickereien??
Schauen Sie sich EMdigitizing an! Wir sind spezialisiert auf Stickerei digitalisieren und habe ein tolles Angebot für Sie. If you’;Ich bin Erstkunde, Du bekommst ein riesiges 50% Rabatt auf alle unsere Dienstleistungen.
Unser Team ist Experte für Digitalisierung, Sie nehmen Ihren Entwurf und digitalisieren ihn sorgfältig, making sure it’;Es ist schnell und ohne große Kosten fertig.
Habe Fragen? Kontaktieren Sie uns einfach.
Unser Team ist immer für Sie da und wird sich schnell bei Ihnen melden. Und wenn Sie denken, dass diese Informationen hilfreich sind, Teilen Sie es gerne mit Ihren Freunden.
Danke fürs Lesen, und viel Spaß beim Nähen!
Häufig gestellte Fragen:
Headwear serves various functions, including protection from the elements, fashion statement, and cultural or religious significance.
Ja, a hat is a type of headwear, designed to cover the head for various purposes like warmth, Stil, or protection.
Ja, headwear is considered a garment as it is an item of clothing worn on the head.
Avoiding improper hooping, wrong thread tension, incorrect needle choice, unsuitable design size, neglecting fabric type, overlooking stabilizer use, and ignoring machine maintenance is crucial.
Zur Verbesserung der Stickqualität, use appropriate stabilizers, select the right needle and thread, ensure proper hooping and tension, and regularly maintain your embroidery machine.
Always start with a well-planned design and suitable materials, and practice consistent stitching for a neat and professional finish.
