
Cricut Screen Print: How to Screen Print with Vinyl
Introduction:
Screen printing is a popular technique used to transfer designs onto various surfaces. Traditionally, screen printing requires complex setups involving stencils, screens, and inks.
However, with the advent of modern technology, the Cricut cutting machine has made screen printing more accessible and convenient than ever before. In this article,
Cricut Screen Print: How to Screen Print with Vinyl
What Is a Screenprint?
Screen printing, also known as silk screens for printing or serigraphy, is a printing technique that involves transferring ink through a fine mesh screen onto a surface to create a embroidery design or image. It is a versatile and widely used method for reproducing artwork, graphics, and designs on various materials, including fabric, paper, plastics, metals, and more.
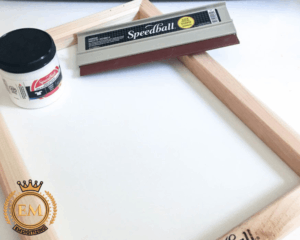
Things you will need for making cricut screen print with vinyl:
Cricut cutting machine (such as Cricut Explore or Cricut Maker)
Computer with design software (Cricut Design Space)
Heat transfer vinyl (HTV)
Weeding tools (such as a weeding hook or tweezers)
Heat press or iron
T-shirt or fabric to print on t-shirt screen print machine
Protective covering (such as a Teflon sheet or parchment paper)
Step-by-Step Guide on How to Do Screen Printing with Vinyl
Let’s have a detailed discussion of how can you screen print with vinyl:
Designing Your Print
Start by creating or selecting a design you want to screen print onto your fabric.
Open Cricut Design Space on your computer and create a new project. You can choose from the preloaded designs or upload your own custom design.Ensure that your design is suitable for cutting with vinyl printmaking and has clean, distinct lines.
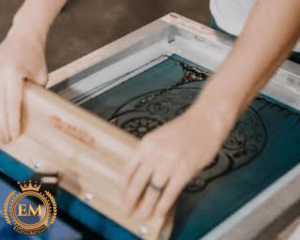
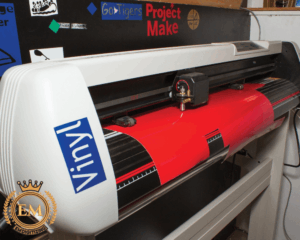
Cutting the Vinyl
Once you have your design ready, it’s time to cut the vinyl using your Cricut cutting machine.
Place the heat transfer vinyl (HTV) onto a cutting mat with the shiny side facing down. Load the mat into the machine and follow the on-screen instructions in Cricut Design Space to cut your design accurately.
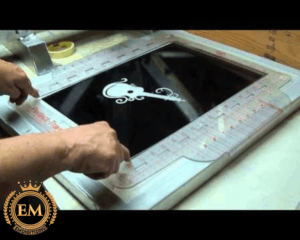
Weeding the Vinyl
Screen printing, also known as silk screens for printing or serigraphy, is a printing technique that involves transferring ink through a fine mesh screen onto a surface to create a design or image.
It is a versatile and widely used method for reproducing artwork, graphics, and designs on various materials, including fabric, paper, plastics, metals, and more.
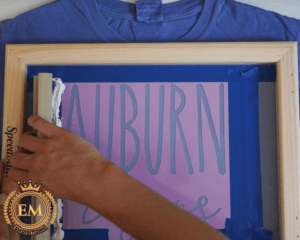
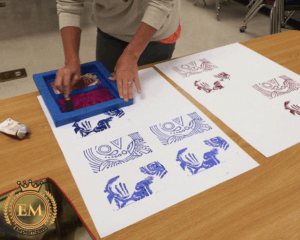
Applying the Vinyl
Carefully position the weeded vinyl design onto the fabric, ensuring it is centered and aligned correctly. You may use transfer tape or directly place the vinyl onto the fabric, depending on your preference and the complexity of the design.
Use a heat press or iron set to the appropriate temperature and apply firm pressure for the recommended duration, as per the instructions provided with your HTV. Ensure that you apply heat evenly across the entire design.
Peeling and Finishing
Once the heat transfer process is complete, allow the vinyl to cool down before removing the backing sheet.
Start peeling the backing sheet away from the fabric at a 45-degree angle, ensuring that the vinyl adheres firmly to the fabric. If any part of the design lifts with the backing sheet, place it back down and reapply heat using the press or iron.

Post-Application Care
After successfully transferring the vinyl design onto the fabric, it is essential to care for the printed garment properly. Turn the fabric inside out before washing to protect the vinyl from excessive rubbing and potential damage.
Follow the manufacturer’s instructions for washing and drying, as different types of vinyl may have specific care requirements.
These were the simple steps for how to screen print with vinyl. Using Cricut prints machine, screen printing at home with screen printer at home is now easy. Let’s shed some light on tips and trick to consider while screen printing with Cricut.
Tips To Enhance Your Screen Printing Experience With Vinyl Using A Cricut Machine:
Here are a few tips and tricks to enhance your screen printing experience with vinyl using a Cricut machine:
- Before cutting your design on the actual screen print transfers printer vinyl, perform a test cut on a small piece of vinyl. This helps ensure that the machine settings are accurate, preventing wasted material and potential errors in the final print.
- When designing your print in Cricut Design Space, remember to mirror the image horizontally before cutting. Since you’ll be transferring the design onto the fabric, mirroring it ensures that the final print appears correctly when viewed from the front.
- If your design involves multiple colors or intricate details, you can create layered effects with vinyl. Cut each layer separately, align them accurately, and press them onto the fabric one layer at a time. Be sure to follow the recommended pressing order provided by the vinyl manufacturer.
- Pay attention to the recommended heat press temperature and pressure settings specific to the type of heat transfer vinyl you’re using. These settings may vary depending on the brand and material composition. Adjusting the temperature and pressure can greatly impact the adhesion and durability of your print.
- When peeling the backing sheet off the vinyl after heat pressing, you have two options: hot peel or cold peel. Hot peel involves removing the backing sheet while the vinyl is still warm, whereas cold peel requires allowing the vinyl to cool completely before peeling. Refer to the vinyl manufacturer’s instructions to determine which peeling technique is recommended for the specific type of vinyl you’re using.
- To protect both the vinyl and your heat press or iron, place a Teflon sheet or parchment paper on top of the design before applying heat. This prevents direct contact between the vinyl and the heating element, ensuring a smooth and even application.
- Weeding intricate designs can be challenging, so make sure you work in a well-lit area. Good lighting helps you see the fine details of the design and ensures that you weed accurately without accidentally removing parts of the vinyl you want to keep.
- For intricate or delicate designs, consider using transfer tape to transfer the vinyl onto the fabric. Transfer tape acts as a carrier sheet, allowing you to easily position and apply the design onto the fabric without risking misalignment or stretching.
- Before applying the vinyl, it’s beneficial to pre-press the fabric for a few seconds to remove any moisture, wrinkles, or residual sizing. This step ensures a smooth surface and better adhesion for the vinyl.
- Different heat transfer vinyl brands and materials may require slight variations in pressing time and pressure. If you find that your vinyl isn’t adhering well or is peeling off after washing, adjust the pressing time and pressure accordingly. Test small pieces first to find the optimal settings for your specific vinyl.
- If you frequently work on garments with seams, zippers, or buttons, using a heat press pillow can help create an even surface for pressing. The pillow elevates the area around the seams, allowing for better heat transfer and preventing uneven pressure that can distort the design.
- Vinyl can sometimes stick to your work surface or transfer onto other objects accidentally. To prevent this, place a protective covering such as a Teflon sheet or parchment paper under the fabric you’re working on. This also helps protect your work surface from excess heat or vinyl residue.
- If your design involves multiple layers of vinyl, practicing the alignment beforehand can save you time and frustration. Use registration marks or reference points on the fabric and the vinyl layers to ensure accurate placement and alignment during the pressing process.
- Screen printing with vinyl may require a bit of practice to perfect your technique. Experiment with different settings, materials, and designs to achieve the desired results. Be patient and take your time during each step, from cutting and weeding to applying and peeling the vinyl.
Remember, practice makes perfect, so don’t be discouraged if your initial attempts don’t turn out exactly as expected. With persistence and experimentation, you’ll become more proficient in creating stunning screen prints with vinyl using your Cricut machine. Enjoy the creative process and have fun exploring the endless possibilities of this versatile technique!
Conclusion:
Screen print on shirt near me with vinyl using a Cricut cutting machine opens up a world of creative possibilities. By following these step-by-step instructions, you can achieve professional-looking print screens on various fabric items. Experiment with different designs, colors, and fabrics to personalize t-shirts, bags, home decor, and more. Enjoy the satisfaction of creating custom, eye-catching printing screens for t-shirts with ease, all from the comfort of your own home.
If you want to customize embroidery logo digitizing, EM DIGITIZING will be your best choice. At EM DIGITIZING, we deliver the best embroidery logo digitizing services with the best quality. We offer 50% off on all our services to our potential customers on their first order. So, get a free quote now and we will get in touch with you.
Hope this article will be helpful for you guys!
If there’s any question related to this article feel free to comment to us. And, thanks for reading!
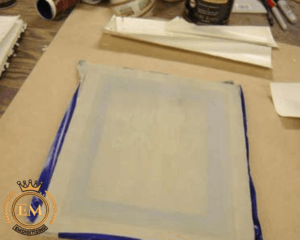
While Cricut machines are not designed specifically for silk screen printing, they can be used to create stencils or designs that can be used in the silk screen process. However, additional equipment and materials are needed for the complete silk screen printing technique.
No, a Cricut heat press is not suitable for traditional screen printing. Heat presses are commonly used for applying heat transfer vinyl or sublimation designs onto garments, while screen printing involves using screens and inks to create multi-colored designs with high durability.
The choice between vinyl and screen printing depends on various factors. Vinyl is great for smaller quantities, intricate designs, and personalization, while screen printing is ideal for larger quantities, vibrant colors, and long-lasting durability. Consider your specific needs and preferences when deciding which method to use.
To print on fabric using a Cricut, you can use the Print then Cut feature. Design and print your desired image on a compatible printer, then use your Cricut machine to precisely cut out the design. Apply the design onto your fabric using an appropriate adhesive or heat transfer method.
While Cricut machines are not typically used for traditional screen printing, you can create screen print-like designs using adhesive stencils made with your Cricut. Cut the stencil from a suitable material, apply it to the shirt, and use fabric ink or paint to fill in the design using a squeegee or similar tool. Follow the instructions for curing or heat-setting the ink to ensure durability.


