Best Screen Printing Tools And Accessories
Introduction:
In this article, we will explore the world of screen printing tools and accessories, essential for creating stunning prints on various surfaces. Whether you’re a beginner or a seasoned screen printer, having the right materials for screen printing can make a significant difference in the quality and efficiency of your prints. From the necessary equipment to screen printing materials, stencils, and setup techniques, we’ll cover everything you need to know to enhance your screen printing journey. Get ready to dive into the realm of equipment for screen printing and discover the tools that will elevate your craft to new heights.
Best Screen Printing Tools And Accessories
Screen Printing Tools And Accessories – A Complete Guide
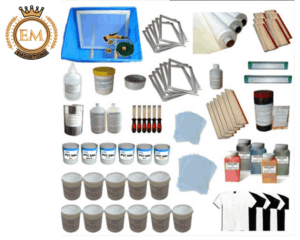
Screen printing, also known as silk screening, is a popular and versatile method of printing that allows you to create vibrant and durable embroidery designs on various surfaces. Whether you’re interested in printing t-shirts, posters, or even artwork, having the right tools and accessories is crucial for achieving professional-quality results. In this article, we will delve into the world of screen printing tools and accessories, providing you with a comprehensive guide to help you get started or improve your existing screen printing setup.
Screen Printing Equipment:
The backbone of any screen printing operation is the equipment. Key components include:
Screens:
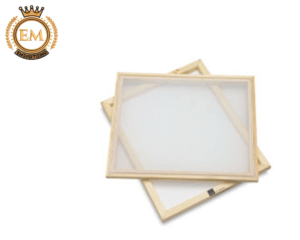
Screens are the foundation of screen printing. They consist of a mesh stretched over a frame. The mesh openings allow ink to pass through, creating the desired design. Screens come in various mesh counts, which determine the level of detail and ink coverage in your prints.
Squeegees:
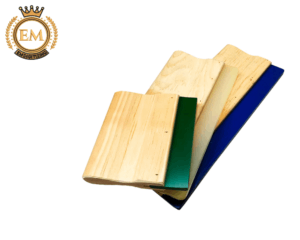
Squeegees are used to push ink through the screen and onto the printing surface. They are typically made of rubber or polyurethane, and their hardness and size can be chosen based on the type of print and ink you’re using.
Printing Press:
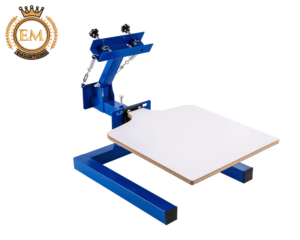
Consider the amount of ink coverage required for your design. Excessive ink coverage can lead to bleeding, smudging, or a loss of fine details. On the other hand, insufficient ink coverage may result in a patchy or uneven print. Strike a balance between the amount of ink used and the desired effect to achieve optimal results.
Exposure Unit:
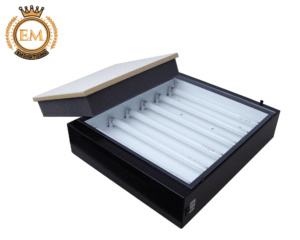
An exposure unit is used to transfer your design onto the screen. It exposes the screen to light, which hardens a light-sensitive emulsion coating. Areas of the screen covered by the design remain unexposed and can be washed out, creating stencil openings for ink to pass through.
Conveyor Dryer:
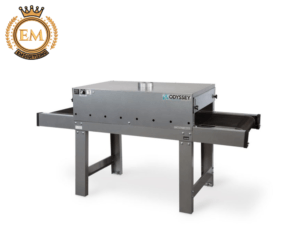
A conveyor dryer is essential for curing the ink and making it permanent on the printed surface. It uses heat to dry and cure the ink, ensuring durability and washability.
Exposure Unit:
An exposure unit is used to transfer your design onto the screen by exposing it to light. Depending on your budget and needs, you can choose from tabletop exposure units or larger, freestanding models.
Drying Rack:
A drying rack is essential for drying your printed garments or materials after they have been printed. It allows proper airflow and prevents ink smudging or sticking.
Registration System:
Advanced registration systems, such as micro-registration or pin registration systems, offer precise control over the alignment of multiple screens. These systems are particularly useful for multicolor prints or designs that require high accuracy.
Flash Cure Unit:
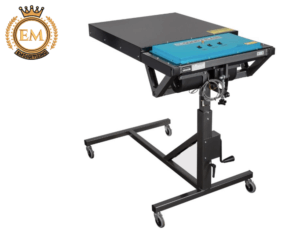
A flash cure unit is used to partially cure the ink between colors or on-demand to prevent smudging and allow for multiple layers of ink. It provides controlled heat to quickly dry the ink without fully curing it.
Washout Booth:
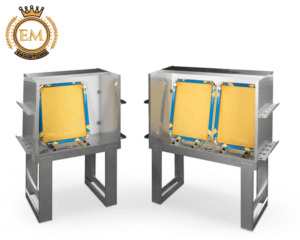
A washout booth is used for cleaning and reclaiming screens. It typically features a built-in sink, water sprayers, and a filtration system to prevent clogged drains.
Pressure Washer:
A pressure washer can be used in conjunction with a washout booth to remove stubborn ink and emulsion from screens. It offers a high-pressure stream of water that effectively cleans the screen.
Screen Racks and Carts:
Screen racks and carts provide a convenient way to organize and store screens. They allow you to keep screens upright, preventing damage and facilitating easy access during the printing process.
Screen Printing Table:
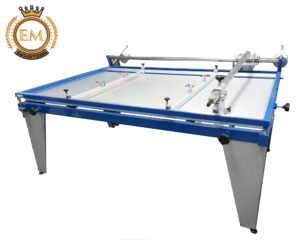
A screen printing table provides a stable and smooth surface for placing your substrates during printing. It typically features a vacuum or adhesive system to hold the substrate securely in place.
Heat Press:
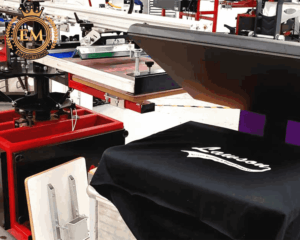
While not directly related to screen printing, a heat press can be a valuable addition to your setup. It is used to cure the ink and bond it to the substrate using heat and pressure. Heat presses are commonly used for smaller prints or specialty items.
Screen Printing Materials:
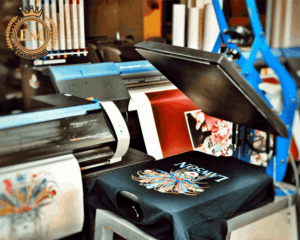
To bring your designs to life, you’ll need various materials that are specific to screen printing:
Screens:
As mentioned earlier, screens are a fundamental material in screen printing. They are available in different sizes and mesh counts to accommodate different print sizes and levels of detail.
Inks:
Screen printing inks come in various formulations, such as water-based, plastisol, and discharge. It’s important to choose inks that are compatible with your printing surface and desired effect.
Emulsion:
Emulsion is a light-sensitive liquid that coats the screen and allows you to create stencil openings for ink. There are different types of emulsion, including dual-cure and diazo, each with its own exposure and development requirements.
Cleaning Supplies:
Proper cleaning and maintenance of your screens are essential for achieving consistent results. Screen cleaning chemicals, emulsion removers, and scrub brushes are a few examples of the cleaning supplies you’ll need.
Substrates:
Substrates are the surfaces onto which you’ll be printing. These can include t-shirts, posters, paper, wood, metal, and more. Ensure that the substrates you choose are suitable for the ink type you’re using and can withstand the curing process.
Screen Printing Setup and Techniques:
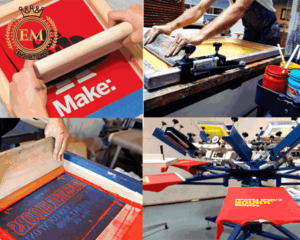
To achieve the best results in screen printing, it’s crucial to set up your workspace properly and employ effective techniques:
Design Preparation:
Before you can create a screen, you’ll need a properly prepared design. This involves converting your artwork into a high-contrast, black-and-white image and preparing it for screen exposure.
Screen Preparation:
Properly preparing the screen is essential for achieving clean and accurate prints. This includes coating the screen with emulsion, ensuring even and consistent coverage, and properly drying and storing the screens to avoid premature exposure.
Registration:
Registration refers to the alignment of multiple screens to ensure that each color in a design lines up correctly. Techniques such as using registration marks and hinge clamps can help you achieve precise registration.
Printing Techniques:
Different printing techniques, such as flood coats, spot colors, and halftones, can add depth, texture, and visual interest to your prints. Experimenting with these techniques can help you achieve unique effects and elevate your designs.
Tips for Beginners and Troubleshooting:
For beginners venturing into screen printing, here are a few helpful tips to keep in mind:
- Beginning with simple designs will help you grasp the basic techniques and gain confidence before moving on to more complex projects.
- Learning how to control ink flow, squeegee pressure, and stroke speed will help you achieve consistent and even prints.
- Regularly cleaning and maintaining your equipment will prolong its lifespan and ensure optimal performance.
- Screen printing comes with its fair share of challenges. Learning to identify and troubleshoot issues such as ink bleeding, ghosting, or improper registration will help you overcome obstacles and improve your prints.
Conclusion:
In conclusion, screen printing in art is a dynamic and rewarding form of printing that allows you to unleash your creativity and produce visually stunning designs. By understanding the various silk screen supplies, screen printing equipment, and accessories needed, as well as proper setup and techniques, you can embark on a successful screen printing journey. Remember to experiment, learn from your experiences, and continually refine your craft. Happy printing!
If you want to customize embroidery logo digitizing, EM DIGITIZING will be your best choice. At EM DIGITIZING, we deliver the best embroidery logo digitizing services with the best quality. We offer 50% off on all our services to our potential customers on their first order. So, get a free quote now and we will get in touch with you.
Hope this article will be helpful for you guys!
If there’s any question related to this article feel free to comment to us. And, thanks for reading!
The tools used in screen printing include a screen (made of mesh), a squeegee, ink, a printing press or frame, and stencil materials (such as emulsion or film).
To make a screen print, you will need a design or image, a transparent film or emulsion-coated screen, a light source for exposure, a washout booth or sink for rinsing, and drying equipment.
The best materials for screen printing are typically cotton or cotton-blend fabrics, as they absorb and hold ink well. However, other materials like polyester or nylon can also be used with appropriate inks and additives.
To start a t-shirt printing business, you will need a screen printing press or carousel, a drying unit or conveyor dryer, a exposure unit or light table, a washout booth or sink, screens, squeegees, inks, a heat press (optional for curing), and a computer with design software.
