Silk screen printing, also known as silk screening or serigraphy, is a versatile and popular printing technique that has been used for centuries to transfer designs onto various surfaces.
From t-shirts and textiles to posters and signage, it offers a precise and vibrant way to bring creative visions to life.
Whether you are a beginner or looking to refine your skills, this step-by-step guide will provide you with the knowledge and techniques necessary to successfully execute screen printing techniques.
Silk Screen Printing Steps: Mastering the 10 Essential Techniques
How To do Silk Screen Printing: Step-By-Step Process:
Let’s have a look at the screen printing techniques you can follow to produce a masterpiece:
Gathering the Necessary Materials and Tools:
Before diving into the process, it’s important to gather all the necessary printing materials and tools. Here’s what you’ll need:
Essential Materials:
- Screen: A mesh screen made from silk or synthetic materials, mounted on a frame.
- Emulsion: A light-sensitive substance that helps create the stencil.
- Ink: Specialized ink designed for screen printing, available in a variety of colors.
- Substrate: The material onto which you’ll be printing, such as fabric, paper, or plastic.
- Masking tape: Used to secure the substrate during the printing process.
- Cleaning supplies: Solvents or emulsion removers for cleaning the screens.
Required Tools:
- Squeegee: A tool with a flat rubber blade used to push the ink through the screen.
- Exposure unit or light source: A device used to expose the emulsion-coated screen to light.
- Screen printing press or frame: A device that holds the screen in place during printing.
- Artwork or design: Your desired design, either hand-drawn or digitally created.
- Scoop coater: A tool used to evenly apply the emulsion onto the screen.
- Drying rack: A rack or space where you can let your screens and prints dry.
Step 1: Preparing the Design
Now that you have all your materials and tools ready, it’s time to prepare your design and screens for printing.
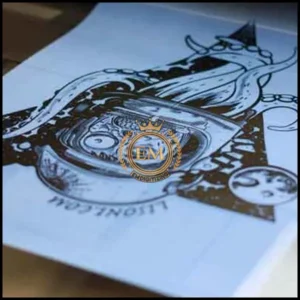
- Decide on the design you want to print and make sure it is suitable for silk printing. Avoid intricate details or very fine lines, especially if you’re a beginner.
- If you’re working digitally, make sure your design is in a high-resolution format. If you’re working by hand, create your design on a transparent or tracing paper.
- Resize your design if necessary to fit the desired printing area.
Step 2: Preparing the Screens for Printing
- Place your substrate, such as a t-shirt or paper, on a clean and flat surface.
- Use masking tape to secure the substrate in place, preventing it from moving during printing.
- If you’re printing on fabric, consider placing a cardboard or plastic sheet inside the garment to prevent ink from bleeding through to the other side.
Step 3: Setting up the Workspace
To ensure smooth and hassle-free printing, it’s important to set up a suitable workspace and prepare the printing surface.
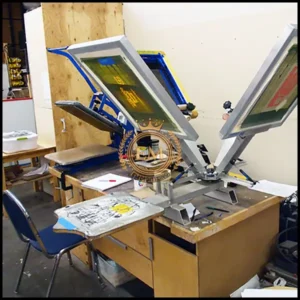
- Find a well-ventilated area with proper lighting for your printing process.
- Cover your work area with a drop cloth or old newspapers to protect it from ink spills.
- Organize your materials and tools within reach for easy access during printing.
Step 4: Mixing and Applying Emulsion
Now that you’ve prepared the screens, it’s time to coat them with emulsion.
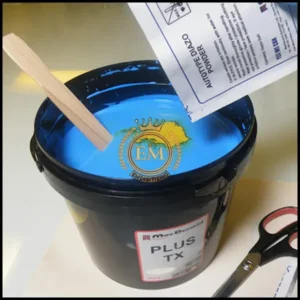
To get started, mix the emulsion according to the manufacturer’s instructions. It’s a bit like playing mad scientist but without the explosions (hopefully).
Once mixed, use a scoop coater or a squeegee to evenly apply the emulsion onto both sides of the screen. Make sure to cover every nook and cranny, like a protective layer of armor.
Step 5: Exposing the Screens to Light
It’s time to let the screens bask in the glorious light. Place a transparency or a film positive with your design on top of the coated screen. Secure it in place with tape or you’ll have a dancing design when exposing it to light.
Now, the fun part – exposing the screens to light!
Using a light source like a UV light box or the sun (if you’re feeling adventurous), expose the screen for the recommended time.
The light will magically react with the emulsion, causing the unexposed areas to remain water-soluble while the exposed parts harden. It’s like a secret handshake between the light and the emulsion.
Step 6: Develop the Screens
Now that you’ve exposed the screens to light, it’s time for the big reveal. Head to your sink and gently spray water on both sides of the screen.
Watch as the unexposed emulsion washes away, revealing your design in all its glory. It’s like uncovering buried treasure, except much cleaner.
Remember to be gentle during this step, as excessive scrubbing or rushing can damage the stencil. Treat the screen like a delicate flower – shower it with love and care.
Step 7: Preparing the Printing Ink
You’re now ready to transform your design from screen to fabric. But first, let’s prepare the ink. Choose the color that speaks to your creative soul, and mix it with the desired amount of silk screen printing ink.
It’s like crafting your own personalized shade, blending hues like a master painter. Stir the ink until it reaches a smooth and consistent texture, ready for its grand debut.
Step 8: Positioning and Printing the Design
Now comes the moment of truth – printing your design onto the fabric.
Place the coated screen on top of the fabric, making sure the design is properly positioned. It’s like aligning the stars, except with ink, fabric, and a touch of finesse.
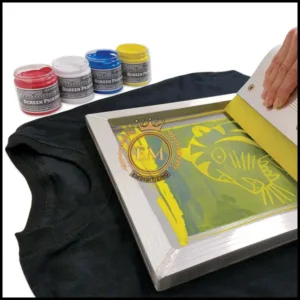
Apply a generous amount of ink onto the screen, moving it to the top end of the design. With the help of a squeegee, press firmly and drag the ink over the screen, like a conductor leading an orchestra. The ink will magically pass through the stencil onto the fabric, creating a beautiful visual symphony.
Repeat this process for each color or layer of your design, allowing the ink to dry between each application. With each print, your artistic masterpiece will gradually come to life, leaving you feeling like the Van Gogh of silk screen printing.
Step 9: Curing and Finishing the Printed Fabric
Congratulations, you’ve completed the printing process!
Troubleshooting Common Issues in Silk Screen Printing:
Okay, so maybe your first attempt didn’t turn out as flawless as expected. Don’t worry, we’re here to help you troubleshoot those common printing problems:
Dealing with Ink Bleeding and Smudging:
Oh no, ink bleeding and smudging – the enemies of a clean and crisp print. But fear not, for every problem has a solution.
To combat ink bleeding, ensure that your screen is properly prepped and tightly stretched. This will prevent the ink from seeping into unwanted areas.
Additionally, make sure your ink isn’t too watery, as that can also contribute to bleeding. Practice maintaining consistent pressure with the squeegee to avoid pushing excess ink through the screen.
As for smudging, make sure your printing surface is clean and free from any dust or debris. Use a lint roller or a clean cloth to remove any potential culprits before printing.
If smudging still occurs, try reducing the amount of ink you’re applying or adjusting the angle and pressure of your squeegee. Remember, a little experimentation can go a long way in troubleshooting these pesky issues.
Resolving Screen Clogging and Imperfections:
Regularly clean your screen to prevent clogging. After each print, remove excess ink from both sides of the screen with a spatula or scraper.
Rinse the screen with water, making sure to remove all remnants of ink and any pesky particles. Properly dry the screen to avoid any moisture-related issues.
If imperfections persist, inspect your screen for damages or wear and tear. Torn or frayed mesh, for example, can cause unwanted blemishes. Replace any damaged screens and keep them in good condition to ensure a smooth and flawless printing process.
Fixing Uneven or Patchy Prints:
First, ensure your printing surface is properly aligned, as misplacement can lead to uneven prints. Double-check your registration marks or guides and make any necessary adjustments. Taking the time to get it right from the beginning can save you from disappointment later on.
If you’re still stuck with patchy prints, make sure your screen is evenly coated with ink. Apply a consistent amount.
Conclusion:
In conclusion, mastering the essential techniques of silk screen printing opens up a world of creative possibilities.
By understanding the equipment, preparing the design and materials meticulously, and honing your techniques, you can achieve impressive and professional results. While printing may require practice and troubleshooting, the satisfaction of seeing your designs come to life on various surfaces is unparalleled.
So, embrace the art of silk printing on screen, experiment with different techniques, and enjoy the journey of creating beautiful and unique prints.
EMdigitizing: Vector Art Expert At Your Service:
Would you like some help making your design ready for screen printing?
Take a look at EMdigitizing! We provide vector art services worldwide and offer a great deal to you. You can get 50% off on your first order.
Our team is proficient in digitization; they meticulously digitize your design, ensuring that it is completed promptly and affordably.
Have you any inquiries? Reach out to us.
Our staff will respond to you quickly and is active 24/7. You can share this information with your friends if you think it’s useful.
Have fun stitching! I appreciate you taking the time to read this.
Frequently Asked Questions:
Silk screen printing is versatile and not limited to fabrics. It can be used on various surfaces including paper, wood, glass, and metal, making it a popular choice for diverse applications in art and industry.
To troubleshoot silk screen printing issues, check for common problems like uneven ink distribution, clogged screens, improper squeegee pressure, or incorrect screen mesh count. Adjusting these factors often resolves most printing issues.
The basics of screen printing involve creating a stencil on a mesh screen, applying ink, and using a squeegee to press the ink through the screen onto the printing surface. This process is repeated for each color in the design.
A silk screen is often referred to as a “screen printing frame.” This term highlights the frame that holds the mesh screen in place during the printing process.
