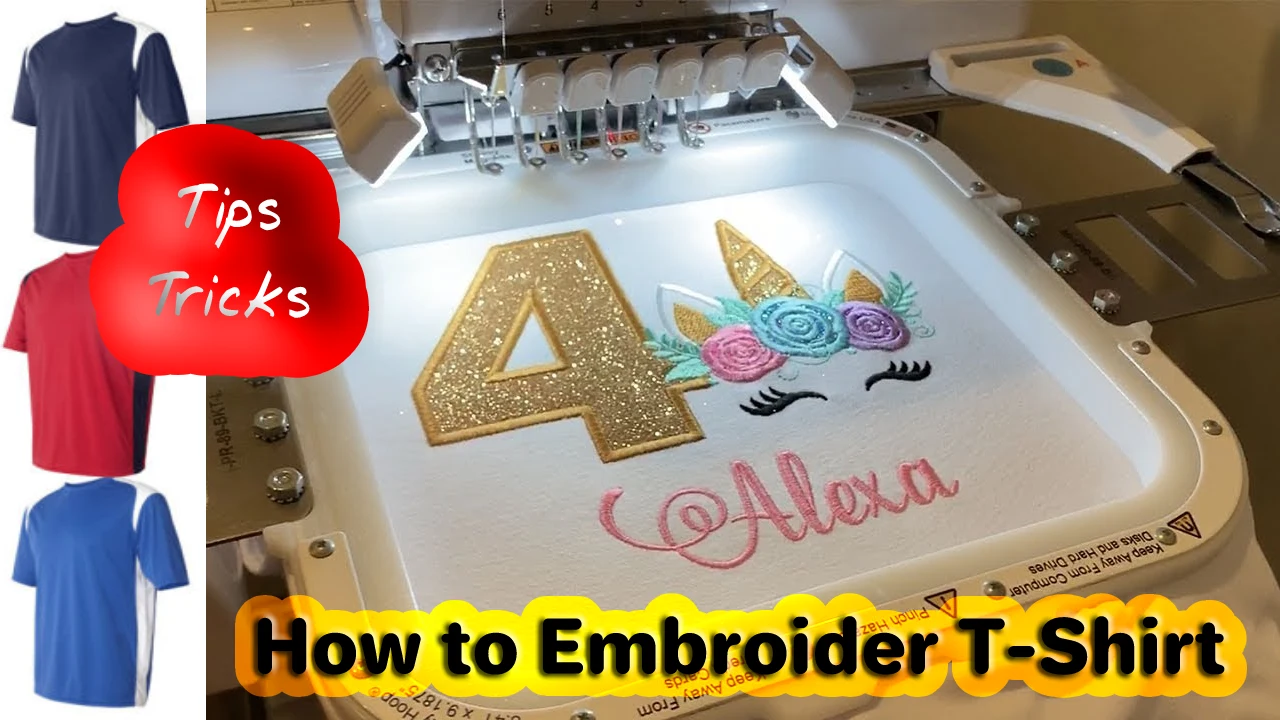
Come ricamare una maglietta con suggerimenti e trucchi

How to Embroider T-Shirt with tips and tricks

Servizi di digitalizzazione del ricamo

Se stai cercando servizi di digitalizzazione del ricamo, La digitalizzazione EM è una delle migliore digitalizzazione del ricamo azienda. Fornire tutti i tipi di ricamo digitalizzazione. Ti consiglio di testare i servizi di digitalizzazione.

In questo articolo, you will learn how to embroider T-Shirt step by step. The embroidery on a T-shirt is a perfect activity for those who are just starting out. T-shirts are affordable and easily accessible. If you do miss the one you’;ve got, you won’;t be out much, and they’;re simple to replace.

Customized t-shirts are great as gifts for children. I’;m not even able to count how many fun birthday shirts I’;ve stitched using my embroidery machine. Appliqued birthday crowns that have one initial are ideal for gifts for a girl’;s birthday, and embroidered T-shirts are an amazing gift for boys. I’;ve stitched weird characters, superheroes, and outrageous birthday numbers on t-shirts, and they always get a great response. In order to make my shirt special and unique, I always include the child’;nome.

If you’;re considering the idea of starting your own embroidery business, learning embroidery on t-shirts is essential. Numerous companies and companies want personalized, embroidered t-shirts and polos for their employees. Corporate customers are likely to be more frequent customers than moms who only want a birthday shirt for their child It can be extremely lucrative to be an expert at sewing embroidery designs on T-shirts.

Helpful Tips For Embroidering A T-Shirt:

  • Select the thread colors you want and organize them according to the order of use to ensure they are all ready to use while they stitch your design. read more about thread brands
  • The self-adhesive tearaway stabilizer is recommended since it can prevent the fabric of the t-shirt from stretching out during embroidery. Read more in detail about stabilizers: quale, why, and when the use of stabilizer for embroidry.
  • Include the additional tearaway or cutaway stabilizer beneath the hoop before stitching when you have a thick pattern that requires an additional stabilizer.
  • Clean and dry the t-shirt before embroidering it. The shirt will be pre-shrunk so that it doesn’;t shrink, and then alter the design once it’;s stitched.

Basic Instructions For Embroidering A T-Shirt:

  1. Then load the design into the embroidery machine.
  2. Decide what direction to draw and the proper position when hooping.
  3. Cut the stabilizer slightly bigger than the hoops. The stabilizer must be positioned within the hoop while hooping to ensure that the shirt doesn’;t shift or stretch during embroidery.
  4. Flip the shirt over and place a self-adhesive tearaway stabilizer over the area, which will be embroidered.
  5. Flip the shirt right side up and create a vertical crease in the middle of the shirt.
  6. Place the hoop’;s outer edge inside the shirt.
  7. Determine the location of this design using the vertical line for a reference, and then press the top of the hoop to secure it.
  8. Quindi, roll over the top of your shirt and the extra fabric over the hoop, making sure it’;s away from it—the embroidery area.
  9. Attach the embroidery hoops to the machine.
  10. Verify the design’;s placement.
  11. Stitch to the embroidery design.
  12. Remove the stabilizers from around the edges part of the pattern.
  13. Fusible interfacing can be added to an inside layer of your shirt to cover the stitching to prevent roughness against your skin.

What You Need to embroider T-Shirt:

  • Macchina da ricamo
  • The embroidery design template is to suit your machine.
  • T-shirt (pre-shrink by drying and washing)
  • Stabilizer for the back that is sticky (see below for hyperlinks)
  • Cut or tearaway stabilizer (optional depending on the pattern)
  • Fusible interfacing or soft
  • Filo

Detailed Instructions To Embroider On Clothing:

To embroider a Shirt or How to Embroider Clothing the Easy Way? , follow this written guideline step by step.

Fare un passo 1: Select And Load The Design

Select And Load The DesignChoose the design that will get embroidered on the shirt. Any design can be stitched. It could be an embellished embroidery style or embroidery design. The majority of embroidery machines have patterns that can be installed on their machines. The other option is to buy or locate an online machine embroidery design on the web. Make sure the design you download is in the right size and format for your embroidery machine.

If you buy a design, then download it onto your computer. The majority of embroidery machines utilize USB sticks. USB stick, so copy the design to USB and then load the design into your embroidery machine.

Fare un passo 2: Organize Threads For Embroidery

Select the thread colors required to complete the embroidery design. Designs generally include suggested color numbers. Tuttavia, I like picking the color from embroidery threads that I have. Sort your threads according to the order they are stitched, so they’;re ready. A handy egg carton can be turned into an organizer for threads. guardare 5 Le migliori marche di filati per ricamo

Fare un passo 3: Design Direction

Take a look at the direction in which the design appears when it is loaded onto the embroidery machine. The hoop should remain in its correct direction on the shirt, or it will be stitched in the wrong direction. The embroidered pattern will stitch in the wrong direction.

The design utilized for this demo was flipped to the side, and the hoop needed to be set horizontally.

When you’;re embroidery pattern is facing upwards, and you want to place the hoop in a vertical position.

Fare un passo 4: Add Sticky-Backed Stabilizer

The stabilizer with the sticky backing should be cut slightly larger than the hoops. The stabilizer must be positioned within the hoop while hooping to ensure that the shirt does not move or stretch when embroidering.

Flip the shirt over and then place a self-adhesive tearaway stabilizer on the part which will get embroidered as well as hooped. Reverse the shirt to the right side after the stabilizer has been put set. More about Stabilizzatori per ricamo a macchina, Guide complete

Fare un passo 5: Crease Center Of Shirt

Crease Center Of Shirt for embroideryTo locate the center of the shirt, cut the shirt into half and line the arms and sides from the shirt. Create a fold in the shirt at the fold. This crease can be utilized when hooping the shirt.

Fare un passo 6: Hoop Shirt For Embroidery

Place it flat on the table. The wrinkle should be visible in the center of your shirt. Place the hoop’;s outside hoop into the shirt below the area that needs to be hooped. Utilizing the marks on the middle of your hoop and the guidelines provided on the template, place the hoop in a straight line along the fold. Make use of your measuring tape to make sure that you’;ve got it aligned properly.

After you have the hoop set, you can press the top hoop onto the lower hoop. The embroidery on t-shirts is usually placed in the top part of the shirt.

Fare un passo 7: Get The Shirt Back Out Of The Way

Before you are able to embroider your design on the shirt, the back must be removed from the way. In the event that it is not done, both the back and front of your shirt may be sewn together. Fold the back of the shirt and the extra fabric around the hoop until it’;s away from its embroidery area.

Tuck into the sleeves of the shirt so that they do not be stuck by the sewing. Be sure that the side of the hoop is free of any fabric and that on the front, there is an open area for the design to get embroidered onto the garment.

Fare un passo 8: Check Design Placement

Attach the embroidery hoops and the machine. Once more, make sure you verify the orientation of your design as well as the direction that the shirt was hooped in to ensure that the design is correctly stitched.

Examine which area the embroidery design will be stitched on the t-shirt to ensure you are satisfied with the outcome. Based on the size of the design of the hoop, you could be able to make minor adjustments to the layout of the design before making your embroidery on the shirt.

If you’;re working on a dense design that requires extra stability, then put the extra tearaway or cut-off stabilizer underneath the hoop right now. Cut the stabilizer in a large enough size to slide it underneath the hoop and be held in the stitches.

Fare un passo 9: Stitch The Embroidery Design

Sew the embroidery design by changing the thread colors at the end of each step according to the design that will instruct you. It is expected that the embroidery machine will be stopped after every color change.

Fare un passo 10: Remove The Stabilizer

When the embroidery design has been stitched, you can remove the hoops of your machine. Quindi, take the embroidered shirt out of the hoop. Remove the stabilizer that is around the edges part of the image. If you’;ve used an additional cutaway stabilizer, cut it over the pattern.

Fare un passo 11: Add Soft Interfacing

To create the interior of embroidered shirt more comfortable to the point where the design appears cut a piece of fusible or Sulky Tender Touch the shape of the design or slightly larger than the design. Then glue them inside the shirt. This is particularly important for children so that the stitching won’;t be scratchy against the skin.

Infine!

The embroidered shirt is now done and is ready for wear. Enjoy creating machine embroidered T-shirts to give to family and acquaintances. Send them out as presents!

There are three kinds of embroidery machines:

  • Only embroidery –; they are special machines that can only perform machine embroidery and not stitch straight lines or any other stitches.
  • Sewing and embroidery Combo The following is the model I have, and it can change to embroidery or sewing.
  • Multi-needle embroidery –; They have several needles. So when stitching patterns, you can load different color threads and then thread them onto the needles. The machine will then stitch using all those colors, not stopping for color changes.

I don’;t recommend particular machines to buy because it is a personal decision that is based on a variety of factors, such as the budget and the features. I suggest that you do some do some research online and make an appointment with one or two local machine dealers to discover the different options and features available on various machines. Ask your dealer if they provide classes. The lessons are important to ensure that you’;ll know how to operate your machine to get the most from it.

There are a variety of manufacturers of embroidery machines which include Brother, Vichingo, Bernina, e BabyLock. Each manufacturer offers a variety of various machines, and all have distinct characteristics.

We have a hyperlink to embroidery machines that are available through Amazon below, but they aren’;t high-end machines and are not appropriate for all. These machines could provide you with some ideas on specifications and pricing. The most expensive machines are sold only through dealers.

The most important thing to think about is the size of the hoops. Every machine has hoops that it is able to handle, and you are not able to change to bigger hoops later on. Perciò, if you buy the machine that has the largest hoops, which measure five”; x 7″;, you are not in a position to buy a larger hoop later.

Many people advise buying a machine that has the biggest hoop that you can afford. If you have the option of two machines and one of them is larger, then you might want to go with the larger hoop as the majority of people outgrow their machines with smaller sizes of hoops quickly.

I suggest using a back stabilizer that is sticky, such as a Sulky Sticky Tear Away stabilizer (look for the link below). This stabilizer is best with t-shirts as they’;re so stretchy, and this stabilizer prevents the shirt from stretching or shifting when stitching.

If you’;ve got a complex design that requires additional stabilization, grab an edge of cutaway or another tearaway stabilizer, and place it into your hoop prior to beginning stitching.

With a single needle machine, it is possible to set the machine stops at every color, allowing you to alter the needle. Multi-needle machines allow you to add multiple colors at one time, and then the machine will change the color for you.

The company I use to purchase my t-shirts is largely contingent on the date by which I must finish the project, and also the location I am shopping. Most brick-and-mortar stores sell T-shirts that are blank, such as Joann’;S, Amazzonia, Walmart, Vecchia Marina, Target and the numerous dollar stores that have simple T-shirts. The advantage of purchasing T-shirts from these stores is that you do not need to open an account with wholesale.

T-shirts purchased from these shops are fine for when it is intended to be a gift. The downside to purchasing t-shirts from these stores particularly if you’;re operating an embroidery company is inconsistency. They don’;t know what they have on hand, which makes the process of reordering difficult.

If you’;d like to provide customers with regular sizes, brands, e colori, take a look at companies like S&;S Activewear, Jiffy Shirts, Sanmar, or Alpha Broder. While these companies will require you to open an account for wholesale and offer a wide range of products and their supply is reliable. prices are competitive. Ma, you typically need to purchase in large quantities to receive free shipping, unless you live close to any of the distribution centers. You are able to pick up your purchase in person.

Lascia un commento