

Perché ricamare su carta Cartoncini realizzati con carte da acquerello?
Nella nostra era digitale, una carta ricamata sembra ricca, personalizzato, e unico. Tuttavia, il costo e il tempo per costruirne uno sono molto bassi. Plus –; puoi personalizzare completamente la carta per qualsiasi destinatario. Basta caricarne uno diverso disegno e aggiungi un nome.
Le carte solitamente non sono molto grandi. Quindi se hai solo un piccolo telaio da ricamo, questo è un ottimo progetto con cui iniziare. Il ricamo sulle carte è un ottimo modo per sentirsi a proprio agio con il proprio macchina da ricamo.
Che tipo di carte dovresti ricamare?
Esistono fondamentalmente due modi per ricamare una carta. Puoi ricamarlo su carta e poi incollarlo sulla parte anteriore di un semplice biglietto per appunti. In alternativa, puoi semplicemente ricamare sulla parte anteriore del biglietto. Qualunque metodo tu scelga, you’;ll need to choose a paper that’;È abbastanza resistente da resistere alle forature dell'ago durante la cucitura disegno del ricamo. La carta da acquerello o il cartoncino funzionano bene.
Tieni presente che se cuci il disegno del ricamo sulla parte anteriore della carta piegata, il brutto, il retro del ricamo sarà all'interno del biglietto. That’;Ecco perché copri l'interno della carta con un pezzo di carta.
Il miglior stabilizzatore per ricamo su carta
Come con la maggior parte dei tipi di carta, stabilizzatore tagliato (o PolyMesh) crea ottimi biglietti d'auguri. Supporta bene i punti, soprattutto con disegni più densi e carte più sottili. Mentre puoi staccare lo stabilizzatore tagliato dal disegno dopo la cucitura, ne avrai ancora uno sotto il disegno. Questo può essere facilmente coperto con un ulteriore pezzo di cartoncino.
As much as I’;Vorrei utilizzare Tearaway Stabilizer per abbellire il retro del disegno, it doesn’;Non produrre davvero grandi risultati.
If you’;stai cercando un effetto divertente, però, prova le cuciture satinate fitte sul biglietto con uno stabilizzatore a strappo. Otterrai un effetto 3D come abbattere la mia farfalla svolazzante, grazie!
Il miglior ago per ricamare su carta
Più grande è l'ago, più grande sarà il buco.
così, mentre serve un ago abbastanza spesso da forare la carta, vuoi scegliere la dimensione più piccola possibile per evitare di forare la carta. Scegli una taglia più piccola come 75/11 o 70/10, ma assicurati che l'occhio sia abbastanza grande per la selezione del filo. Se uno ago da ricamo doesn’;non fare il trucco, aumentare la taglia e utilizzare un ago da cucito affilato per creare un foro pulito.
Per ricamo su carta, it’;È anche meglio prenderne uno fresco, nuovo ago dalla confezione. Gli aghi lenti causeranno solo problemi.
Tipi di thread
Molti tipi diversi di filo funzionerà per il ricamo su carta. La cosa più importante è assicurarti che il tuo thread e scelte dell'ago sono compatibili. Fili decorativi, Per esempio, don’;Funziona bene con un ago con una cruna piccola.
Maggior parte disegni da ricamo sono digitalizzati per filo da 40wt, ma puoi scegliere un peso diverso. Mentre tendo a sbagliare usando il mio filo di poliestere o rayon 40wt preferito, ecco alcune altre divertenti opzioni di filo per il ricamo delle carte:
- Utilizzare diversi pesi di filo di cotone (prova 30wt!) per imitare l'aspetto del ricamo cucito a mano.
- Filo metallico
- Filo che si illumina al buio (Imparare come realizzare fili per macchine da ricamo che si illuminano al buio!)
- Discussione diversificata
Disegni di ricamo a macchina per carta di carta
La scelta di un disegno è la chiave per un oggetto di carta perfettamente ricamato, especially if you’;stai usando carta sottile.
La cosa principale da ricordare è che i disegni a punto pieno densi e i disegni con punti di rinforzo prominenti non avranno un bell'aspetto quanto quelli più aperti, disegni meno densi con un numero di punti inferiore. Mentre le applicazioni sono possibili, è necessario puntare ad una grande stabilità e ad una stabilità molto elevata, carta fibrosa affinché funzionino bene.
Caratteristiche del design più adatte per il ricamo su carta:
- Redwork, punto catenella, o disegno di contorno
- Esecuzione dei caratteri Stitch.
- Se il sottofondo viene rimosso e il numero di punti viene ridotto, disegno con punto di riempimento (aumentando la lunghezza del punto o modificando la densità).
- Disegni digitalizzati specifico per cartoncino (Ricamodesigns.com, Oma’;s Luogo, e SWAK Ricamo sono fonti di immagini utilizzate in questo tutorial.)
- Minimize jump stitches if you don’;Non hai una macchina che li taglia automaticamente per te.
E, poiché i fori dell'ago sono permanenti, make sure the needle isn’;t poking down anywhere and it won’;nemmeno cucire!
Tecniche decorative per realizzare ricami su cartoncini
sì, i tipi di disegni che puoi cucire sui biglietti possono essere un po' limitati, ma ci sono molte tecniche che puoi utilizzare per rendere i tuoi biglietti ricamati davvero unici.
- Cuci l'intero disegno su un cartoncino blu o nero con filo bianco.
- Cuci un disegno colorato, si illuminano al buio, o filo da ricamo metallico per aggiungere un arcobaleno di colori.
- Migliora la tua carta con una perforatrice per carta e una fascetta a nastro
- Combina disegni ricamati con stampe o scritte decorative.
Le possibilità sono infinite.
Suggerimenti su come ricamare su cartoncini di carta
- Cuci su cartoncino di alta qualità, carta da acquerello, o altra carta pesante senza elementi decorativi come foglie o fiori incastonati.
- Funzionerà anche la carta a grana lunga, ma prova prima.
- Usa uno stabilizzatore tagliato per un supporto extra.
- Fai galleggiare la tua carta sullo stabilizzatore nel telaio fissato con uno spray adesivo temporaneo.
- Usa un piccolo ago affilato, taglia 11 o più piccolo, per evitare buchi grandi.
- Considera l'idea di rallentare la tua macchina.
- Aggiungi carta per album per coprire il retro del punto.
- Considera l'idea di aggiungere ulteriori abbellimenti con le matite colorate.
Tutorial come ricamare su cartoncino di carta
Ho iniziato questo progetto trovandolo noioso, carta di carta di colore marrone. It’;s so dull that I can’;t imagine what I’;lo userò per. Il disegno del ricamo Ero solito ricamare sul biglietto che avevo digitalizzato qualche tempo fa, una stravagante applicazione di bouquet di fiori.
Fare un passo 1: Intelaiare un pezzo di stabilizzatore
Penso che tu possa davvero farla franca con qualsiasi cosa tipo di stabilizzatore per questo progetto. Ho applicato un pezzo di stabilizzatore a strappo con retro adesivo, but I’;Ho sentito parlare di persone che usano anche stabilizzatori regolari a strappo o tagliati. Dopo aver intelaiato lo stabilizzatore, segnare il centro dello stabilizzatore nel telaio utilizzando una penna a inchiostro a scomparsa ed estendere le linee centrali verticalmente e orizzontalmente.
Fare un passo 2: Fai galleggiare la carta
Se si utilizza uno stabilizzatore a strappo con retro adesivo, incidere il bordo interno dello stabilizzatore con uno spillo per strappare lo strato superiore di carta. Prossimo, staccare la carta per esporre la superficie adesiva. Se si utilizza un normale stabilizzatore a strappo o a spalla mancante, dovrai spruzzare lo stabilizzatore con un adesivo temporaneo. Incolla il cartoncino sullo stabilizzatore in modo che il centro del cartoncino sia allineato con il centro dello stabilizzatore inserito nel telaio.
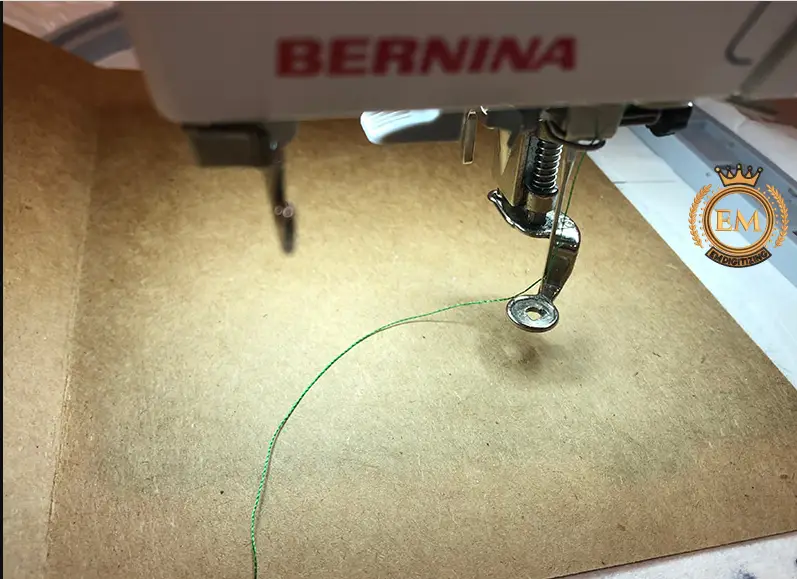
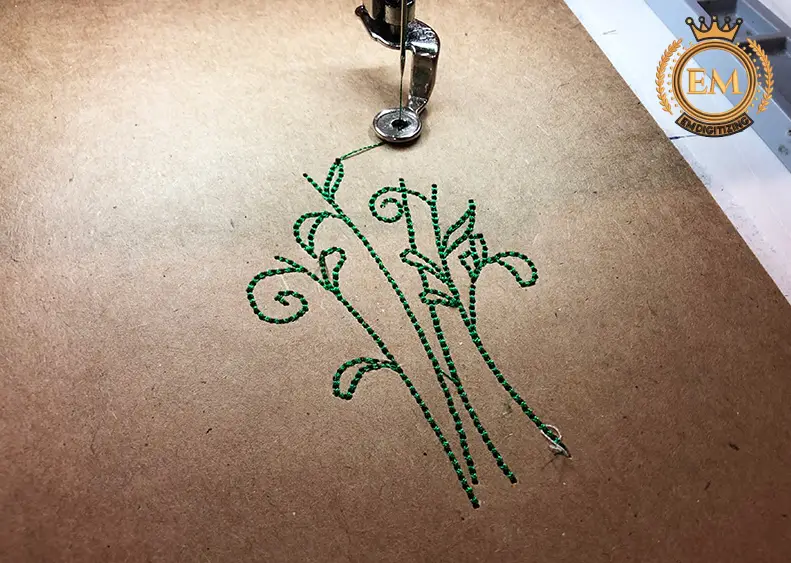
Fare un passo 3: Inizia a cucire sul tuo disegno
Ascoltare gli aghi che perforano la carta è molto soddisfacente.
Fare un passo 4: Rimuovi la carta dal telaio
Se stai utilizzando uno stabilizzatore a strappo, assicurati di strappare lo stabilizzatore e non quando rimuovi la carta dal telaio.
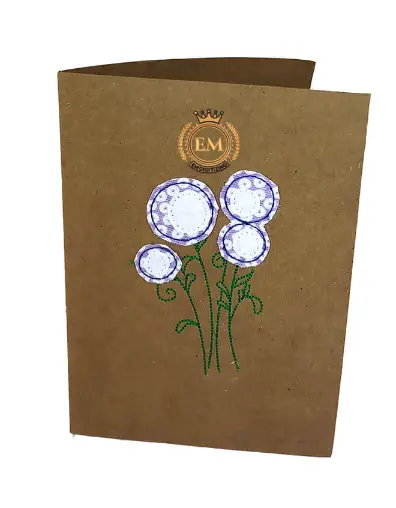
Fare un passo 5: Aggiungi alcuni tocchi finali
Utilizzando un tronchese da ricamo, taglia i fili dal tuo disegno. Dal momento che il disegno che ho realizzato era un disegno di applique a taglio vivo, Avevo anche bisogno di rifinire il tessuto usando le forbici per applicazioni.
Conclusione
Spero che ora tu abbia imparato una nuova divertente applicazione per la tua macchina da ricamo: ricamare su cartoncino!


