I cappelli da beanie ricamati con una macchina da ricamo sono un modo divertente e creativo per aggiungere design personalizzati al tuo copricapo. Sia che tu voglia mostrare il tuo logo preferito, Crea un regalo unico, o semplicemente aggiungere un tocco di talento, L'uso di una macchina da ricamo rende il processo rapido e semplice.

In questo articolo, Ti guideremo attraverso il processo passo-passo per ricamare i cappelli di berretto, Dalla raccolta dei materiali necessari alla creazione della macchina da ricamo.
Così, let’;Iniziamo!
Come ricamare cappelli a cuffia- Processo completo
Raccogliere i materiali e le attrezzature necessari
Prima di immergersi nel mondo del ricamo per cappelli di berretto, it’;è importante avere i materiali e le attrezzature giuste a portata di mano.
Scegliere il cappello da berretto giusto
Quando si seleziona un cappello da berretto per i ricami, optare per uno stile fatto di tessuto in grado di resistere al processo di cucitura senza distorcere il design.

Cerca cappelli che abbiano una trama stretta e sono realizzati con materiali come il cotone o l'acrilico.
Forniture di ricamo essenziali
Per ricamare con successo il tuo cappello da berretto, you’;Avranno bisogno di alcune forniture chiave. Questi includono un macchina da ricamo (Certo!), filo da ricamo, stabilizzatore (Per fornire supporto al cappello durante il processo di ricamo), aghi da ricamo, e forbici.
Inoltre, it’;è utile avere uno strumento di marcatura per delineare dove si desidera che il ricamo venga posizionato.
Preparare il cappello da berretto per i ricami
Prima di iniziare a cucire, it’;è importante preparare correttamente il tuo cappello da berretto. Questo passaggio è fondamentale per garantire che i tuoi ricami siano puliti e professionali.
Lavare e premere il cappello
Prima, Dai un lavaggio al tuo cappello da berretto e premilo per ottenere una superficie pulita e liscia. Ciò eliminerà qualsiasi sporcizia o rughe che potrebbero interferire con il processo di ricamo.
Contrassegnare il posizionamento del ricamo
Utilizzando uno strumento di marcatura, delineare leggermente l'area sul cappello del berretto dove vuoi il disegno del ricamo da collocare.

Questo fungerà da una guida quando si colpisce il cappello sulla macchina da ricamo in seguito.
Impostazione della macchina da ricamo e scegliere il design
Now it’;S è ora di impostare la tua macchina da ricamo e prepararti per la magia di cucitura!
Familiarità con i controlli della macchina da ricamo
Prima di immergerci nel processo di ricamo, Prenditi un momento per familiarizzare con i controlli e le funzioni della tua macchina da ricamo. Capire come infilare la macchina correttamente, Cambia gli aghi, regolare la tensione, e navigare attraverso le impostazioni disponibili.
Questa conoscenza renderà il processo di configurazione più fluido e ti aiuterà a evitare eventuali errori inutili.
Caricamento del design appropriato nella macchina da ricamo
Seleziona un design adatto al tuo stile personale e completa il cappello da berretto. Molte macchine da ricamo ti consentono di caricare disegni dal tuo computer o connettersi ai database di progettazione da ricami.
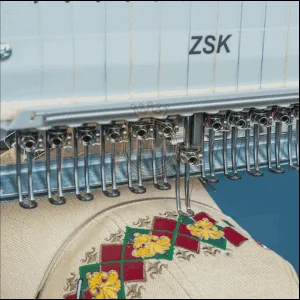
Choose a design compatible with your machine’;s format and transfer it to the machine’;S Memoria o area di lavoro.
Regolazione delle dimensioni e del posizionamento del design per i cappelli da berretto
Use the embroidery machine’;software S per regolare le dimensioni del design e posizionarla correttamente sul cappello da berretto. Assicurarsi che il design si adatti all'interno della marcata area di posizionamento del ricamo. Tenere conto delle dimensioni del cappello e dell'impatto visivo desiderato del design.
Once you’;RIFERIMENTO DEI REGOLAZIONI, Preparare la macchina per il ricamo Cappello con stabilizzatore.
Hooping the Beanie Hat per ricamo
Quando si tratta di ricamare i cappelli da berretto, Il primo passo è quello di curare correttamente il cappello.
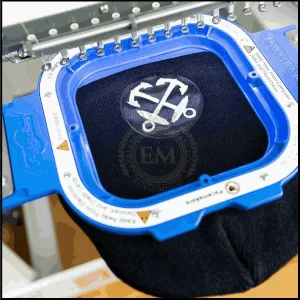
Ciò garantisce stabilità durante il processo di ricamo e aiuta a creare una finitura pulita e professionale.
Selezione della dimensione del cerchio corretta per i cappelli di berretto
Non tutte le dimensioni del cerchio sono create uguali, e scegliere quello giusto per il tuo cappello da berretto è essenziale. Troppo piccolo, e rischi di distorcere il cappello o il design; troppo grande, E potresti avere difficoltà a ottenere una vestibilità aderente per il ricamo.
Cerca una dimensione del cerchio che corrisponda alla circonferenza del tuo cappello da berretto e fornisce una presa sicura.
Assiccare correttamente il cappello da berretto per garantire la stabilità con il cappello da berretto
Ora che hai la dimensione del cerchio giusto, it’;è il momento di tendere il cappello da berretto. Inizia trasformando il cappello per assicurarti che il ricamo si trovi all'esterno. Posizionare il cerchio interno all'interno del cappello, assicurandosi che si trovi comodamente contro il tessuto.
Quindi, Posizionare il cerchio esterno sul cappello, allinearlo con il cerchio interno. Spingere delicatamente verso il basso per fissare il cappello tra i cerchi, assicurandosi che sia teso ma non allungato.
Ricamare il design sul cappello da berretto
cercato in modo sicuro, it’;è il momento di dare vita al tuo design.
Filmare la macchina da ricamo con il colore appropriato
Prima di iniziare a ricamare, Assicurati di infilare la macchina da ricamo con il colore appropriato. Questo potrebbe sembrare un gioco da ragazzi, Ma fidati di me, we’;ve hanno tutti quei momenti
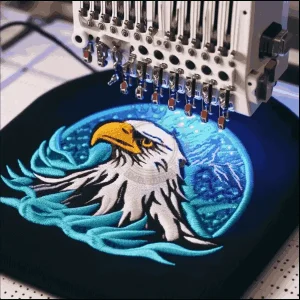
Quando abbiamo infranto accidentalmente la macchina con il colore sbagliato e abbiamo realizzato solo dopo che il design era completo (oops).
Quindi salvati il mal di testa e ricontrolla il colore del filo prima di iniziare.
Esecuzione di un punto di prova per garantire la tensione e il posizionamento adeguati
A nessuno piacciono le sorprese, Soprattutto quando si tratta di ricami. Per evitare potenziali catastrofi, Esegui un punto di prova su un pezzo di tessuto di scarto o il cappello da berretto stesso (if you don’;toci un piccolo segno di prova) Per garantire che la tensione e il posizionamento siano corretti.
Questo ti aiuterà a catturare problemi prima che rovinino il tuo design.
Ricamare il design sul cappello del berretto con cura e precisione
Ora per la parte divertente! Con tutto impostato e validato, it’;è il momento di lasciare che la tua macchina da ricamo funzioni la sua magia. Procedi lentamente e con calma, permettendo alla macchina di fare il suo lavoro mentre ammiri i movimenti fluidi e precisi.
Assicurati di monitorare il processo per garantire che tutto stia progredendo senza intoppi.
Tocchi finiti e istruzioni per la cura per i cappelli da berretto ricamato
Una volta completato il ricamo, you’;abbiamo quasi finito! Solo pochi passaggi per aggiungere quei tocchi finali e mantenere il tuo cappello da berretto al meglio.
Rimozione del cappello da berretto dalla macchina da ricamo e dal cerchio
Rimuovere con cura il cappello da berretto dalla macchina da ricamo e dal cerchio. Prenditi il tuo tempo, Poiché la corsa può far strappare i fili o il cappello.
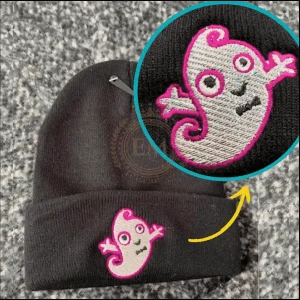
Rilascia delicatamente il cerchio e rimuovilo dal cappello, Essere consapevoli di non tirare o tirarli troppo con forza.
Tagliare i fili in eccesso e ispezionare il lavoro di ricamo
Now it’;è il momento di dare al tuo cappello da berretto ricamato un po 'di toelettatura. Prenditi un momento per ispezionare il tuo lavoro di ricamo, Garantire che il design sia nitido e privo di thread sciolti. Se individua thread randagi, Usa una coppia di forbici affilate per tagliarle con cura, Prende cura di non tagliare il tessuto.
Un po 'di attenzione ai dettagli qui può fare una grande differenza nella presentazione finale.
Istruzioni di cura adeguate
infine, let’;S parla di come mantenere il tuo cappello da berretto ricamato in ottima forma. Per preservare l'integrità del design, it’;è meglio lavare a mano il cappello in acqua fredda con un detergente delicato.
Evita di usare sostanze chimiche aggressive o candeggina, poiché possono danneggiare il ricamo e il tessuto. Dopo il lavaggio, rimodellare il cappello e lasciarlo asciugare completamente.
E il gioco è fatto! Seguendo queste istruzioni passo passo, you’;sarà ricamoso cappelli da berretto come un professionista in pochissimo tempo. Quindi prendi il tuo design preferito, Accendi la tua macchina da ricamo, E preparati ad aggiungere un tocco personale al tuo guardaroba invernale.
Buon ricamo!
EMDigitalizzazione: Esperto di digitalizzazione del ricamo al tuo servizio
Se sei interessato a qualsiasi tipo di progetto di ricamo, allora EMdigitizing è la soluzione migliore per te. Noi offriamo digitalizzazione del ricamo e servizi di arte vettoriale con tempi di consegna rapidi. Puoi anche visitare e controllare il nostro sito web e i nostri migliori servizi.
Offriamo anche un ottimo 50% sconto su tutti i nostri servizi per i nostri stimati clienti per la prima volta. Offriamo anche preventivi gratuiti generato in appena 5 minuti.
Dovresti approfittare di questa offerta a tempo limitato e portare il tuo progetto di ricamo al livello successivo con EMdigitizing.
Se hai domande su questo argomento, puoi chiedere a loro. Grazie per aver dedicato del tempo a leggere questo articolo.
Buon ricamo!
Domande frequenti:
sì, puoi ricamare un berretto. Implica disegni o motivi di cucitura sul tessuto, di solito fatto con un ago e un filo.
Ricamare un cappello, In genere si usa un cerchio per mantenere il tessuto teso e quindi cucire il design usando il filo da ricamo, Seguendo uno schema o una mano libera.
Il ricamo per cappelli si riferisce al processo di cucitura di design decorativi sui cappelli, spesso usando fili colorati per creare motivi o testo.
I cappelli ricamanti possono essere impegnativi a causa della loro forma curva e del materiale spesso, Ma con la pratica e gli strumenti giusti, diventa gestibile.
sì, puoi ricamare i tuoi vestiti. It’;S un modo creativo per personalizzare l'abbigliamento usando abilità di cucitura di base e materiali da ricamo.
