
Il ricamo ha fatto molta strada dai tempi in cui i disegni venivano scrupolosamente cuciti a mano. Con il progresso della tecnologia, ora abbiamo la possibilità di creare disegni intricati e belli utilizzando monogrammi digitali per il ricamo a macchina.
Questi ti consentono di personalizzare e personalizzare i tuoi progetti di ricamo con facilità e precisione.
In questo articolo, ti guideremo attraverso il processo passo passo di creazione di un monogramma per ricamo a macchina. Quindi preparati a liberare la tua creatività e ad aggiungere un tocco di stile personale ai tuoi progetti!
Impostazione monogramma digitale: Una guida per gli appassionati di ricamo
Raccolta dei materiali e delle attrezzature necessarie
Prima di tuffarsi nel mondo dei monogrammi digitali, it’;È essenziale raccogliere tutti i materiali e le attrezzature necessarie. Here’;s what you’;avrò bisogno:
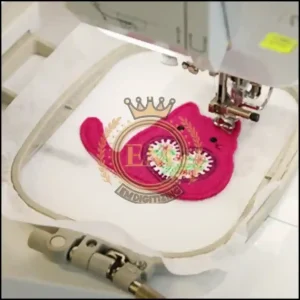
Macchina da ricamo: Scegli un ricamo monogramma macchina adatta alle tue esigenze e al tuo budget. Assicurati che sia compatibile con il software di ricamo che intendi utilizzare.
Cerchi da ricamo: Questi tengono il tessuto teso mentre viene cucito. I cerchi sono disponibili in varie dimensioni, quindi assicurati di avere la taglia giusta per il tuo design.
Aghi: Usa il aghi da ricamo appropriati per la tua macchina e il tuo tessuto. It’;È importante cambiare regolarmente gli aghi per mantenere la qualità del punto.
Filo: Selezionare filo da ricamo di alta qualità in una gamma di colori per adattarsi ai tuoi progetti. I fili di poliestere e rayon sono comunemente usati per il ricamo a macchina.
Tessuto e stabilizzatore: Scegli il tessuto giusto per il tuo progetto, considerando il peso, stirata, e stabilità. Gli stabilizzatori vengono utilizzati per sostenere il tessuto durante la cucitura ed evitare arricciature.
Avere gli strumenti e i materiali giusti garantirà progetti di ricamo fluidi e di successo.
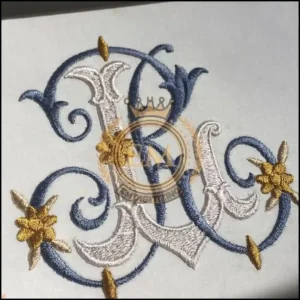
Scelta e progettazione del monogramma
Ora arriva la parte divertente: scegliere e progettare il tuo monogramma!
Selezione dello stile del monogramma
Quando si tratta di monogrammi ricamati a macchina, le possibilità sono infinite. Inizia decidendo uno stile monogramma adatto ai tuoi gusti e all'estetica generale che desideri ottenere.
Che tu preferisca il classico ed elegante oppure il moderno e audace, there’;C'è uno stile là fuori per tutti. Prendi ispirazione dai design dei monogrammi esistenti o crea il tuo tocco unico!
Esplorazione degli elementi di design e delle opzioni di personalizzazione
Dopo aver selezionato lo stile del monogramma, it’;È ora di personalizzarlo ulteriormente incorporando elementi di design. Prendi in considerazione l'aggiunta di elementi decorativi come svolazzi, cornici, o motivi che riflettono la tua personalità o lo scopo del progetto di ricamo.
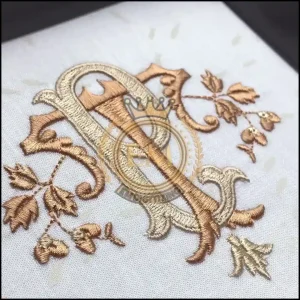
Puoi anche sperimentare caratteri diversi, dimensioni, e posizionamenti per rendere il tuo monogramma davvero unico nel suo genere.
Digitalizzazione del design del monogramma
Una volta finalizzato il design del monogramma, it’;È ora di digitalizzarlo per il ricamo a macchina.
A digitalizza il tuo monogramma, you’;Avrai bisogno di un software di ricamo che ti consenta di creare o importare file di disegno. Questi programmi software spesso dispongono di strumenti e funzionalità integrati progettati specificamente per la digitalizzazione.
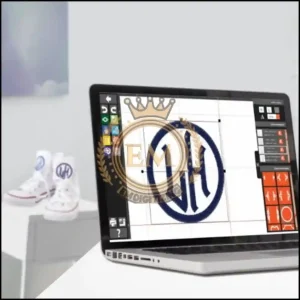
Follow the software’;s istruzioni per importare il tuo disegno, assegnare tipi di punto e densità, e perfezionare tutti i dettagli per garantire un risultato pulito e raffinato.
Ma se trovi difficile la digitalizzazione, puoi assumerci. Noi di EMdigitizing offriamo servizi di digitalizzazione del ricamo alla tariffa più conveniente possibile.
Configurazione della macchina da ricamo
Iniziare con il ricamo a macchina potrebbe sembrare intimidatorio, but don’;Non preoccuparti, it’;È più semplice di quanto sembri. Il primo passo per impostare il tuo monogramma digitale per il ricamo a macchina è configurare la macchina da ricamo stessa.
Assicurati di avere i materiali necessari, come il telaio da ricamo, stabilizzatore, e filo, pronto prima di iniziare.
Preparazione della macchina per il ricamo
Prima di iniziare a cucire, it’;È fondamentale garantire che la macchina sia pronta per il ricamo. Inizia selezionando quello appropriato file di disegno del ricamo sulla tua macchina. Assicurati che il design sia compatibile con il tuo machine’;formato file s.
Once you’;ho scelto il design, fissare saldamente il telaio da ricamo alla macchina. Ciò manterrà il tessuto in posizione durante il processo di cucitura.
Testare e regolare le impostazioni
Anche le ricamatrici più esperte conoscono l'importanza di testare e regolare le impostazioni della macchina.
It’;È sempre una buona idea eseguire una prova su un pezzo di tessuto di scarto prima di ricamare il progetto finale. Ciò ti consentirà di apportare tutte le modifiche necessarie per garantire una qualità del punto ottimale.
Esecuzione di test e modifiche
L'esecuzione di cicli di prova aiuta a identificare eventuali problemi prima di iniziare il ricamo vero e proprio. Prestare molta attenzione alla tensione del filo, lunghezza del punto, e densità durante questi test.
If the design isn’;non esce come previsto, don’;Non scoraggiarti. La regolazione di queste impostazioni potrebbe richiedere un po’ di tentativi ed errori, but it’;Fa tutto parte del processo di apprendimento.
Ottimizzazione della lunghezza del punto, Densità, e tensione
Per ottenere i migliori risultati, prenditi del tempo per ottimizzare cucire densità, lunghezza, e le impostazioni di tensione sulla macchina. La regolazione della lunghezza del punto può influire sul livello di dettaglio del monogramma ricamato a macchina, mentre la densità influisce sullo spessore complessivo del disegno
Tensione adeguata assicura che i fili siano uniformemente bilanciati. Experiment with these settings until you’;sei soddisfatto del risultato.
Avvio del processo di ricamo a macchina
Now that you’;Ho configurato la macchina e testato le impostazioni, it’;È ora di tuffarsi nel processo di ricamo a macchina. Segui questi passaggi per avviare il tuo monogramma!
Caricamento del progetto e preparazione della macchina
Inizia caricando il disegno digitalizzato nel tuo macchina da ricamo. Assicurati che il disegno sia centrato e posizionato correttamente sul tessuto. Ricontrolla che il telaio sia fissato saldamente in modo che il tessuto rimanga teso durante tutto il processo di cucitura.
Esecuzione del processo di ricamo
Con tutto predisposto, it’;È ora di premere il pulsante di avvio e osservare la magia accadere! Mentre la macchina inizia a cucire, tieni d'occhio il processo per assicurarti che il monogramma venga fuori come desiderato. Siediti, relax, e lascia che la tua macchina faccia il suo dovere!
Tocchi finali e suggerimenti per la risoluzione dei problemi
Una volta che la macchina ha finito di ricamare il tuo monogramma, it’;È ora di aggiungere gli ultimi ritocchi e affrontare eventuali problemi di risoluzione dei problemi che potrebbero sorgere.
Rimozione del ricamo dal telaio
Rimuovere con attenzione il tessuto dal telaio, facendo attenzione a non danneggiare i punti.
Strappare delicatamente eventuali eccessi lo stabilizzatore dal rovescio del tessuto e tagliare eventuali fili sciolti. Voilà! Il tuo monogramma è ora pronto per essere ammirato.
Gestione dei problemi comuni e tecniche di risoluzione dei problemi
Se riscontri problemi durante il processo di ricamo, don’;t panico!
It’;È normale affrontare le sfide lungo il percorso. Refer to your machine’;s manuale o chiedere aiuto alle comunità online o ai forum per suggerimenti sulla risoluzione dei problemi. Con un po' di pazienza e perseveranza, you’;Supererai ogni ostacolo e diventerai un professionista del ricamo a macchina in pochissimo tempo.
Ricapitoliamo
Insomma, creare un monogramma digitale per il ricamo a macchina è uno sforzo gratificante e creativo. Seguendo la procedura dettagliata descritta in questo articolo, puoi progettare e cucire con sicurezza bellissimi monogrammi sui tuoi articoli in tessuto.
Ricordati di raccogliere il materiali necessari, scegli un design adatto, digitalizzarlo, configura la tua macchina da ricamo, ed eseguire test approfonditi prima di iniziare il processo di ricamo.
Con pratica e pazienza, you’;Potrai padroneggiare l'arte della monogrammazione digitale e aggiungere un tocco personalizzato alle tue creazioni. Cuciture felici!
EMDigitalizzazione: Il tuo esperto di digitalizzazione del ricamo a cui rivolgersi
Stai cercando aiuto con un progetto di ricamo?
EMdigitizing rappresenta la scelta migliore. Siamo specializzati nella fornitura di servizi di digitalizzazione di ricami e di arte vettoriale di prim'ordine, il tutto consegnato con tempi di consegna celeri. Ti invitiamo ad esplorare il nostro sito web e scoprire la gamma di servizi che offriamo.
Per dare un benvenuto speciale ai nostri nuovi clienti, we’;Siamo entusiasti di offrire un'esclusiva 50% sconti su tutti i nostri servizi. Inoltre, noi forniamo preventivi gratuiti nel giusto 5 minuti, assicurandoti di poter pianificare rapidamente e facilmente il tuo progetto.
Don’;Non perdere questa fantastica opportunità di migliorare il tuo progetto di ricamo con l'esperienza di EMdigitizing.
Se hai domande sui nostri servizi o su questa offerta, non esitate a contattarci. Grazie per averci considerato per le tue esigenze di ricamo.
Domande frequenti:
sì, puoi monogramma con una macchina da ricamo. Queste macchine hanno spesso stili di monogrammi preimpostati o consentono di caricare disegni personalizzati per monogrammi personalizzati.
Per ricamare un monogramma, seleziona prima lo stile e le lettere del monogramma. Quindi, posizionare il tessuto in un telaio da ricamo, predisporre la macchina da ricamo con il filo scelto, e avviare la macchina per cucire il disegno sul tessuto.
Il formato monogramma tradizionale per un individuo è la prima iniziale del nome, un'iniziale più grande del cognome al centro, e la prima iniziale del secondo nome per ultima. Per le coppie sposate, the woman’;L'iniziale è la prima, l'iniziale del cognome condiviso (più grande) nel mezzo, and the man’;è l'ultimo iniziale.
sì, un monogramma può essere composto da due lettere. Di solito è composto dalle iniziali del nome e del cognome. It’;È più semplice e viene spesso utilizzato per personalizzare oggetti in cui lo spazio è limitato.
Un monogramma composto da una sola lettera utilizza in genere l'iniziale del cognome. It’;È una scelta classica ed elegante, spesso utilizzato per articoli in cui si desidera la semplicità o per articoli personali in cui il nome completo non è necessario.


