
El bordado ha recorrido un largo camino desde los días en que se cosían minuciosamente diseños a mano.. Con el avance de la tecnología, Ahora tenemos la capacidad de crear diseños intrincados y hermosos usando monogramas digitales para bordado a máquina..
Estos le permiten personalizar y personalizar sus proyectos de bordado con facilidad y precisión..
En este articulo, Lo guiaremos a través del proceso paso a paso para configurar un monograma para bordado a maquina. Así que prepárate para dar rienda suelta a tu creatividad y añadir un toque de estilo personal a tus proyectos.!
Configuración de monograma digital: Una guía para entusiastas del bordado
Reunir los materiales y equipos necesarios
Antes de sumergirnos en el mundo de los monogramas digitales, it’;Es esencial reunir todos los materiales y equipos necesarios.. Here’;s what you’;necesitaré:
Maquina de bordar: Elige un bordado de monograma máquina que se adapta a tus necesidades y presupuesto. Asegúrese de que sea compatible con el software de bordado que planea utilizar.
Aros de bordado: Mantienen la tela tensa mientras se cose.. Los aros vienen en varios tamaños., así que asegúrese de tener el tamaño correcto para su diseño.
Agujas: Utilice el agujas de bordar apropiadas para su máquina y tejido. It’;Es importante cambiar las agujas periódicamente para mantener la calidad de la puntada..
Hilo: Seleccionar hilo de bordar de alta calidad En una gama de colores para adaptarse a tus diseños.. Los hilos de poliéster y rayón se utilizan habitualmente para el bordado a máquina..
Tela y estabilizador: Elige la tela adecuada para tu proyecto, considerando el peso, estirar, y estabilidad. Los estabilizadores se utilizan para sostener la tela durante la costura y evitar arrugas..
Tener las herramientas y materiales adecuados garantizará proyectos de bordado fluidos y exitosos..
Elegir y diseñar el monograma
Ahora viene la parte divertida: elegir y diseñar tu monograma.!
Seleccionar el estilo del monograma
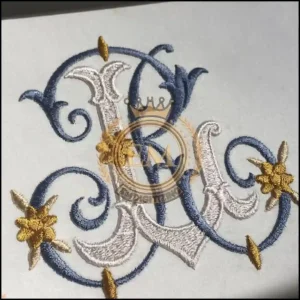
Cuando se trata de monogramas bordados a máquina, Las posibilidades son infinitas. Comience por elegir un estilo de monograma que se adapte a sus gustos y a la estética general que desea lograr..
Si prefieres lo clásico y elegante o lo moderno y atrevido, there’;Hay un estilo para todos.. Inspírate en diseños de monogramas existentes o crea tu propio toque único.!
Explorando elementos de diseño y opciones de personalización
Después de seleccionar su estilo de monograma, it’;Es hora de personalizarlo aún más incorporando elementos de diseño.. Considere agregar elementos decorativos como florituras., marcos, o motivos que reflejen su personalidad o el propósito del proyecto de bordado.
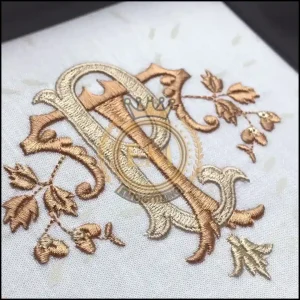
También puedes experimentar con diferentes fuentes, tamaños, y ubicaciones para hacer que su monograma sea verdaderamente único.
Digitalizando el diseño del monograma
Una vez que haya finalizado el diseño de su monograma, it’;Es hora de digitalizarlo para bordarlo a máquina..
A digitaliza tu monograma, you’;Necesitará un software de bordado que le permita crear o importar archivos de diseño.. Estos programas de software A menudo tienen herramientas integradas y funciones diseñadas específicamente para la digitalización..
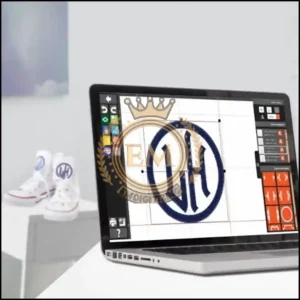
Follow the software’;s instrucciones para importar su diseño, asignar tipos de puntadas y densidades, y refinar cualquier detalle para garantizar un resultado limpio y pulido.
Pero si te resulta difícil digitalizar, puedes contratarnos. Nosotros en EMdigitalizing ofrecemos servicios de digitalización de bordados al precio más asequible posible.
Configurar la máquina de bordar
Comenzar a bordar a máquina puede parecer intimidante, but don’;no te preocupes, it’;Es más simple de lo que parece.. El primer paso para configurar su monograma digital para bordado a máquina es configurar la propia máquina de bordar..
Asegúrate de tener los materiales necesarios., tales como el aro de bordado, estabilizador, y hilo, listo antes de comenzar.
Preparar la máquina para bordar
Antes de empezar a coser, it’;Es fundamental garantizar que su máquina esté lista para bordar.. Comience seleccionando el apropiado archivo de diseño de bordado en tu máquina. Asegúrese de que el diseño sea compatible con su machine’;formato de archivo s.
Once you’;He elegido el diseño., fije el bastidor de bordado de forma segura a la máquina. Esto mantendrá la tela en su lugar durante el proceso de costura..
Prueba y ajuste de la configuración
Incluso las bordadoras más experimentadas conocen la importancia de probar y ajustar la configuración de la máquina..
It’;Siempre es una buena idea realizar una prueba en un trozo de tela sobrante antes de bordar su proyecto final.. Esto le permitirá realizar los ajustes necesarios para garantizar una calidad de puntada óptima..
Realizar ejecuciones de prueba y realizar ajustes
Realizar pruebas ayuda a identificar posibles problemas antes de comenzar el bordado real.. Preste mucha atención a la tensión del hilo., largo de puntada, y densidad durante estas pruebas.
If the design isn’;no sale como se esperaba, don’;no te desanimes. Ajustar estas configuraciones puede requerir un poco de prueba y error, but it’;Todo es parte del proceso de aprendizaje..
Optimización de la longitud de la puntada, Densidad, y tensión
Para lograr los mejores resultados, tómate un tiempo para optimizar puntada densidad, longitud, y ajustes de tensión en su máquina. Ajustar la longitud de la puntada puede afectar el nivel de detalle del monograma de bordado a máquina., mientras que la densidad afecta el espesor total del diseño
tensión adecuada asegura que los hilos estén uniformemente equilibrados. Experiment with these settings until you’;Estoy satisfecho con el resultado..
Iniciar el proceso de bordado a máquina
Now that you’;He configurado la máquina y probado los ajustes., it’;Es hora de sumergirse en el proceso de bordado a máquina.. Siga estos pasos para poner en marcha su monograma!
Cargando el diseño y preparando la máquina
Comience cargando el diseño digitalizado en su Maquina de bordar. Asegúrese de que el diseño esté centrado y colocado correctamente en la tela.. Vuelva a verificar que el aro esté bien sujeto para que la tela permanezca tensa durante todo el proceso de costura..
Ejecutando el proceso de bordado
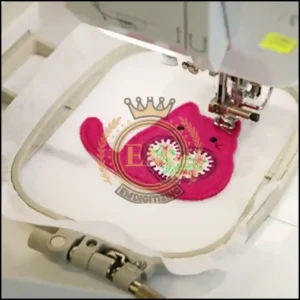
Con todo configurado, it’;Es hora de presionar el botón de inicio y ver cómo sucede la magia.! Cuando la máquina comienza a coser, Esté atento al proceso para asegurarse de que el monograma salga como se desea.. Recostarse, relajarse, y deja que tu máquina haga lo suyo!
Toques finales y consejos para solucionar problemas
Una vez que la máquina haya terminado de bordar tu monograma, it’;Es hora de agregar esos toques finales y abordar cualquier problema de solución de problemas que pueda surgir..
Quitar el bordado del aro
Retire con cuidado la tela del aro., teniendo cuidado de no dañar los puntos.
Retire con cuidado cualquier exceso el estabilizador desde la parte posterior de la tela y recorte los hilos sueltos. Voilá! Tu monograma ya está listo para ser admirado..
Manejo de problemas comunes y técnicas de resolución de problemas
Si encuentra algún problema durante el proceso de bordado, don’;no entre en pánico!
It’;Es normal enfrentar desafíos en el camino.. Refer to your machine’;s manual o busque ayuda en comunidades o foros en línea para obtener sugerencias para la solución de problemas.. Con un poco de paciencia y perseverancia., you’;Superarás cualquier obstáculo y te convertirás en un profesional del bordado a máquina en poco tiempo..
Recapitulemos
En conclusión, Configurar un monograma digital para bordar a máquina es un esfuerzo creativo y gratificante.. Siguiendo el proceso paso a paso descrito en este artículo, Puedes diseñar y coser con confianza hermosos monogramas en tus prendas de tela..
Recuerde reunir el materiales necesarios, elige un diseño adecuado, digitalizarlo, configura tu máquina de bordar, y realizar pruebas exhaustivas antes de comenzar el proceso de bordado.
Con practica y paciencia, you’;Podrás dominar el arte de los monogramas digitales y añadir un toque personalizado a tus creaciones.. feliz costura!
EMdigitalización: Su experto en digitalización de bordados
¿Estás buscando ayuda con un proyecto de bordado??
La digitalización electrónica se erige como la principal opción. Nos especializamos en brindar servicios de arte vectorial y digitalización de bordados de primer nivel., todo entregado con tiempos de respuesta rápidos. Le invitamos a explorar nuestro sitio web y descubrir la gama de servicios que ofrecemos..
Como bienvenida especial a nuestros nuevos clientes., we’;Estamos emocionados de ofrecer una exclusiva 50% descuento en todos nuestros servicios. Además, proporcionamos cotizaciones gratis en solo 5 minutos, garantizando que pueda planificar su proyecto rápida y fácilmente.
Don’;No pierda esta fantástica oportunidad de mejorar su proyecto de bordado con la experiencia de EMdigitizing..
Si tiene alguna pregunta sobre nuestros servicios o esta oferta, no dude en comunicarse. Gracias por considerarnos para sus necesidades de bordado..
Preguntas frecuentes:
Sí, puedes monogramar con una máquina de bordar. Estas máquinas suelen tener estilos de monogramas preestablecidos o le permiten cargar diseños personalizados para monogramas personalizados..
Para bordar un monograma, Primero seleccione el estilo del monograma y las letras.. Después, Coloque la tela en un bastidor de bordado., configurar la máquina de bordar con el hilo elegido, y encienda la máquina para coser el diseño en la tela.
El formato tradicional de monograma para un individuo es la primera inicial del nombre., una inicial más grande del apellido en el medio, y la primera inicial del segundo nombre. Para parejas casadas, the woman’;s inicial es primero, la inicial del apellido compartido (más grande) en el centro, and the man’;s inicial último.
Sí, un monograma puede tener dos letras. Por lo general, consta de las iniciales del nombre y el apellido.. It’;Es más simple y se usa a menudo para personalizar artículos donde el espacio es limitado..
Un monograma de una sola letra suele utilizar la inicial del apellido.. It’;Es una elección clásica y elegante., a menudo se usa para artículos donde se desea simplicidad o para artículos personales donde el nombre completo no es necesario.


