
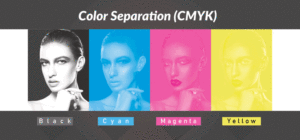
A process through which any design or artwork is separated into different color segments is called Color Separation For Screen Printing. To make a design on any given item, it is important to first separate the colors as this is an important part of screen printing.
Embroidery Digitizing Services
Types Of Color Separation For Screen Printing:
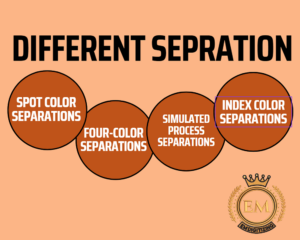
There are different types of Color Separation For Screen Printing that includes:
1. Spot Color Separations:

This is the most common type of color separations used in screen printing. Spot color separations are for vector images.
Spot color separations include some halftone dots to create a shading effect. Spot color separations are generally made in illustrator or CorelDraw.
2. Four Color Separations
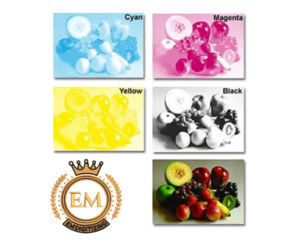
The Four-Color Separations process also uses halftone dots but of CMYK – CYAN, MAGENTA, YELLOW, and, BLACK to make detailed photorealistic pictures.
These types of separations are done in Photoshop.
3. Simulated-Process Separations:

Like the four-color separations process, simulated process separations use halftone dots to make high-detailed or photorealistic pictures.
The difference is that simulated process separations use a range of ink colors. They tend to be more vibrant than four-color separations and could be printed on darker fabrics, unlike four-color separations. Simulated process separations are done in Photoshop.
4. Index Color:
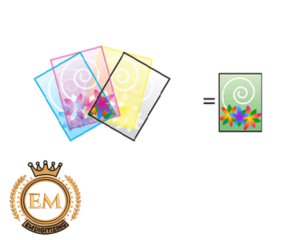
Index color separations use the same size square pixels, rather than halftone dots, to make color shading. Performing, printing, and index color separation could be simpler to perform than process separations.
Though, it often takes more colors to make a photorealistic print. The index color separations are done in Photoshop.
Creating Color Separation For Screen Printing:
You can absolutely make successful color separations, project after project, comparatively simple, with no training or fancy software. The ideal way to make sure quality color separations that result in exact, clear screen prints is to make and follow a process for color separation time and time again.
Different screen printers will develop their own preferences when it comes to making separations but if you find and commit to a procedure that works best for you, and pay attention to potential issues, oyuwill increase the success ratio of your separations and lessen waste in your shop!
1. Begin With Good Artwork:

Always make sure, to begin with, good artwork. If a customer sends you a low-resolution picture trying to make that picture work can end in frustration for both you and your client.
Ensure all of your clients know what you want in a picture to make a quality screen print, and ensure you address subpar artwork with clients, if it is submitted. In the end, your clients will thank you for putting the effort and time into finding or making artwork that results in a quality print.
2. Know Which Colors The Separation Will Involve:
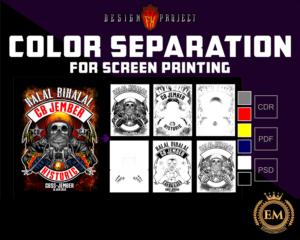
Before you start, identify which colors will be involved in the separation. Understand what might cause you trouble, like gradient transitions from two opposite colors or odd shades.
3. Extract Your Colors:
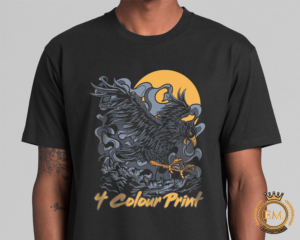
Separate every color, one at a time. For spot color separations, ensure that any overlapping colors are removed from the color that is visually UNDER to avoid printing layer upon layer of ink.
4. Address Potential Issues:
There are all kinds of issues that appear with color separation for screen printing, and the exact challenges you face will rely on which separation process you are using and the image you are printing. Four-color separations might show color pollution as you separate. That is, other colors entering the picture that you were not expecting to be there.
The CMYK – CYAN, MAGENTA, YELLOW, and, a BLACK palette that Photoshop defaults to is for printing on paper, so you may want to import your own CMYK – CYAN, MAGENTA, YELLOW, and, BLACK palette. If you transfer a vector art image into Photoshop, the program might soften the edges automatically with its anti-aliasing setting, which you might have to reverse. Eventually, you have to understand what potential issues your type of color separation might face and be ready to face those issues head on during your color separation for the screen printing process.
Print Your Separated Images Successfully:
While color separation for screen printing can be a vital part of the production process, screen printers know that there is a lot to be done to make a high-quality print from the images they have separated. Once you are hundred percent sure that you have implemented your color separation successfully, ensure you follow screen printing best practices to make sure a quality print.
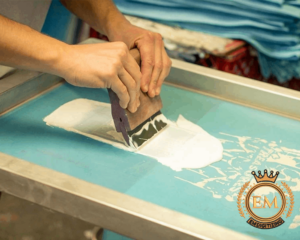
Create solid film positives, and properly expose your screens. Ensure you are using the right inks, mesh, and squeegees for your project, and ensure that all of your tools are in good condition. And finally, check your presses before you print: loose print heads or pallets can expose your registration, turning your successful color separation into a failed print!
Closing Line:
That was the end of this article. We hope you now understand what color separation for screen printing is, its types, and how to make a color separation for screen printing.
We hope you enjoyed reading this article as we did in writing. If you want to customize color separation services contact us as we promise quality and on-time delivery to all kinds of businesses worldwide.
At EM DIGITIZING, we deliver the best customized color separation services with the best quality. We offer 50% off on all our services to our potential customers on their first order. So, get a free quote now and we will get in touch with you.
Hope this article will be helpful for you guys!
A process through which any design or artwork is separated into different color segments is called Color Separation. To make a design on any given item, it is important to first separate the colors as this is an important part of screen printing.
You can absolutely make successful color separations, project after project, comparatively simple, with no training or fancy software. The ideal way to make sure quality color separations that result in exact, clear screen prints is to make and follow a process for color separation time and time again.
Different screen printers will develop their own preferences when it comes to making separations but if you find and commit to a procedure that works best for you, and pay attention to potential issues, you will increase the success ratio of your separations and lessen waste in your shop!
There are different types of Color Separation For Screen Printing that includes:
1. SPOT COLOR SEPARATIONS:
2. FOUR-COLOR SEPARATIONS:
3. SIMULATED-PROCESS SEPARATIONS:
4. INDEX COLOR:
While color separation for screen printing can be a vital part of the production process, screen printers know that there is a lot to be done to make a high-quality print from the images they have separated. Once you are hundred percent sure that you have implemented your color separation successfully, ensure you follow screen printing best practices to make sure a quality print.
While color separation for screen printing can be a vital part of the production process, screen printers know that there is a lot to be done to make a high-quality print from the images they have separated. Once you are hundred percent sure that you have implemented your color separation successfully, ensure you follow screen printing best practices to make sure a quality print.
Create solid film positives, and properly expose your screens. Ensure you are using the right inks, mesh, and squeegees for your project, and ensure that all of your tools are in good condition. And finally, check your presses before you print: loose print heads or pallets can expose your registration, turning your successful color separation into a failed print!
