Come correggere gli errori di ricamo? Guida completa
introduzione:
Il ricamo è un hobby bello e soddisfacente, ma a volte, anche le ricamatrici più abili commettono errori. La buona notizia è che la maggior parte degli errori commessi nel ricamo possono essere corretti con un po’ di pazienza e cura.
In questo articolo, we’;Esamineremo gli errori più tipici che le persone commettono durante il ricamo e ti guideremo su come correggerli. Inoltre, parleremo di alcune idee e trucchi che ti aiuteranno a stare lontano dagli errori.
Come correggere gli errori di ricamo? Guida completa
Strumento necessario per correggere gli errori di ricamo
Vediamo cosa ci serve per correggere gli errori di ricamo:
- Taglia asole
- Piccole forbici
- Pennarello indelebile
- Smacchiatore
- Gomma per cucire
- Rasoio
- Macchina da ricamo
Modi per correggere gli errori di ricamo
Una volta che hai gli strumenti giusti per correggere gli errori durante il ricamo, è tempo di muoversi verso le vie:
Modo # 1: Rimuovere le cuciture nel ricamo
Puoi strappare i punti in due modi:
1. Usa un taglia asole
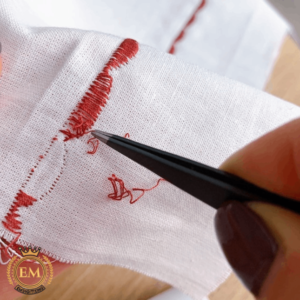
Il modo più veloce ed economico per eliminare i ricami è con un taglia asole. Basta girare il tuo progetto di ricamo per vedere il retro del tessuto. Per strappare i punti, fai scorrere il taglia asole sotto di essi e sollevalo inclinandolo. Fai attenzione a farlo solo pochi centimetri o pollici alla volta.
Inizia a rimuovere i punti pieni se stai lavorando con un oggetto da ricamo che ha più strati. Go back to the fabric’;è davanti. Prendi le maglie dal davanti del tessuto e tirale fuori. Fallo ancora e ancora finché tutto il ricamo non sarà sparito.
2. Usa piccole forbici
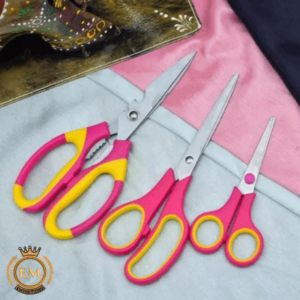
Se il ricamo è troppo spesso è possibile rimuoverlo utilizzando un taglia asole, puoi tagliare i fili con piccole forbici. Don’;t tagliare il tessuto con le forbici.
3. Usa una gomma per punti
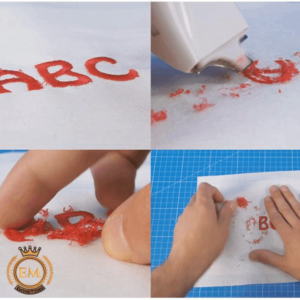
Una cancellapunti è uno strumento specializzato utilizzato dai professionisti per rimuovere in modo facile e sicuro i punti ricamati a macchina dal tessuto. È un metodo più rapido ed efficace per rimuovere i ricami dal tessuto.
4. Usa un rasoio
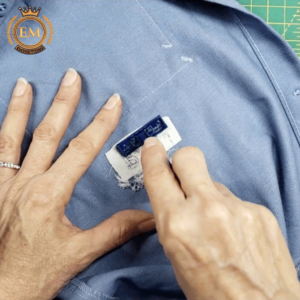
La rimozione dei punti di ricamo può essere eseguita utilizzando un rasoio. Capovolgi il tessuto e rifinisci il ricamo con il rasoio. Assicurati di non tagliare il tessuto.
Modo # 2: Copri l'errore con una toppa
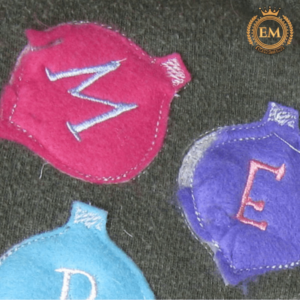
Usare una toppa è un modo per correggere un errore nel tuo progetto di ricamo. La procedura è la seguente:
- Scegli una toppa che si abbini al disegno da ricamo e al tessuto.
- Regola le dimensioni e la forma della patch in modo che possa nascondere l'errore.
- Copri l'errore con la toppa e fissalo con uno spillo.
- Attacca la toppa al tessuto cucendola a mano o con un macchina da cucire. Be sure to stitch around the patch’;s bordi per mantenerlo in posizione.
- Taglia via eventuali fili o tessuti in eccesso.
Ricorda che questa strategia funzionerà solo in condizioni particolari. Poiché una toppa può essere rigida, it wouldn’;Non sta bene su tessuti troppo sottili. Inoltre, sarebbe difficile trovare una patch abbastanza grande da coprire un errore abbastanza evidente. Se l'errore è troppo grande o evidente, potresti dover ricominciare da capo o provare qualcos'altro.
Modo # 3: Aggiungi un nuovo elemento di design
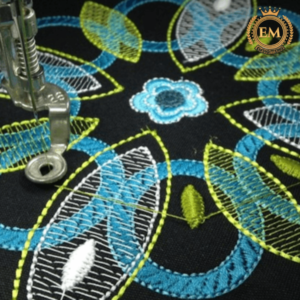
Un altro modo per coprire gli errori di ricamo è aggiungere un nuovo elemento di design. I passaggi sono i seguenti:
- Scegli una nuova funzionalità di progettazione che si adatti bene al tuo disegno di ricamo.
- Usa un macchina da ricamo per aggiungere un nuovo elemento di design al tessuto. Assicurati che si adatti al disegno da ricamo già presente.
- Una volta terminato il disegno, tagliare eventuali fili o tessuto in eccesso.
Ricorda che questo metodo richiede un po' di fantasia e abilità. È necessario un eccellente senso del design e l'abilità di incorporare la nuova funzionalità nel vecchio motivo ricamato.
Anche, ensure the design element you chose fits well with the rest of the embroidery and doesn’;Non risaltare troppo. Se non sei sicuro delle tue capacità di progettazione, È preferibile assumere un designer di ricamo professionista.
Puoi assumere EMdigitizing per i tuoi disegni di digitalizzazione di ricamo. I nostri digitalizzatori forniscono un disegno che può fondersi con il tuo vecchio disegno da ricamo per correggerne gli errori. Così clicca qui per prenotare i tuoi progetti con un rapido turnover.
Cosa fare se non riesci a correggere l'errore di ricamo?
A volte non è possibile correggere gli errori di ricamo nei modi sopra menzionati.
Ti senti frustrato? Giusto?
Abbiamo altre soluzioni per te, quindi continua a leggere!
Usa l'indumento per piccoli progetti
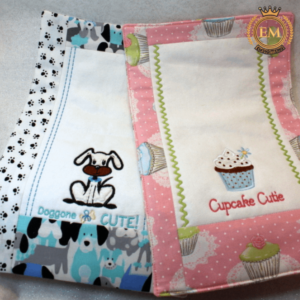
Hai provato di tutto: taglia asole, forbici, rasoio, eccetera, ma non riesco a correggere gli errori durante il ricamo. Puoi usare quel tessuto per progetti più piccoli. Ad esempio, puoi creare una piccola borsa o un sacchetto, realizzare accessori per capelli come fasce per capelli, e molte altre cose.
It’;È ora di usare il tuo creatività e pensare fuori dagli schemi di fronte alla sfida di riutilizzare tessuti che presentano errori di ricamo. Un'altra cosa che puoi fare con gli scarti di tessuto è creare un cuscino patchwork o trasformarli in un nuovo tessuto.
Crea un nuovo pezzo per l'indumento e rifai il ricamo
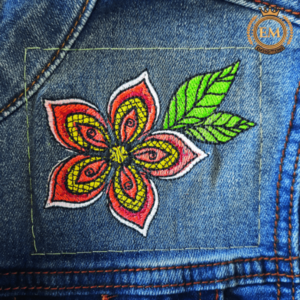
Se sei fortunato e rovini una parte del capo che può essere facilmente rimossa, puoi sempre ricominciare da capo. Ad esempio, se il nome è sul colletto di un vestito, potresti toglierlo e indossare invece un nuovo colletto.
Mi sembra un sacco di lavoro, ma se l'oggetto è molto importante per te dal punto di vista finanziario o emotivo, potrebbe essere la cosa giusta da fare.
Offerta bonus: Se utilizzi i nostri ricami digitali, puoi usarli ancora e ancora senza compromettere la qualità. La tua macchina da ricamo può leggerli facilmente e completare il tuo progetto senza problemi. Contattaci adesso.
Suggerimenti per la rimozione delle macchie nel ricamo
- Macchia d'olio: Questo accade comunemente. Assorbire l'olio è l'obiettivo principale qui. Non strofinare mai! Si consiglia di mettere un materiale assorbente sopra l'olio e lasciarlo riposare 30 minuti. Materiali assorbenti adatti includono borotalco, bicarbonato di sodio, talco in polvere, gesso, farina di mais, and waterless mechanic’;è sapone. Prendi un cucchiaio e raschia con cura l'olio e la polvere dai vestiti.
- Macchia stabilizzante: If it’;È solubile in acqua, immergerlo in acqua fredda. Si prega di non provare a stirarlo ulteriormente se si tratta di una macchia di ferro. Per una rimozione più semplice, indebolire l'adesivo stirando il tessuto per alcuni secondi prima di staccare lo stabilizzatore. Per eliminare ancora di più la colla, metterci sopra un pezzo di stoffa umido, premerlo, e poi rimuoverlo immediatamente. Do this again and again until it’;è fatto.
Come evitare problemi di ricamo?
Ecco alcuni suggerimenti per aiutarti a evitare errori di ricamo:
- Disegni di ricamo di buona qualità: Secondo noi, questo è uno dei modi migliori per garantire il successo! Acquista sempre disegni da un digitalizzatore affidabile che abbia una solida reputazione e venda disegni da ricamo privi di errori.
Suggerimento bonus: Desideri ottenere servizi di digitalizzazione del ricamo a tariffe convenienti senza compromettere la qualità? Allora la digitalizzazione EM è la scelta migliore. Offriamo servizi di digitalizzazione del ricamo con la promessa che la tua macchina da ricamo funzionerà perfettamente durante l'intero progetto.
- Usa uno stabilizzatore: Uno stabilizzatore viene utilizzato per evitare che il tessuto si allunghi e si arricci.
- Usa la tensione del filo corretta: Se hai bisogno di sapere come modificare il file tensione del filo sulla tua macchina, consulta il manuale di istruzioni fornito con la macchina da ricamo.
- Intelaiare correttamente il tessuto: It’;È importante mantenere il tessuto il più teso possibile all'interno telaio senza strapparlo.
- Controlla il posizionamento del disegno prima di iniziare a cucire: Controlla che il disegno sia al centro e allineato correttamente.
- Prenditi il tuo tempo: Lavorare con il ricamo richiede molto tempo e pazienza. Don’;Non avere così tanta fretta. Altrimenti, potresti finire per commettere uno stupido errore.
Parole finali: I modi migliori per correggere gli errori di ricamo
Please don’;Non stressarti se commetti un errore!
Con molta attenzione e tempo, la maggior parte degli errori di ricamo possono essere corretti. Se segui attentamente le istruzioni contenute in questo articolo, dovresti essere in grado di salvare la tua creazione di ricamo.
DIGITALIZZAZIONE EM: IL TUO PARTNER PER LA DIGITALIZZAZIONE DEL RICAMO
EMDigitizing è un'azienda esperta e rispettabile che offre servizi completi di digitalizzazione e grafica vettoriale a clienti di tutto il mondo per le loro esigenze di progettazione di ricamo e stampa.
Se hai bisogno di qualcosa di digitalizzato rapidamente e di alta qualità, EMDigitalizzazione è un'opzione fantastica. Offriamo ai clienti alle prime armi a 50% sconti su tutti i nostri servizi, più un preventivo gratuito generato in meno di 5 minuti.
Puoi porre qualsiasi domanda su questo articolo nei commenti, and don’;Non dimenticare di condividerlo con le persone che ritieni possano trovarlo utile.
Grazie per aver letto, e buona fortuna!
Per correggere gli errori di ricamo, puoi seguire queste strade:
- Rimuovi la maglia e ricomincia
- Copri l'errore con una toppa
- Aggiungi un nuovo elemento di design
Ecco alcuni suggerimenti per aiutarti a evitare errori di ricamo:
- Buona qualità disegni da ricamo
- Usa uno stabilizzatore
- Usa la tensione del filo corretta
- Intelaiare correttamente il tessuto
- Controlla il posizionamento del disegno prima di iniziare a cucire
- Prenditi il tuo tempo
