Il ricamo è un mestiere bello e intricato che consente alle persone di esprimere la propria creatività e aggiungere tocchi personali a vari oggetti. Tuttavia, una sfida comune che le ricamatrici devono affrontare sono le increspature del ricamo: le antiestetiche pieghe o distorsioni del tessuto attorno alle aree ricamate.
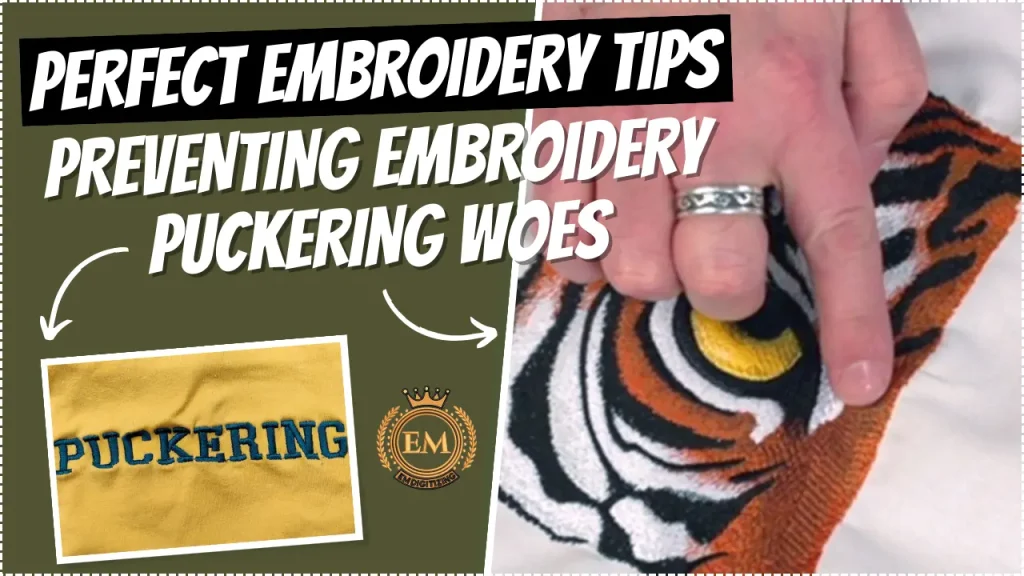
L'arricciatura può ridurre significativamente il qualità del ricamo e l'aspetto generale del progetto di ricamo finale. Per ottenere risultati di ricamo perfetti, è fondamentale comprendere le cause delle arricciature e attuare misure preventive durante tutto il processo di ricamo.
Suggerimenti per il ricamo perfetti: Prevenire i problemi di arricciature del ricamo
Cos'è l'arricciatura del ricamo?
Le arricciature nel ricamo si verificano quando il tessuto attorno al disegno ricamato diventa spiegazzato o arricciato, dando al tuo capolavoro una finitura tutt'altro che perfetta. Invece di punti lisci e dall'aspetto professionale, ti ritroverai con un pasticcio increspato che può essere piuttosto frustrante.
Perché è importante prevenire le arricciature per ottenere un ricamo perfetto?
A nessuno piace un ricamo spiegazzato, Giusto?
Se lo desideri, prevenire le arricciature è essenziale i tuoi progetti di ricamo per apparire lucido e ordinato. Le arricciature non solo influiscono sull'aspetto del tuo lavoro, ma possono anche rendere il tessuto rigido e scomodo.
Così, per ottenere quel ricamo perfetto, it’;È fondamentale affrontare le cause delle arricciature frontalmente.
Quali sono le cause delle arricciature da ricamo?
Per combattere le arricciature del ricamo, it’;È importante capire innanzitutto quali sono le cause. Ecco alcuni colpevoli comuni:
Tecniche di intelaiatura inadeguate
L'intelaiatura è il processo di fissaggio del tessuto in un telaio da ricamo per mantenerlo teso e stabile durante la cucitura. Inadeguato telaio da ricamo tecniche, ad esempio non intelaiare il tessuto abbastanza stretto o posizionarlo in modo non uniforme, può causare increspature.
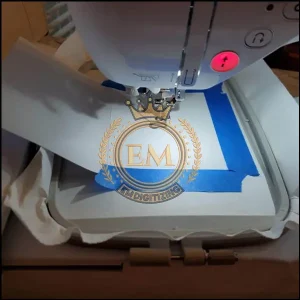
Dopotutto, if the fabric isn’;t adeguatamente fissato, it’;Si raggrinzirà e si accumulerà quando l'ago inizierà a fare la sua cosa.
Impostazioni di tensione errate
Scelte di tessuti non adatti
Non tutti i tipi di tessuto sono uguali quando si tratta di ricamo. Alcuni tessuti, come quelli leggeri o elastici, are more prone to puckering. ;
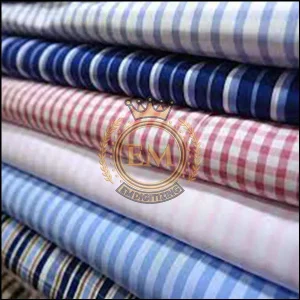
La loro natura delicata li rende soggetti a grinze sotto la pressione dei punti di ricamo. Scegliere il tessuto sbagliato può farti provare una profonda delusione.
Scelta corretta del tessuto per evitare arricciature nel ricamo
Ora che sappiamo che i tessuti non adatti possono contribuire alla formazione di grinze, let’;Scopriamo come effettuare la scelta giusta del tessuto che ti aiuterà a evitare questo incubo del ricamo.
Considerazioni sulla scelta dei tessuti adatti al ricamo
quando scelta dei tessuti per il ricamo, optare per quelli stabili e con una trama fitta. Tessuti come il cotone, biancheria, denim, e il twill sono un'ottima scelta perché possono sopportare la tensione dei punti di ricamo senza sgualcirsi.
Evita i tessuti troppo sottili o molto elastici, as they’;è più probabile che si arricci.
Testare il tessuto per la suscettibilità alle arricciature
Prima di iniziare un grande progetto di ricamo, it’;È sempre una buona idea testare il tessuto per la sua suscettibilità alle arricciature. Prendi un piccolo pezzo di tessuto e cucilo disegno del ricamo su di esso utilizzando diverse impostazioni di tensione e tecniche di intelaiatura.
Da questa parte, you’;Sapremo come reagisce il tessuto e potremo apportare le modifiche di conseguenza. It’;È come una corsa di prova prima dell'evento principale!
Tecniche di intelaiatura per evitare arricciature
Hooping might sound like something you’;vedrei in un circo, but it’;È in realtà un passo cruciale nella prevenzione delle increspature.
Let’;Esploriamo alcune tecniche di intelaiatura che manterranno il tessuto liscio e senza pieghe.
Utilizzo della dimensione giusta del telaio
La scelta della dimensione del telaio corretta per il tuo progetto di ricamo è essenziale. A hoop that’;Se è troppo piccolo, il tessuto si allungherà troppo, facendolo arricciare, while a hoop that’;Se è troppo grande, lascerà tessuto in eccesso che può anche causare pieghe.
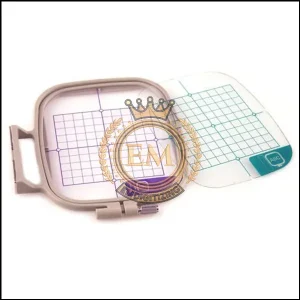
Trova la dimensione del telaio che corrisponde al tuo disegno e al tuo tessuto, and you’;sarai sulla buona strada verso una zona senza grinze.
Corretta tensione e allineamento dell'intelaiatura
Once you’;ho la dimensione giusta del telaio, it’;È tempo di concentrarsi sulla tensione e sull'allineamento. Assicurati che il tessuto sia teso e teso uniformemente all'interno del telaio.
Appianare eventuali grinze o pieghe prima di fissarlo. Align the fabric so that it’;È dritto e centrato all'interno del cerchio. L'adozione di questi passaggi aggiuntivi aiuterà a prevenire la formazione di grinze e a garantire che il ricamo risulti impeccabile.
Stabilizzatori del cerchio e il loro ruolo nella prevenzione delle grinze
Gli stabilizzatori del telaio sono la tua arma segreta contro le arricciature. Questi materiali utili, come stabilizzatori a strappo o tagliati, fornire ulteriore supporto al tessuto durante il ricamo.
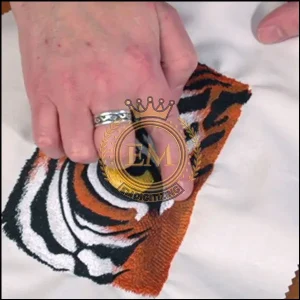
Aiutano a distribuire la tensione dei punti e ad evitare che il tessuto si arricci. L'utilizzo dello stabilizzatore appropriato per il tuo tipo di tessuto può fare un'enorme differenza nell'ottenimento di risultati di ricamo perfetti.
Scegliere lo stabilizzatore giusto per un ricamo fluido
Stabilizzatori per ricamo potrebbero sembrare gli agenti segreti del mondo del cucito, ma svolgono un ruolo cruciale nel prevenire la formazione di grinze e nell'ottenere ricami impeccabili.
Questi compagni fidati fungono da sistema di supporto per il tuo tessuto, mantenendolo teso e stabile durante tutto il processo di cucitura.
Diversi tipi di stabilizzatori e loro scopi
Gli stabilizzanti sono disponibili in vari gusti, ciascuno con uno scopo specifico. Gli stabilizzatori a strappo sono come i supereroi della prevenzione delle grinze, poiché forniscono un supporto temporaneo e possono essere facilmente rimossi dopo la cucitura.
D'altro canto, gli stabilizzatori tagliati sono più simili a guardie del corpo, offrendo supporto a lungo termine rimanendo attaccato al tessuto.
Stabilizzanti idrosolubili, come suggerisce il loro nome, svaniscono se esposti all'acqua. Sono ottimi per tessuti delicati o ricami con dettagli intricati.
Infine, abbiamo stabilizzatori a caldo, che scompaiono con l'applicazione del calore, making them ideal for fabrics that can’;Non gestire l'umidità.
Stabilizzatore adatto ai requisiti del tessuto e del design
Just like you wouldn’;t abbinare una giacca di pelle con le infradito, it’;È importante scegliere lo stabilizzatore giusto per il tessuto e il design. I tessuti spessi e pesanti richiedono stabilizzatori più robusti per mantenerli in linea, mentre i tessuti delicati necessitano di un supporto delicato per evitare distorsioni.
Considera anche la densità e la complessità del tuo progetto. I design densi richiedono ulteriore stabilità, quindi optare per stabilizzatori più forti. al contrario, i disegni più leggeri su tessuti delicati possono farla franca con stabilizzatori più leggeri.
La sperimentazione è fondamentale qui. Prova diversi stabilizzatori con ritagli di tessuto e una varietà di tipi di design per trovare il tuo abbinamento perfetto. Once you’;ho decifrato il codice dello stabilizzatore, you’;Sarai un passo avanti verso il nirvana del ricamo.
Regolazione delle impostazioni di tensione per la prevenzione delle grinze
Macchine da ricamo potrebbero sembrare bestie complesse, but don’;Non lasciarti ingannare dal loro aspetto intimidatorio. Nascosto sotto la superficie lucida si trova una funzione di controllo della tensione, pronto ad affrontare il problema delle increspature a testa alta.
Comprendere le impostazioni di tensione sulle macchine da ricamo
Le impostazioni di tensione determinano quanto saranno strette o allentate le cuciture. Immagina un tiro alla fune tra il filo superiore e quello inferiore, con il tessuto intrappolato nel mezzo. Raggiungere la tensione perfetta è come trovare il punto giusto in cui entrambi i fili esercitano la stessa forza.
Adeguati aggiustamenti della tensione per prevenire le grinze
Per evitare arricciature, allentare!
Bene, almeno quando si tratta di tensione del filo. Dai un po' più di gioco al filo superiore riducendone leggermente la tensione. Ciò consentirà al tessuto di appiattirsi ed evitare le temute grinze.
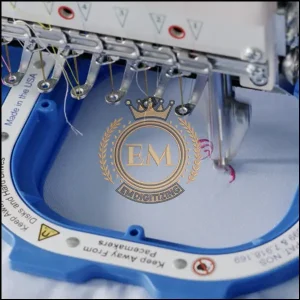
Prova diverse regolazioni della tensione fino a trovare il giusto equilibrio. Ricorda, il ricamo è un'arte, e un po' di tentativi ed errori fanno parte del processo.
Suggerimenti per prevenire le arricciature durante la cucitura del ricamo
We’;siamo quasi al traguardo! Ecco alcuni suggerimenti bonus per aiutarti a eliminare le grinze dal tuo mondo del ricamo:
Iniziare con una cucitura di prova
Prima di immergerci nell'evento principale, prenditi qualche minuto per ricamare un disegno di prova su un pezzo di tessuto di scarto. Questa prova generale in miniatura ti consente di individuare tempestivamente eventuali problemi di arricciatura e apportare le modifiche necessarie prima di ricamare sul modello reale.
Utilizzando la corretta tensione del filo
We’;Abbiamo già parlato della regolazione delle impostazioni di tensione, but it’;s worth mentioning again because it’;È proprio così importante. Don’;Non aver paura di sperimentare e modificare la tensione finché non trovi il punto debole in cui le increspature sono bandite.
Pensieri finali
Le arricciature da ricamo sono un mal di testa comune, ma armati delle conoscenze e degli strumenti giusti, puoi conquistarlo come un boss.
Ricordarsi di scegliere lo stabilizzatore appropriato, padroneggia le impostazioni di tensione, e impiegare tecniche aggiuntive per evitare arricciature e mantenere il ricamo impeccabile.
Don’;Non lasciarti scoraggiare da alcuni ostacoli lungo il percorso. Dopotutto, anche una grinza qua e là aggiunge carattere alle tue creazioni uniche.
Cuciture felici!
EMDigitalizzazione: Esperto di digitalizzazione del ricamo al tuo servizio
Stai cercando aiuto per trasformare i tuoi disegni in ricami?
Guardare EMDigitalizzazione! Siamo specializzati in digitalizzazione del ricamo e ho molto per te. If you’;sei un cliente per la prima volta, ottieni un enorme 50% sconto su tutti i nostri servizi.
Il nostro team è esperto nella digitalizzazione, prendono il tuo disegno e lo digitalizzano attentamente, making sure it’;È pronto rapidamente e senza costarti molto.
Ho qualche domanda? Basta contattarci.
Il nostro team è sempre qui per aiutarti e ti risponderà velocemente. E se ritieni che queste informazioni siano utili, sentiti libero di condividerlo con i tuoi amici.
Grazie per aver letto, e cuciture felici!
Domande frequenti:
Le arricciature nel ricamo spesso si verificano a causa di una mancata corrispondenza tra i tassi di restringimento del tessuto e del filo utilizzato, o dal non utilizzare uno stabilizzatore. Può verificarsi anche se il tessuto è inserito nel telaio troppo stretto o se il ricamo è troppo denso per il tessuto.
Per appiattire i ricami arricciati, puoi provare a rilavare e asciugare l'oggetto, utilizzando il vapore del ferro da stiro (senza premere direttamente il ricamo), o allungare delicatamente il tessuto per rimetterlo in forma. Si consiglia inoltre di utilizzare un panno pressato tra il ferro e il ricamo per proteggere il filo e il tessuto.
Le arricciature nel ricamo sono generalmente causate da una tensione non uniforme nei punti, il tessuto e il filo reagiscono diversamente al lavaggio, o non stabilizzare adeguatamente il tessuto prima di iniziare il ricamo. Scegliere il tessuto giusto, filo, e stabilizzatore, e garantire una tensione uniforme delle cuciture può prevenire questo problema.
