If you’;vous envisagez sérieusement de démarrer votre propre entreprise de broderie, la numérisation de broderies personnalisées est l'un des moyens les plus rapides d'accélérer son temps de production et d'augmenter votre marge.
Dans ce blog, we’;Nous expliquerons pourquoi vous avez besoin d'une numérisation de broderie personnalisée et comment cela rend l'ensemble du processus plus facile et plus rapide..
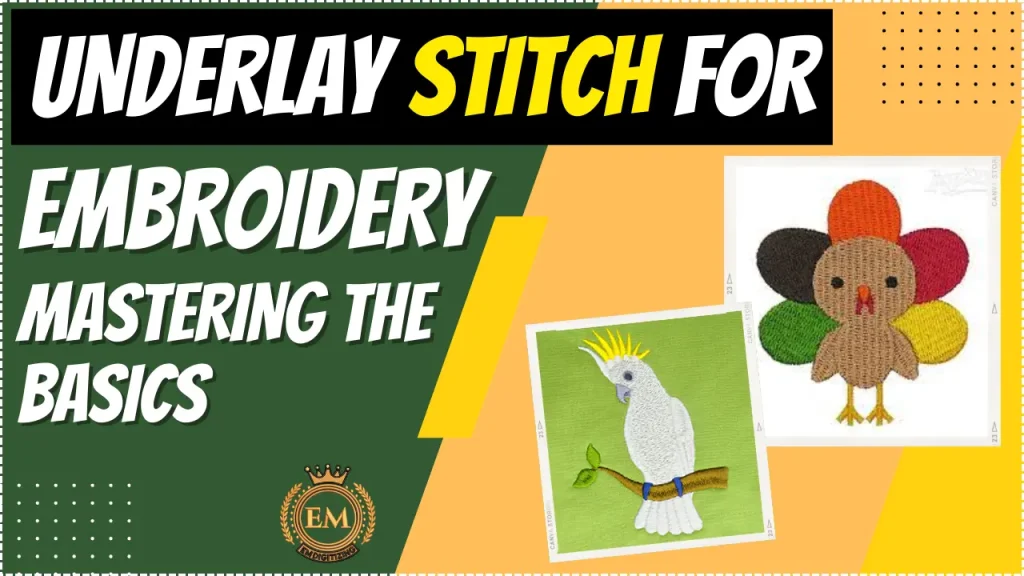
Dans cet article, nous allons approfondir les points de sous-couche pour la broderie, explorer son importance, différents types, techniques étape par étape, et offrant de précieux conseils pour maîtriser cette compétence fondamentale en broderie.
Que vous soyez brodeur débutant ou chevronné, Comprendre et maîtriser le point de sous-couche améliorera sans aucun doute la qualité et la longévité de vos créations de broderie machine..
Point de sous-couche pour la broderie: Maîtriser les bases
Qu'est-ce que le point de sous-couche?
La broderie, c'est comme construire une maison; vous avez besoin d’une base solide pour assurer la longévité et la stabilité. Entrez le point de sous-couche, le héros méconnu de la broderie machine.
Le point de sous-couche est la première couche de points qui apporte soutien et structure à votre motif.. It’;C'est comme l'échafaudage qui maintient tout ensemble.
Importance des points de sous-couche pour la broderie
Vous vous demandez peut-être, pourquoi ai-je besoin de cette couche supplémentaire de coutures?
Bien, laisse-moi te dire, it’;ce n'est pas juste pour le spectacle. The underlay stitch plays a crucial role in ensuring your embroidery looks top-notch and doesn’;ne s'effondre pas après quelques lavages.
Améliorer la stabilité et la durabilité de la conception
Personne ne veut que sa broderie s'affaisse ou perde sa forme, droit?
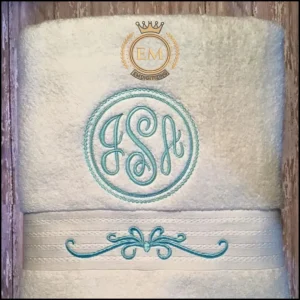
That’;C'est là que le point de sous-couche vient à la rescousse. En fournissant une base solide, il aide à stabiliser la conception, le rendant plus durable et empêchant toute distorsion indésirable.
Prévenir la déformation et le froncement du tissu
Imaginez ceci: vous passez des heures à broder un beau motif sur votre chemise préférée, seulement pour découvrir qu'il ressemble à un désordre froissé après le premier lavage.
Ouais!
Le point de sous-couche peut vous sauver de ce cauchemar de broderie. Il aide à répartir la tension uniformément sur le tissu, réduire les risques de plissement ou distorsion.
Créer de la dimension et de la texture en broderie
Vous voulez que votre broderie ressorte?
Le point de sous-couche peut également vous aider à y parvenir.

En ajoutant stratégiquement des points sous le motif principal, ça crée de la profondeur, et texture, et donne à votre broderie une finition professionnelle.
It’;c'est comme ajouter des pépites à un gâteau déjà délicieux.
Types de points pour les techniques de sous-couche
Les techniques de point de sous-couche sont fondamentales éléments en broderie machine, servant de base à la version finale points de broderie sont appliqués.
Point de sous-couche central
Le point central est la technique la plus courante. Cela implique de coudre des lignes droites au centre de chaque élément de votre conception..
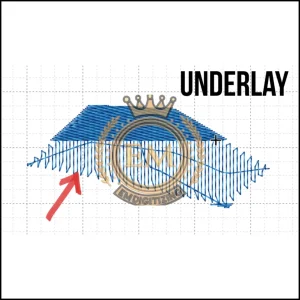
Cette technique assure la stabilité et est parfaite pour les conceptions simples ou petites.
Point de sous-couche en zigzag
Pour les conceptions avec de plus grandes zones à couvrir, le point zigzag est votre technique de prédilection.
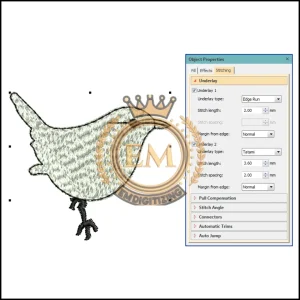
Il ajoute une stabilité supplémentaire en croisant les points sur toute la zone de conception., empêchant toute lacune ou distorsion potentielle.
Point de sous-couche Edge Run
Lorsqu'il s'agit de designs délicats ou complexes, le point de bordure est votre meilleur ami. Il suit les bords extérieurs du motif, créer une frontière de soutien qui maintient tout en place.

Technique de sous-couche de point de remplissage
Got a design that’;est principalement rempli de points de suture?
La technique de sous-couche au point de remplissage est parfaite pour vous. Il ajoute une solide grille de points sous la zone de remplissage, assurant une surface lisse et uniforme sans aucun plissement.
Techniques de point de sous-couche combinées
Envie d'avoir de la fantaisie?
Vous pouvez toujours mélanger et assortir différentes techniques de points pour la sous-couche en fonction de votre design..
Soyez audacieux, expérience, et créez la magie de la broderie avec une combinaison de passage central, zigzag, passage de bord, et techniques de sous-couche de points de remplissage.
Guide étape par étape pour maîtriser les techniques de point de sous-couche
La maîtrise du point pour les techniques de sous-couche est essentielle pour réaliser broderie de qualité professionnelle, car ces points fondamentaux jettent les bases de la conception finale, assurer la stabilité, texture, et dimension.
Préparation de la machine à broder et du tissu
Avant de plonger dans le point de sous-couche, assurez-vous que votre machine à broder est correctement configurée. Choisissez l'entoilage approprié pour votre tissu et entourez-le solidement.
Sélectionnez le couleur de fil souhaitée et chargez-le sur la machine. Préparer votre fichier de conception, en veillant à ce que le point de sous-couche soit inclus dans le motif de broderie numérisé.
Configuration des paramètres de point de sous-couche
En fonction de votre machine et logiciel de broderie, vous pouvez choisir parmi différentes options de points de sous-couche. Expérimenter avec différents points densités, les types, et angles pour obtenir la stabilité et la texture souhaitées.
Ajustez la longueur et la largeur du point si nécessaire. Don’;N'ayez pas peur de jouer et de trouver ce qui fonctionne le mieux pour votre design et votre tissu spécifiques..
Exécution du point de sous-couche
Une fois que vous avez sélectionné les paramètres de sous-couche appropriés, it’;Il est temps de laisser votre machine faire sa magie. Positionnez soigneusement l'aiguille sur le point de départ de votre dessin.
Démarrer le processus de broderie, s'assurer que le point de sous-couche est cousu en premier et couvre toute la zone du motif. Take note of the machine’;s la vitesse et la tension pour éviter tout problème.
Ajustement et réglage fin du point de sous-couche
Après avoir terminé ce type de points, inspectez votre conception de broderie. Vérifiez si le tissu est stable, si une transparence est visible, et si la dimension et la texture souhaitées ont été obtenues.
Si nécessaire, ajustez les paramètres du point de sous-couche ou expérimentez avec des points de sous-couche supplémentaires pour perfectionner votre broderie.
Rappelles toi, maîtriser le point de sous-couche demande de la pratique et de l'expérimentation. Don’;t be discouraged if your first attempts don’;ça ne se passe pas exactement comme prévu.
Erreurs courantes à éviter lors de l'utilisation de points de sous-couche pour la broderie
La broderie est une forme d'art délicate qui nécessite précision et attention aux détails.. Lorsque vous utilisez ce point dans vos projets de broderie, it’;Il est important d'être conscient des erreurs courantes qui peuvent affecter la qualité globale de votre travail..
Voici quelques pièges à éviter:
Utilisation d'un type de point de sous-couche incorrect
L'une des décisions les plus cruciales lors de l'utilisation de points de sous-couche pour la broderie est de sélectionner le type approprié pour votre motif.. Votre choix devrait ça dépend du tissu, complexité de conception, et résultat souhaité.
L'utilisation d'un mauvais type de point de sous-couche peut entraîner une broderie déformée ou inégale.. Alors$£€¥789/456*123-0.=+_çàiopjkln,;:! ذ ضِ ئ, assurez-vous de faire vos recherches et vos expériences pour trouver la correspondance parfaite.
Densité de point incorrecte
La densité des points joue un rôle essentiel pour obtenir une broderie nette et d'aspect professionnel. Une densité trop élevée peut provoquer des plis dans le tissu, alors que trop faible peut entraîner un manque de définition.
Finding the right balance is essential for ensuring your underlay stitch provides the necessary support and stability without compromising the design’;l'esthétique.
Négliger l’étirement et la stabilité du tissu
Différents tissus ont différents degrés d'élasticité et de stabilité. Ignorer ces facteurs lors de l'application du point de sous-couche peut entraîner une distorsion, rides, ou même le design se désagrège.
Take into account the fabric’;s caractéristiques et ajustez votre point de sous-couche en conséquence pour maintenir l'intégrité de votre broderie.
Ignorer la tension et la sélection du fil
Le point de sous-couche repose sur bonne tension et sélection de fils pour des résultats optimaux. Une tension incorrecte peut provoquer rupture de fil, boucle, or looping on the fabric’;surface.
De même, utiliser le mauvais poids du fil or type can affect the underlay stitch’;l'efficacité. Assurez-vous d'avoir la bonne combinaison de tension et de fil pour éviter tout incident de broderie embêtant..
Trucs et astuces pour obtenir des résultats professionnels avec le point de sous-couche
Maîtriser les points de sous-couche ou la broderie demande de la pratique et une bonne compréhension du processus de broderie.. Voici quelques trucs et astuces utiles pour vous aider à obtenir ces résultats professionnels.:
Expérimenter différentes combinaisons de points de sous-couche
Don’;N'ayez pas peur de mélanger et assortir les types de points de sous-couche pour trouver la combinaison parfaite pour vos créations..
Essayer différentes combinaisons peut améliorer la stabilité globale et l'impact visuel de votre broderie.. Alors$£€¥789/456*123-0.=+_çàiopjkln,;:! ذ ضِ ئ, faites preuve de créativité et laissez libre cours à votre explorateur de points intérieur!
Comprendre les exigences de structure et de conception
Chaque tissu et design présente son propre ensemble de défis et d'exigences. Take the time to understand the fabric’;caractéristiques, comme l'élasticité, densité, et texture.
En outre, analyze the design’;s complexité et réfléchissez à la manière dont le point de sous-couche peut mieux le soutenir et l’améliorer. Cette compréhension vous aidera à prendre des décisions éclairées et à créer des broderies remarquables..
Entretien et nettoyage appropriés de la machine à broder
Entretenir et nettoyer régulièrement votre machine à broder est crucial pour des performances optimales. L’accumulation de peluches, poussière, or debris can affect the underlay stitch’;s la précision et causer des problèmes de broderie.
Take the time to follow the manufacturer’;s directives pour l'entretien, garantir que votre machine est en parfait état pour une exécution impeccable des points de sous-couche.
Utilisation des fonctionnalités du logiciel pour l'optimisation des points de sous-couche
Les logiciels de broderie fournissent souvent des fonctionnalités avancées pour optimiser le point de sous-couche. Explorez ces outils pour exploiter leur potentiel et affiner vos conceptions.
Des fonctionnalités telles que le réglage de la longueur du point, contrôle de la densité des sous-couches, et la manipulation de la direction du point peuvent contribuer à améliorer la qualité de votre point de sous-couche..
Conclusion
Maîtriser les bases des points de sous-couche pour la broderie avec une machine est une compétence précieuse qui peut élever vos créations vers de nouveaux sommets..
En évitant les erreurs courantes, mettre en œuvre des techniques efficaces, et faire preuve de créativité avec les applications de points de sous-couche, you’;Vous serez sur la bonne voie pour réaliser une broderie d'aspect professionnel qui laissera une impression durable.
Alors$£€¥789/456*123-0.=+_çàiopjkln,;:! ذ ضِ ئ, embrasser le talent artistique, amusez-vous avec vos points, et laisse briller ta broderie!
EMnumérisation: Expert en numérisation de broderie à votre service
Si vous êtes intéressé par tout type de projet de broderie, alors EMdigitizing est la meilleure option pour vous. Nous offrons numérisation de broderie et des services d'art vectoriel avec un délai d'exécution rapide. Vous pouvez également visiter et consulter notre site Web ainsi que nos meilleurs services.
Nous offrons également un excellent 50% réduction sur tous nos services pour nos nouveaux clients respectés. Nous proposons également devis gratuits généré en seulement 5 minutes.
Vous devriez profiter de cette offre à durée limitée et faire passer votre projet de broderie au niveau supérieur avec EMdigitizing.
Si vous avez des questions concernant ce sujet, tu peux leur demander. Merci d'avoir pris le temps de lire cet article.
Questions fréquemment posées:
Oui, l'utilisation d'une sous-couche avec point satin 3D est bénéfique car elle fournit une base stable, améliorer la texture et le volume du point satin, notamment dans les zones à forte densité ou sur des tissus instables.
Les points de sous-couche sont cruciaux en broderie pour stabiliser le tissu, s'assurer que les points supérieurs reposent correctement, et améliorer l'apparence générale et la durabilité de la conception.
La longueur du point pour la sous-couche varie généralement de 1,5 mm à 2,5 mm., en fonction du type de sous-couche et de l'effet recherché sur la broderie finale.
La quantité de points de sous-couche nécessaire dans un motif varie en fonction du type de tissu, complexité de conception, et le type de point utilisé; en général, suffisamment de sous-couche est utilisée pour fournir une stabilité suffisante sans causer de volume inutile.
