Sérigraphie Cricut: Comment sérigraphier avec du vinyle
Introduction:
L'impression d'écran est une technique populaire utilisée pour transférer des conceptions sur diverses surfaces. Traditionnellement, L'impression d'écran nécessite des configurations complexes impliquant des pochoirs, écrans, et encres.
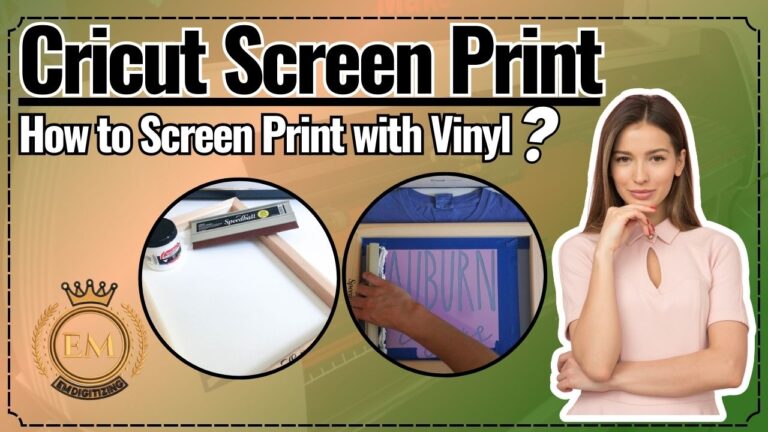
Cependant, avec l'avènement de la technologie moderne, La machine à découper Cricut a rendu l'impression d'écran plus accessible et pratique que jamais. Dans cet article,
Sérigraphie Cricut: Comment sérigraphier avec du vinyle
Qu'est-ce qu'uneprint Screen?
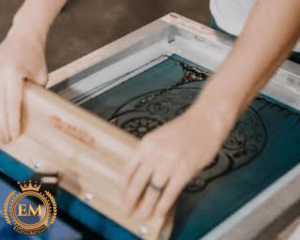
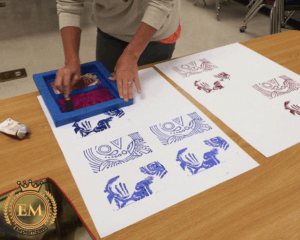
Impression d'écran, également connu sous le nom d'écrans de soie pour l'impression ou la sérigraphie, est une technique d'impression qui implique de transférer de l'encre à travers un écran de maillage fin sur une surface pour créer un conception de broderie ou image. Il s'agit d'une méthode polyvalente et largement utilisée pour reproduire les illustrations, graphique, et des conceptions sur divers matériaux, y compris le tissu, papier, plastiques, métaux, et plus.
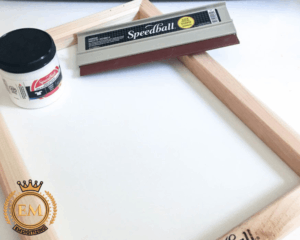
Des choses dont vous aurez besoin pour faire des imprimés à l'écran Cricut avec du vinyle:
Cricut Machine à découper (comme Cricut Explore ou Cricut Maker)
Ordinateur avec logiciel de conception (Espace de conception Cricut)
Vinyle de transfert de chaleur (VTH)
Outils de désherbage (comme un crochet de désherbage ou des pincettes)
Presse à la chaleur ou fer
T-shirt ou tissu à imprimer sur une machine à imprimer d'écran de t-shirt
Revêtement de protection (comme une feuille de téflon ou du papier parchemin)
Guide étape par étape sur la façon de faire l'impression d'écran avec du vinyle
Ayons une discussion détaillée sur la façon dont vous pouvez-vous crier une impression avec du vinyle:
Concevoir votre impression
Commencez par créer ou sélectionner un design que vous souhaitez filtrer l'impression sur votre tissu.
Ouvrez l'espace de conception Cricut sur votre ordinateur et créez un nouveau projet. Vous pouvez choisir parmi les conceptions préchargées ou télécharger votre propre conception personnalisée.Anurez que votre conception convient à la coupe avec une gravure en vinyle et a une propreté, lignes distinctes.
Couper le vinyle
Une fois que vous avez votre design prêt, it’;Il est temps de couper le vinyle à l'aide de votre machine à découper Cricut.
Placer le vinyle de transfert de chaleur (VTH) sur un tapis de coupe avec le côté brillant orienté vers le bas. Chargez le tapis dans la machine et suivez les instructions à l'écran dans l'espace de conception CRICUT pour couper votre conception avec précision.
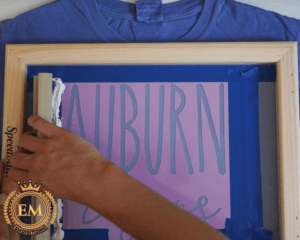
Désherber le vinyle
Impression d'écran, également connu sous le nom d'écrans de soie pour l'impression ou la sérigraphie, est une technique d'impression qui consiste à transférer de l'encre à travers un écran de maillage fin sur une surface pour créer une conception ou une image.
Il s'agit d'une méthode polyvalente et largement utilisée pour reproduire les illustrations, graphique, et des conceptions sur divers matériaux, y compris le tissu, papier, plastiques, métaux, et plus.
Appliquer le vinyle
Positionnez soigneusement la conception en vinyle désherbant sur le tissu, S'assurer qu'il est centré et aligné correctement. Vous pouvez utiliser du ruban de transfert ou placer directement le vinyle sur le tissu, en fonction de votre préférence et de la complexité de la conception.
Utilisez une presse à chaleur ou un ensemble de fer à la température appropriée et appliquez une pression ferme pour la durée recommandée, Selon les instructions fournies avec votre HTV. Assurez-vous que vous appliquez de la chaleur uniformément sur l'ensemble de la conception.
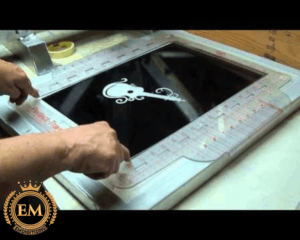
Pelage et finition
Une fois le processus de transfert de chaleur terminé, Laisser refroidir le vinyle avant de retirer la feuille de support.
Commencez à décoller la feuille de support loin du tissu à un angle de 45 degrés, s'assurer que le vinyle adhère fermement au tissu. Si une partie de la conception se soulève avec la feuille de support, Placez-le et réappliquez la chaleur à l'aide de la presse ou du fer.
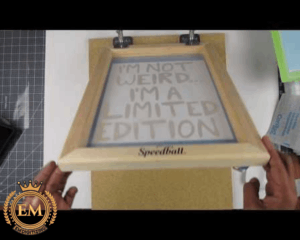
Soins post-application
Après avoir réussi à transférer la conception en vinyle sur le tissu, il est essentiel de s'occuper correctement du vêtement imprimé. Tournez le tissu à l'intérieur avant de se laver pour protéger le vinyle des frottements excessifs et des dommages potentiels.
Follow the manufacturer’;S Instructions pour le lavage et le séchage, Comme différents types de vinyle peuvent avoir des exigences de soins spécifiques.
C'étaient les étapes simples sur la façon d'écran d'impression avec du vinyle. Utilisation de la machine Cricut Imprimés, impression d'écran à la maison avec une imprimante d'écran à la maison est maintenant facile. Faisons la lumière sur les conseils et les astuces à considérer lors de l'impression d'écran avec Cricut.
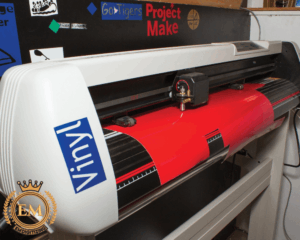
Conseils pour améliorer votre expérience d'écran avec du vinyle à l'aide d'une machine Cricut:
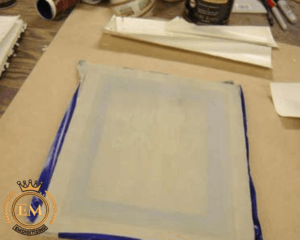
Voici quelques conseils et astuces pour améliorer votre expérience d'écran d'impression avec du vinyle à l'aide d'une machine Cricut:
- ; ; ; Avant de couper votre conception sur l'écran d'impression d'écran Transferts en vinyle d'imprimante, effectuer un test coupé sur un petit morceau de vinyle. Cela permet de garantir que les paramètres de la machine sont précis, Empêcher le matériau gaspillé et les erreurs potentielles dans l'impression finale.
- ; ; ; Lorsque vous concevez votre imprimé dans un espace de conception Cricut, N'oubliez pas de refléter l'image horizontalement avant de couper. Since you’;Je transférerai le design sur le tissu, Il en miroir garantit que l'impression finale apparaît correctement lorsqu'elle est vue depuis l'avant.
- ; ; ; Si votre conception implique plusieurs couleurs ou des détails complexes, Vous pouvez créer des effets en couches avec du vinyle. Coupez chaque couche séparément, Alignez-les avec précision, et appuyez-les sur le tissu une couche à la fois. Assurez-vous de suivre l'ordre de pressage recommandé fourni par le fabricant de vinyle.
- ; ; ; Pay attention to the recommended heat press temperature and pressure settings specific to the type of heat transfer vinyl you’;j'utilise. Ces paramètres peuvent varier en fonction de la marque et de la composition des matériaux. L'ajustement de la température et de la pression peut avoir un impact considérable sur l'adhésion et la durabilité de votre impression.
- ; ; ; Lors de la pelage de la feuille de support du vinyle après appuyer à la chaleur, Vous avez deux options: peeille chaude ou pee à froid. La peluche chaude implique de retirer la feuille de support pendant que le vinyle est encore chaud, tandis que la peau froide nécessite de permettre au vinyle de se refroidir complètement avant de se décoller. Refer to the vinyl manufacturer’;s instructions to determine which peeling technique is recommended for the specific type of vinyl you’;j'utilise.
- ; ; ; Pour protéger le vinyle et votre presse à chaleur ou votre fer, Placer une feuille de téflon ou du papier parchemin sur le dessus de la conception avant d'appliquer la chaleur. Cela empêche le contact direct entre le vinyle et l'élément chauffant, Assurer une application lisse et uniforme.
- ; ; ; Les conceptions complexes de désherbage peuvent être difficiles, Alors assurez-vous de travailler dans une zone bien éclairée. Un bon éclairage vous aide à voir les détails fins de la conception et vous assure que vous désherbez avec précision sans retirer accidentellement des parties du vinyle que vous souhaitez garder.
- ; ; ; Pour des conceptions complexes ou délicates, Envisagez d'utiliser du ruban de transfert pour transférer le vinyle sur le tissu. La bande de transfert agit comme une feuille de transporteur, vous permettant de positionner facilement et d'appliquer la conception sur le tissu sans risquer un désalignement ou un étirement.
- ; ; ; Avant d'appliquer le vinyle, it’;s bénéfique pour pré-presser le tissu pendant quelques secondes pour éliminer toute humidité, rides, ou dimensionnement résiduel. Cette étape assure une surface lisse et une meilleure adhérence pour le vinyle.
- ; ; ; Différentes marques de vinyle de transfert de chaleur et matériaux peuvent nécessiter de légères variations de temps de pressage et de pression. If you find that your vinyl isn’;t adhérer bien ou se décolle après le lavage, Ajustez le temps de pressage et la pression en conséquence. Testez d'abord de petites pièces pour trouver les paramètres optimaux pour votre vinyle spécifique.
- ; ; ; Si vous travaillez fréquemment sur les vêtements avec des coutures, fermetures à glissière, ou boutons, L'utilisation d'un oreiller de presse à chaleur peut aider à créer une surface uniforme pour appuyer. L'oreiller élève la zone autour des coutures, Permettre un meilleur transfert de chaleur et prévenir une pression inégale qui peut déformer la conception.
- ; ; ; Le vinyle peut parfois s'en tenir à votre surface de travail ou transférer accidentellement sur d'autres objets. Pour éviter cela, place a protective covering such as a Teflon sheet or parchment paper under the fabric you’;je travaille sur. Cela aide également à protéger votre surface de travail contre l'excès de chaleur ou de résidu en vinyle.
- ; ; ; Si votre conception implique plusieurs couches de vinyle, Pratiquer l'alignement à l'avance peut vous faire gagner du temps et de la frustration. Utilisez des marques d'enregistrement ou des points de référence sur le tissu et les couches de vinyle pour assurer un placement et un alignement précis pendant le processus de pressage.
- ; ; ; L'impression d'écran avec du vinyle peut nécessiter un peu de pratique pour perfectionner votre technique. Expérimentez avec différents paramètres, matériaux, et des conceptions pour obtenir les résultats souhaités. Soyez patient et prenez votre temps à chaque étape, de la coupe et du désherbage à l'application et au pelage du vinyle.
Rappelles toi, c'est en forgeant qu'on devient forgeron, so don’;t be discouraged if your initial attempts don’;t se déroulent exactement comme prévu. Avec persévérance et expérimentation, you’;Je deviendra plus compétent pour créer de superbes impressions d'écran avec du vinyle en utilisant votre machine Cricut. Profitez du processus créatif et amusez-vous à explorer les possibilités infinies de cette technique polyvalente!
Conclusion:
Print d'écran sur une chemise près de moi avec du vinyle à l'aide d'une machine à découper Cricut ouvre un monde de possibilités créatives. En suivant ces instructions étape par étape, Vous pouvez réaliser des écrans d'impression d'apparence professionnelle sur divers articles en tissu. Expérimentez avec différents designs, couleurs, et des tissus pour personnaliser les t-shirts, Sacs, décoration de maison, et plus. Profitez de la satisfaction de créer une coutume, Écrans d'impression accrocheurs pour les t-shirts avec facilité, Tout du confort de votre propre maison.
Si vous souhaitez personnaliser la numérisation du logo de broderie, EM DIGITIZING sera votre meilleur choix. À NUMÉRISATION EM, nous livrons le meilleur logo de broderie services de numérisation avec la meilleure qualité. Nous offrons 50% de réduction sur tous nos services à nos clients potentiels lors de leur première commande. Alors$£€¥789/456*123-0.=+_çàiopjkln,;:! ذ ضِ ئ, obtenez un devis gratuit maintenant et nous vous contacterons.
J'espère que cet article vous sera utile les gars!
Si vous avez des questions liées à cet article, n'hésitez pas à nous faire part de vos commentaires.. Et, Merci d'avoir lu!
Tandis que les machines Cricut ne sont pas conçues spécifiquement pour l'impression d'écran de soie, Ils peuvent être utilisés pour créer des pochoirs ou des conceptions qui peuvent être utilisées dans le processus d'écran de la soie. Cependant, Des équipements et des matériaux supplémentaires sont nécessaires pour la technique d'impression d'écran de soie complète.
Non, Une presse à chaleur Cricut ne convient pas à l'impression d'écran traditionnelle. Les pressions thermiques sont couramment utilisées pour appliquer des conceptions de vinyle de transfert de chaleur ou de sublimation sur les vêtements, tandis que l'impression d'écran implique d'utiliser des écrans et des encres pour créer des conceptions multicolores avec une durabilité élevée.
Le choix entre le vinyle et l'impression d'écran dépend de divers facteurs. Le vinyle est idéal pour les plus petites quantités, dessins complexes, et personnalisation, tandis que l'impression d'écran est idéale pour les plus grandes quantités, couleurs vibrantes, et durabilité durable. Considérez vos besoins et préférences spécifiques lorsque vous décidez quelle méthode utiliser.
À imprimer sur le tissu à l'aide d'un cricut, vous pouvez utiliser la fonction imprimée puis couper. Concevoir et imprimer votre image souhaitée sur une imprimante compatible, Ensuite, utilisez votre machine Cricut pour découper précisément le motif. Appliquez la conception sur votre tissu à l'aide d'une méthode adhésive ou de transfert de chaleur appropriée.
Tandis que les machines Cricut ne sont généralement pas utilisées pour l'impression d'écran traditionnelle, Vous pouvez créer des conceptions d'écran semblables à une impression à l'aide de pochoirs adhésifs fabriqués avec votre cricut. Coupez le pochoir d'un matériau approprié, Appliquez-le sur la chemise, et utilisez de l'encre ou de la peinture en tissu pour remplir la conception à l'aide d'une raclette ou d'un outil similaire. Suivez les instructions pour durcir ou régler la chaleur à l'encre pour assurer la durabilité.
