If you’re new to embroidery, understanding machine embroidery basics can feel a bit overwhelming. But don’t worry – we’re here to break it down step by step! In this guide, we’ll walk you through everything you need to know to get started, from choosing the right machine and materials to learning basic stitches and techniques.
Machine embroidery opens up endless creative possibilities, allowing you to personalize clothing, gifts, and home decor with your own designs. By learning these basics, you’ll be able to transform simple fabrics into beautiful, custom pieces. So, let’s dive in and explore the essentials, helping you build the confidence and skills you need to create stunning embroidery projects.
Essential Guide to Machine Embroidery Basics for Beginners
Basic Materials Needed for Machine Embroidery
To understand the basics of machine embroidery, it’s essential to know about the basic materials and tools, including software, that make the process smooth and successful. Here are the key items you’ll need:
- Embroidery Machine
- Embroidery Hoops
- Embroidery Threads
- Embroidery Software
- Stabilizers
- Embroidery Needles
- Fabric
- Scissors
Now that you understand the essentials of embroidery basics, let’s dive deeper into each component in detail.
1. Embroidery Machine
An embroidery machine is a specialized device designed to stitch intricate patterns and designs onto fabric. Unlike standard sewing machines, embroidery machines use digital files and automated stitching to produce precise, consistent results. They are essential for both hobbyists and professionals looking to learn machine embroidery basics and create personalized or custom designs.
Types of Embroidery Machines
It comes in various types, each designed to meet different needs, from simple home projects to high-volume commercial use. Here’s an in-depth look at the main types of embroidery machines:
1. Single-Needle Embroidery Machines
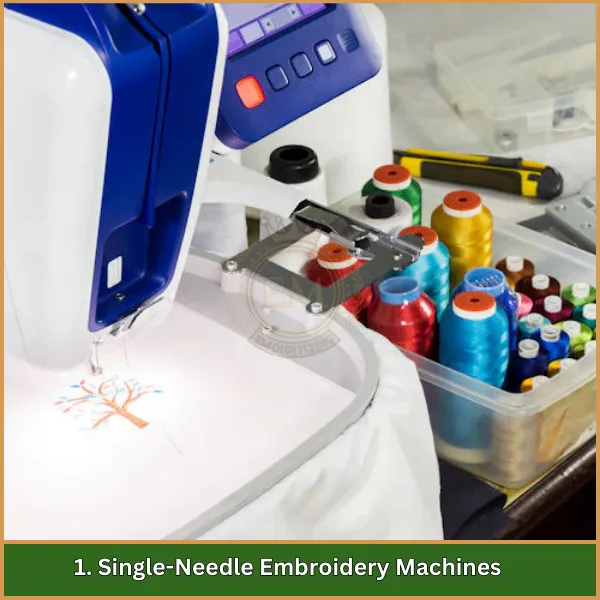
Single-needle embroidery machines are the most common type for home use. They have one needle, which means the machine can only handle one color of thread at a time. To create multi-colored designs, you need to change the thread manually for each color.
Features:
- Ease of Use: Single-needle machines are user-friendly and straightforward, making them ideal for beginners.
- Compact Size: These machines are usually smaller and more portable, perfect for home setups.
- Versatility: Some single-needle models can also function as sewing machines, adding value for users interested in both sewing and embroidery.
Best For: Hobbyists, beginners, and those who do embroidery projects occasionally.
2. Multi-Needle Embroidery Machines
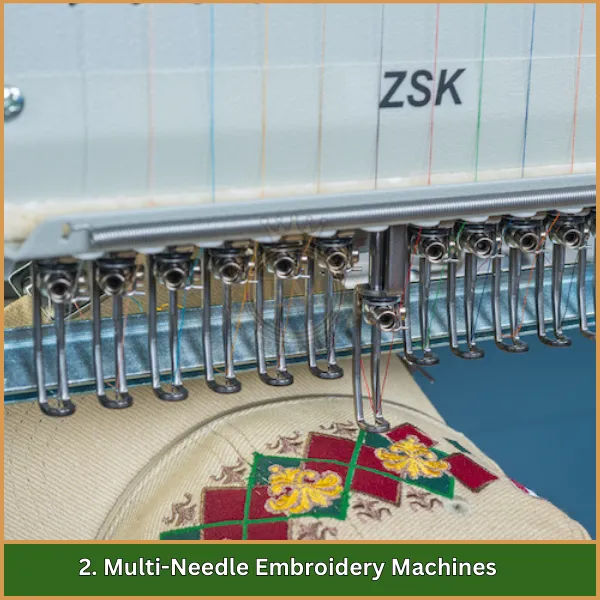
Multi-needle embroidery machines are designed for efficiency and are often used by professionals. These machines have multiple needles (typically 4 to 10), allowing them to hold multiple thread colors simultaneously and switch automatically during stitching.
Features:
- Speed and Efficiency: Multi-needle machines save time by automatically changing colors, making them much faster for complex designs.
- Higher Embroidery Field Size: Many multi-needle machines offer larger embroidery fields, ideal for bigger or more detailed designs.
- Advanced Features: They often come with advanced functions like automatic thread trimming, thread break detection, and customizable stitching settings.
Best For: Professionals, small business owners, or anyone handling high-volume or complex embroidery projects.
Key Features to Consider When Choosing a Embroidery Machine
When selecting a basic embroidery machine for beginners, some key features can make a big difference in your embroidery experience. Here are the main things to look for:
- Built-In Designs and Fonts: Many machines come with pre-loaded designs and fonts, making it easier to start projects right away.
- Embroidery Field Size: This is the maximum area you can embroider in a single hooping. Larger fields allow for bigger designs.
- Stitching Speed: Faster stitching speeds save time, especially for large projects or detailed designs.
- Design Transfer Options: Check if the machine supports USB, Wi-Fi, or direct computer connections for easy design transfers.
- Automatic Thread Trimming: This feature cuts the thread between stitches, keeping your work neat and saving time.
- Color Touch Screen: A color touch screen can help you preview and edit designs with ease before stitching.
Each of these features can enhance your embroidery experience, so it’s helpful to choose based on your project needs and preferences.
2. Embroidery Hoops
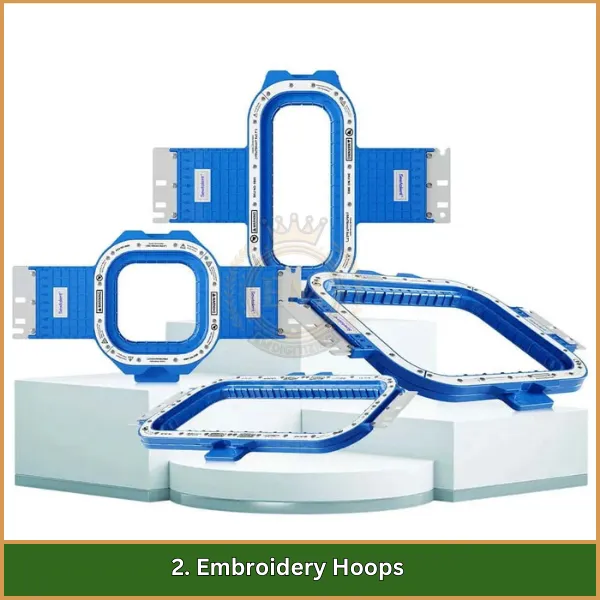
They are essential tools in machine embroidery, used to hold the fabric tightly in place as the machine stitches designs. They ensure stability, reduce shifting, and help maintain the precision of each stitch, which is crucial for clean and professional results. Here’s an in-depth look at embroidery hoops and their importance.
Types of Embroidery Hoops
- Standard Hoops: These are basic hoops that come with most embroidery machines. They’re typically used for smaller projects or simple designs and are perfect for beginners.
- Magnetic Hoops: Magnetic hoops use magnets to hold the fabric in place. They’re ideal for delicate fabrics that could get damaged with traditional clamping hoops, like silk or thin cotton.
- Jumbo or Multi-Position Hoops: These hoops are larger and allow for bigger or multi-part designs to be stitched without re-hooping. They are especially useful for large projects like blankets, jackets, or quilts.
- Adjustable Hoops: Some hoops allow for size adjustments, which makes them versatile for various embroidery projects. They’re convenient when switching between different-sized designs.
3. Embroidery Threads
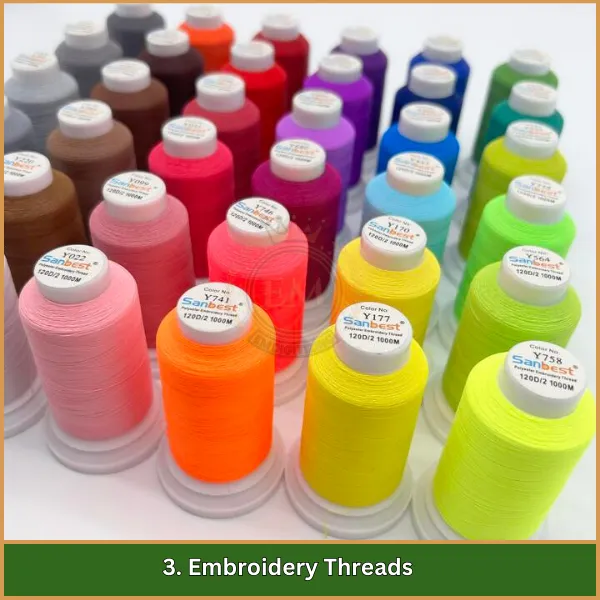
They are a key component in machine embroidery, bringing designs to life with vibrant colors, textures, and finishes. The quality and type of thread you choose can greatly affect the appearance, durability, and overall success of your embroidery project. Let’s explore embroidery threads in detail to understand their role, types, and tips for using them.
Types of Embroidery Threads
Understanding the different types of embroidery threads is essential for mastering machine embroidery basics. Each type offers unique qualities that can impact the look and durability of your designs.
- Rayon Thread: Known for its vibrant colors and sheen, ideal for decorative designs with a smooth finish.
- Polyester Thread: Durable and fade-resistant, perfect for items that will be washed frequently, like uniforms and sportswear.
- Cotton Thread: Has a matte finish, providing a natural look, and is excellent for vintage or softer designs.
- Metallic Thread: Adds sparkle and texture, ideal for decorative projects, though requires careful handling due to its delicate nature.
- Silk Thread: Luxurious and smooth, used for high-end or delicate embroidery projects; it adds a fine, elegant finish.
- Variegated Thread: Changes color along the strand, creating a unique gradient effect that adds interest to simple designs.
Each type of thread has specific uses, allowing you to choose based on your project’s needs and desired effect.
Thread Weights and Thickness
Embroidery threads come in different weights, usually ranging from 30 to 60. Lower numbers indicate thicker threads, while higher numbers represent finer threads. Choosing the correct weight is important:
- 40-weight thread is the most common and works well for general embroidery.
- 60-weight thread is finer and suitable for detailed designs or small lettering.
- 30-weight thread is thicker, ideal for bold designs that need to stand out.
4. Embroidery Software
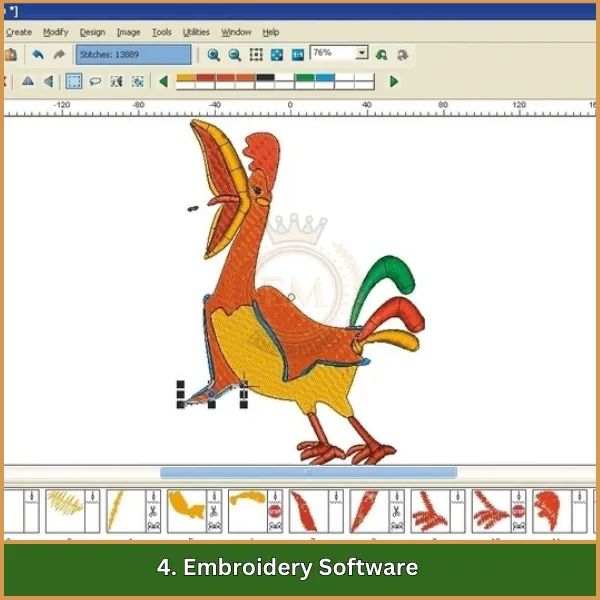
It is a vital tool for creating, editing, and converting designs in machine embroidery. It allows users to customize patterns, adjust stitch types, and even convert images into embroidery-friendly formats. With the right software, both beginners and professionals can easily bring their creative ideas to life on fabric.
Purpose of Embroidery Software
Embroidery software serves multiple functions, from basic design creation to advanced editing. It enables users to:
- Create Original Designs: Draw or import shapes and patterns to create unique embroidery designs.
- Edit Existing Patterns: Modify existing designs by resizing, rotating, or changing colors to suit project requirements.
- Convert Files: Transform standard image files (like JPEG or PNG) into embroidery file formats (like DST, PES, or EXP) that machines can read.
- Preview Designs: View how the design will look when stitched out, allowing for adjustments before starting the embroidery process.
Key Features to Look for in Embroidery Software
- User-Friendly Interface: A simple interface is helpful, especially for beginners, as it makes learning the software faster and easier.
- Design Customization Options: Look for features like text adding, resizing, color adjustments, and layering to customize each design.
- File Compatibility: Ensure the software supports the file formats your embroidery machine reads, like DST, PES, or JEF.
- Preview and Simulation: Allows you to preview how the design will look on fabric, helping to identify any potential issues before stitching.
- Stitch Editing: Some software allows advanced editing of stitch types, density, and direction, which is beneficial for more complex designs.
5. Stabilizers
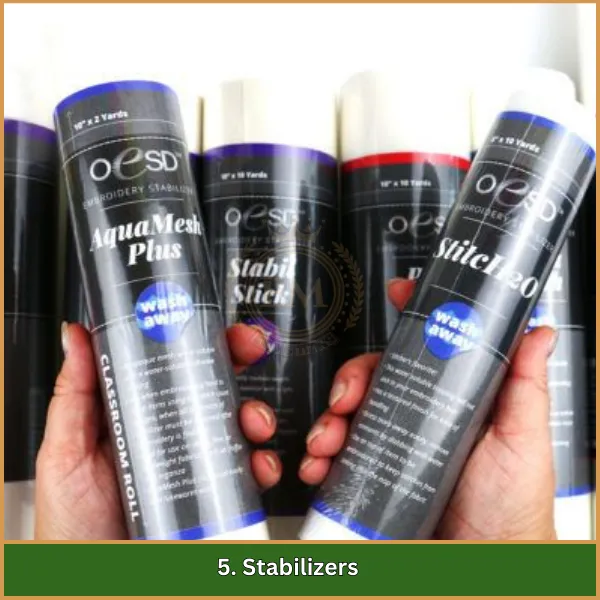
They are essential materials used in machine embroidery to provide support and prevent fabric from stretching or distorting during stitching. They help maintain the fabric’s shape, prevent puckering, and ensure that stitches remain clean and well-defined. Choosing the right stabilizer is crucial for achieving high-quality embroidery results, especially on challenging fabrics.
Types of Stabilizers
- Cut-Away Stabilizers: These provide permanent support and stay attached to the fabric after stitching. They’re best for stretchy or delicate fabrics that need lasting stability.
- Tear-Away Stabilizers: Designed for temporary support, they tear off easily after stitching. Ideal for stable fabrics like cotton and denim that don’t require long-term backing.
- Water-Soluble Stabilizers: Completely dissolves in water, leaving no trace behind. Perfect for lace designs or sheer fabrics where you don’t want any visible stabilizer.
Heat-Away Stabilizers: Removed by applying heat, making them ideal for fabrics that can’t be washed or torn. These stabilizers work well with delicate or specialty materials.
6. Embroidery Needles
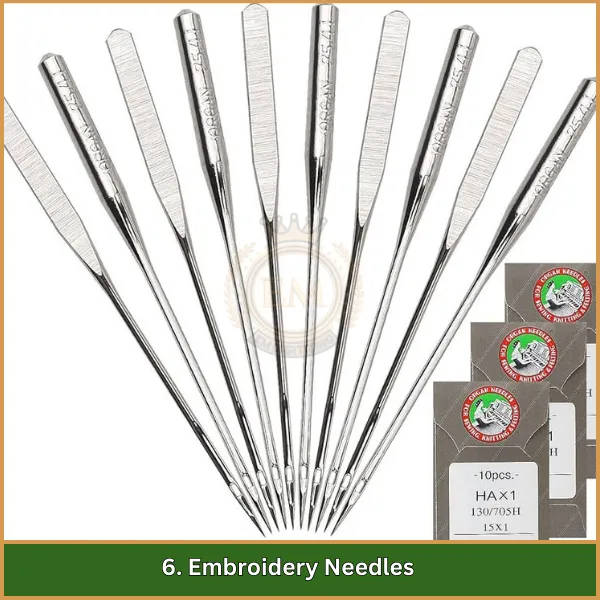
They are specially designed with larger eyes and a smooth, rounded tip to handle embroidery threads without causing frays or snags. Choosing the right needle size and type is essential for achieving clean, even stitches on various fabric types.
7. Fabric
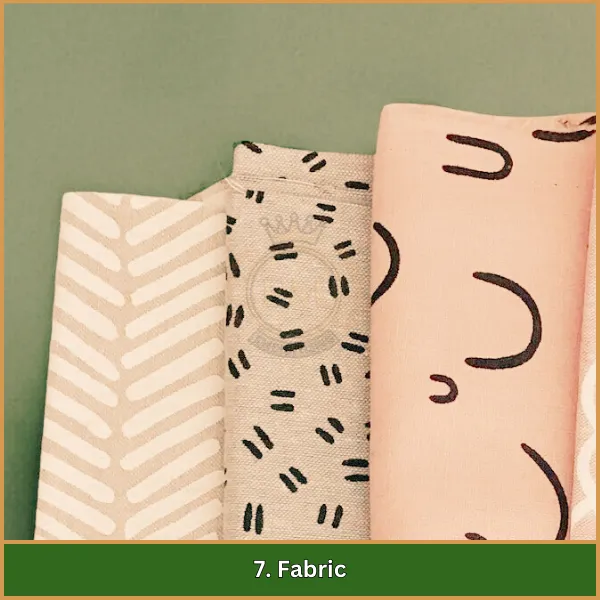
It is the base for any embroidery project, and choosing the right one can greatly affect the final result. Different fabrics interact uniquely with threads and stabilizers, so selecting the appropriate fabric type is important for a smooth and professional finish.
8. Scissors
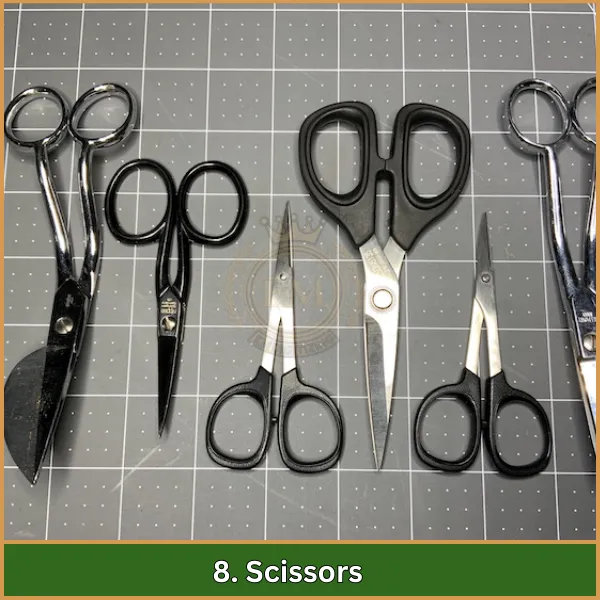
They are essential tools for trimming threads, cutting stabilizers, and precisely finishing embroidery projects. Having the right pair of scissors makes the embroidery process smoother and helps achieve a neat, professional finish.
Understanding Machine Embroidery Designs
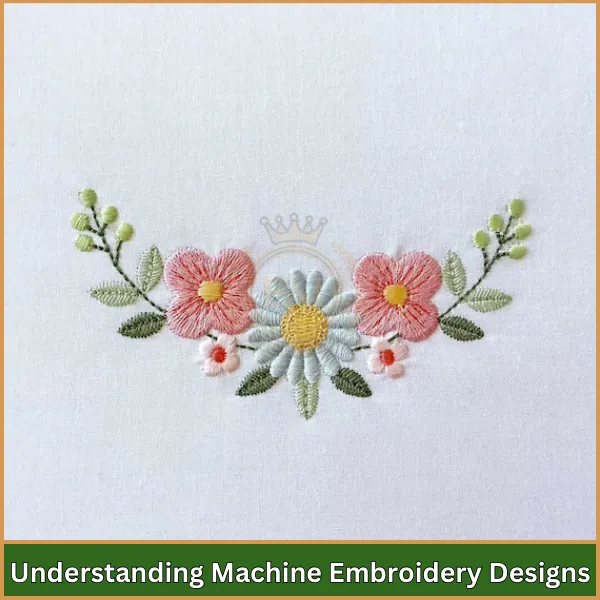
They are digital patterns that guide the embroidery machine in creating detailed images, logos, and text on fabric. However, simply having a design isn’t enough; to achieve professional, polished results, designs must undergo a crucial step called digitizing.
This process converts the design into a machine-readable format with precise instructions on how each stitch should be made. If you’re just learning machine embroidery basics, we highly recommend hiring a professional for digitizing, as it requires expertise to adjust stitch types, densities, and directions based on fabric and design intricacies.
For flawless embroidery results, hiring a professional digitizer is highly recommended. EMdigitizing offers exceptional digitizing services to transform your designs into high-quality embroidery files. Our expert team at EMdigitizing uses the latest techniques to ensure each design is perfectly suited to your fabric and machine, delivering a seamless embroidery experience.
By choosing EMdigitizing, you’re investing in precision and quality that truly sets your embroidery projects apart. Let us handle the complexities of digitizing so you can focus on creating beautiful, detailed embroidery that lasts. Order now for a professional finish you can trust!
File Formats for Embroidery Designs
They are saved in specific file formats that embroidery machines can read and interpret. Each machine brand may require a different format, so it’s important to know which file type suits your equipment.
- DST: A widely used format, especially for commercial embroidery machines.
- PES: Commonly used with Brother and Baby Lock embroidery machines.
- JEF: Used by Janome machines and compatible with various home embroidery machines.
- EXP: Compatible with Bernina machines and other professional-grade machines.
Choosing the right file format is essential for achieving the best results with your machine. It ensures that your design’s stitch details and specifications are accurately transferred, resulting in a polished final product.
Understanding Basic Machine Embroidery Stitches
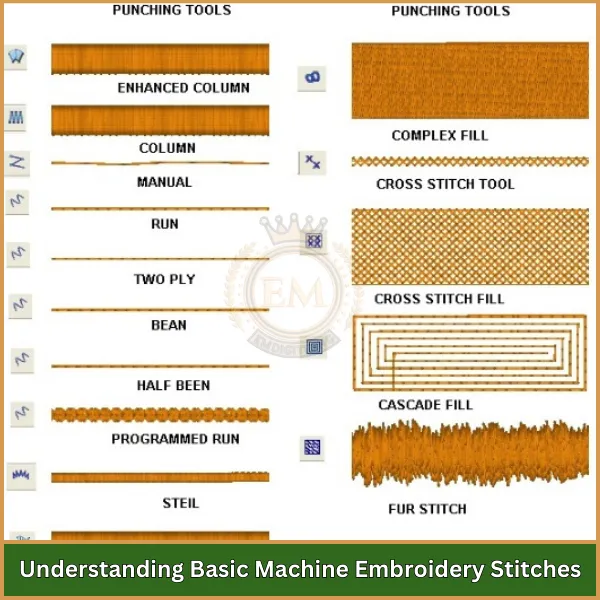
When learning machine embroidery basics, understanding the different types of stitches is essential for creating high-quality designs. Each stitch type adds unique texture, dimension, and detail to your embroidery projects. Here’s a look at the most common stitches used in machine embroidery:
- Satin Stitch: Known for its smooth, shiny finish, the satin stitch is commonly used for lettering and outlines. It creates a dense, bold line and is ideal for adding emphasis to certain areas of a design.
- Fill Stitch (Tatami Stitch): This stitch covers large areas with a consistent fill and is often used for backgrounds or solid shapes. The stitch pattern prevents puckering and gives a balanced, textured appearance.
- Running Stitch: A simple, single-line stitch used for outlining, detailing, or creating fine lines in a design. It’s quick and economical, making it suitable for light detailing.
- Bean Stitch (Triple Stitch): A reinforced running stitch that goes over each line three times, creating a bolder, more durable line. Bean stitches are excellent for outlines and adding definition.
- Zigzag Stitch: This stitch alternates in a zigzag pattern, adding texture and a slightly stretchy quality. It’s useful for securing edges or adding an eye-catching detail.
- Chain Stitch: Mimicking a hand-sewn look, the chain stitch is often used in decorative embroidery. It creates a textured, looped effect, adding depth and character to the design.
- Cross Stitch: Used to create a grid or textured pattern, cross stitch is often seen in more traditional designs and adds a unique, old-fashioned charm.
- French Knot: A specialty stitch that creates small, raised knots for adding detail and texture to specific parts of the design, such as flower centers or accents.
By mastering these basic machine embroidery stitches, you can create beautiful, versatile designs with a range of textures and effects, bringing your projects to life with style and precision.
Conclusion
In conclusion, mastering machine embroidery basics will set you on the path to creating beautiful, custom pieces with confidence. Whether you’re just starting or refining your skills, having well-prepared designs is essential to achieving flawless results.
For top-quality digitizing services, trust EMdigitizing! We offer the most affordable rates, super-fast turnaround times, and a quality guarantee on every design. Plus, with our preview option, you can see exactly how your design will look before stitching.
And if it’s your first time with us, you’ll receive an exclusive 50% off. Order now and let EMdigitizing bring your creative ideas to life with precision and excellence!
