T-shirt screen printing is a popular and versatile method for creating custom designs on fabric. ;
Whether you’;Ein Kleinunternehmer, der für Ihre Marke oder eine Person werben möchte, die Ihre Kreativität ausdrücken möchte, mastering the art of screen printing can open up a world of possibilities. ;
Dieser umfassende Leitfaden führt Sie durch die sechs wesentlichen Schritte, um jedes Mal perfekte Drucke zu erreichen.
Tipps zum T-Shirt-Siebdruck: 6-Schritt-für-Schritt-Anleitung für perfekte Drucke
Aus der Auswahl des Rechts Ausrüstung und Materialien Fehlerbehebung bei gemeinsamen Problemen, we’;LL Decken Sie alles ab, was Sie wissen müssen, um ein kompetentes T-Shirt-Bildschirmdrucker zu werden.
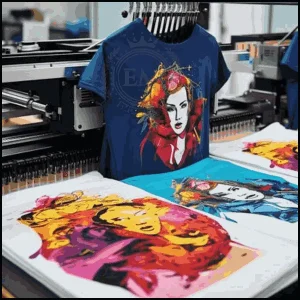
So, let’;S Tauchen Sie ein und erkunden Sie die faszinierende Welt des T-Shirt-Screen-Drucks gemeinsam.
Was ist T-Shirt-Screen-Druck??
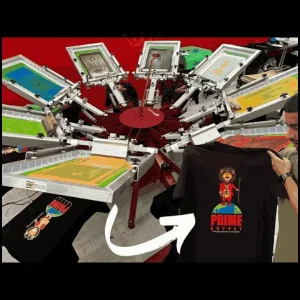
T-Shirt-Screen-Druck ist eine beliebte Methode zum Auftragen von Designs auf Stoff mit Bildschirmen und Tinte. Es beinhaltet die Erstellung einer Schablone auf einem Bildschirm, durch die Tinte gezwungen ist, das gewünschte Design auf dem T-Shirt zu erstellen.
Vorteile des T-Shirt-Siebdruckdrucks
Der Siebdruck bietet mehrere Vorteile für den T-Shirt-Druck. zuerst, it allows for vibrant and long-lasting prints that won’;Nach ein paar Wäschen verblassen T..
Zweitens, Es bietet eine große Flexibilität in Bezug auf Design- und Farboptionen, Erlauben Sie Ihnen, Ihre kreativen Ideen zum Leben zu erwecken.
zuletzt, Der Siebdruck kann für größere Mengen kostengünstig sein, Machen Sie es zu einer ausgezeichneten Wahl für Veranstaltungen, Unternehmen, oder Werbezwecke.
Wesentliche Ausrüstung und Materialien
Wesentliche Ausrüstung und Materialien Bilden Sie das Rückgrat jeder Aufgabe oder eines Projekts, Stellen Sie sicher, dass die Operationen reibungslos und effizient laufen.
Siebdruckpresse
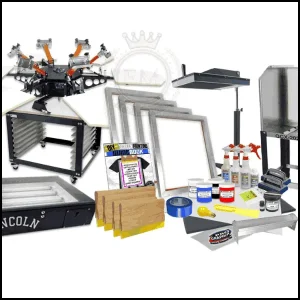
Eine Screen -Druckmaschine ist das Rückgrat Ihres Drucksaufsatzes. Es hält den Bildschirm an Ort und Stelle und ermöglicht einen konstanten Druck während des Druckprozesses.
Bildschirme und Maschenzahlen
Bildschirme mit verschiedenen Netz Zählungen werden verwendet, um verschiedene Detailebenen in Ihren Drucken zu erstellen. Höhere Netzzahlen sind ideal für komplizierte Designs, Während die Anzahl der unteren Mesh für mutig besser funktioniert, solide Designs.
Tinten und Zusatzstoffe
Wenn es um Tinten geht, Es stehen unzählige Optionen zur Verfügung. Tinten auf Wasserbasis sind beliebt für ihr sanftes Gefühl und ihre Umweltfreundlichkeit, Während Plastisol -Tinten für ihre lebendigen Farben und Haltbarkeit bekannt sind.

Zusatzstoffe, wie Extender oder Reduzierer, can help you achieve specific effects or improve the ink’;S Fluss.
Rausch- und Emulsionsbeschacher
Sprunges werden verwendet, um die Tinte durch den Bildschirm und auf das T-Shirt zu schieben. Verschiedene Rakel -Durometer (Härte) sind verfügbar, Ermöglichen.
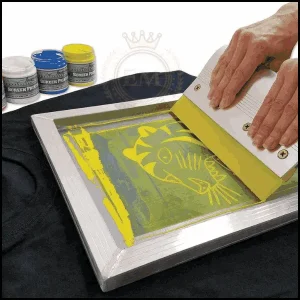
Emulsionsbeschützer, auf der anderen Seite, werden verwendet, um die Emulsion gleichmäßig auf den Bildschirm anzuwenden, Erstellen der Schablone.
Vorbereitung des Kunstwerks und des Designs
Die Vorbereitung des Kunstwerks und des Designs ist eine kritische Phase des kreativen Prozesses, Wo Ideen und Konzepte in visuelle Darstellungen übersetzt werden.
Entwurfsüberlegungen zum Siebdruckdruck
Wann Entwerfen für den Siebdruck, Denken Sie daran, dass jede Farbe einen separaten Bildschirm erfordert. Deswegen, it’;S wichtig, um Ihr Design zu vereinfachen und die Anzahl der Farben zu minimieren, um Komplexität zu vermeiden und die Effizienz zu erhöhen.
Vektorisieren und vorbereiten des Kunstwerks
Um einen reibungslosen Druck zu gewährleisten, Konvertieren Sie Ihr Design in a Vektorformat und alle Unvollkommenheiten aufräumen. Dies wird dazu beitragen, sauber zu kreieren, knusprige Linien und verhindern unerwartete Überraschungen während des Druckprozesses.
Farbtrennung
Für mehrfarbige Designs, Farbtrennung ist wesentlich. Dieser Prozess beinhaltet die Trennung jeder Farbe in einzelne Schichten, Ermöglichen Sie, dass Sie separate Bildschirme für jede Farbe erstellen und nacheinander drucken.

Vorbereitung des Bildschirms und der Tinte
Die Vorbereitung des Bildschirms und der Tinte ist ein wichtiger Schritt im Bildschirmdruckvorgang, wo Präzision Kreativität trifft.
Auswählen des richtigen Bildschirms
Die Auswahl des richtigen Bildschirms ist entscheidend für die Erreichung genauer und präziser Drucke. Betrachten Sie die Maschenzahl, Bildschirmgröße, und Rahmenmaterial basierend auf Ihrem Design und Ihrem gewünschten Ergebnis.
Emulsion auftragen und Schablonen schaffen
Das Beschichten Ihres Bildschirms mit Emulsion und Erstellung der Schablone ist ein wichtiger Schritt im Bildschirmdruckprozess. Follow the manufacturer’;s Anweisungen, um die Emulsion gleichmäßig anzuwenden, Gewährleistung einer ordnungsgemäßen Belichtung und gründlichen Spülung, um die gewünschte Schablone zu enthüllen.
Mischen und Vorbereiten der Tinte
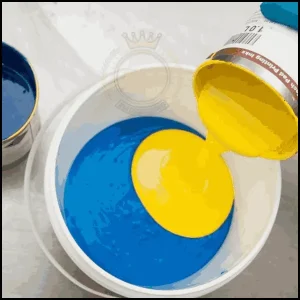
Die genaue Mischen von Tintenfarben sind wichtig, um die gewünschten Farbtöne und -töne zu erreichen. Mischbecher, Waage, und Pantone -Farbführer Kann Ihnen helfen, eine konsistente und genaue Farbanpassung zu erreichen.
Schritt-für-Schritt-Druckprozess
Der Schritt-für-Schritt-Druckprozess ist ein methodischer Ansatz zum Übertragen von Designs auf eine Vielzahl von Materialien, Liebe zum Detail und die Beherrschung der Technik benötigen.
Einrichten des Bildschirms auf der Presse einrichten
Bevor Sie in die aufregende Welt des Siebdrucks eintauchen, Sie müssen Ihren Bildschirm auf der Presse einrichten. It’;S wie die Vorbereitung der Leinwand, bevor Sie Ihr Meisterwerk malen.
Stellen Sie sicher, dass der Bildschirm auf der Presse fest gesichert ist, so it doesn’;wackeln Sie wie eine betrunkene Qualle herum. Ein stabiler Bildschirm bietet Ihnen knackige und saubere Drucke.
Ausrichten des Designs und der Platte
Jetzt, wo Ihr Bildschirm fertig ist, it’;Es ist Zeit, Ihr Design mit der Platte auszurichten. Betrachten Sie es als ein High-Stakes-Spiel von Connect-the-Dots, aber mit mehr Tinte.
Nehmen Sie sich Zeit, um sicherzustellen, dass das Design auf der Platte zentriert ist, Oder Sie könnten ein T-Shirt haben, das so aussieht, als wäre es von einem Affen mit verbundenen Augen gedruckt worden.
Richtige Tintenantragstechniken
Der Moment ist angekommen, um Ihr inneres Picasso zu entfesseln und die Tinte aufzutragen. Don’;Ich bin nicht geizig damit, but don’;Ich werde auch nicht wild werden.
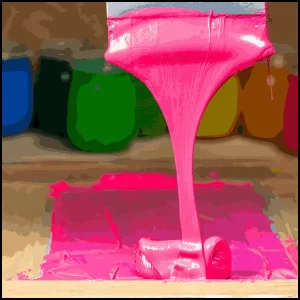
Verwenden Sie gerade genug Tinte, um Ihr Design hervorzuheben, Wie ein Pfau, der seine Federn zur Schau stellen. It’;S alles darum, diesen Sweet Spot zwischen zu wenig und zu viel Tinte zu finden.
Verbreiten Sie es gleichmäßig über den Bildschirm, Wie ein reibungsloser Verbrecher.
Härten und Trocknen der gedruckten Hemden
Herzliche Glückwünsche, you’;Ich habe Ihre Hemden erfolgreich gedruckt! But don’;Ich feiere noch nicht, Weil sie zärtliche liebevolle Fürsorge brauchen, um ihr volles Potenzial auszuschöpfen. Das Aushärten und Trocknen der Drucke ist wie das Senden eines luxuriösen Spa -Rückzugs.
Follow the instructions for the specific ink you’;Verwenden Sie und geben Sie diesen Hemden eine schöne Wärmebehandlung, um sicherzustellen, dass die Drucke lebendig bleiben und länger dauern.
Fehlerbehebung bei Problemen mit häufigem Druck
Ah, Die Freude an der Fehlerbehebung. Gerade als Sie dachten, alles lief reibungslos, Es erscheint ein wildes Druckproblem. Don’;Keine Panik!
Hier sind einige häufige Probleme, denen Sie begegnen können und wie Sie sie angehen können:
- Ausbluten der Tinte: Wenn sich Ihre Tinte wie ein rebellischer Teenager außerhalb der Linien ausbreitet, Versuchen Sie weniger Druck, wenn Sie die Tinte auftragen oder auf eine dickere Tintenkonsistenz wechseln. Sie können auch versuchen, einen unteren Netzbildschirm zu verwenden, um zu verhindern, dass Tinte durchdringt.
- Ungleichmäßige Drucke: Wenn Ihr Design wie ein Picasso -Meisterwerk aussieht (aber nicht gut), Überprüfen Sie, ob Ihr Bildschirm richtig mit dem Hemd ausgerichtet ist. Unebener Druck oder ein nicht ordnungsgemäß gestrecktes Bildschirm kann auch dieses Problem verursachen.
- Tinte Smudges: Wenn Ihr Druck aussieht, als wäre er von einem schelmischen Tintenmonster angegriffen worden, Es kann überschüssige Tinte auf dem Bildschirm sein, oder Ihr Rakel könnte zu schmutzig sein. Reinigen Sie beide gründlich und versuchen Sie es erneut. And don’;Vergessen Sie nicht, Ihre Hände danach zu waschen, Es sei denn, Sie möchten mit Tintenfingerabdrücken wie ein Möchtegern-Detektiv.
EMdigitalisieren: Experte für die Digitalisierung von Stickereien zu Ihren Diensten
Wenn Sie an einem Stickprojekt jeglicher Art interessiert sind, Dann ist EMdigitizing die beste Option für Sie. Wir bieten Stickerei digitalisieren und Vektorkunstdienste mit einer schnellen Bearbeitungszeit. Sie können auch unsere Website besuchen und sich über unsere besten Dienstleistungen informieren.
Wir bieten auch ein tolles 50% Rabatt auf alle unsere Dienstleistungen für unsere angesehenen Erstkunden. wir auch kostenlose Angebote anbieten in gerade erzeugt 5 Protokoll.
Schnappen Sie sich dieses zeitlich begrenzte Angebot und bringen Sie Ihr Stickprojekt mit EMdigitizing auf die nächste Stufe.
Wenn Sie Fragen zu diesem Thema haben, du kannst sie fragen. Vielen Dank, dass Sie sich die Zeit genommen haben, diesen Artikel zu lesen.
Häufig gestellte Fragen:
Sie brauchen einen Bildschirm, Rakel, Tinte, Emulsion, ein dunkler Raum, und eine Lichtquelle für die Belichtung. Zusätzlich, Ein sauberer Arbeitsbereich und ein Trockenbereich für die fertigen Hemden sind unerlässlich.
Pre-wash the shirt to remove impurities and ensure it’;s völlig trocken vor dem Drucken. Ebenfalls, Bügeln Sie das Hemd, um Falten zu beseitigen, die die Druckqualität beeinflussen könnten.
Erstellen Sie Ihr Design, Bereiten Sie den Bildschirm vor und legen Sie sie frei, Tragen Sie Tinte durch den Bildschirm auf das Hemd auf, und dann die Tinte heilen. Das Reinigen des Bildschirms nach der Verwendung ist für zukünftige Drucke von entscheidender Bedeutung.
Ja, mit grundlegenden Geräten und Vorräten, Sie können zu Hause mit dem Bildschirmdruck beginnen. Geduld und Praxis sind der Schlüssel zu professionellen Ergebnissen.
