
Tipps zum Entfernen der Stickerei
Beim Sticken, Es ist normal, dass sich etwas Unterlage und Stickgarn auf dem Stoff befindet, da die Unterlage zur Stabilisierung des Stoffes während des Stickvorgangs erforderlich ist.
Wenn Sie das Stickprojekt abgeschlossen haben, Der letzte Schritt besteht darin, die Maschinenstickerei zu entfernen. Wenn Sie nicht aufpassen, Sie können den Stoff oder die Stickerei selbst beschädigen, wenn Sie das Stickentfernungswerkzeug nicht verwenden.
Hier sind einige Tipps, die Ihnen helfen, Backups sicher und einfach zu entfernen:
Identifizieren Sie die Art der verwendeten Sicherung. Dadurch wird ermittelt, wie sich die Stickerei am besten entfernen lässt. Wenn Backwaren wasserlöslich sind, Sie können es in heißem Wasser einweichen, bis es sich auflöst. Wenn das Backen wärmebetrieben ist, Sie können ein Dampfbügeleisen verwenden.
- zuerst, Sie benötigen eine Schere
- Zweite, Sie müssen aufpassen, dass Sie den Stoff nicht zerschneiden.
- Entfernen Sie die Rückseite der zusätzlichen Stickerei an der Außenseite des Designs
- Ziehen Sie die Rückseite der Stickerei vorsichtig ab, Achten Sie darauf, dass Sie nicht an den Nähten ziehen.
- Wenn Sie auf Widerstand stoßen, Halten Sie an und schneiden Sie diesen Teil des Rückens ab.
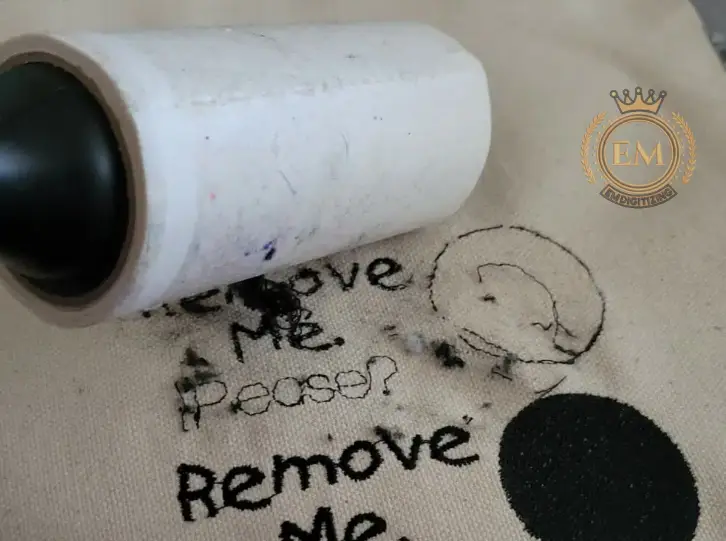
- Nach dem Entfernen der Unterlage, Bürsten Sie vorsichtig alle losen Stickfäden ab (Sie müssen einen Fusselroller verwenden, um alle verbleibenden Fäden zu entfernen).
- Zu guter Letzt, Sie müssen den Bereich bügeln, um eventuelle Falten zu entfernen.
Mit etwas Geduld, Sie können Ihre Stickerei im Handumdrehen entfernen!
Werkzeuge zum Entfernen der Stickerei
Es gibt viele Werkzeuge, die Ihnen beim Entfernen der Stickerei helfen. Manche sind so einfach wie eine Schere, während andere eher als Stickrahmen geeignet sind.
Am gebräuchlichsten ist die Verwendung eines Nahtwicklers, ein kleines, scharfes Werkzeug, mit dem Stiche vorsichtig durchtrennt werden können. Eine andere Möglichkeit besteht darin, die Stickerei mit einem scharfen Messer oder einer Schere vorsichtig vom Stoff zu entfernen.
It doesn’;Es spielt keine Rolle, welches Werkzeug Sie verwenden, Ziel ist es, die Stickerei und alle losen Fäden zu entfernen, ohne den Stoff zu beschädigen.
Verwendung eines Handrasierers
Handrasierer funktionieren wie Nähreiniger oder Elektrorasierer, aber schneller. Kunststoffrasierer sind sehr preiswert und in jedem Geschäft leicht zu finden.
Entfernen Sie die Stickerei, indem Sie das Material auf eine ebene Fläche legen und stabil halten. Führen Sie nun den Rasierer vorsichtig unter die Rückseite der Stickerei.
Nachdem alle Stiche fertig sind, Drehen Sie das Tuch um, um den Faden von außen zu entfernen. Reinigen Sie alle verbleibenden Fäden mit einem Kamm.
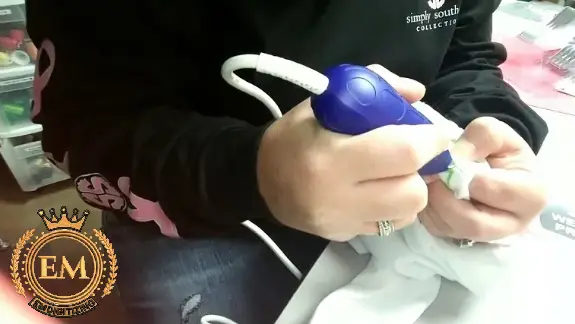
Verwenden Sie einen Nähreiniger
Nähreiniger sind batteriebetriebene oder elektrische Nähmaschinenentferner, die elektrischen Rasierern oder Trimmern ähneln. Dies geschieht durch Schneiden der Stickerei mit einem kleinen Zahn.
Wie öffne ich die Ärmel der Stickerei mit einem Nähradierer?? Verwenden Sie zum Entfernen von Stickstichen mit einem Nähreiniger eine glatte Oberfläche. Wenn nicht, Die Chemikalien können ernsthafte Gesundheitsprobleme verursachen.
In wenigen Sekunden können Sie die Naht auf Ihrem Rücken erkennen. Abhängig von der Dichte des Stoffes, Ein Nähreiniger wird wahrscheinlich mehrere Male brauchen, bis alle unerwünschten Stiche und Maschen entfernt sind.
Mit einem Nahttrenner
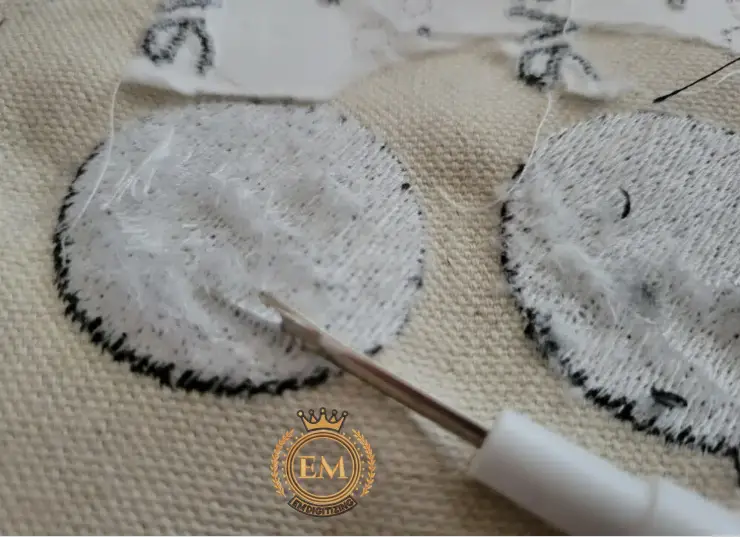
Wenn Sie die Stickerei mit der Rückseite entfernen möchten, Der Nahtwickler ist das beste Werkzeug für diese Aufgabe.
Ein Nahtwickler ist ein Werkzeug zum Entfernen nadelförmiger Stickereien, scharfe Enden. Der erste Schritt beim Entfernen der bestickten Rückseite besteht darin, sie mit diesem Spezialwerkzeug von außen zu entfernen.
Führen Sie einfach die Nahtumwickelspitze unter die Naht ein, und bewegen Sie das Werkzeug vorsichtig hin und her, um die Nähte zu lösen. Sobald die Nähte locker sind, Sie können die Rückseite vorsichtig abziehen. Fahren Sie um den Stickrahmen herum fort, bis er vollständig entfernt ist.
Verwendung von Elektroschüttlern
Wenn Sie ein Kleidungsstück mit Stickereien haben, das Sie entfernen möchten, Sie können ein paar verschiedene Dinge dagegen tun. Eine Möglichkeit, die Stickerei zu entfernen, ist die Verwendung eines Elektroschüttlers.
Dabei handelt es sich um ein Gerät, das die Stoffstickerei grundsätzlich in Schwingung versetzt. Dies ist ein relativ schneller und einfacher Vorgang und erfordert keine besonderen Fähigkeiten oder Kenntnisse.
Zuerst, Sie müssen einen elektrischen Shaker finden, den Sie in den meisten Kunsthandwerksgeschäften finden. Sobald Sie Ihren Shaker eingenommen haben, Sie müssen das Trägermaterial von der Stickerei entfernen.
Um dies zu tun, Sie benötigen eine Stickerei in einer Hand und einen Streuer in der anderen. Mit dem Shaker kräftig rühren, bis der Teig locker ist. Wenn die Unterlage locker ist, Sie können es von der Stickerei entfernen.
Nachdem alle Nähte entfernt wurden, Der Stoff wird gedreht und mit den Fingern abgezogen. Verwenden Sie zum Reinigen der Oberfläche Fusselrollen oder Klebeband.
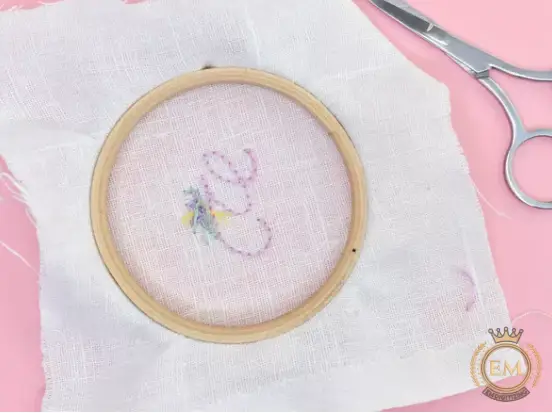
Wie entferne ich die Stickerei mit einer Stickschere??
Wenn Sie die Stickerei von einem Kleidungsstück entfernen möchten, Das beste Werkzeug für diese Aufgabe ist eine bestickte Schere. Stickscheren haben eine scharfe Spitze, dünne Spitze, die sich leicht vom Stickgarn lösen lässt, ohne den darunter liegenden Stoff zu beschädigen.
Zum Entfernen der Stickerei, Schneiden Sie zunächst entlang der Außenkante des Motivs, um es mit einem Tuch zu lösen. Dann, Schneiden Sie die einzelnen Stiche vorsichtig ab, bis das Motiv entfernt ist.
Diese Schere wurde speziell zum Schneiden des Stickgarns entwickelt und kann unerwünschte Stiche schnell entfernen. Verwenden Sie unbedingt eine scharfe Schere und schneiden Sie entlang der Außenkante der Stickerei, um den Stoff darunter nicht zu beschädigen.
Wenn Sie Schwierigkeiten haben, die Stickerei zu entfernen, ohne den Stoff zu beschädigen, Versuchen Sie, die Nähte vorsichtig mit einem Nahtwickler anzuheben.
Was muss ich für das Entfernen der Stickerei verlangen??
Viele Stickereifachleute bieten keine Dienste zum Entfernen von Stickereien an, Ganz einfach, weil Nähte schwierig zu entfernen sein können und nicht immer die besten Ergebnisse liefern. Beim Entfernen von Nähten, Es ist sehr leicht, eine falsche Bewegung zu machen und ein Loch in das Kleidungsstück zu bohren.
An experienced embroiderer told me that she was so confident in her removal skills that she would do it for –; 12- $ 15. Jedoch, Sie wird nur dann an dem Projekt arbeiten, wenn sie glaubt, dass sie nach dem Entfernen der Stickerei gute Ergebnisse erzielen wird.
Entfernt man die Stickerei, entstehen Löcher?
Manchmal kann es beim Entfernen der Stickerei zu Durchstichen in Ihrem Stoff kommen. Wieder, Dies ist wahrscheinlicher, wenn Sie die Stickerei auf einem empfindlicheren Stoff entfernen.
Selbst wenn Sie die Stickerei auf dem Stoff entfernen, ist dieser sehr haltbar, Manchmal sieht man die Löcher dort, wo der Faden der vorherigen Stickerei durch den Stoff ging. Diese kleinen Löcher verschwinden normalerweise, wenn Sie Kleidung waschen. Bügeln kann auch dabei helfen, Stickflecken auf der Rückseite zu entfernen.
Aber, Auch wenn Sie beim Entfernen der Stickerei und dem Bohren großer Löcher in den Stoff etwas aggressiver vorgehen, Es ist möglich, die Löcher zu verbergen. Sie können dieses Loch tatsächlich sticken und ein Loch in Ihren Stoff bohren. Grundsätzlich, Sie versiegeln die Rückseite und besticken die Oberseite, und man weiß nie, ob das Loch da war. Das ist durchaus zufriedenstellend.
In der Tat, there are some crazy people out there who think it’;s fun to “;repair”; Kleidung durch Sticken von Löchern. Wenn Sie etwas Schnittschutzmittel auf der Rückseite des Kleidungsstücks aufbewahren, Sie können die Oberseite besticken und das Loch ist nicht mehr sichtbar.
Eine Frau, die ich kenne, stickt gerne auf von Insekten zerfressene Wollpullover, Zigarettenkippen, und Lieblings-Sweatshirts und Windjackenlöcher. Stoffe mit Löchern, Tränen, und Flecken werden in Secondhand-Läden und Secondhand-Läden oft rabattiert, was eine interessante Herausforderung beim Beheben mit Stickereien darstellen kann.
Fazit
Obwohl Stickerei ein wunderschönes Handwerk ist, Manchmal möchte man es vom Stoff entfernen. Vielleicht haben Sie einen Fehler gemacht oder das Design ist nicht mehr Ihre Wahl. Aus welchem Grund auch immer, Es ist nicht schwierig, die Stickerei mit dem Trägermaterial zu entfernen.
Schneiden Sie zunächst den überschüssigen Faden vom Rand des Motivs ab. Dann, Verwenden Sie einen Nahtwickler, um die Nähte vorsichtig zu entfernen. Die Nähte lösen das Backen.
Sobald die Nähte entfernt sind, Das Backen sollte leicht von der Hand gehen. Wenn dies nicht geschieht, Sie können ein Stück Klebeband zum Entfernen verwenden.
Mit etwas Zeit und Geduld, Sie können die Stickerei leicht durch Backen entfernen, und auch Maschinenstickstiche entfernen.


