
Embroidery Essentials for Beginners
No embroidery guide is complete without the essentials you need to get going. Luckily you don’t need much to make your own embroidery starter kit.

The needle
Embroidery needles have a long eye which makes threading easier if you are sewing with several threads. Choose sizes 7 and 9 for embroidery as they are suitable for hand stitching.
The Fabric
It’s best to sew on a closely woven fabric so that your stitches don’t disappear between the threads of the fabric. Cotton and linen are ideal. Love crafts have a good range of embroidery fabrics to get you started.
The Thread
There are many different yarns you can use but stranded cotton is the most common. Each yarn has six strands per length so you can vary depending on how thick you want your stitches to be.
There are many different yarns you can use but stranded cotton is the most common. Each length of thread has six strands so you can use different numbers depending on how thick you want your stitches to be.
Embroidery Hoop
If you haven’t used them before, hoops are inexpensive but essential to keep your fabric nice and snug while sewing. Without one it can be really hard not to pull too hard when sewing, which can cause the fabric to tear.
Embroidery Scissors
Embroidery scissors are smaller than your average pair of scissors with sharp blades that easily snag your threads. They come in some attractive and classic designs and will become one of the most used tools in your kit.
Types of Hand Embroidery Stitches
Backstitch
Use backstitching for a clean outline. Bring the needle up and back on the fabric, as shown. Push the needle back in front of where you started, making sure you keep all the stitches neat and even.
Satin Stitch
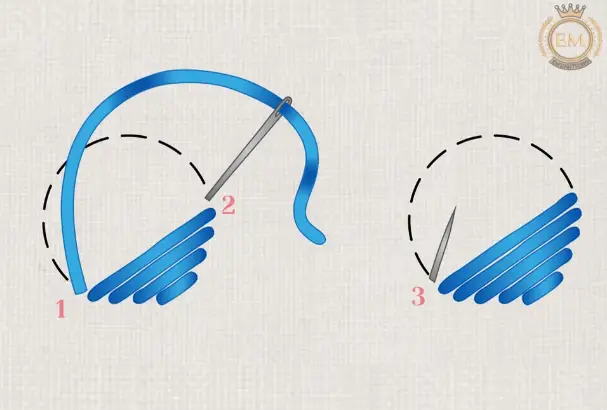
To work satin stitch, bring the needle up to 1 on one side of the shape and then down to 2 on the other side. Continue sewing in this way so that all the stitches are close together without any of the fabric showing through.
Stem Stitch
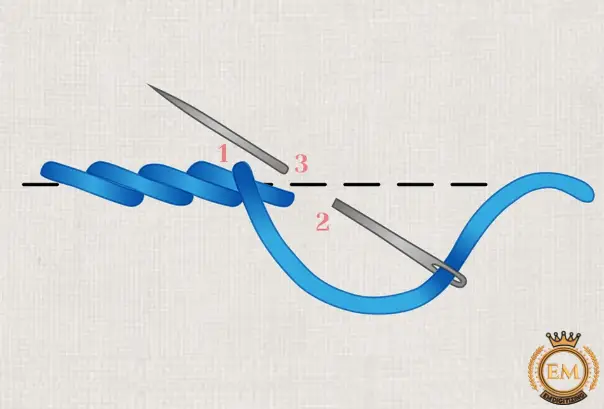
Stitch from left to right in regular small stitches along the line of the design. For stem stitching, the thread should always exit to the left of the previous stitch. Stem stitch is used for flower stems, outlines, etc.
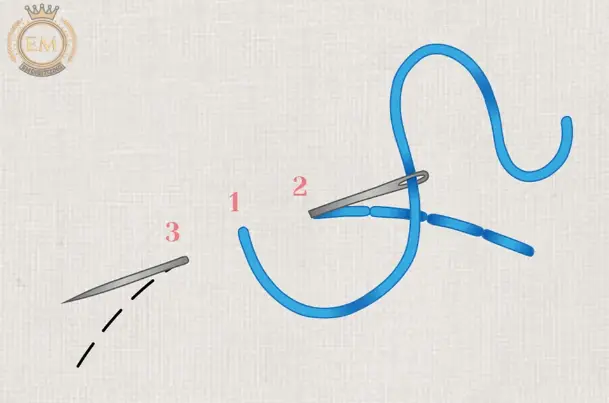
Lazy Daisy Stitch
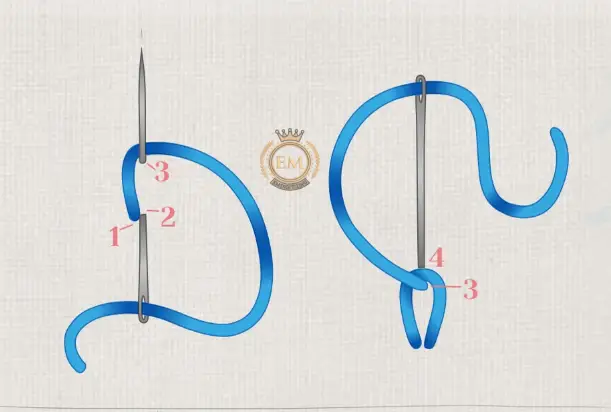
Hold the needle up at 1 and down at 2, without pulling the needle all the way through the fabric. Bring the needle back up to 3 o’clock with the thread under the needle, and pull gently to form a loop. Secure the loop by pushing the needle back in on the very another side of the loop.
Colonial Knots
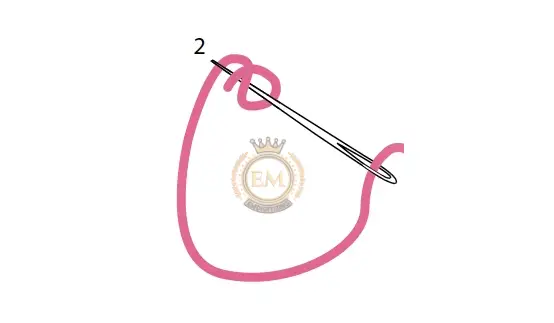
Bring the needle to 1 and loop the yarn over it. Then take the thread up and down the needle in a figure of eight. Follow the thread path on the diagram to see how this happens. Push the needle down at 2, close to where it first emerged. Before you pull it all the way constantly, tight the loops around the needle and hold them in place. Pull the needle to form a neat knot.
Woven Wheel Stitch
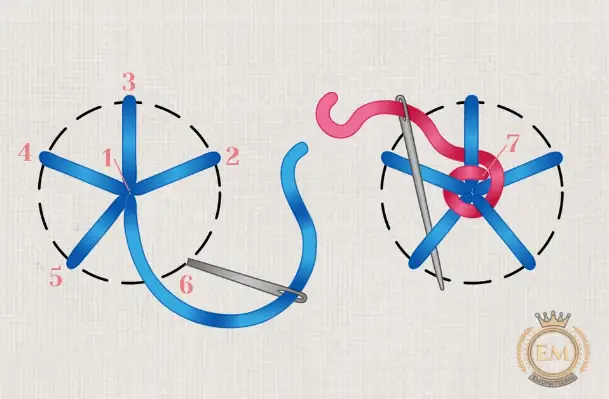
Make five straight stitches evenly spaced in a circle as shown. Now, bring the needle up to the center where all the straight stitches meet. Stitch it alternately under and over the straight stitches, making sure you don’t sew through the fabric or the stitches. Continue until you have knitted the yarn straight to the outer ends of the stitches, then move the needle back to finish.
Running Stitch
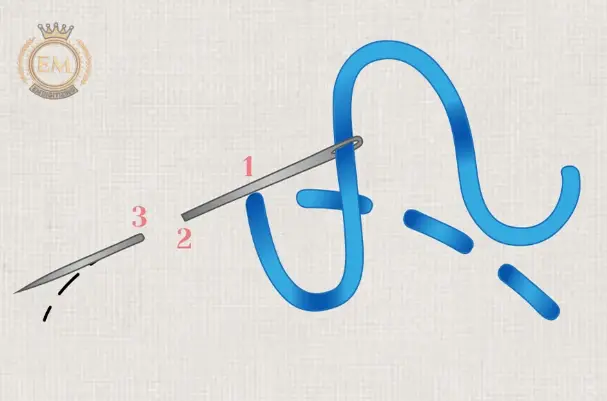
Move the needle up and down the fabric to make stitches of regular length. Make sure all the stitches are the same length and the spaces left between them are the same length for a neat stitch. Maintain tension so that the stitches lie neatly on the fabric.
Hand Embroidery Complete Tutorial: Step By Step
Step No. 1
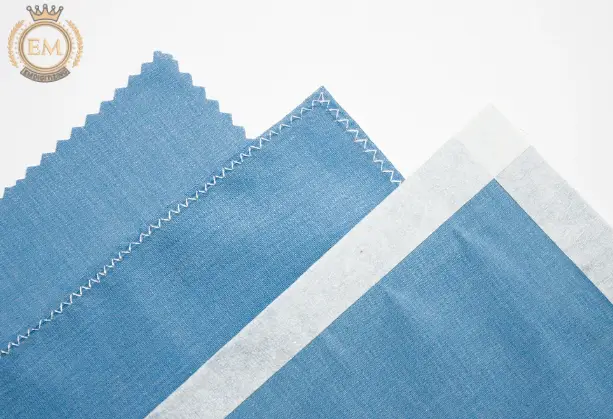
Prepare your fabric to prevent fraying. There are many ways to do this. For a quick fix, seal the edges with masking tape, or you can trim around the edge with pinking shears. For the most secure finish, use a sewing machine to do a quick zigzag stitch around the edges.
Step No. 2
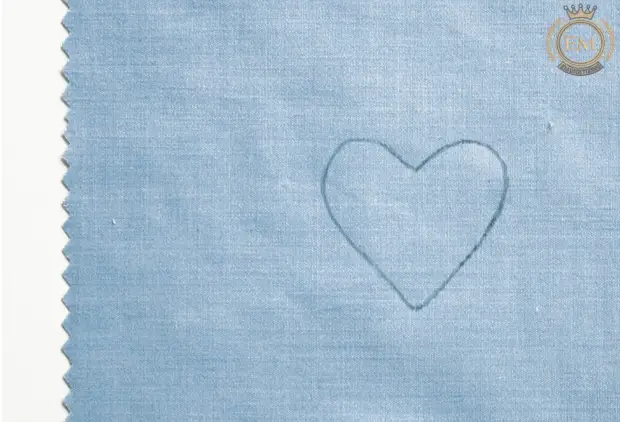
Move the design. Most embroidery projects use templates, which you will need to transfer onto your fabric. The simple and easy way is to track it down. Place the fabric right side up over the template and secure it with masking tape. Using a pencil, water-soluble pen, or chalk, trace all the lines in the color that will appear on the fabric. If you struggle to see the design through the fabric, then tape the design and fabric to the window. The light will shine so you can see to trace the design as before.
Step No. 3
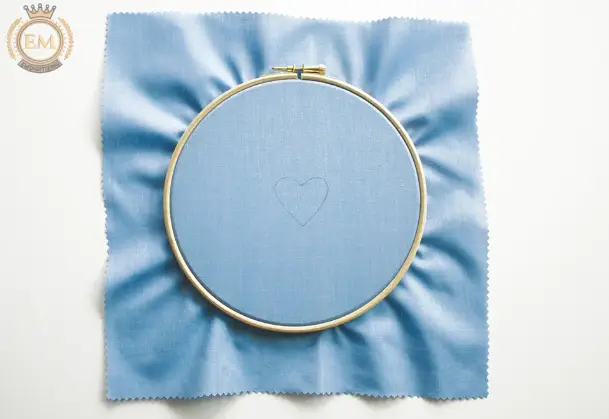
Once you’ve traced your design, place the fabric in a hoop or frame. This will provide the right tension and your stitches will be neat.
Step No. 4
The easiest way to start is with an idle knot. Knot one end of your thread and bring it down the front of your fabric, about 2.5 cm (1 inch) from your starting point. Bring it back up to create your first stitch. Begin stitching your design, making sure you stitch on your starting thread. Once your starting thread is secure, simply cut the knot. If you are sewing with 2 strands of thread, you can also try a loop knot start for the neatest finish.
Step No. 5
Now you work around the design you have traced making a series of small embroidery stitches.
Step No. 6
To secure the thread when you’re done sewing, weave it through the back of your stitch.
How to Finish Embroidery
How to Wash Embroidery
Washing your clothes after sewing will really bring your embroidery to life and also restore the crispness of the cotton or linen. Soak your sewn fabric in a bowl of warm water with a little mild soap for about 15 minutes, then gently shake it out. To remove marks, sponge carefully, taking care not to disturb the stitches if possible. Rinse well and roll your stitch in a towel to squeeze out excess water. Leave flat to dry.
How to Press Embroidery
If you have washed your fabric, it is best to press your fabric while still slightly damp. First of all, pad your ironing board with a thick towel. Lay your work right side down on top of a thin, clean cloth. Press carefully until the fabric is dry. The towel will prevent the iron from flattening the stitches. Gently press the point of the iron into the stitches as you work them.
Conclusion
I am sure this article will help you understand hand embroidery. And also know about the types of hand embroidery and step-by-step working of hand embroidery. I hope this helps you guys!


