Ready to start embroidery? But what is it that you need to do embroidery work? The project requires the use of helpful embroidery business tools, as well as performance.
Tools are by far the most important thing for any craft. You will need some things. Here is a list of essentials you will need to complete the embroidery project.
Embroidery is a way to decorate fabric by hand or machine with a design made of thread or floss. Most people start with basic kits to learn the types of sewing and to create original designs for homes, accessories, and clothing.
If you’ve ever struggled with machine embroidery, you may not have the right tools to complete your project effectively. Embroidery tools and accessories make embroidery on many products faster, correct errors, and prevent errors.
The embroidery is beautiful. It is a remedy for the soothing, healing, and troubled mind. The art of embroidery has withstood the test of time and has established itself as a hobby that is easy to learn and budget-friendly. If you are going to pick up this ancient craft, you will need some essential embroidery tools to move forward.
Embroidery Digitizing Services
Below are some helpful embroidery business tools you will want and need: –
Tool # 1: Needles
The needle is the first and most important tool in our list of helpful embroidery business tools. Anyone can pull a piece of thread through a needle fabric, but individual styles work better. Using the right needle for a task will make embroidery less difficult for newborns and will increase the chances of getting better results.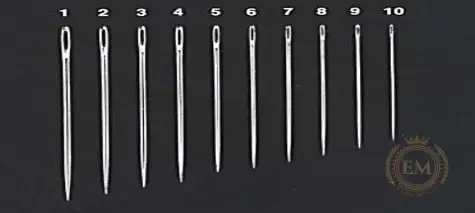
There are three types of needles used in embroidery.
- Crewel needle
- Tapestry needle
- Milliner’s needle
Crewel needle
- Its Length is 4-5 cm
- Having a Long eye and sharp point
- It is used for threading thick yarn.
Crewel needle eyes handle large embroidery threads, and a sharp tip is needed to press the needle through the thick layers of yarn and cloth.
Since you will also place stitches right on top of each other and your thread will be tightly packed and woven, you will need to buy sharp needles to get stuck in other lines or without damage.
To learn about which needle is best for your project click here.
Tapestry needle
A tapestry needle is a long eye needle that can carry thick or multi-stranded threads in embroidery. This type of needle is usually 4-6 cm in length and is slightly thicker at the end of the eye to prevent the thread from being rubbed and worn.
The most commonly used cross stitch needles are sizes 24 and 26, while the needles are available in sizes 20, 22, 24, 26, and 28. When using size 28, use only one strand of trapped cotton (floss), so that the eye is very good. Delicate and can split.
Milliner’s needle
Milner’s needles are sometimes called straw needles and are traditionally used for hat embroidery.
The features of Meliner’s needle are as follows:
- Having Round eyes
- It is used in pleating and fancy decorative needlework
In general, the class of needles is sharp, long, useful for wrapping and tying, and is commonly used in milling.
Tool # 2: Hoops and Frames
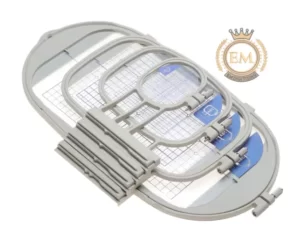
Hoop and frames are 2nd most important tools in our helpful embroidery business tools list. Embroidery made of wood, bamboo, or plastic holds the fabric taught during sewing. They help maintain the tension of the fabric and stitches. Hand embroidered hoops can be round or oval, while machine embroidered hoops can be square.
Materials:
Plastic and wood are perfect for beginners, while brass versions of hoops are available for more experienced semesters. I prefer the wooden version to the plastic as I don’t hold the fabric tightly. If you buy plastic, get good quality hard plastic.
Size:
Buy some sizes for different projects, keeping in mind that you can always move small hoops around for larger items. I have some large hoops that I rarely use because I prefer the way small hoops are easier to handle.
Tool # 3: Scissors
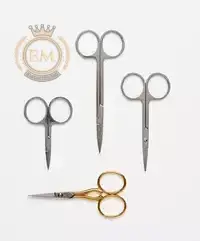
Scissors are very common but the 3rd most important tool in the list of embroidery business tools. Embroidery scissors differ from standard art scissors. They have small, usually thin blades that are incredibly sharp and usually reach a tipping point. The maximum of them is about 3.5 to 4 “long, with blades that are 1 to 2.5” long. The main reason for their use is; They can go near the ground fabric to cut the threads neatly.
Tool # 4: Lighting
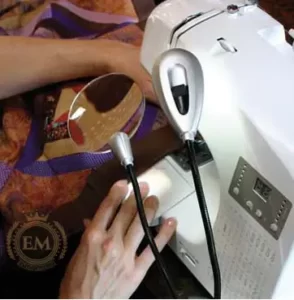
Next on the list of essential embroidery business tools is lighting. The good work involved in embroidery requires good lighting. It can be in the form of a really nice place by the window or a suitable lamp. Magnifying lamps are a great asset for really great work.
If you do not have a lighting budget, remember that sunlight is free and stronger than any of these lamps. I occasionally use a magnifying lamp when I need a section to be particularly perfect but can’t complete the project under the magnifier.
Tool # 5: Thread
Another essential embroidery business tool is the thread. There are a wide variety of choices when it comes to embroidery thread. Choose the type that best suits your project and your fabric. There are floss, cotton, wool, and metals to choose from. Ensure that thread is durable and washable.
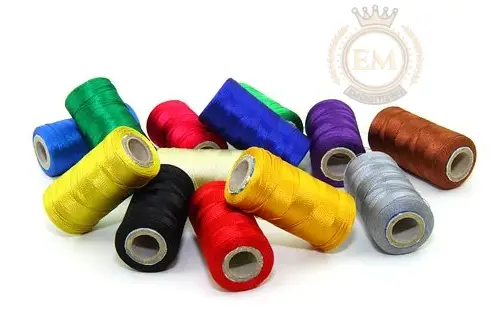
Cheap handicraft threads should only be used for projects that do not require washing. You will also find that some cheap threads are more likely to get tangled and knotted. DMC is a brand known for its good quality embroidery floss. I usually use a mix of cheaper and more expensive brands to keep costs down.
The embroidery floss usually comes in 6 edges which you can open and separate for fine embroidery. You will need a lot of patience to embroider 1 strand. Most people use 3-6 edges.
To learn more about the best thread for your project click here.
Tool # 6: Tracing Paper
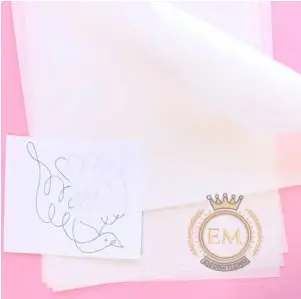
The first step towards beautiful embroidery is to transfer the embroidery patterns to the fabric. Lightweight tissue or tracing paper marked with your pattern is used in the process of transferring tracing paper to mark the embroidery design on the fabric, often called thread tracing.
Without direct markings on the fabric, this is a great way to move a pattern into the fabric, making it suitable for use on delicate or washable fabrics. Find your pattern for embroidery, copy it into your fabric, and start your work.
Tool # 7: Tape Measure
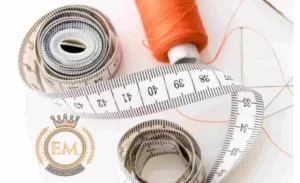 Tape is also a very common and most important tool in our list of essential embroidery business tools. A measuring tape for measuring the body is usually 60 inches long, which is about 1.5 meters. It is a good idea to have a tape measure on hand so that you can measure your completed work, and this tool can replace a strict ruler.
Tool # 8: Pens
There are various options for drawing water-soluble pencils, tailor’s chalk, pens, and cloth drawing ink patterns. I often use a sharp HB (lead) pencil where the stitching will hide the pattern. It gives a nice clean line. 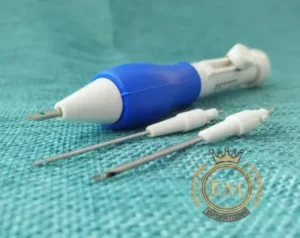
Always check the method of your marking tools to see if it does not come out when washing the item or staining the clothes. Stay away from time or heat-sensitive marking pans as embroidery takes some time and the markings may disappear before they are finished.
Tool # 9: Thimble
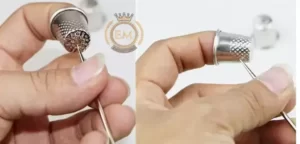
The finger is used to force the needle into the cotton by wearing it on the tip of the finger and is also used to help push the needle. It protects your fingers from sticking needles and prevents blood stains on embroidery.
Tool # 10: Eraser
This electronic device looks and feels like a pair of clippers. If you want to remove large sections of your embroidery or start completely, you can use this tool to cut all your threads at once.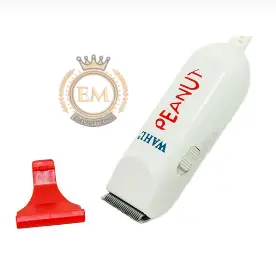
Conclusion
Tools vary greatly. In this article, the most helpful business tools of embroidery are discussed. During the embroidery process, all these wonderful tools do a job. So, you may not need each one for every project, it is helpful to take it in hand, only if you do it!
Hope this helps you guys. If you have any questions or would like to read more articles related to the embroidery business, check out the blog.
Do you need digitizing service for your embroidery machine, with extremely fast change and excellent quality? Click on the link and get a free quote.
