L'intelaiatura multiposizione è una tecnica straordinaria che ti consente di creare disegni di grandi dimensioni cucendoli in sezioni. If you’;Sei nuovo a questo, potrebbe sembrare un po' opprimente, ma non preoccuparti!
Con i giusti consigli, puoi rendere il processo semplice e fluido. Questo articolo ti guiderà attraverso semplici passaggi per garantire che i tuoi progetti si allineino perfettamente, il tuo tessuto rimane al sicuro, ed eviti gli errori comuni.
Che tu abbia appena iniziato o desideri migliorare, questi suggerimenti ti aiuteranno a ottenere i migliori risultati e a rendere i tuoi progetti di ricamo più divertenti e di successo!
- Comprendere la tecnica dell'intelaiatura multiposizione
- Pianifica attentamente il layout del tuo progetto
- Segna punti di allineamento accurati
- Utilizza modelli o guide di intelaiatura
- Stabilizzare adeguatamente il tessuto
- Metti alla prova il tuo disegno prima del ricamo finale
- Monitorare la posizione del telaio durante il ricamo
- Garantire la corretta tenuta del telaio
- Esercitazioni su tessuto di scarto
- Pulisci e mantieni regolarmente i tuoi cerchi
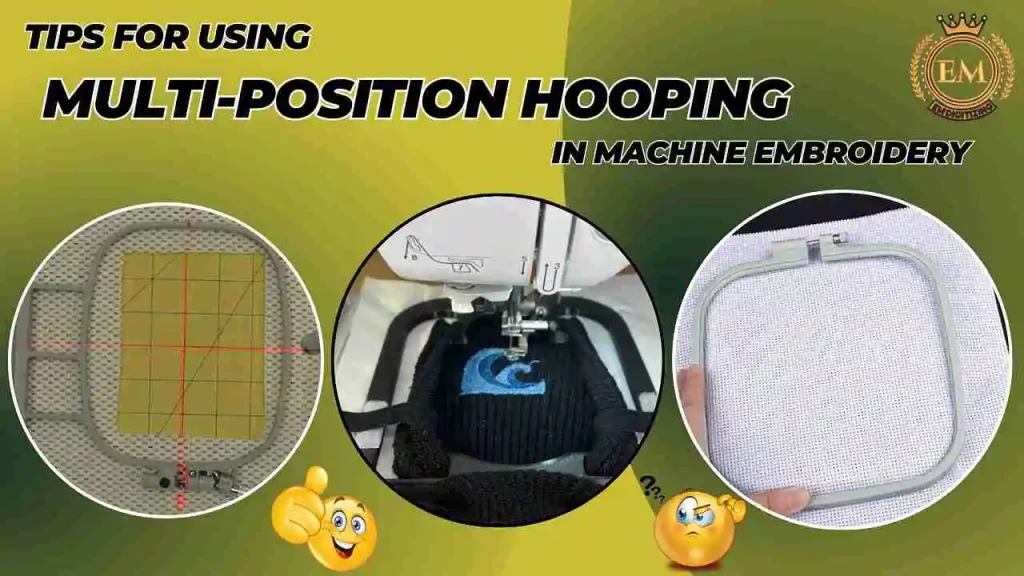
Suggerimenti per l'utilizzo dell'intelaiatura multiposizione nel ricamo a macchina
1. Comprendere la tecnica dell'intelaiatura multiposizione
L'intelaiatura multiposizionale ti consente di farlo ricamare disegni di grandi dimensioni che non rientrano in una singola area del telaio. Questa tecnica prevede la suddivisione del disegno in sezioni più piccole e la loro cucitura in più passaggi mantenendo l'allineamento. Per usarlo in modo efficace, familiarizzare con le funzionalità della macchina, come i segni di allineamento, guide per l'intelaiatura, o strumenti software compatibili. Comprendere il processo garantisce risultati accurati e riduce il rischio di errori durante il ricamo.
2. Pianifica attentamente il layout del tuo progetto
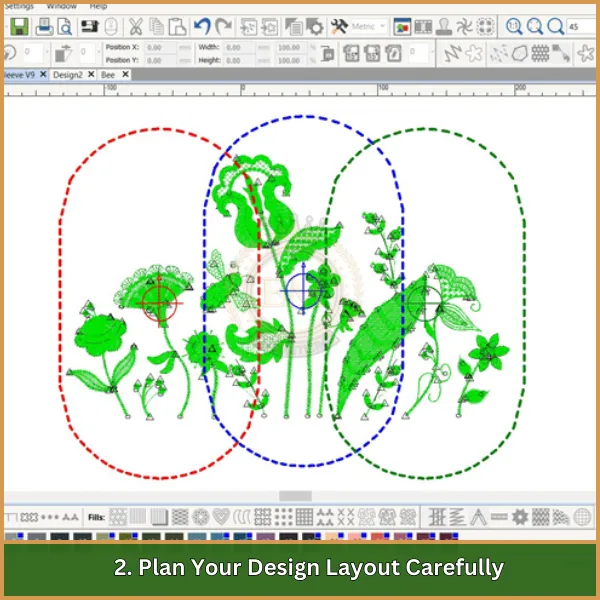
Prima di iniziare, dividi il tuo progetto in sezioni che si allineano perfettamente. Utilizza il software di ricamo per dividere il disegno e visualizzare in anteprima come apparirà una volta completato. Questo passaggio è fondamentale per garantire che le parti del progetto si connettano perfettamente. Prestare attenzione alle aree sovrapposte e regolarle per evitare spazi o disallineamenti. Un piano di layout chiaro aiuta a evitare errori e garantisce una finitura professionale.
3. Segna punti di allineamento accurati
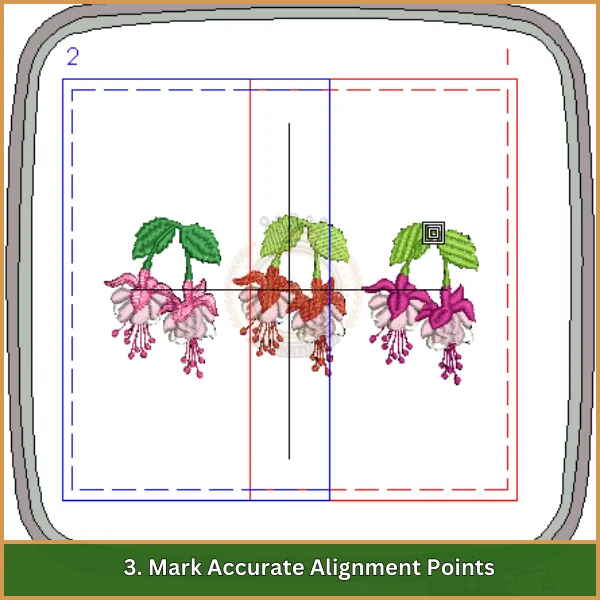
Per garantire che ogni sezione sia perfettamente allineata, segna il tessuto con i punti di allineamento. Usa strumenti come penne idrosolubili, gesso da sarto, o modelli stampati per indicare dove posizionare il telaio per ogni passaggio. Una marcatura corretta garantisce la continuità del progetto, soprattutto per modelli complessi. Assicurarsi che questi segni siano chiari ma rimovibili una volta completato il ricamo.
4. Utilizza modelli o guide di intelaiatura
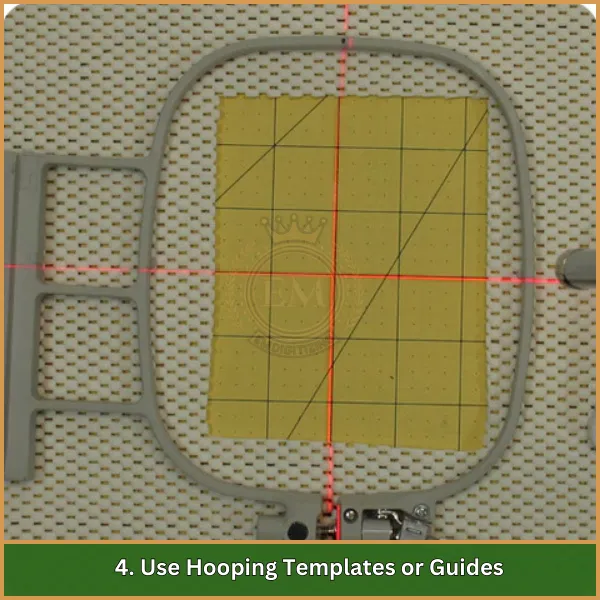
Molte macchine da ricamo sono dotate di modelli o guide di intelaiatura che facilitano l'intelaiatura multiposizionale. Questi modelli ti aiutano a posizionare accuratamente il tessuto all'interno del telaio e ad allineare le sezioni del disegno. Riducono anche il tempo impiegato per regolare il telaio, rendendo il processo più fluido ed efficiente. Se la tua macchina non ha guide integrate, considera l'utilizzo di modelli esterni su misura per le dimensioni del tuo telaio.
5. Stabilizzare adeguatamente il tessuto
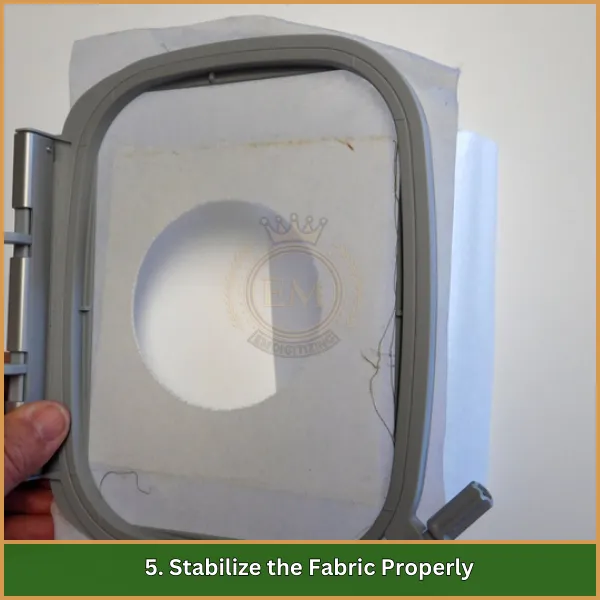
La stabilizzazione è fondamentale per evitare movimenti del tessuto e arricciature durante il ricamo. Scegli uno stabilizzatore adatto al tipo di tessuto e al design. Per progetti più grandi, assicurarsi che lo stabilizzatore si estenda oltre l'area di ricamo per un supporto uniforme. Utilizzare spray adesivo temporaneo o punti di imbastitura per fissare lo stabilizzatore in posizione, evitando qualsiasi movimento tra le intelaiature.
6. Metti alla prova il tuo disegno prima del ricamo finale
Testa sempre il tuo disegno su tessuto di scarto prima di iniziare il progetto finale. Ciò ti consente di identificare potenziali problemi con l'intelaiatura multiposizionale, come l'allineamento, tensione del filo, o suddivisione del design. I test fanno risparmiare tempo e riducono la possibilità di rovinare il tessuto o il design. Utilizza lo stesso tipo di tessuto e stabilizzatore del tuo progetto finale per risultati accurati.
7. Monitorare la posizione del telaio durante il ricamo
Mentre ricami, controllare periodicamente che il telaio rimanga nella posizione corretta. Anche un leggero movimento può disallineare il design e rovinare l'intero progetto. Se la tua macchina offre un'anteprima di posizionamento, usalo per confermare che ciascuna sezione sia allineata con quella precedente prima di cucire. Rimanere vigili garantisce un processo fluido e privo di errori.
8. Garantire la corretta tenuta del telaio
Quando si intelaia il tessuto per l'intelaiatura multiposizione, assicurarsi che la tensione sia distribuita uniformemente senza allungare eccessivamente il materiale. Il tessuto allentato può spostarsi, causando disallineamento, mentre un tessuto troppo stretto potrebbe distorcere il disegno. Regolare la vite del telaio e assicurarsi che il tessuto sia teso ma non allungato. L'intelaiatura corretta riduce gli errori e garantisce risultati di ricamo puliti.
9. Esercitazioni su tessuto di scarto
Esercitarsi su tessuto di scarto ti offre un'esperienza pratica con l'intelaiatura multiposizione prima di lavorare sul tuo progetto finale. Ti aiuta a comprendere il processo di allineamento e a sentirti a tuo agio nel riposizionare il telaio. Usa questa opportunità per affinare la tua tecnica e risolvere eventuali problemi, garantendo sicurezza e precisione durante il ricamo del disegno finale.
10. Pulisci e mantieni regolarmente i tuoi cerchi
I telai sporchi o usurati possono perdere la presa sul tessuto, portando a spostamenti durante il ricamo. Pulisci i telai con un panno morbido e un detergente delicato dopo ogni progetto per rimuovere la lanugine, polvere, o residui di adesivo. I telai ben mantenuti garantiscono una presa salda sul tessuto e risultati costanti, rendendo i tuoi progetti di ricamo più fluidi e divertenti.
Conclusione
Creare bellissimi disegni con l'intelaiatura multiposizione non deve essere difficile se hai la guida giusta. Per rendere le cose ancora più facili, lascia che EMdigitizing gestisca le tue esigenze di digitalizzazione!
Offriamo alta qualità servizi di digitalizzazione a prezzi imbattibili, con tempi di consegna rapidi per mantenere i tuoi progetti nei tempi previsti. Preoccupato per l'aspetto finale? Nessun problema: la nostra opzione di anteprima garantisce che il tuo design sia esattamente come lo desideri.
Più, Se questa è la prima volta che lavori con noi, godrai di un'esclusiva 50% sconto sul tuo primo ordine. Non aspettare: inizia EMDigitalizzazione oggi e dai vita alle tue idee di ricamo!
Domande frequenti
È un metodo utilizzato nel ricamo per ricamare disegni di grandi dimensioni dividendoli in più piccoli, sezioni gestibili.
Questa tecnica è essenziale per creare grandi dimensioni, motivi complessi che superano le dimensioni standard del telaio da ricamo, consentendo la libertà creativa.
Per impostare, assicurati che il tessuto sia stabilizzato correttamente, usa il tuo software per dividere il disegno, e segnare i punti di allineamento per un'intelaiatura accurata.
Gli strumenti essenziali includono un telaio multiposizione compatibile, stabilizzatore, macchina da ricamo, strumenti di marcatura, e software per la suddivisione del design.
Le sfide comuni includono l'allineamento perfetto delle sezioni, mantenendo una tensione costante, ed evitare lacune o sovrapposizioni nella progettazione.
