Hai mai iniziato a cucire e il tuo thread si è attorcigliato, annodato, o sembrava troppo spesso? Ecco perché imparare a separare il filo di ricamo nel modo giusto è così importante.
Il filo di ricamo arriva con 6 Strands si sono attorcigliati, Ma la maggior parte dei design ha solo bisogno 1, 2, o 3 fili. Se non li separa correttamente, I tuoi punti possono sembrare disordinati o irregolari.
Prendendo qualche secondo per separare il tuo filo interdentale nel modo giusto, otterrai più ordinato, più liscio, e più risultati dall'aspetto professionale. Ti aiuta anche a salvare il filo ed evitare i grovigli.
In questa guida, Imparerai 5 modi semplici per separare il filo interdentale:
- L'ascensore e il trucco tirano
- Metodo pieghevole
- Tecnica di scorrimento
- Separazione assistita da aghi
- Strumento separatore filo interdentale
Ognuno è semplice e ottimo per i principianti. Iniziamo!
Come separare il filo di ricamo: 5 Metodi per principianti
1. Il "Sollevare e tirare" Trucco
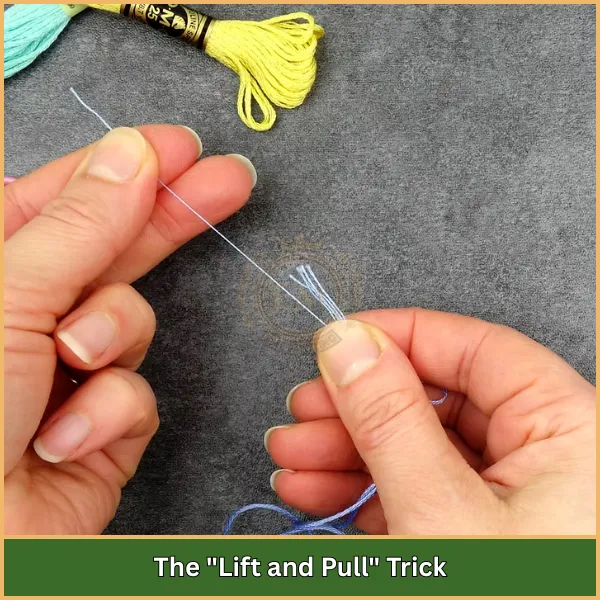
Questo è uno dei modi più semplici e sicuri per separare i fili senza causare grovigli.
Come farlo:
- Taglia un pezzo di filo interdentale da 18 pollici.
- Tieni un'estremità tra le dita.
- Scegli delicatamente un filo e tiralo verso l'alto.
- Lascia che gli altri fili si aprano liberamente.
- Ripeti se hai bisogno di più fili.
Questa è un'ottima risposta se qualcuno lo chiede, Dovresti separare il filo di ricamo? sì, E questa tecnica ti mostra esattamente come senza frustrazione.
2. Metodo pieghevole
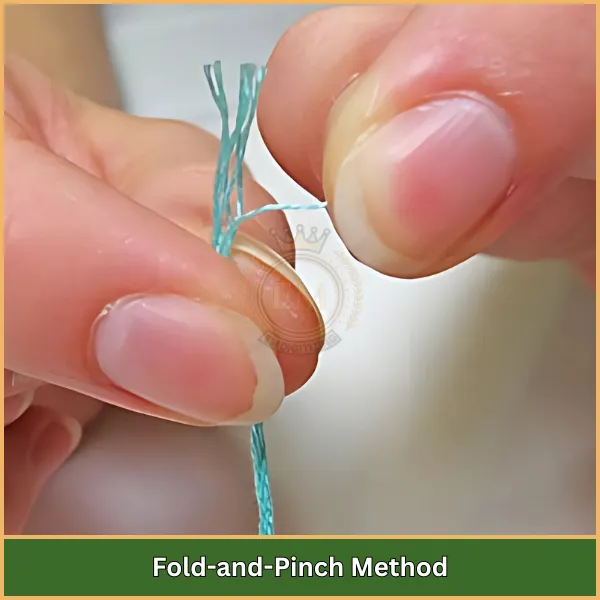
Vuoi separare più di un filo alla volta? Prova questo metodo regolare.
Passi da seguire:
- Piega l'estremità del filo interdentale per fare un piccolo ciclo.
- Pizzica il ciclo tra le dita.
- Usa l'altra mano per tirare i fili che desideri.
- Fallo lentamente per evitare di torcere o annodare.
È particolarmente utile quando stai ancora imparando come separare i fili di filo di ricamo Con controllo e facilità.
3. Tecnica di scorrimento per correzioni rapide
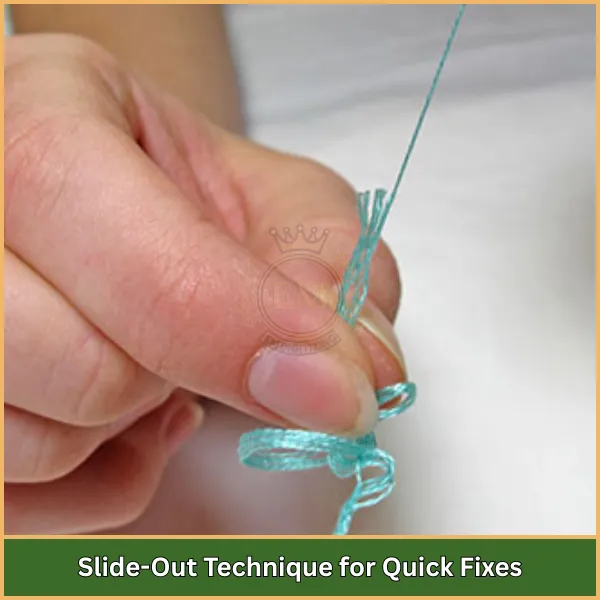
Questo metodo funziona bene quando hai fretta o hai bisogno di cambiare rapidamente i colori.
Ecco come:
- Taglia il filo interdentale alla lunghezza necessaria.
- Tienilo stretto tra il pollice e il dito.
- Prendi un filo e fai scivolare lentamente.
- Ripeti se hai bisogno di più fili.
Questo è il nostro go-to quando ne abbiamo bisogno Floss di ricamo separato Nel mezzo di un progetto senza impiegare troppo tempo.
4. Separazione assistita da aghi
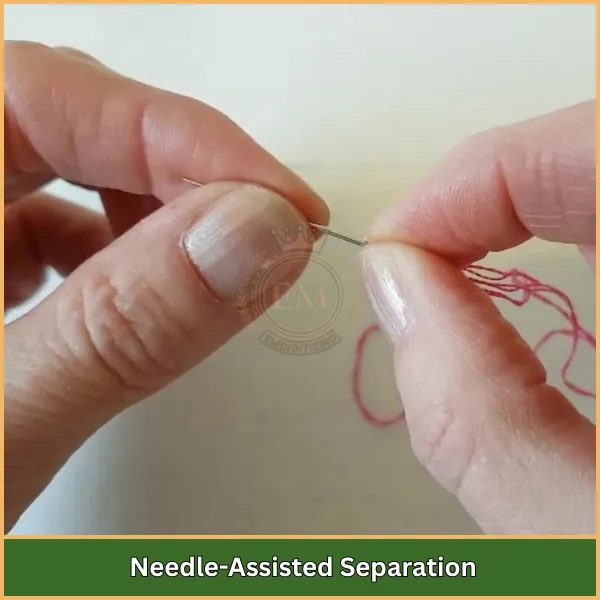
If you’;fare lottare con la presa o la precisione, Un ago schietto può aiutare molto.
Fallo:
- Taglia una lunghezza di filo interdentale di 18 pollici.
- Inserisci una schietta (Arazzo) ago attraverso la parte superiore del filo interdentale.
- Agganciare un filo e sollevarlo delicatamente verso l'alto.
- Usa l'altra mano per stabilizzare il Fila mentre separarsi.
Questo è un metodo affidabile per separando il filo di ricamo Durante la preparazione per grandi progetti o kit.
5. Strumento separatore filo interdentale
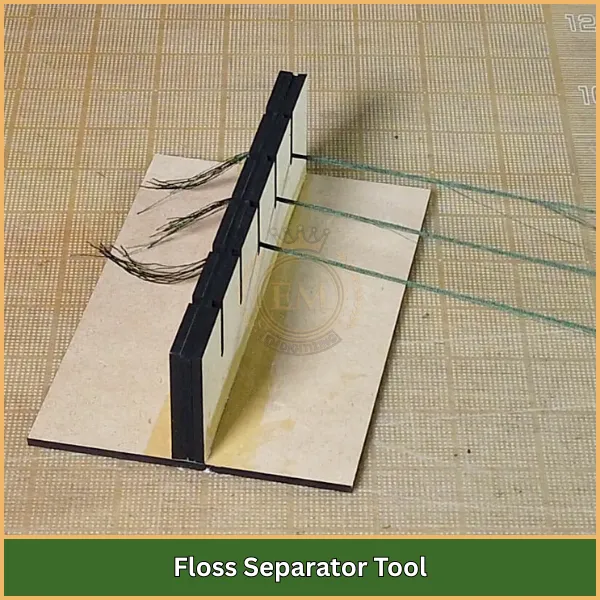
Preferisci uno strumento sopra le dita? Questo rende il lavoro più veloce e più facile.
Ecco come funziona:
- Inserisci il filo interdentale nello slot dello strumento.
- Tenere in posizione sia lo strumento che il filo interdentale.
- Estrarre il numero di fili necessari attraverso la guida.
Tools like this are great when you’;è a che fare con Colori multipli o preparare molti fili.
Offrono un pulito, modo senza groviglio per padroneggiare Come separare il filo di ricamo in pochi secondi.
Parole finali
Ora hai imparato cinque modi semplici per padroneggiare Come separare il filo di ricamo, I tuoi punti sembreranno sicuramente più ordinati e più professionali. Ma la preparazione del thread impeccabile non significherà molto se il tuo file di ricamo non è digitalizzato correttamente.
Ecco dove EMDigitalizzazione può aiutare. Offriamo servizi di digitalizzazione esperti con Tariffe piatte, Turnaround superveloce, 24/7 supporto, 3D Metodi di pagamento sicuri, e qualità garantita su ogni design.
Ordina ora E ottieni 50% SPENTO il tuo primo design personalizzato file. Che si tratti di un progetto personale o di un ordine aziendale, Lascia che EmDigitizing ti aiuti a dare vita al tuo ricamo, Risultati precisi, veloce e conveniente.
Domande frequenti
Another term used for this is “;stripping the floss.”; Significa separare i fili per usare meno fili per un lavoro di ricamo più fine.
Il filo interdentale metallico deve essere separato lentamente per evitare la rottura. It’;è utile utilizzare un condizionatore di filo e tirare delicatamente per ridurre il groviglio.
Puoi organizzare il filo interdentale usando bobine, sacchette zip, o organizzatori del filo interdentale. Etichettarli con i numeri di colore ti aiuta a trovare quello giusto rapidamente.
Non in ogni caso. Alcuni design richiedono tutti e sei i fili, mentre altri sembrano meglio con solo due o tre, Quindi dipende dal tuo modello.
sì, La maggior parte del filo di ricamo è sicura da lavare. Fai solo attenzione con fili speciali come quelli metallici o tinti a mano, che può sanguinare o svanire.
