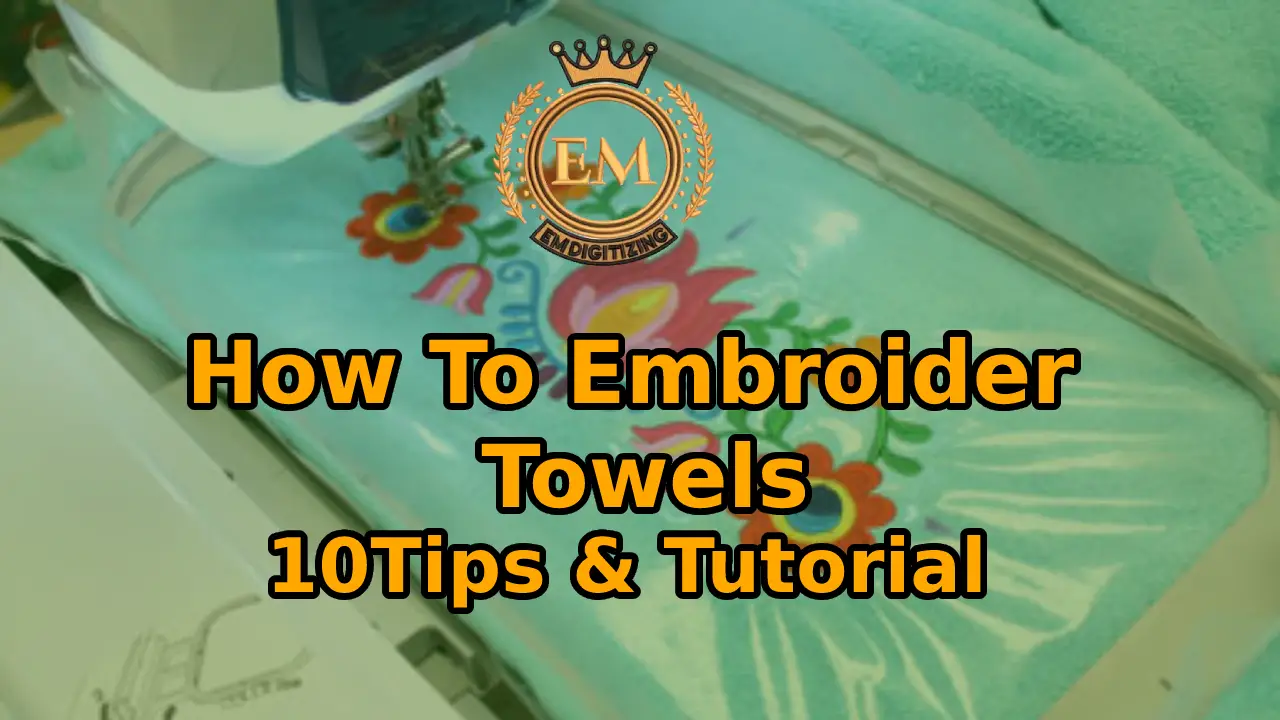
Se sei un essere sul muro di casa mia, potresti avere l'impressione che i miei figli vivano in un rifugio per senzatetto in base al modo in cui si lamentano dei loro asciugamani. Il problema è che escono dalla mia stanza del cucito con un sacco di asciugamani con il monogramma e poi si abituano a vedere altre persone come regali.
Così, naturalmente, sono gelosi dell'asciugamano e chiedono di unirsi all'azione. Sfrutterò questa opportunità per iniziare il mio cucito natalizio e mostrarvi come ricamare sugli asciugamani.
Perché ricamare sugli asciugamani?
Se sei un principiante nel ricamo a macchina, gli asciugamani sono un ottimo inizio. Gli asciugamani sono piatti, il che li rende facili da nuotare su un pezzo di stabilizzatore a cerchio. Quando stai ricamando, non devi lottare per tenere lontano il materiale extra.
Gli asciugamani sono economici
Anche gli asciugamani sono piuttosto economici, soprattutto se inizi con gli asciugamani da cucina del negozio in dollari. If you are confused –; it’;Non è un grosso problema. Puoi anche trovare degli asciugamani da bagno a prezzi molto economici. Walmart e Marshalls vendono asciugamani da bagno per circa $ 7 o $ 8.
Gli asciugamani ricamati sono un ottimo regalo
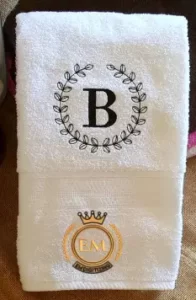
Anche gli asciugamani sono un ottimo regalo. Particolarmente adatto per regali di matrimonio e fidanzamento. Una coppia di sposi o fidanzati adorerebbe vedere le loro iniziali insieme su qualsiasi cosa, so you really can’;Non sbagliare regalando un set di asciugamani con monogramma.
Gli strofinacci da cucina possono anche essere un ottimo regalo per un ospite o una hostess con un ricamo divertente o stagionale. I’;d like to sew seasonal embroidery designs on some kitchen towels and then add my recipient’;s cognome qui sotto per un tocco completamente personalizzato e personalizzato.
Servizi di digitalizzazione del ricamo
Suggerimenti per il ricamo sugli asciugamani
Se vuoi tuffarti nel ricamo con l'asciugamano, we’;Abbiamo compilato un elenco dei nostri migliori consigli per ricamare gli asciugamani. Le ricamatrici di tutti i livelli devono trovare qualcosa da imparare. Let’;Saltiamo subito dentro!
1. Lava e asciuga il tuo asciugamano
Most towels don’;Non si restringono troppo quando li lavi, ma è possibile, soprattutto se sono di cotone. That’;Ecco perché ti consiglio di lavare e asciugare gli asciugamani prima di ricamare.
Si prende cura del restringimento e lava via eventuali coloranti o prodotti chimici in eccesso utilizzati durante il processo di produzione. Se cuci molto, pre-setacciare il tessuto potrebbe non essere un'idea nuova per te, but don’;Non dimenticare che vale anche per gli spazi ricamo che hai acquistato.
2. Scegli un design con cuciture solide
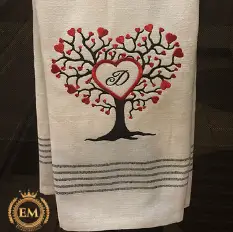 Sono migliori perché i punti delicati o sottili si perderanno nella trama dell'asciugamano! Inoltre, il motivo solido e le cuciture sono più stabili e più adatti all'abbigliamento tradizionale fornito con l'asciugamano. Se hai intenzione di usare l'asciugamano (invece di metterlo semplicemente in mostra) assicurati di evitare disegni di cucito delicati.
3. Gioca con i posizionamenti, e usa ciò che funziona per te!
Per un posizionamento infallibile, posiziona il tuo disegno 4 pollici sopra il bordo inferiore dell'asciugamano. Questo è il posizionamento standard per adulti come asciugamani da bagno o teli da mare e avrà un bell'aspetto una volta piegato.
4. Uso 11 o 14 aghi di dimensioni
UN 14 l'ago è extra affilato ed è perfetto per penetrare senza danneggiare il tessuto. Queste sono le taglie generalmente consigliate ma non sono universali. Invece, è più opportuno utilizzare queste dimensioni come punto di partenza e ampliarle o restringerle. Ancora, si tratta di tentativi ed errori e dell'utilizzo di ciò che ti fa sentire a tuo agio.
5. Usa uno stabilizzatore da tagliare
Mentre per gli asciugamani puoi utilizzare praticamente qualsiasi stabilizzatore, l'utilizzo dello stabilizzatore tagliato ti darà il massimo supporto poiché è lo stabilizzatore più forte disponibile.
6. Ma ci sono alternative
Se sai che il retro del tuo asciugamano sarà in mostra, alcune ricamatrici preferiscono utilizzare uno stabilizzatore rimuovi strappi. The bits of your cut-off stabilizers will stick with your final project so if you don’;t desiderare uno stabilizzatore a strappo è un'opzione migliore. Click here for more information on our blog “;Taking the Headache out of Embroidery Stabilizers”; e scarica la guida gratuita agli stabilizzatori.
7. Usa guarnizioni idrosolubili
Si consiglia vivamente di utilizzare una copertura solubile in acqua. This is to make sure your stitches don’;Non perderti o sprofondare nell'asciugamano. La copertura si adatterà al tuo design perché la tua macchina funziona. È un materiale plastico trasparente che si rimuove facilmente strappando e pulendo poi i residui con un panno umido.
8. ‘;Float’; i tuoi ricami
Sometimes your towel can be so thick that you can’;Intelaiarlo insieme allo stabilizzatore e alla copertura. To remedy this you can ‘;break’; il tuo asciugamano sopra il cerchio.
9. Utilizzare un adesivo spray
Se provi a far galleggiare il tuo materiale, assicurati di avere una bomboletta di adesivo spray in mano! Ciò ti aiuterà a mantenere tutti i tuoi strati a posto e non causerà alcun problema ai tuoi articoli. Nota: Alcune ricamatrici utilizzano invece gli spilli. Tutto dipende dall'individuo e dalle sue preferenze, ma molte persone pensano che le cose appiccicose siano facili e veloci!
10. Utilizza il modello di progettazione
Ciò garantirà che il tuo posizionamento risulti perfetto. Ci sono alcuni modelli forniti con il software e altri forniti con le macchine da ricamo. Se il tuo software o computer non viene fornito con il modello, puoi acquistarli o scaricare quello base da internet. Il tuo software di ricamo a tratteggio ti consentirà di stampare il disegno con riferimenti che puoi utilizzare come modello.
Come ricamare un asciugamano
Ora che abbiamo alcuni dettagli noiosi, let’;Passiamo al ricamo! (E, se sei completamente nuovo al ricamo, guardare Nozioni di base sul ricamo a macchina per principianti)
1. Crea il tuo asciugamano e segna il disegno
È importante lavare e asciugare gli asciugamani in anticipo. Da quando asciugo gli asciugamani con una temperatura media e tiepida, Ho lavato il mio asciugamano in questo modo durante la preparazione.
Se hai un'etichetta sul tuo asciugamano, rimuovilo o lascialo sul retro dell'asciugamano sul lato opposto che decidi di ricamare.
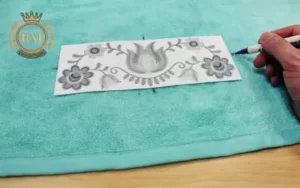
Devi anche decidere dove vuoi il tuo disegno sull'asciugamano. Per la progettazione integrata, è possibile stampare il disegno dal software, taglialo fuori, quindi posizionalo sopra l'asciugamano per individuare il disegno. Dato che in questo tutorial ho ricamato le iniziali e i monogrammi sui miei asciugamani, Ho appena contrassegnato la posizione eseguendo semplici calcoli e contrassegnando il centro.
Segnalo il centro del mio disegno da ricamo con una penna per stoffa blu, che verrà lavato con acqua una volta terminato il ricamo. L'intersezione delle due linee sottostanti sarà il centro del mio monogramma.
2. Stabilizzare gli asciugamani
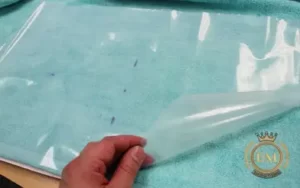 La scelta dello stabilizzatore dipende dall'uso desiderato del tuo asciugamano, lo spessore dell'asciugamano, e il design che scegli. Nella mia esperienza, lo stabilizzatore migliore per il ricamo a macchina sugli asciugamani è lo stabilizzatore a strappo di peso medio. Ci sono più informazioni qui, anche se.
Tipi di stabilizzatori
Tutto ciò di cui hai bisogno è uno stabilizzatore a strappo, senza allungare troppo per asciugamani sottili e di peso medio. Quando guardi il retro del tuo asciugamano, non avrai più stabilizzatore visibile una volta completato il ricamo dell'asciugamano.
Adesso, se si ricamano teli da mare o altri asciugamani instabili, potresti prendere in considerazione uno stabilizzatore a spalla mancante o una rete in poliestere. Ciò supporterà e proteggerà ulteriormente l'integrità dei tuoi punti. L'unico problema con la spalla mancante è che devi tagliarla dal retro del tuo disegno, e sarà visibile dal retro.
Peso stabilizzatore
Dovrai considerare anche il peso dello stabilizzatore di cui avrai bisogno: leggero, peso medio, o pesante. Scegli il peso dello stabilizzatore in base allo spessore e alla resistenza del tuo asciugamano, nonché alla densità del tuo disegno. In questo tutorial ho utilizzato uno stabilizzatore di peso medio per i miei asciugamani.
Fattibile vs Adesivo vs. Stabilizzatore non fattibile
Eventuali stabilizzatori vengono fissati sul retro dell'asciugamano con un ferro da stiro.
C'è anche uno stabilizzatore adesivo, che si attacca sul retro come un adesivo. A volte fa male il passante dell'asciugamano quando lo rimuovo, so I don’;Non mi piace per quello scopo.
Lo stabilizzatore non fusibile può essere applicato utilizzando un adesivo temporaneo per tessuti. Preferisco uno stabilizzatore temporaneo adesivo in tessuto non fattibile, ma ogni ricamatrice ha preferenze diverse, e questo non è un principio scolpito nella pietra.
3. Aggiunta di copertura solubile in acqua
Qualsiasi asciugamano di spugna o asciugamano con pisolino richiede una copertura o uno stabilizzatore idrosolubile.
Ciò rafforzerà i punti e impedirà loro di affondare nell'asciugamano. E, uno dei motivi per cui hai bisogno di un bene, ago affilato per questo progetto è che perforerà bene questa copertura. Come ho detto prima, Sono un grande fan di Silky Solvay Stabilizer.
4. Come intelaiare un asciugamano
Se riesco a inserire qualcosa nel mio telaio, Lo faccio sempre. Nella mia esperienza, saltare fornisce maggiore stabilità, and it’;È più facile per me realizzare ricami all'interno del telaio. Il salto funziona solo con gli asciugamani sottili.
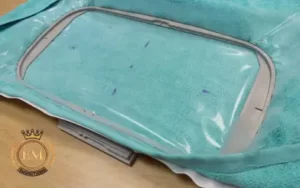 Per allegare tutto, Per prima cosa ho applicato il mio stabilizzatore a strappo sul retro dell'asciugamano utilizzando uno strato molto leggero di adesivo temporaneo per tessuti. Fare attenzione a non immergere lo stabilizzatore o l'asciugamano nell'adesivo, altrimenti, tirerai alcuni anelli da dietro quando poi rimuoverai le lacrime. You don’;Non è necessario utilizzare l'adesivo e alcune ricamatrici lo odiano, ma penso che impedisca alle cose di cambiare e dia risultati migliori.
Avvolgi lo stabilizzatore sotto, poi l'asciugamano, e poi il topper idrosolubile come strato superiore. If you can’;t fare un cerchio di copertura, puoi sempre metterlo sopra il telaio più tardi.
5. Come far galleggiare un asciugamano
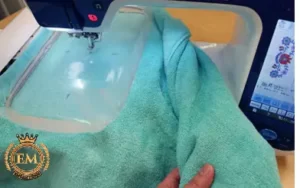
Se non riesci a far oscillare l'asciugamano a causa dello spessore o delle preferenze, puoi posizionarlo sopra lo stabilizzatore nel telaio.
Modi per evitare che gli asciugamani si muovano durante il ricamo Utilizzando stabilizzatori adesivi autoadesivi, aggiungendo una scatola per imbastire, o addirittura bloccarlo in posizione.
6. Ricamo su asciugamano
Collega il telaio alla macchina da ricamo e sistema il tutto. Assicurati che la parte dell'asciugamano che non viene ricamata non sia sotto nessuna parte del telaio.
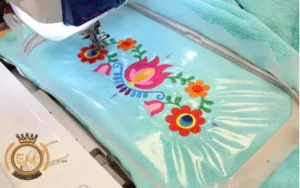 Vorrei prima vedere in anteprima il mio disegno con la macchina su cui viene cucito. Ciò conferma che ho applicato correttamente il disegno. Ogni tanto, dopo aver fatto un'anteprima, Mi renderò conto di aver sbagliato misura.
Se tutto va bene, vai avanti e inizia a ricamare i tuoi asciugamani!
7. Ripulire
Una volta che hai un asciugamano, rimuoverlo dal telaio. Se lo cerchi in modo sicuro, you’;probabilmente vedrai i segni del cerchio sul lato. Don’;Non preoccuparti, gli asciugamani sono tessuti molto flessibili! Queste cicatrici possono essere lavate via, RIMOSSO, o pressato con Magic Spray Sizing.
Se hai dei punti saltati come quello qui sotto, go ahead and trim them if your machine doesn’;non viene automaticamente. Qualche volta, quando sull'asciugamano è presente una copertura idrosolubile, è più facile rimuovere i punti saltati.
Quindi, per rimuovere la copertura solubile in acqua, strappatelo. Non è necessario essere perfetti al riguardo. Quando metti l'asciugamano in acqua o durante il primo ciclo di lavaggio, il resto si scioglierà.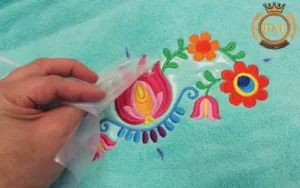
Per rimuovere lo stabilizzatore del terrazzo, strapparlo delicatamente dal retro. Se applichi lo stabilizzatore sul retro dell'asciugamano, potrebbe volerci un po' più di tempo. Se vuoi evitare che piccoli pezzi si strappino, sarà uno strappo pulito dopo il primo lavaggio. Come appare il retro del mio asciugamano ricamato qui sotto?
E infine, se segni con una penna idrosolubile, scompare quando immergi l'asciugamano nell'acqua o lo lavi di nuovo.
Conclusione
Congratulazioni! Ora hai ricamato con successo l'asciugamano. Appendilo con orgoglio a casa tua o conservalo come regalo!
Goditi il tuo asciugamano ricamato.
Lo stabilizzatore Cutway è la scelta migliore per gli asciugamani in spugna. Cospargere un pezzo di stabilizzatore mancante con un adesivo temporaneo, quindi lisciare l'asciugamano. Utilizzare uno stabilizzatore idrosolubile per evitare che i punti affondino nel tessuto.
Basta scaldare il ferro 320-355 gradi, applica il nastro in tessuto al tuo oggetto e poi posiziona sopra un pezzo di stoffa in più, premere saldamente il ferro sul panno 15-30 secondi, e rimuovere il pezzo di stoffa in più.
Un piccolo pezzo di nastro adesivo e un pennarello indelebile possono essere utilizzati durante tutto il clic per etichettare i vestiti. Scrivi il nome sul nastro adesivo e attaccalo sul panno. Coprire il nastro con un panno pressato e poi riscaldare il nastro coperto con un ferro da stiro asciutto 10 a 15 secondi.
O avvolgo (frusta intorno alla parte posteriore dei punti), o semplicemente fai passare i fili attraverso le maglie, e fai un punto indietro extra sul retro dei fili per ancorare il filo. Se lo desideri, puoi leggerlo in Fili da ricamo finali.
Quando si monogrammano salviette e mani, bagno, e teli mare, si consiglia di posizionare il monogramma tra ciascuno di essi. In alternativa, alcune persone aggiungono un monogramma ad un angolo. Per gli asciugamani da bagno, solitamente viene posizionato il monogramma 4 pollici sopra l'orlo o 1.5-2 centimetri dal confine.
