Creare un design di ricamo a contorno è un processo gratificante che porta un unico, Look lucido ai tuoi progetti di ricamo. I disegni del contorno enfatizzano i bordi, Rendere i dettagli chiari e nitidi. Se sei nuovo a digitalizzare, Non preoccuparti!
Questa guida ti guiderà attraverso ogni passaggio, Dalla scelta degli strumenti giusti per mettere a punto il tuo design finale. Con un po' di pratica, Sarai in grado di trasformare qualsiasi immagine in un design di contorno pulito e professionale.
Pronto per iniziare? Immergiamoci!

Digitalizza disegni di ricamo con contorni perfetti: Una guida per principianti
Il miglior software per la digitalizzazione dei disegni di ricami
Se vuoi creare disegni di contorno chiari e chiari, Ecco le tre migliori opzioni software:
- Studio di ricamo Wilcom
- Fratello PE-Design
- Studio IBIRD
Questi programmi software offrono strumenti per rendere la digitalizzare la digitalizzazione facile e di alta qualità.
1. Studio di ricamo Wilcom
Wilcom Gentoidery Studio è un software professionale noto per i suoi strumenti avanzati, Rendendolo uno dei migliori per i disegni di tiri del contorno di ricami. Offre un controllo preciso sulla lunghezza del punto, densità, e posizionamento, Aiutandoti a creare liscio, linee pulite. Con strumenti integrati specificamente progettati per i contorni, Wilcom assicura che ogni punto del contorno sia acuto e coerente, rendendolo popolare tra Digitalizzatori professionisti.
2. Fratello PE-Design
Fratello PE-Design è facile da usare e offre funzionalità robuste per principianti e professionisti. Consente una configurazione rapida e una modifica liscia dei disegni di ricamo a contorno, semplifica la creazione di design di qualità. L'interfaccia intuitiva del software e le varie opzioni di punto sono ideali per raggiungere contorni dettagliati, rendendolo una scelta eccellente per chiunque lo cerchi Crea disegni di alta qualità con seccatura minima.
3. Studio IBIRD
IMBIRD STUDIO è un software versatile che offre flessibilità nella progettazione di punti di contorno. Il suo approccio basato sul vettore ti aiuta a creare progetti accurati e scalabili, che è particolarmente utile per il ricamo a punti di contorno. Il programma include anche una vasta gamma di strumenti specifici per il contorno, permettendoti di regolare e perfezionare ogni dettaglio, Garantire una finitura professionale ogni volta.
Come digitalizzare il design del ricamo del contorno | Passo dopo passo
Ecco una guida passo-passo per la creazione di un design di ricamo per macchine con contorni WILCOM RACCODINE Studio.
1. Apri la tua immagine in Wilcom

Inizia aprendo l'immagine che si desidera digitalizzare. Vai a File >; Importare e seleziona la tua immagine. Questo fungerà da base per il design del tuo contorno.
2. Imposta il tuo spazio di lavoro
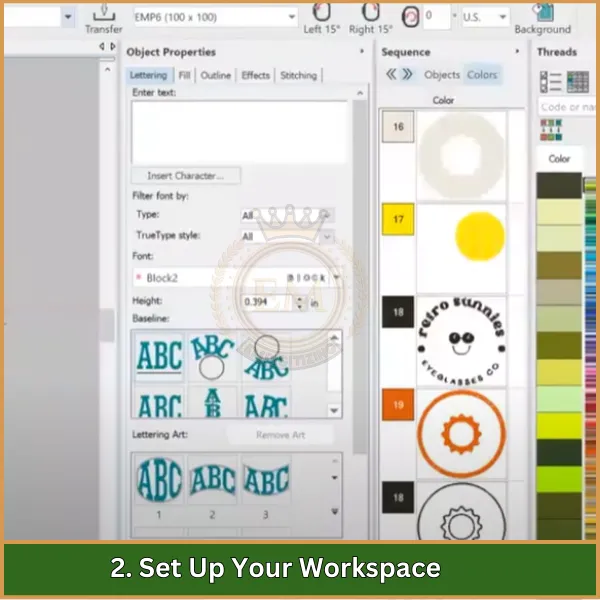
Regola le impostazioni dell'area di lavoro per soddisfare le esigenze di progettazione. Imposta le dimensioni del telaio, tipo di tessuto, e altre opzioni per garantire che il tuo profilo si adatti bene all'area del ricamo.
3. Seleziona lo strumento di schema
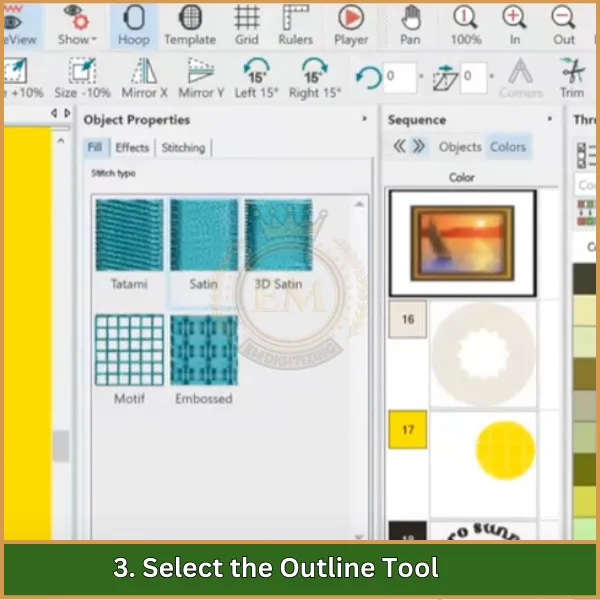
Scegli il Strumento di contorno dalla barra degli strumenti. Questo strumento è specifico per la creazione di punti di contorno puliti e continui, Ideale per i disegni digitalizzano con il contorno.
4. Traccia il contorno
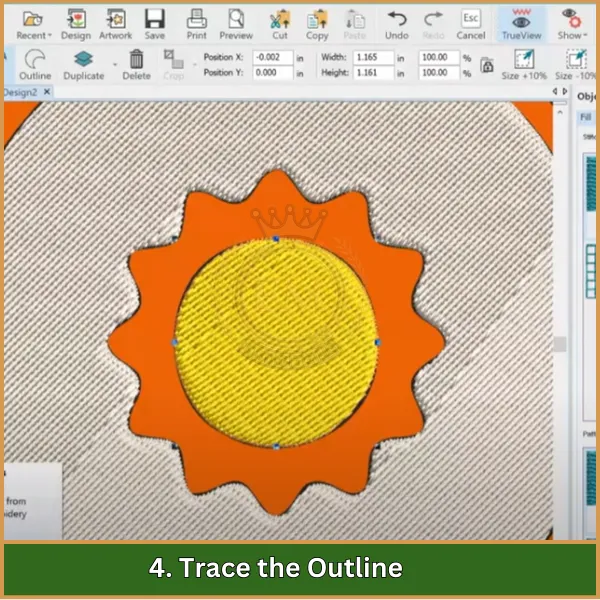
Usando lo strumento di contorno, Traccia lungo i bordi della tua immagine. Fai attenzione a seguire i contorni senza intoppi, Poiché ciò avrà un impatto sulla qualità del punto finale.
5. Regola le impostazioni del punto
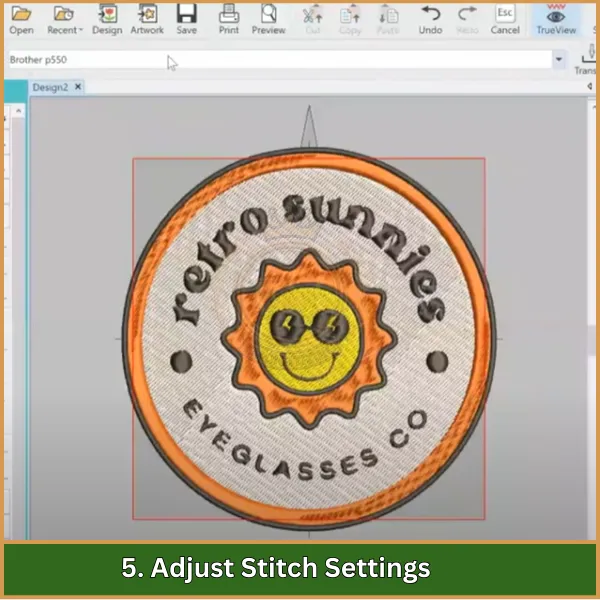
Imposta il tipo di punto, lunghezza, e densità per il profilo. Per ricami di contorno, UN punto corrente o punto pieno Di solito funziona meglio. Regola queste impostazioni per ottenere lo spessore e lo stile desiderati.
6. Perfezionare il contorno
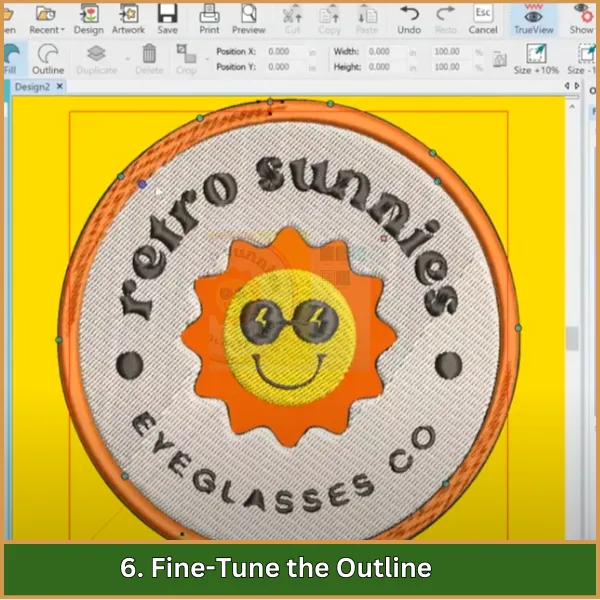
Zoom per verificare la presenza di lacune o linee irregolari. Apporta le regolazioni necessarie selezionando i punti lungo il contorno e perfezionando la forma.
7. Anteprima e salva il design
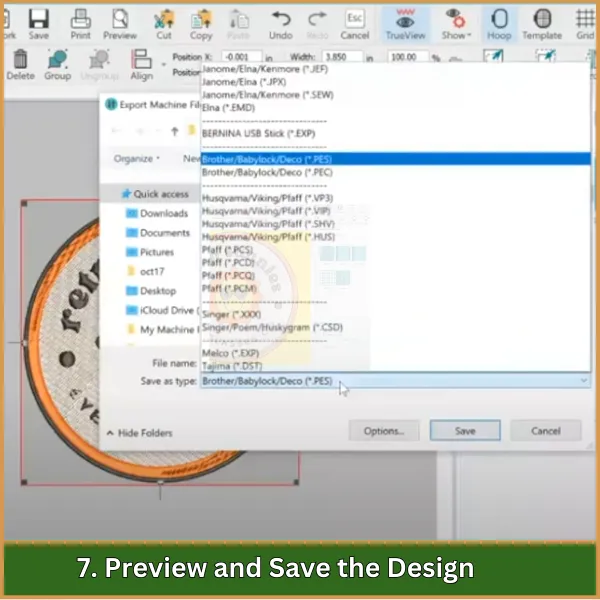
Usa il Anteprima funzione per verificare come apparirà il design quando è cucito. Una volta soddisfatto, Salva il tuo lavoro nel formato file desiderato, Come DST, per le macchine da ricamo.
Tecniche essenziali per perfezionare la digitalizzazione del contorno
Ecco alcune tecniche chiave per garantire che i disegni del punteggio del ricamo a rivelano puliti e professionali.
- Mantenere una direzione coerente: Digitalizza da un'estremità all'altra (come da sinistra a destra o dal basso verso l'alto) Per ridurre le finiture inutili e mantenere il contorno coeso.
- Sequenza strategicamente: Decidi l'ordine di cucitura in anticipo per ridurre al minimo le finiture e i punti di viaggio, Garantire un flusso di lavoro regolare.
- Perfetto con lo strumento Reshape: Tocca il tasto "H" per accedere allo strumento Reshape, permettendoti di mettere a punto il contorno e ottenere un posizionamento preciso.
- Scegli gli strumenti giusti: Per il design del ricamo contorno, Usa lo strumento di contorno a esecuzione singola, e per gli oggetti in raso, Vai con la colonna uno strumento per ottenere croccante, bordi definiti.
- Organizza con l'elenco degli oggetti a colori: Mantieni la sequenza di progettazione organizzata e facilmente regolabile monitorando ogni parte attraverso l'elenco degli oggetti a colori.
- Regola le impostazioni del punto in modo pensieroso: Lunghezza e densità del punto su misura per il tipo di tessuto, Ottimizzare sia l'aspetto che la durata.
- Viaggiare in modo efficiente: Usa i punti a corsa singola per muoversi sotto altri oggetti, Evitare finiture extra e creare un design senza soluzione di continuità.
- I contorni fluidi sono importanti: Concentrati sulla creazione liscia, linee e curve ininterrotte per un aspetto raffinato e professionale.
Conclusione
Per concludere, Digitalizzare il design del ricamo a contorno è un ottimo modo per ottenere croccante, risultati professionali. Con la pratica, Puoi padroneggiare il processo, Ma se preferisci concentrarti sul tuo mestiere, EMDigitizing ti copre!
Offriamo a prezzi accessibili, di alta qualità servizi di digitalizzazione con tempi di consegna rapidi garantiti per mantenere i tuoi progetti in pista. Più, Forniamo un'opzione di anteprima in modo da poter vedere il tuo design prima che sia finalizzato.
Ed ecco un bonus: Se questo è il tuo primo ordine con noi, riceverai un 50% sconto. Permettere EMDigitalizzazione Gestisci i dettagli in modo da poter godere di un ricamo impeccabile ogni volta!
Domande frequenti
Usa software come Wilcom, Schiudere, or Brother’;S PE-Design, che sono popolari per le loro robuste funzionalità e interfacce intuitive, Ideale per la digitalizzare i punti di contorno.
Inizia importando il tuo design nel software, quindi traccia i contorni utilizzando lo strumento penna, Regolando il tipo di punto in esecuzione o scrupoli per pulire, linee precise.
Semplice, contorni chiari come quelli che si trovano nei loghi, testo, e le forme semplici sono le migliori per la digitalizzazione, Garantire risultati di cuciture pulite e affilate.
Una lunghezza del punto ideale per i punti di contorno è in genere tra 2 a 3 millimetri, fornendo un equilibrio tra levigatezza e dettagli.
