¿Alguna vez has pensado en convertir tus proyectos de bordado en algo realista?, arte perfecto? El bordado fotorrealista consiste en capturar cada pequeño detalle, mezclando colores a la perfección, y añadiendo profundidad a tus diseños. Va más allá de las técnicas básicas de costura, Requerir un ojo agudo y una atención cuidadosa al sombreado y la textura.
En este articulo, Te guiaremos a través de los pasos esenciales, herramientas, y consejos para ayudarlo a dominar esta técnica. Si es para retratos, Escenas de la naturaleza, o patrones intrincados, Este bordado dará vida a sus diseños!

Hacer bordados fotorrealistas: Una guía paso a paso
Materiales esenciales para bordados fotorrealistas
Para lograr fotorrealista bordado a maquina, Tener los materiales correctos es la clave. Below is a list of essential items you’;necesitará los mejores resultados.
- Tela: Elija telas estables como algodón o telas especiales como Velvet para texturas únicas.
- Estabilizadores: Usa el corte, arrancar, o estabilizadores de lavado para soportar su tela durante el bordado.
- Maquina de bordar: Una máquina capaz de manejar diseños intrincados y múltiples colores de hilos.
- Hilo de bordar: Use hilos de rayón o poliéster para colores vibrantes y un acabado brillante.
- software de bordado: Convierta imágenes en diseños de bordado y ajuste la configuración de puntadas.
- Agujas: Seleccione Basado en el tipo de tela - Ballpoint para tejer, afilado para telas tejidas.
- Aros y Marcos: Asegurar telas y estabilizadores con varios tamaños de aro para diferentes proyectos.
- Suministros varios: Tijeras para recortar hilos, marcadores de tela, o tiza para marcar tela.
Crear bordados fotorrealistas a partir de imágenes: Proceso paso a paso
Requiere una planificación cuidadosa, las herramientas adecuadas, y técnicas precisas para lograr impresionantes, resultados de alta calidad.
Paso 1: Seleccione su imagen
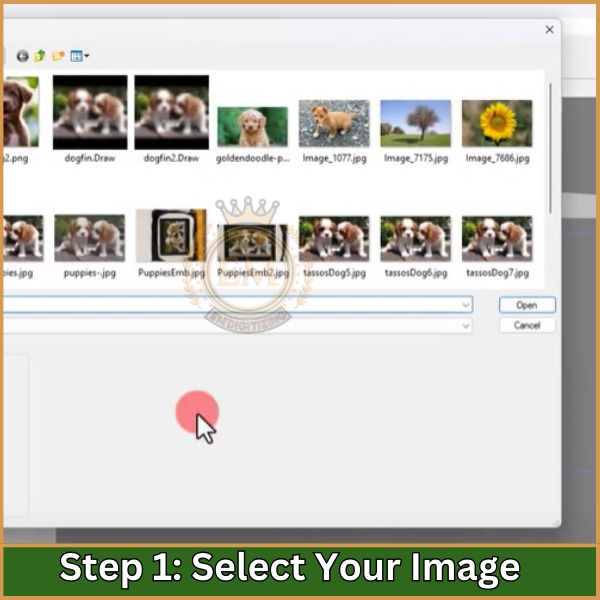
Elija una foto de alta resolución: Elija una imagen con detalles nítidos y colores vibrantes. Los retratos y las escenas de la naturaleza son excelentes opciones para la foto digitalizando Para lograr un resultado realista.
Paso 2: Preparar el diseño para bordado
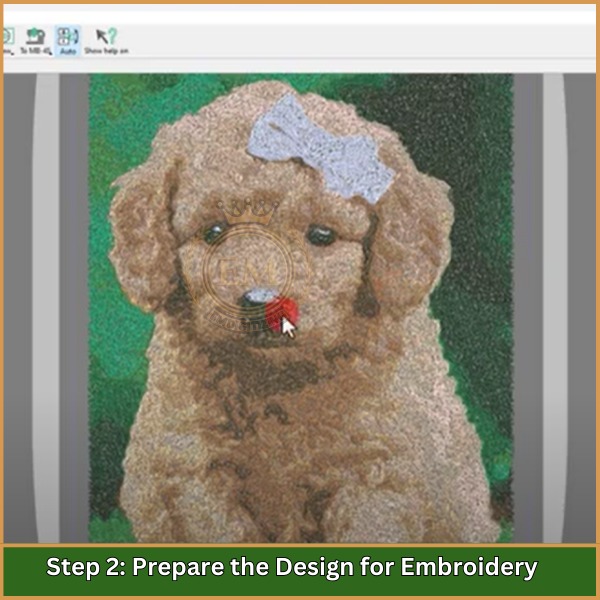
Importar la imagen en el software de bordado: Use un software como PaintStitch o Drawings Pro XII para cargar su imagen.
Convertir la imagen: El software lo ayudará a digitalizar la imagen convirtiéndola en un formato listo para bordados. Ajuste las paletas de colores y la densidad de puntadas para detalles precisos.
Paso 3: Personalizar el diseño de bordado
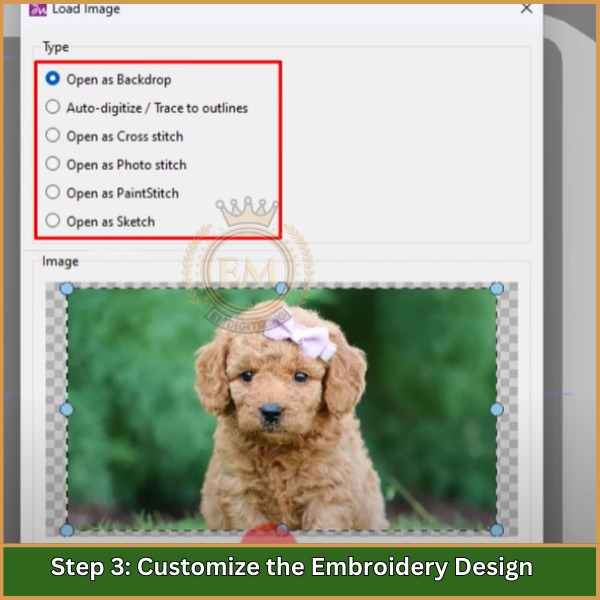
Modificar los colores y la densidad de puntadas: Haga coincidir los colores del hilo con su imagen, ajustar la cantidad de colores y la densidad de puntadas para lograr claridad y detalle.
Vista previa del diseño: Verifique cómo se verá el diseño cuando se coserá. Hacer los cambios necesarios antes de continuar.
Si you’;no estoy seguro de este paso, Puedes tener tu diseño digitalizado por nosotros. We’;LL ajusta la densidad de color y la configuración de puntadas de acuerdo con su diseño específico, asegurar profesional, resultados de alta calidad. Ofrecemos servicios asequibles con respuesta rápida y calidad garantizada.
Paso 4: Configura la máquina de bordado
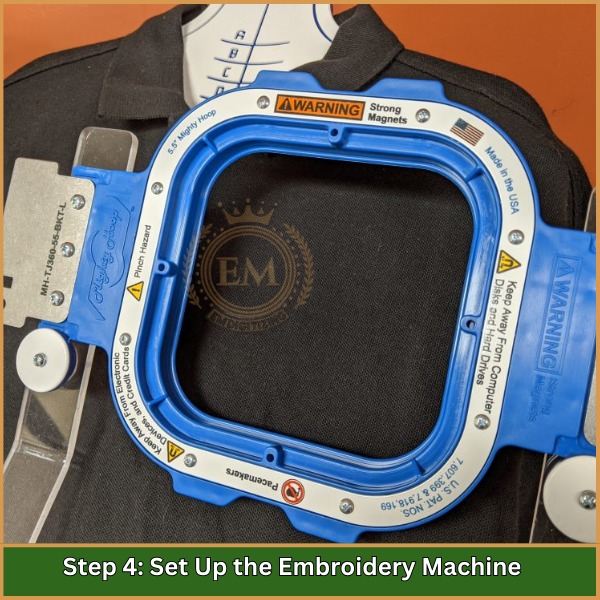
Aro la tela y el estabilizador: Asegure su tela y estabilizador en el aro, asegurando que sean suaves y apretados.
Cargue el diseño de bordado: Transfiera el diseño digitalizado a la máquina y siga las instrucciones para enhebrarlo correctamente.
Paso 5: Iniciar el proceso de bordado
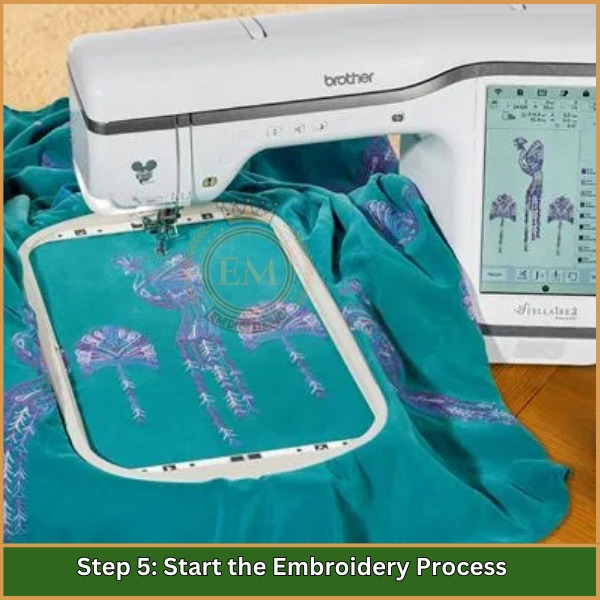
Empezar a bordar: Comience el proceso de costura. La máquina le notificará cuándo cambiar los subprocesos según sea necesario. Monitorear de cerca para cualquier problema, como saltos de subprocesos o agrupados,.
Paso 6: Toques finales
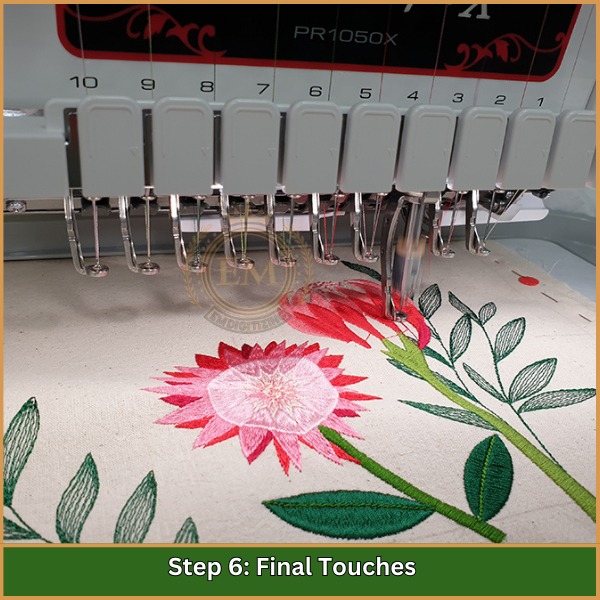
Retire el estabilizador: Una vez terminado el bordado, Retire con cuidado cualquier estabilizador restante desgarrándolo o lavándolo.
Inspeccionar y hacer ajustes: Verifique los hilos sueltos o las pequeñas imperfecciones y realice los retoques necesarios.
Paso 7: Terminar y mostrar
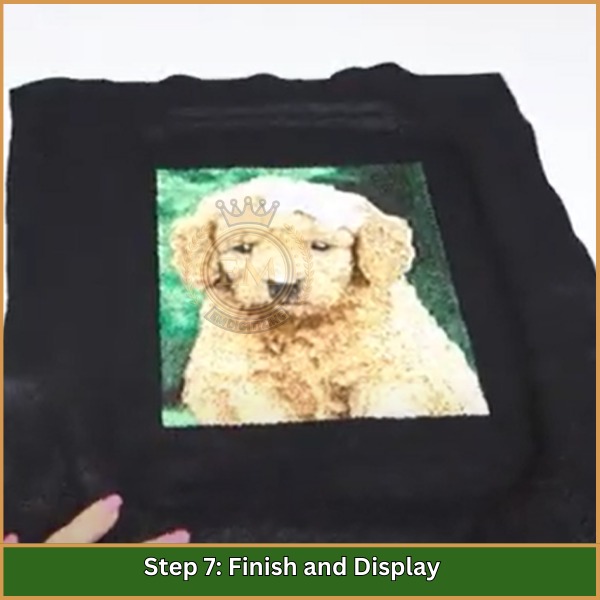
Enmarca tu bordado: Si es deseado, Enmarca tu pieza terminada, asegurarse de que esté centrado y seguro.
Consejos para lograr detalles fotorrealistas en bordado
Aquí hay algunos consejos efectivos para ayudarlo a crear detalles fotorrealistas en su proyectos de bordado:
- Incorporar texturas: Aplicar diferentes tipos de puntadas para crear textura, Agregar un efecto 3D que mejora el realismo.
- Use puntadas de gradiente: Variar la longitud de la puntada y la densidad para replicar los gradientes naturales y el sombreado en el diseño.
- Mezclar colores gradualmente: Use una combinación de colores de hilos para hacer una transición suave entre tonos, creando profundidad y dimensión similar a una pintura.
- Ajustar la dirección de puntada: Cambie los ángulos de puntada para seguir las líneas y contornos naturales del diseño, dándole una apariencia más auténtica.
- Gestionar la densidad de hilo: Ajuste la densidad de puntadas para evitar secciones demasiado gruesas o escasas, Asegurar un aspecto suave y equilibrado.
- Use hilos de alta calidad: Elija duradero, Hilos de alta calidad que ofrecen una amplia gama de colores para lograr sombreado realista y transiciones suaves.
- Simplificar detalles complejos: Reduzca partes innecesarias o demasiado detalladas del diseño para una más clara, Resultado más limpio en el bordado final.
Errores clave para evitar para un bordado perfecto fotorrealista
Aquí hay algunos errores cruciales de los que debe evitar cuando trabaje en este bordado:
- Usando colores excesivos: Agregar demasiados colores de hilo puede abrumar el diseño, conduciendo a un aspecto desordenado y antinatural.
- Descuidar la simplificación de la imagen: Si la imagen es demasiado detallada, puede perder claridad durante el bordado. Simplificar el diseño asegura un resultado más limpio.
- Densidad de puntada inconsistente: La densidad desigual puede hacer que el diseño se vea irregular. Mantenga la densidad de puntada consistente para transiciones más suaves.
- Ignorando los ángulos de puntada adecuados: Not adjusting the stitch direction to follow the design’;La forma de S puede hacer que el bordado se vea plano y poco realista.
- Selección de calidad de hilo inferior: Los hilos de baja calidad pueden romperse fácilmente y afectar la apariencia general con colores inconsistentes.
- Elegir la tela o el estabilizador incorrecto: La tela o el respaldo inapropiado pueden causar distorsiones, como fruncir, extensión, o arrugas.
Evite estos errores para garantizar que su bordado sea suave, detallado, y profesional.
Envolverlo
Crear bordado fotorrealista puede parecer desafiante al principio, Pero con las técnicas correctas, Puede traer cualquier imagen a bordados con impresionantes detalles. Centrándose en la mezcla de colores, textura, y costuras precisas, Puede convertir imágenes simples en obras de arte realistas que impresionarán a cualquiera.
If you’;Estoy buscando ahorrar tiempo en Digitalizando sus diseños, dejar EMDigitalización ayuda! Ofrecemos un servicio de fotografía de digitalización rápida, Resultados de alta calidad, y el precio que se ajuste a su presupuesto. Más, if you’;eres un cliente nuevo, obtendrás 50% fuera de tu primer pedido. Haga que sus diseños digitalicen de manera rápida y asequible, y comienza a coser tus obras maestras hoy!
preguntas frecuentes
Para hacer que una imagen se vea bordada, Digitalice el uso de un software especializado para convertirlo en un archivo de puntada, Luego bíjalo en la tela usando una máquina de bordado para una apariencia cosida realista.
Transforme una imagen en un diseño de bordado utilizando el software de digitalización para convertir la imagen en datos de puntada, Ajuste de parámetros como densidad y dirección de puntadas para garantizar resultados de bordado de calidad.
El bordado es como un profesional masterizando técnicas de digitalización, seleccionar estabilizadores y hilo apropiados, Mantenimiento de tensión, y practicar aros y costuras precisas para resultados de calidad profesional.
