
Bordar servilletas con una máquina de bordar puede parecer sofisticado, but it’;s actually a fun and accessible way to add a personal touch to your dining experience. ;
Ya sea que quieras impresionar a los invitados o simplemente mejorar tu propio juego de mesa., este tutorial te guiará a través del proceso como un jefe.
Tutorial de bordado en servilletas: Dominar el arte como un jefe
Herramientas y materiales esenciales para bordar en servilletas
Primero, reúne todos los materiales que necesitas:
Elegir la máquina de bordar adecuada
Lo primero es lo primero, you’;Necesitaré un máquina de bordar confiable para hacer realidad tus sueños con servilletas. Hay muchas opciones por ahí, Así que elige uno que se adapte a tu presupuesto y necesidades..
Asegúrese de considerar factores como el tamaño del aro, velocidad de costura, y diseños integrados. ah, the wonders of technology –; we’;Estamos viviendo en una época en la que incluso las servilletas se pueden adornar con intrincados bordados.!
Herramientas necesarias para bordar servilletas
Aparte de tu máquina de bordar, you’;todos necesito algunas otras herramientas Para empezar. Éstas incluyen hilo de bordar en varios colores, agujas de bordar, estabilizador, tijeras de bordar, y, por supuesto, the star of the show –; servilletas!

While your creativity can’;t ser medido en herramientas, tener los correctos definitivamente hace que el proceso sea más sencillo.
So gather your supplies and let’;Preparémonos para sacudir esas servilletas.!
Preparando la servilleta: Lavado adecuado, planchado, y técnicas de estabilización
Antes de sumergirnos en el proceso de bordado, it’;Es crucial preparar ambas servilletas..
Prelavado y planchado de las servilletas
Antes de sumergirnos en el bordado, it’;Es fundamental preparar las servilletas correctamente.. Dales un buen lavado para eliminar cualquier suciedad o tamaño que pueda interferir con sus puntos.
Una vez limpio, don’;No olvides darles un buen planchado.. Las servilletas suaves no sólo facilitan el proceso de bordado sino que también le dan brillo., mirada profesional. Más, you’;ll feel like Martha Stewart while doing it –; who doesn’;No quiero eso?
Métodos de estabilización para el bordado de servilletas.
Ahora, let’;s talk stabilization –; no del tipo emocional, pero el tipo de bordado.
Un estabilizador es como la columna vertebral de su proyecto de bordado, ayudando a mantener la tela tensa y evitar arrugas. Hay diferentes tipos de estabilizadores, como desgarro y corte, cada uno con sus propias ventajas.
Experimente con diferentes métodos para encontrar el que funcione mejor para usted. Recuerda, Las servilletas merecen una base sólida como cualquier buena comida..
Selección de diseño: Elegir los patrones de bordado perfectos para servilletas
Para garantizar el éxito del bordado, it’;Es importante elegir el diseño adecuado para su proyecto..
Teniendo en cuenta el tamaño y la forma de la servilleta
Cuando se trata de elegir diseños de bordado para tus servilletas, el tamaño y la forma importan. Considere las dimensiones de sus servilletas y seleccione un diseño que se ajuste bien al espacio disponible..
You don’;No quiero que tu hermoso bordado se pierda en un mar de tela., o peor, Cuelga del borde como un invitado torpe a cenar..
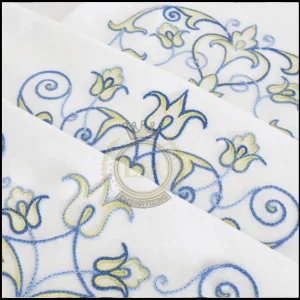
Explorando diferentes estilos de diseño
Ahora, deja volar tu creatividad y explora diferentes estilos de diseño. Desde delicados estampados florales hasta citas atrevidas o incluso monogramas, there’;Hay un diseño disponible para cada ocasión con servilletas..
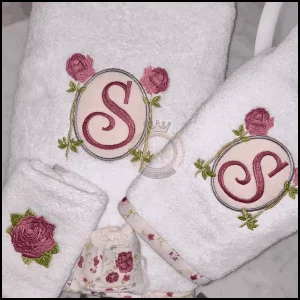
Deja que tu personalidad brille a través de tus puntadas y diviértete con ella. Después de todo, El bordado de servilletas es una forma de arte., and you’;eres el artista maestro.
Configurar la máquina de bordar: Consejos para obtener resultados de costura óptimos
Ahora que tus servilletas y tu máquina están listas, it’;Es hora de prepararse para el bordado..
Ajuste de roscado y tensión
Enhebrar su máquina de bordar puede parecer una tarea desalentadora, pero no temas! Just follow the manufacturer’;Sigue las instrucciones y ve paso a paso.. Asegúrese de que todos los hilos estén correctamente asentados en sus respectivas guías y discos tensores..

Hablando de tensión, it’;Es crucial ajustarlo correctamente para obtener costuras suaves.. Demasiado apretado y el hilo podría romperse, too loose and you’;Terminarás con bucles desordenados..
Recuerda, Encontrar la tensión adecuada es como encontrar el equilibrio perfecto entre patatas fritas y ketchup: implica un poco de prueba y error., pero vale la pena.
Seleccionar la aguja y el hilo correctos
Elegir la aguja adecuada y la combinación de hilos pueden hacer o deshacer su proyecto de bordado. Para bordar servilletas, it’;Lo mejor es utilizar una aguja afilada con un ojo pequeño para minimizar el daño a la delicada tela..
En cuanto al hilo, opt for a high-quality embroidery thread that matches your design’;esquema de color. Don’;No tengas miedo de experimentar con diferentes tipos de hilos como poliéster o rayón para lograr diferentes efectos..
Recuerda, El bordado es como la pizza: cada uno tiene sus preferencias., and there’;No hay nada bueno o malo mientras sepa bien. (o se ve bien, en este caso).
Guía paso a paso para bordar servilletas con una máquina de bordar
Ahora, comencemos a bordar:
Colocar la servilleta correctamente
El Hooping puede parecer un acto de circo, pero cuando se trata de bordado de servilletas, it’;Se trata de lograr la estabilidad.. Comience colocando su estabilizador de bordado debajo de la servilleta., asegurando que cubra toda el área de diseño.
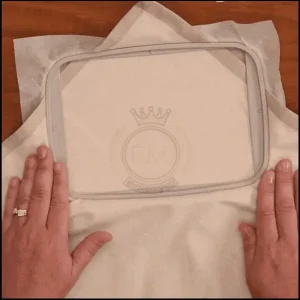
próximo, coloca suavemente una servilleta, making sure it’;está tenso pero no demasiado estirado. Recuerda, una servilleta con un buen aro es como un par de jeans perfectamente ajustados: brinda soporte sin dejar marcas antiestéticas.
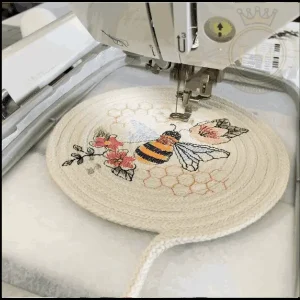
Proceso de bordado
Coloque su servilleta de forma segura the machine’;esperanza, ensuring it’;está tenso y sin arrugas. Después, deja que tu máquina de bordar haga su magia, coser su diseño en la servilleta con precisión y velocidad.
Gestión de cambios y recortes de hilos
Dependiendo de la complejidad de su diseño, Es posible que tengas que cambiar los colores del hilo durante todo el proceso de bordado..
Pay close attention to the machine’;s instrucciones para cambios de hilo, y asegúrese de recortar el exceso de hilos a medida que avanza.. Esto mantendrá su bordado con un aspecto limpio y profesional..
Toques finales e instrucciones de cuidado para servilletas bordadas
Es hora de darle el toque final a tu servilleta bordada:
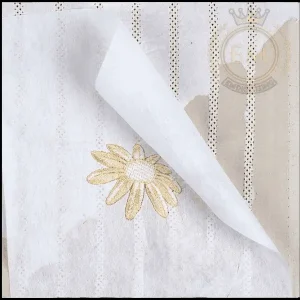
Quitar el estabilizador y recortar el exceso de hilos
Felicidades, you’;Has bordado con éxito tus servilletas.!
Now it’;Es hora de darles los toques finales.. Comience quitando el estabilizador de la parte posterior del bordado..
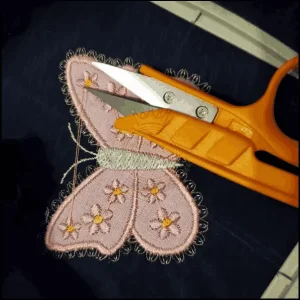
Corta el exceso de estabilizador., teniendo cuidado de no cortar los puntos.
Como recortar las puntas abiertas, Este paso garantiza un resultado limpio y pulido..
Técnicas adecuadas de lavado y secado
Antes de mostrar con orgullo sus servilletas recién bordadas, Asegúrate de lavarlos suavemente.. Utilice un detergente suave y agua fría para conservar los colores y evitar cualquier posible encogimiento..
Cuando se trata de secar, el secado al aire es la opción más suave, but if you’;estamos cortos de tiempo, una temperatura baja en la secadora debería ser suficiente. Recuerda, we’;No vamos a hornear estas servilletas, solo las queremos frescas y crujientes..
Presionar y doblar las servilletas bordadas
Finalmente, let’;s put the “;press”; en impresionante!
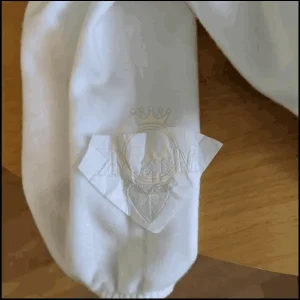
Una vez que tus servilletas estén secas, presiónelos rápidamente con una plancha a temperatura baja. Asegúrate de colocar un paño limpio entre la plancha y el bordado para proteger tus puntadas..
Y voilá! Tus servilletas están listas para deslumbrar a tus invitados. Doblarlos cuidadosamente, como origami pero menos complicado, y prepárate para una gran envidia al poner la mesa.
Línea de fondo
En conclusión, bordar servilletas con una máquina de bordar abre un mundo de posibilidades creativas para mejorar la decoración de su mesa.
Con las técnicas adecuadas y atención al detalle., puede lograr resultados de aspecto profesional que impresionarán a sus invitados y mejorarán cualquier experiencia gastronómica.
Asi que, toma tu máquina de bordar y deja volar tu creatividad mientras te embarcas en este emocionante viaje de transformar servilletas comunes en impresionantes obras de arte..
feliz bordado!
EMdigitalización: Experto en digitalización de bordados a su servicio
¿Estás buscando ayuda para convertir tus diseños en bordado??
Consulte EMdigitalización! Nos especializamos en digitalización de bordados y tengo mucho para ti. If you’;eres un cliente nuevo, obtienes un enorme 50% descuento en todos nuestros servicios.
Nuestro equipo es experto en digitalización, toman tu diseño y lo digitalizan cuidadosamente, making sure it’;Está listo rápidamente y sin que te cueste mucho..
¿Tiene alguna pregunta?? Solo contáctanos.
Nuestro equipo siempre está aquí para ayudar y se comunicará con usted rápidamente.. Y si crees que esta información es útil, no dudes en compartirlo con tus amigos.
Gracias por leer, y feliz costura!
Preguntas frecuentes:
Para bordar servilletas, un peso ligero, el estabilizador soluble en agua es ideal, ya que proporciona el soporte necesario durante el bordado y se puede quitar fácilmente sin dejar residuos.
El lino y el algodón de alta calidad son los mejores materiales para bordar en servilletas., debido a su durabilidad, textura suave, y capacidad para sujetar bien las puntadas de bordado.
Para plantillar una servilleta, Primero elige un diseño de plantilla., luego asegúrelo en la servilleta con cinta adhesiva.. Aplique pintura para tela o tinta sobre la plantilla con un pincel o una esponja., Retire la plantilla con cuidado., y dejar secar la servilleta.
Hay varios tipos de servilletas., incluyendo servilletas de tela (lino, algodón), Servilletas de papel, y servilletas decorativas, Cada uno varía en material y uso previsto., desde cenas diarias hasta ocasiones formales.


