Haben Sie sich jemals gefragt, wie Sie mehrfarbige Designs im Siebdruckverfahren drucken können, die lebendig wirken?? Es ist nicht so kompliziert, wie es sich anhört! Indem Sie Ihr Design in Schichten zerlegen und jede Farbe sorgfältig anwenden, Sie können atemberaubende Drucke auf Stoff erstellen, Papier, oder andere Materialien.
Diese Technik eignet sich perfekt zum Erstellen von auffälligen T-Shirts, Poster, oder benutzerdefinierte Projekte. Mit den richtigen Werkzeugen und Schritten, Auch Anfänger können professionelle Ergebnisse erzielen. Bereit, den Prozess zu erforschen und Ihre kreativen Ideen in die Realität umzusetzen? Lass uns anfangen!
Mehrfarbige Siebdruck-Designs | Schritt für Schritt Anleitung
Was ist mehrfarbig Siebdruckdruck?
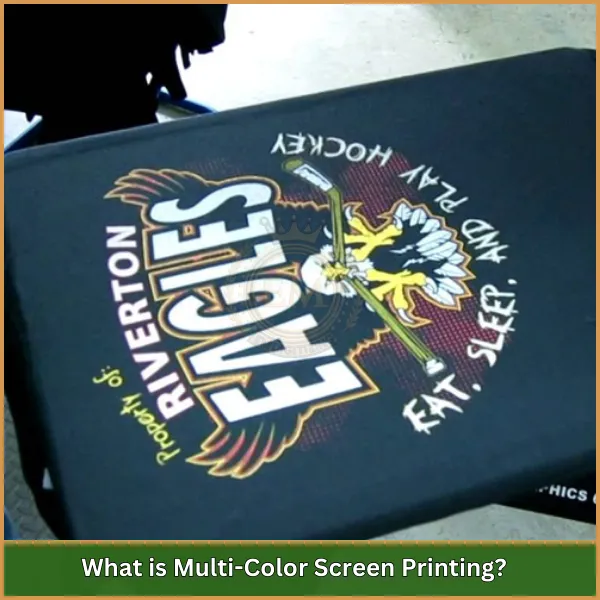
Siebdruck mehrfarbige Designs sind eine Technik, bei der mehrere Farben der Tinte auf ein Substrat angewendet werden (Wie Stoff oder Papier) Verwenden Sie separate Bildschirme für jede Farbe, was zu lebendigen und detaillierten Designs führt.
Vorteile
- Erzeugt lebhafte und lang anhaltende Drucke, die dem Verblassen und Verschleiß widerstehen.
- Ermöglicht komplizierte und detaillierte mehrfarbige Designs.
- Kostengünstig für große Bestellungen, Reduzierung der Kosten pro Einheit.
- Kompatibel mit einer Vielzahl von Materialien wie Stoff, Glas, und Papier.
- Liefert ein professionelles und poliertes Finish, Ideal für Branding und Einzelhandel.
Nachteile
- Erfordert ein zeitaufwändiges Setup, mit separaten Bildschirmen, die für jede Farbe benötigt werden.
- Weniger kostengünstig für kleine Bestellungen aufgrund hoher Einrichtungskosten.
- Die Ausrichtung mehrerer Farben kann schwierig sein und die endgültige Ausgabe beeinflussen.
- Verwendet mehr Materialien, Umweltbedenken beibringen.
- Begrenzt auf flache oder leicht gekrümmte Oberflächen, Reduzierung seiner Vielseitigkeit.
Essentielle Werkzeuge und Materialien für den mehrfarbigen Siebdruckdruck
Wenn es um Siebdruck -Multi -Farb -Designs geht, Die richtigen Werkzeuge und Materialien zu haben, ist der erste Schritt, um lebendige und professionelle Ergebnisse zu erzielen. Nachfolgend finden Sie eine Liste der benötigten, was Sie benötigen und warum jeder Artikel wichtig ist:
- Netzbildschirme
- Abzieher
- Emulsion
- Acetatfilm (für Design)
- Tinte (Verschiedene Farben)
- Acetatfilm (für Design)
- Druckscheibe (für Waschschirme)
- Expositionslichtquelle
- Drucken von Substrat (z.B., Stoff, Papier)
- Registrierungsmarken
- Reinigungsmittel (Seife und Wasser)
1. Netzbildschirme
Dies sind die Grundlage des Siebdruckdrucks. Mesh -Bildschirme halten die Schablone und steuern, wie Tinte auf Ihr Material fließt. Die Mesh -Anzahl bestimmt die Detailniveau in Ihrem Druck - die zahlreichen Zählungen eignen sich perfekt für komplizierte Designs, Während die niedrigeren Zählungen für mutig besser sind, undurchsichtige Farben.
2. Abzieher
Das Rakeln ist Ihr primäres Werkzeug zum Auftragen von Tinte für Siebdruck mehrfarbige Designs. Mit einem robusten Griff und Gummiklinge, Es sorgt sogar der Tintenverteilung. Wählen Sie die Größe basierend auf den Abmessungen Ihres Bildschirms und der Genauigkeit, die Sie für jeden Druck benötigen.
3. Emulsion
Stellen Sie sich Emulsion als die Magie hinter Ihrer Schablone vor. Es ist eine photosensitive Flüssigkeit, die, Einmal Licht ausgesetzt, verhärtet, Tinte in nicht entworfenen Bereichen zu blockieren. Ohne es, kompliziertes Erstellen, Mehrschichtige Designs wären unmöglich.
4. Acetatfilm für den Designtransfer
In diesem transparenten Blatt wird Ihr Design zum Leben erweckt. Drucken Sie Ihr Kunstwerk mit Dark auf Acetat aus, Hogen kontrastische Tinte. Der Film hilft dabei.
5. Tinte in verschiedenen Farben
Der Stern Ihres Drucks - Inkino! Abhängig von dem Look, den Sie suchen, Sie können Plastisol für ein glänzendes Finish verwenden, Tinte auf Wasserbasis für Weichheit, oder Entladungstinte für lebendige Drucke auf dunkleren Stoffen. Die richtige Tinte stellt sicher.
6. Druckscheibe zum Reinigen von Bildschirmen
Nachdem Sie Ihren Bildschirm freigelegt haben, Eine Druckwaschmaschine ist wichtig, um die nicht exponierte Emulsion auszuspülen und Ihre Schablone zu enthüllen. Ein sauberer und genau definierter Bildschirm sorgt jedes Mal knusprige Designs.
7. Expositionslichtquelle
Eine konsistente Lichtquelle ist der Schlüssel zum Übertragen Ihres Designs auf den Bildschirm. UV -Expositionseinheiten oder Halogenleuchten werden häufig verwendet. Das Ziel ist es, die Emulsion für scharfe gleichmäßig freizulegen, Genaue Schablonen.
8. Drucken von Substrat
Dies ist das Material, auf das Sie drucken werden - ob es sich um Stoff handelt, Papier, oder sogar Holz. Jedes Substrat benötigt spezifische Vorbereitungs- und Tintentypen, um die besten Ergebnisse zu erzielen.
9. Registrierungsmarken
Diese kleinen Marker sind Ihr bester Freund, wenn Sie mehrere Farben ausrichten. Durch die Verwendung von Registrierungsmarken sowohl auf dem Bildschirm als auch auf dem Material, Sie können sicherstellen, dass jede Schicht perfekt aussieht, Geben Sie Ihrem Design ein poliertes Finish.
10. Reinigungsmittel
Nachdem der Job erledigt ist, Das Reinigen Ihrer Werkzeuge ist entscheidend. Verwenden Sie Seife und Wasser, um die übrig gebliebene Tinte und Emulsion von Bildschirmen zu entfernen, Rakel, und andere Geräte. Die ordnungsgemäße Reinigung erweitert die Lebensdauer Ihrer Werkzeuge und sorgt in Zukunft hochwertige Drucke.
Siebdruck Multi -Farb -Designs
Multi-Color-Designs von Screendrucks ist ein kreativer und lohnender Prozess. Indem Sie diese Schritte befolgen, Sie können lebendige und professionell aussehende Drucke produzieren, die hervorstechen.
1. Erstellen Sie Ihr Design

Beginnen Sie mit einem digitalen Design mithilfe von Grafikdesign -Software wie Adobe Illustrator oder CorelDraw. Stellen Sie sicher, dass Ihr Design zum Siebdruck geeignet ist, indem Sie es sauber und einfach halten. Unterteilen Sie das Design in individuelle Farbschichten; Jede Farbe erfordert einen eigenen Bildschirm. Verwenden Sie die Schicht- oder Trennwerkzeuge der Software, um dies zu erreichen.
2. Auf Acetatfilm drucken
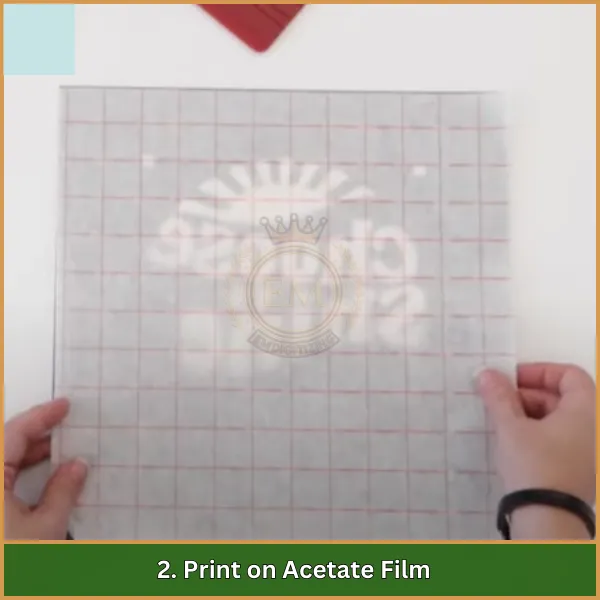
Für jede Farbschicht, Drucken Sie das Design auf transparenten Acetatfilm mit hoher kontrastierter schwarzer Tinte auf. Dies schafft eine klare Schablone, um Ihre Bildschirme aufzudecken. Stellen Sie sicher, dass jede Schicht genau gedruckt ist, um die ordnungsgemäße Ausrichtung während des Druckprozesses aufrechtzuerhalten.
3. Bereiten Sie die Bildschirme vor
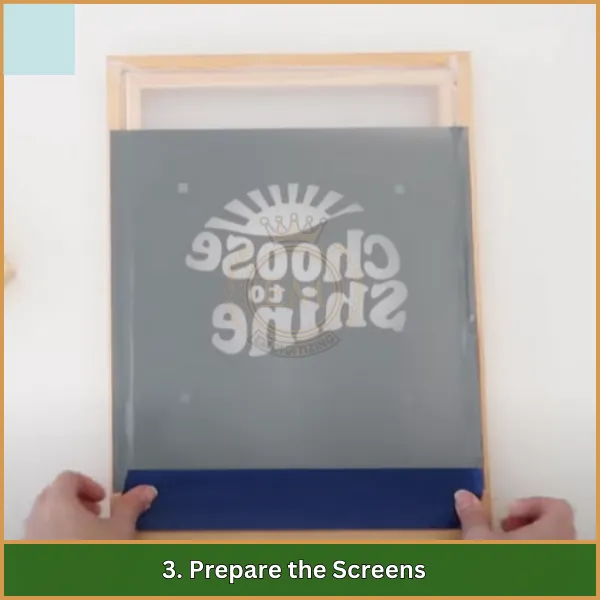
Wählen Sie Netzbildschirme basierend auf dem Detail Ihres Designs. Höhere Maschenzahlen sind ideal für gute Details, Während die Anzahl der unteren Netzzählungen für kräftige Drucke geeignet ist. Die Bildschirme mit einem dünnen, Sogar Schicht von hellempfindlicher Emulsion und ermöglicht sie, in einem völlig dunklen Bereich zu trocknen, um vorzeitige Exposition zu verhindern.
4. Die Bildschirme freilegen
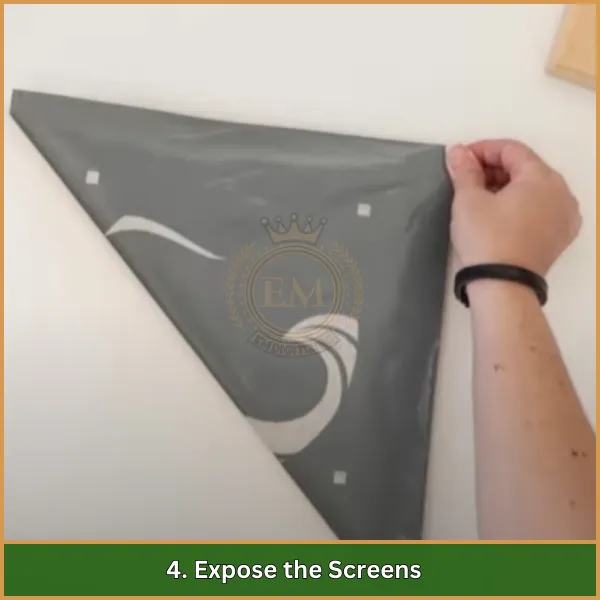
Legen Sie den gedruckten Acetatfilm mit dem Design auf dem Emulsionsbildschirm. Verwenden Sie eine UV -Lichtquelle, um den Bildschirm für eine bestimmte Dauer freizulegen. Das Licht verhärtet die Emulsion, außer wo das Design es blockiert, den Schablonenbereich weich lassen. Dieser Prozess erzeugt eine präzise Schablone für jede Farbschicht.
5. Waschen Sie die Bildschirme
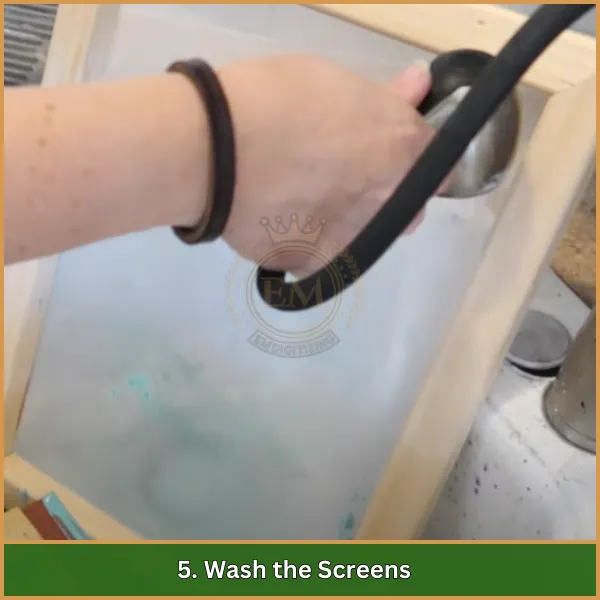
Nach Exposition, Spülen Sie die Bildschirme mit Wasser aus, um die unverrückte Emulsion wegzuwaschen, die Schablone enthüllen. Stellen Sie sicher. Lassen Sie die Bildschirme vollständig trocknen, bevor Sie sich zum nächsten Schritt bewegen.
6. Zum Drucken einrichten
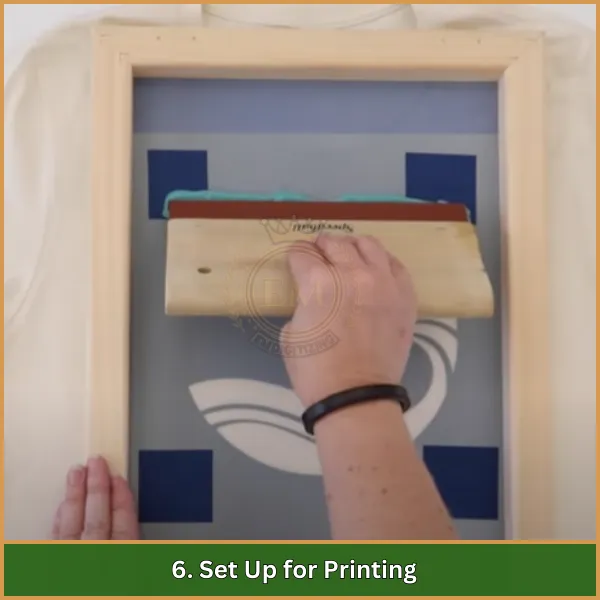
Positionieren Sie den ersten Bildschirm auf der Druckmaschine oder im Rahmen. Verwenden Sie die Registrierungsmarken auf dem Bildschirm und substrat, um das Design genau auszurichten. Legen Sie das Drucksubstrat, wie ein T-Shirt oder Stoff, flach auf dem Druckbereich, Stellen Sie sicher, dass es sicher und faltenfrei ist.
7. Wenden Sie die erste Farbe an
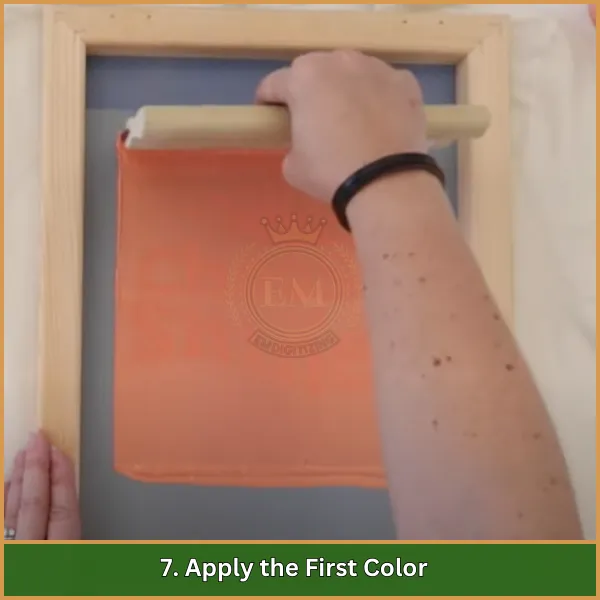
Fügen Sie Tinte zu einem Ende des Bildschirms hinzu. Mit einem Rakel, Drücken Sie die Tinte mit fest durch die Schablone auf das Substrat, sogar Druck. Für Plastisol -Tinten, Heilen Sie diese Schicht teilweise mit einem Blitztrockner aus, um Verschmutzung zu vermeiden, wenn zusätzliche Farben angewendet werden.
8. Wiederholen Sie dies für zusätzliche Farben
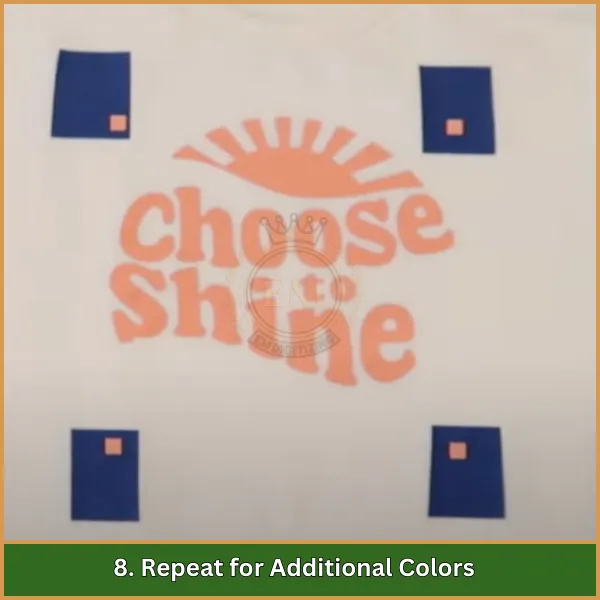
Reinigen Sie den Bildschirm oder ersetzen Sie ihn durch die nächste Schablone für die folgende Farbe. Richten Sie den Bildschirm mit den Registrierungsmarken aus, um sicherzustellen, dass die Farben perfekt ausgerichtet sind. Wiederholen Sie den Druckvorgang für jede Farbschicht, Nach Bedarf jede Schicht heilen.
9. Bildschirme reinigen und speichern
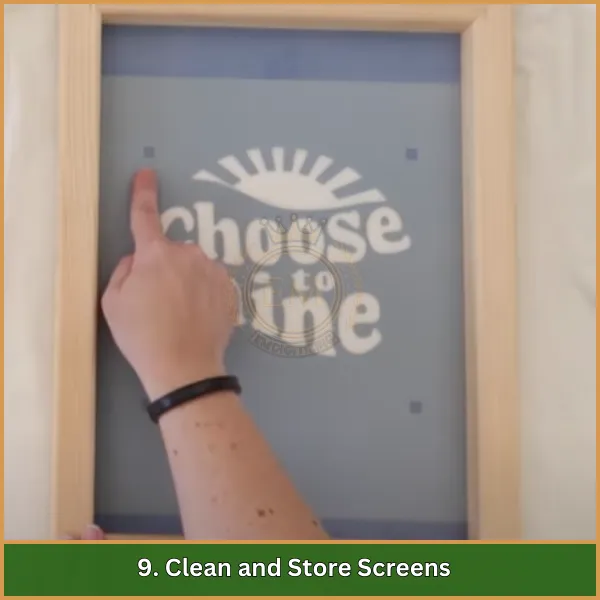
Sobald das Drucken abgeschlossen ist, Entfernen Sie die Emulsion von den Bildschirmen mit einem Emulsionsentferner und einer Druckwaschmaschine. Die ordnungsgemäße Reinigung hält Ihre Bildschirme für zukünftige Projekte wiederverwendbar. Bewahren Sie die gereinigten Bildschirme in einem trockenen Bereich auf, um ihre Qualität aufrechtzuerhalten.
10. Inspizieren und genießen

Untersuchen Sie die endgültigen Drucke auf Unvollkommenheiten oder Fehlausrichtungen. Stellen Sie sicher, dass die Farben lebendig und ordnungsgemäß geschichtet sind. Feiern Sie Ihre fertigen mehrfarbigen Designs und bereiten Sie sie auf den Gebrauch oder den Verkauf vor.
Tipps für einen erfolgreichen Multi-Farben-Screen-Druck
Das Beherrschen der Kunst von Siebdruck -Multi -Farb -Designs erfordert eine Kombination aus Fähigkeiten, Strategie, und die richtigen Techniken. Diese praktischen Tipps führen Sie zu makellosen und auffälligen Drucken.
- Verwenden Sie immer Registrierungsmarken, um Ihre Bildschirme auszurichten und ordnungsgemäß zu substrat. Dies stellt sicher, dass jede Farbschicht perfekt in das Design passt.
- Wählen Sie das rechte Bildschirmnetz für Ihr Design aus. Verwenden Sie höhere Maschenzahlen für komplizierte Details und niedrigere Zählungen für fetthaltige Designs mit dickeren Tintenschichten.
- Für dunkle Stoffe, Beginnen Sie mit einer weißen Unterbasis. Dies hellt nicht nur die Farben auf, sondern stellt auch sicher, dass sie dem Design treu aussehen.
- Teilen Sie Ihr Design mit Halbtontrennungen in separate Farbschichten auf. Dieser Schritt ist entscheidend, um einen nahtlosen mehrfarbigen Druck zu erreichen.
- Vor Beginn des tatsächlichen Laufs, Testen Sie Ihr Design auf Schrottmaterial. Dies hilft Ihnen, Ausrichtungs- oder Farbprobleme frühzeitig zu identifizieren und zu beheben.
- Bei der Arbeit mit Plastisol -Tinten, Blitz heilen Sie jede Schicht vor dem Hinzufügen der nächsten. Dies verhindert die Farben und sorgt für ein professionelles Finish.
- Behalten Sie die Konsistenz Ihrer Tinten bei. Passen Sie die Viskosität nach Bedarf an, um sicherzustellen.
- Reinigen Sie Ihre Bildschirme, sobald Sie den Druck beenden. Die ordnungsgemäße Reinigung hält die Bildschirme in gutem Zustand und bereit für zukünftige Projekte.
- Wenn Sie neu im mehrfarbigen Druck sind, Zögern Sie nicht, Ratschläge zu suchen oder mit erfahrenen Druckern zusammenzuarbeiten. Ihre Erkenntnisse können Zeit sparen und die Ergebnisse verbessern.
- Planen Sie die Reihenfolge Ihrer Farbanwendung sorgfältig. Beginnen Sie mit den undurchstesten Farben und enden Sie mit leichteren oder transparenten Farbtönen für den besten Schichteffekt.
Indem Sie diese Schritte befolgen, Sie machen Ihren mehrfarbigen Bildschirmdruckprozess reibungsloser und erreichen Designs, die sowohl lebendig als auch präzise sind.
Abschließende Gedanken
Meister der Kunst von Siebdruck mehrfarbige Designs ist eine aufregende Reise, mit der Sie mutige und lebendige Ideen zum Leben erwecken können. Mit sorgfältiger Planung und konsequenter Übung, Sie können professionell aussehende Drucke erstellen, die auffallen. Zögern Sie nicht, neue Designs auszuprobieren und mit verschiedenen Techniken zu experimentieren, um Ihre Fähigkeiten zu verbessern.
Wenn Sie Hilfe bei der Vektorisierung Ihrer Designs für ein makelloser Druck benötigen, EMDigitalisierung ist hier, um zu helfen. Wir bieten Premium Vector Art Services zu erschwinglichen Preisen an, und Erstkunden genießen einen exklusiven 50% Rabatt. Wenden Sie sich an uns, um loszulegen und Ihre Siebdruckprojekte auf die nächste Stufe zu bringen.
Sie können uns gerne mit Fragen oder Anfragen kontaktieren - wir helfen Ihnen gerne weiter! Viel Spaß beim Drucken!
Häufig gestellte Fragen
Teilen Sie Ihr Design mit Designsoftware in separate Farbschichten auf. Jede Farbe erfordert einen eigenen Bildschirm zum Drucken.
You’;Ich brauche Bildschirme, Rakel, Tinte für jede Farbe, eine Druckmaschine, ein Trockner, Registrierungsband, und Transparenzfilm für die Ausrichtung.
Verwenden Sie Registrierungsmarken auf den Bildschirmen und Transparenzfilm. Richten Sie jede Farbschicht sorgfältig auf die Presse aus, um genaue Ergebnisse zu erzielen.
Unterbasierung druckt zuerst eine weiße Basisschicht. Es lässt die Farben heller und lebendiger aussehen, Besonders auf dunklen Stoffen.
