
Ich habe jemals darüber nachgedacht, wie man eine Zeichnung in einen Vektor verwandelt? Es ist eine großartige Möglichkeit, Ihre handgezeichnete Kunst für den digitalen Gebrauch vorzubereiten. Durch die Vektorisierung Ihrer Zeichnung bleibt die Qualität erhalten, egal wie stark Sie die Größe ändern, Damit eignet es sich ideal für den professionellen Einsatz wie Logos oder gedruckte Designs. In diesem Ratgeber, I’;Wir führen Sie durch die einfachen Schritte, um Ihre Skizzen in scharfe Vektorbilder umzuwandeln. Whether you’;Sie fangen gerade erst an oder möchten Ihre Fähigkeiten verfeinern, Mit diesem Verfahren können Sie mühelos saubere und skalierbare Vektorgrafiken erstellen!
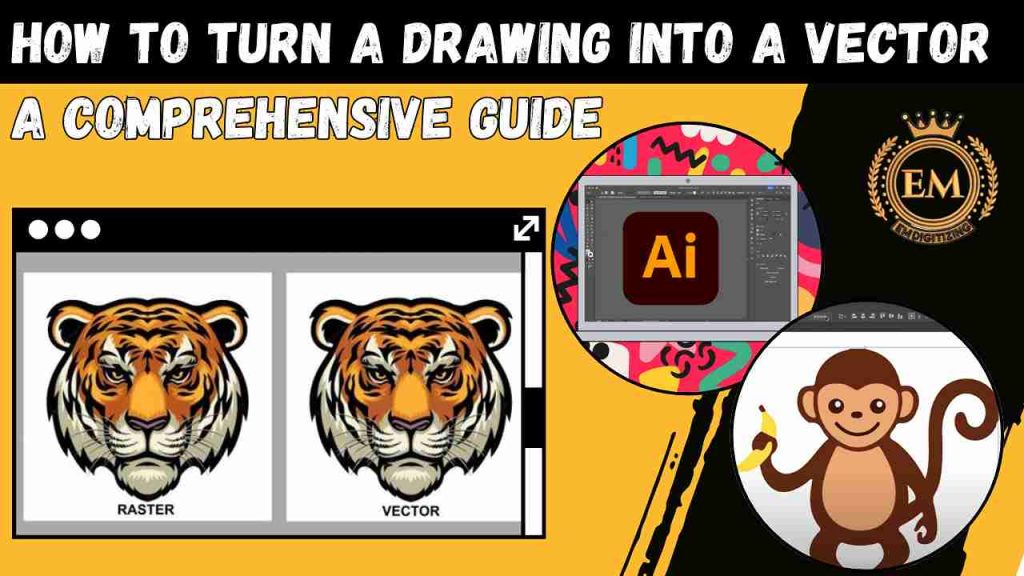
So wandeln Sie eine Zeichnung in einen Vektor um. Eine umfassende Anleitung
Vektor- und Rastergrafiken verstehen
Bei der Arbeit mit digitalen Bildern, it’;Es ist wichtig, die Unterschiede zwischen Vektor- und Rastergrafiken zu verstehen, um das richtige Format für Ihr Projekt auszuwählen.
Was sind Vektorgrafiken??
Vektorgrafiken bestehen aus mathematischen Pfaden, inklusive Punkte, Linien, und Kurven, die Formen und Farben definieren. Diese Pfade erzeugen Bilder, die skalierbar und auflösungsunabhängig sind.
Was sind Rastergrafiken??
Rastergrafiken bestehen aus einem Pixelraster, jedes mit seiner eigenen Farbe. Diese Bilder sind auflösungsabhängig, Dies bedeutet, dass eine Skalierung zu Pixelbildung führen kann.
Hauptunterschiede zwischen Vektor- und Rastergrafiken
- Komposition: Vektorgrafiken werden durch mathematische Pfade definiert, während Rastergrafiken aus einzelnen Pixeln bestehen.
- Skalierbarkeit: Vektorgrafiken können ohne Qualitätsverlust stufenlos skaliert werden, wohingegen Rasterbilder pixelig und unscharf werden, wenn sie über ihre Originalgröße hinaus skaliert werden.
- Dateigröße: Vektordateien sind in der Regel kleiner, da sie mathematische Daten speichern, während Rasterdateien aufgrund der Pixeldichte größer sein können, insbesondere bei hohen Auflösungen.
- Beste Anwendungsfälle: Vektorgrafiken sind ideal für Logos, Symbole, und Designs, die skalierbar sein müssen, Rastergrafiken hingegen eignen sich am besten für Fotos und Bilder mit komplexen Details.
Dateiformate: Zu den gängigen Vektorformaten gehört SVG, KI, ENV, und PDF, während Rasterformate JPEG umfassen, PNG, GIF, und TIFF.
Beste Software, um eine Zeichnung in einen Vektor umzuwandeln
If you’;Ich frage mich wie man eine Handzeichnung in einen Vektor umwandelt, Hier sind fünf der besten Software mit ihren Vorteilen und Einschränkungen:
- Adobe Illustrator
- Coreldraw
- Inkscape
- Affinity-Designer
- Vektormagie
1. Adobe Illustrator

- Why it’;Das ist das Beste: Branchenstandardisierte Software für Vektordesign mit leistungsstarken Werkzeugen und Präzision.
Vorteile: Große Auswahl an Werkzeugen, Hervorragend geeignet für komplexe Vektordesigns.
Einschränkungen: Teures Abo-Modell, Steile Lernkurve für Anfänger.
2. Coreldraw
- Why it’;Das ist das Beste: Bietet umfassende Vektorbearbeitungswerkzeuge mit einer intuitiven Benutzeroberfläche.
Vorteile: Benutzerfreundlich, ideal für Anfänger und Profis.
Einschränkungen: Nur unter Windows verfügbar, kann teuer sein.
3. Inkscape
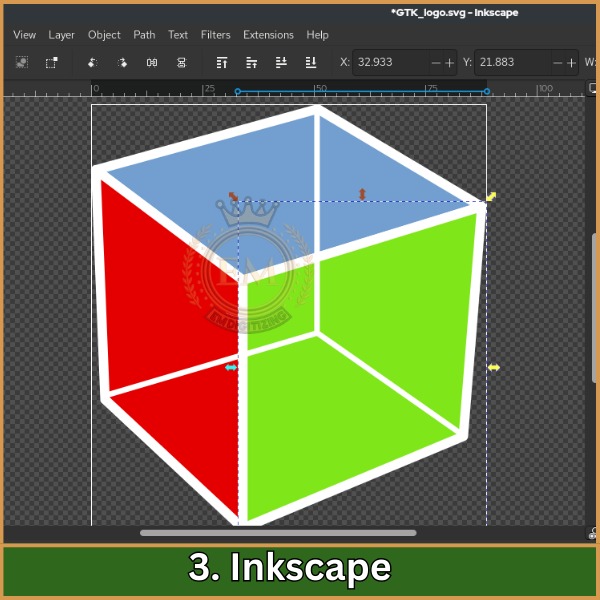
- Why it’;Das ist das Beste: Kostenlos, Open-Source-Vektorsoftware mit einer starken Community.
Vorteile: Kostenlose Nutzung, unterstützt die meisten Vektorformate.
Einschränkungen: Etwas langsamere Leistung, weniger erweiterte Funktionen als kostenpflichtige Alternativen.
4. Affinity-Designer
- Why it’;Das ist das Beste: Erschwinglich, professionelle Vektorsoftware mit reibungsloser Funktionalität.
Vorteile: Einmalige Zahlung, schnelle und reaktionsschnelle Benutzeroberfläche.
Einschränkungen: Es fehlen einige erweiterte Tools von Illustrator.
5. Vektormagie
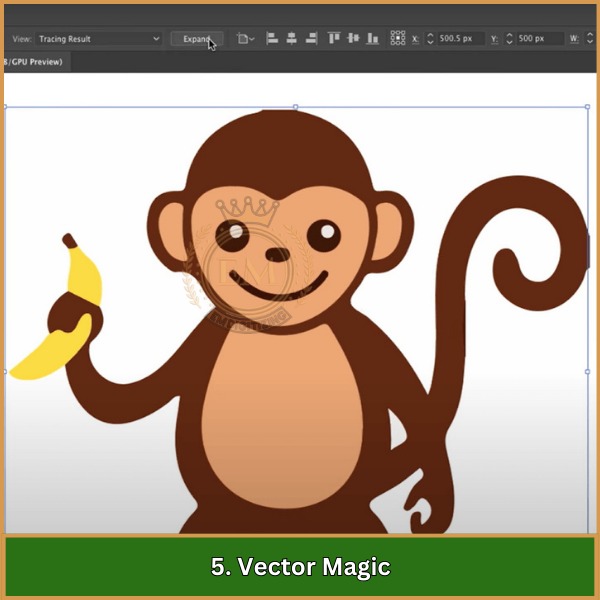
- Why it’;Das ist das Beste: Spezialisiertes Tool zum Konvertieren von Rasterbildern in Vektoren mit minimalem Aufwand.
Vorteile: Automatische Nachverfolgung, einfach zu bedienen.
Einschränkungen: Eingeschränkte Bearbeitungsfunktionen im Vergleich zu vollständigen Design-Suites.
So verwandeln Sie eine Zeichnung in Adobe Illustrator in eine Vektorgrafik
Adobe Illustrator ist eines der leistungsstärksten Tools für Eine Handzeichnung in einen Vektor umwandeln. Befolgen Sie diese einfache Schritt-für-Schritt-Anleitung, um Ihre zu konvertieren Zeichnen in Vektorgrafiken.
Schritt 1: Scannen oder fotografieren Sie Ihre Zeichnung
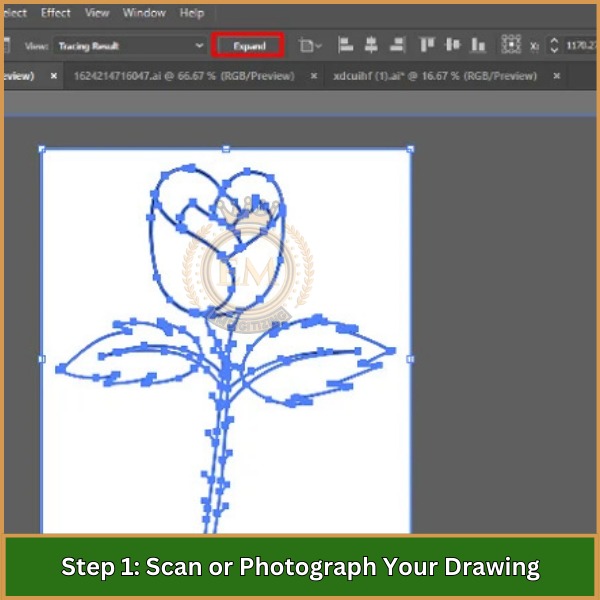
Bevor es losgeht, Stellen Sie sicher, dass Ihre Zeichnung in einem digitalen Format vorliegt, indem Sie sie scannen oder ein hochwertiges Foto aufnehmen. Speichern Sie es als JPEG- oder PNG-Datei.
Schritt 2: Importieren Sie die Zeichnung in Adobe Illustrator
Öffnen Sie Adobe Illustrator, geh zu File >; Offen, und wählen Sie Ihre gespeicherte Zeichnung aus. Dadurch wird Ihr Rasterbild im Arbeitsbereich platziert. Wenn Sie sich gefragt haben, wie Sie meine Zeichnung in einen Vektor umwandeln können, Das ist der Ausgangspunkt.
Schritt 3: Verwenden Sie das Image Trace Tool
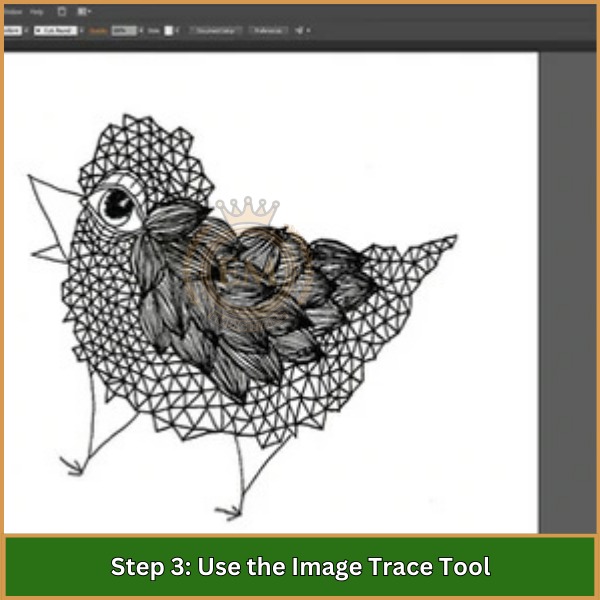
Wählen Sie Ihr Bild aus, dann geh zu Window >; Bildverfolgung. Im Bedienfeld „Bildverfolgung“., Wählen Sie eine Voreinstellung aus (like Black &; Weiß oder Farbe) das zu deiner Zeichnung passt. Illustrator konvertiert Ihr Bild automatisch in Vektorpfade, Wir helfen Ihnen zu verstehen, wie Sie eine Zeichnung in einen Vektorillustrator umwandeln.
Schritt 4: Passen Sie die Tracing-Einstellungen an
Passen Sie die Ablaufverfolgung an, indem Sie die Einstellungen wie folgt anpassen Schwelle, Wege, und Ecken um eine genauere Vektorversion Ihrer Zeichnung zu erhalten. Klicken Expandieren um die Ablaufverfolgung in bearbeitbare Pfade umzuwandeln.
Schritt 5: Bearbeiten Sie die Vektorpfade
Benutzen Sie die Direktauswahl-Tool (EIN) um einzelne Punkte oder Linien im vektorisierten Bild zu optimieren. Sie können auch unerwünschte Bereiche löschen oder Formen für eine bessere Genauigkeit anpassen.
Schritt 6: Fügen Sie Farben und Effekte hinzu
Die Pfade sind jetzt editierbar, Sie können Farben hinzufügen, Farbverläufe, oder Effekte für Ihre Vektorgrafiken. Benutzen Sie die Füllen und Schlaganfall Optionen zu Passen Sie Ihr Design an.
Schritt 7: Speichern und exportieren Sie Ihren Vektor
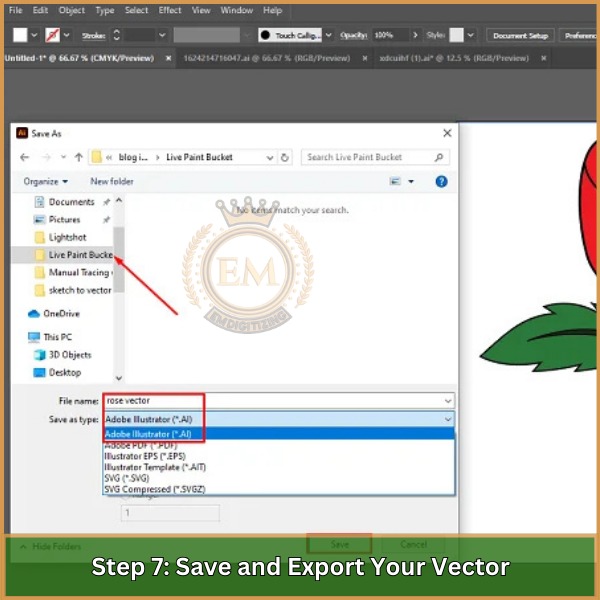
Once you’;Ich bin mit Ihrer Vektorgrafik zufrieden, Speichern Sie Ihre Datei als KI Datei. Um es für andere Zwecke zu exportieren, geh zu File >; Exportieren als, und wählen Sie Formate wie SVG, ENV, oder PDF um die Vektorqualität beizubehalten.
Beheben häufiger Probleme bei der Vektorkonvertierung
Auch mit den richtigen Werkzeugen, Das Konvertieren einer Zeichnung in einen Vektor kann manchmal eine Herausforderung darstellen. Hier sind häufige Probleme aufgeführt, auf die Sie stoßen könnten, und wie Sie diese beheben können.
1. Schlechte Leitungsqualität nach der Verfolgung
- Ausgabe: Die Linien im Vektor sind nach Verwendung des Bildverfolgungswerkzeugs gezackt oder verzerrt.
- Lösung: Passen Sie die an Schwelle und Wege Einstellungen im Bedienfeld „Bildverfolgung“ für glattere Linien. Im Bedarfsfall, Verfeinern Sie die Pfade manuell mithilfe von Stiftwerkzeug oder Direktauswahl-Tool.
2. Lücken oder Überlappungen in den Vektorpfaden
- Ausgabe: Einige Bereiche in der vektorisierten Zeichnung weisen Lücken oder überlappende Pfade auf, das Gesamtbild beeinflussen.
- Lösung: Benutzen Sie die Formerstellungstool um Lücken zu schließen oder überlappende Abschnitte zusammenzuführen. Sie können mit dem auch einzelne Ankerpunkte bearbeiten Direktauswahl-Tool um ein nahtloses Design zu gewährleisten.
3. Farben werden nicht wie erwartet angezeigt
- Ausgabe: Nach der Konvertierung in einen Vektor, the colors of the drawing don’;Sie stimmen nicht mit dem Original überein oder fehlen ganz.
- Lösung: Stellen Sie sicher, dass die korrekte Farbmodus (RGB oder CMYK) ist in Illustrator ausgewählt. Benutzen Sie die Live-Farbeimer-Tool um Bereiche mit den gewünschten Farben aufzufüllen, falls diese fehlen.
4. Große Dateigröße nach der Konvertierung
- Ausgabe: Die Vektordatei wird nach der Konvertierung zu groß, was es schwierig macht, damit zu arbeiten.
- Lösung: Vereinfachen Sie die Pfade, indem Sie zu gehen Object >; Path >; Vereinfachen um die Anzahl der Ankerpunkte zu reduzieren, ohne zu viele Details zu beeinträchtigen. Sie können auch unnötige Elemente oder Ebenen entfernen, um die Dateigröße zu reduzieren.
5. Schwierigkeiten beim Bearbeiten von Vektorpfaden
- Ausgabe: Einige Pfade sind nach der Verfolgung schwer auszuwählen oder zu bearbeiten.
- Lösung: Benutzen Sie die Ebenenbedienfeld um bestimmte Pfade zu finden und auszuwählen, oder versuchen Gruppierung aufheben die Objekte, um die Arbeit mit ihnen zu erleichtern. Sie können auch zwischen wechseln Gliederungsansicht (Strg + Y) und Normalansicht, um Pfade klarer zu sehen und zu bearbeiten.
Fazit
Wenn Sie lernen, wie Sie eine Zeichnung in einen Vektor umwandeln, sehen Ihre Kunstwerke professionell aus und sind für jedes Digital- oder Druckprojekt geeignet. Indem Sie dieser Anleitung folgen, Sie können Ihre handgezeichneten Designs ganz einfach in saubere umwandeln, skalierbare Vektorbilder.
Für eine schnellere und effizientere Lösung, EMDigitalisierung bietet hochwertige Vektorkunstdienste mit kurzen Bearbeitungszeiten und erschwinglichen Preisen. Plus, als Erstkunde, Du kannst es genießen 50% Rabatt auf Ihre erste Bestellung. Lassen Sie uns die Konvertierung übernehmen, damit Sie sich auf die Erstellung weiterer toller Designs konzentrieren können!
Häufig gestellte Fragen
Konvertieren Sie ein Bild in einen Vektor, indem Sie Vektorgrafiksoftware wie Adobe Illustrator oder CorelDRAW verwenden, das Bild nachzeichnen, und Erstellen von Vektorformen.
Vektorisieren Sie ein Design, indem Sie das Bild in eine Vektorgrafiksoftware importieren, Verwenden Sie Werkzeuge wie das Stiftwerkzeug oder die Bildverfolgung, um es als skalierbare Vektorgrafiken neu zu erstellen.
Apps wie Adobe Illustrator, Coreldraw, und Inkscape sind beliebte Optionen zum Umwandeln von Bildern in Vektoren, bietet verschiedene Tools und Funktionen für eine genaue Nachverfolgung und Konvertierung.


