Hatten Sie jemals Probleme damit, Ihr Stickmuster perfekt auszurichten?? Wenn Sie wissen, wie Sie Stickmuster neu ausrichten, können Sie Zeit sparen und Ihren Projekten ein professionelles Aussehen verleihen. Eine Fehlausrichtung kann frustrierend sein, aber mit den richtigen Tipps, it’;Es lässt sich leicht beheben!
In diesem Ratgeber, Ich führe Sie einfach durch, Einsteigerfreundliche Methoden zur genauen Ausrichtung Ihrer Designs, ob Sie ein Raster verwenden, Zielaufkleber, oder sogar Sticksoftware. Am Ende, Sie werden sich sicherer fühlen und bereit sein, jedes Projekt präzise anzugehen.
Lassen Sie uns eintauchen und diese einfachen Möglichkeiten entdecken, um sicherzustellen, dass jeder Stich genau dort landet, wo Sie ihn haben möchten!
So richten Sie Stickmuster neu aus | Beste Methoden
So richten Sie Stickmuster neu aus | Top-Wege
Neuausrichtung Stickmotive kann mit den richtigen Techniken einfach sein. Hier sind acht effektive Methoden, um sicherzustellen, dass Ihre Designs jedes Mal perfekt aufeinander abgestimmt sind.
- Verwenden Sie Ausrichtungsgitter
- Markieren Sie den Stoff mit temporären Stiften
- Nutzen Sie Hoop Marks
- Try the “;Baste in the Hoop”; Methode
- Verwenden Sie ein Laser-Ausrichtungswerkzeug
- Bringen Sie Zielaufkleber an
- Verlassen Sie sich auf die Zentrierfunktion Ihrer Maschine
- Mit Sticksoftware ausrichten
1. Verwenden Sie Ausrichtungsgitter
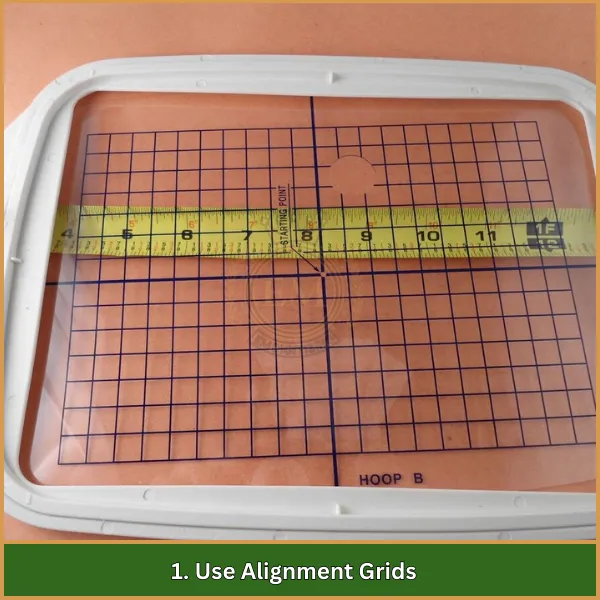
Mithilfe von Ausrichtungsgittern können Sie Ihr Design perfekt auf dem Stoff platzieren. Es hält alles gerade und zentriert für einen gleichmäßigen Stich, hilft Ihnen, Maschinenstickereien präzise auszurichten.
Verfahren:
- Platzieren Sie ein Ausrichtungsgitter unter oder auf Ihrem Stoff, aligning it with your hoop or machine’;s Markierungen.
- Legen Sie den Stoff über das Gitter, Stellen Sie sicher, dass der Designbereich zentriert oder an der gewünschten Stelle ausgerichtet ist.
- Befestigen Sie den Stoff im Stickrahmen, Überprüfen Sie, ob es mit den Gitterlinien übereinstimmt.
- Beginnen Sie mit dem Nähen, da das Raster dafür sorgt, dass das Design genau dort gestickt wird, wo es beabsichtigt ist.
Tipp: Verwenden Sie transparente Raster oder druckbare Rastervorlagen für noch mehr Kontrolle über die Ausrichtung.
2. Markieren Sie den Stoff mit temporären Stiften
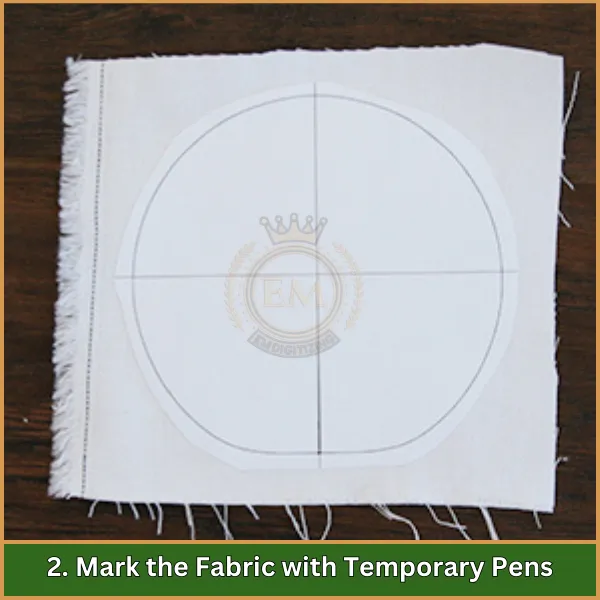
Temporäre Stifte eignen sich hervorragend zum Markieren, wo Ihr Design hingehört. Sobald Sie mit der Stickerei fertig sind, lassen sich die Flecken leicht entfernen.
Verfahren:
- Identifizieren Sie die Mitte und die Ränder Ihres Designbereichs.
- Markieren Sie diese Punkte mit einem temporären Stoffstift leicht auf dem Stoff. Dazu können die genaue Mitte und alle Richtlinien gehören, die Sie zur Ausrichtung benötigen.
- Legen Sie den Stoff in den Stickrahmen, Richten Sie es so aus, dass die markierte Mitte und die Kanten mit der Mitte des Stickrahmens übereinstimmen.
- Beginnen Sie mit dem Nähen. Nach dem Beenden, Waschen Sie die Stiftspuren gemäß den Anweisungen des Stifts ab.
Tipp: Testen Sie den temporären Stift immer an einem kleinen Stück Stoff, um sicherzustellen, dass er sauber radiert.
3. Nutzen Sie Hoop Marks
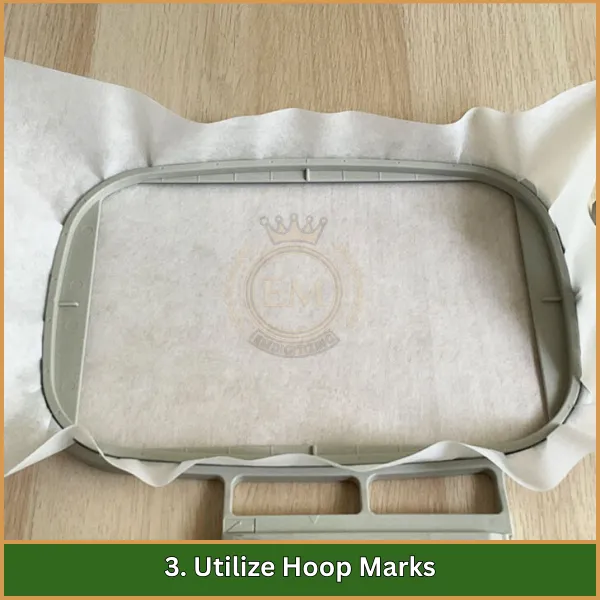
Die Reifen verfügen über integrierte Markierungen, die Ihnen dabei helfen Maschinenstickerei Ausrichtung. Diese Markierungen machen es Ihnen leicht, Ihren Stoff jedes Mal richtig zu platzieren.
Verfahren:
- Überprüfen Sie Ihren Reifen auf eingebaute Kerben oder Markierungen, die oft die Mitte und horizontale oder vertikale Linien anzeigen.
- Legen Sie Ihren Stoff über den Reifen, Richten Sie es so aus, dass die Designmitte und die Ausrichtungslinien mit diesen Markierungen übereinstimmen.
- Einmal positioniert, Befestigen Sie den Stoff im Rahmen und überprüfen Sie erneut, ob er ausgerichtet ist.
- Beginnen Sie mit dem Stickvorgang, Wenn Sie die Rahmenmarkierungen kennen, können Sie sich bei der Platzierung Ihres Designs orientieren.
Tipp: Für zusätzliche Genauigkeit, add temporary marks to your fabric to match the hoop’;s Markierungen.
4. Probieren Sie es aus "Befestigen Sie den Reifen" Methode
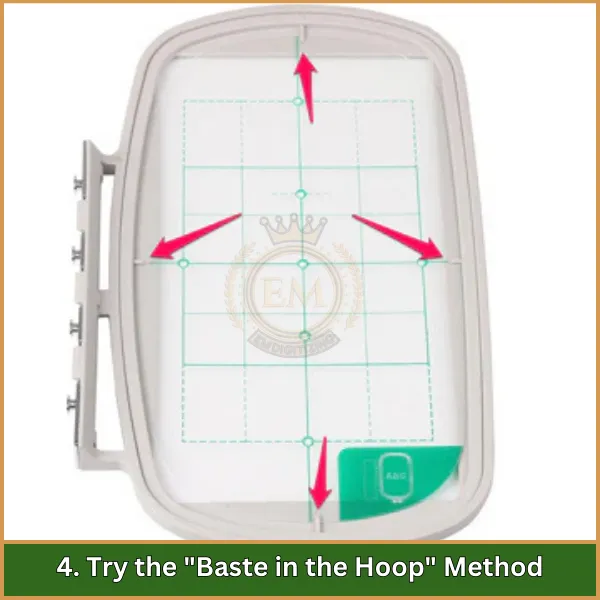
Das Heften im Stickrahmen hält Ihren Stoff vorübergehend an Ort und Stelle. Dadurch bleibt der Stoff stabil und Sie können vor dem Nähen letzte Anpassungen vornehmen, Dadurch wird sichergestellt, dass Stickmuster genau neu ausgerichtet werden.
Verfahren:
- Legen Sie Ihren Stoff locker in den Rahmen, Positionieren Sie es dort, wo das Design erscheinen soll.
- Verwenden Sie die Funktion „Heften im Stickrahmen“ Ihrer Maschine, um einen vorübergehenden Stichumriss um den Designbereich herum zu erstellen, Fixieren des Stoffes.
- Nach dem Begießen, Überprüfen Sie die Stoffausrichtung und passen Sie sie gegebenenfalls an. Durch das Heften wird der Stoff an Ort und Stelle gehalten, So können Sie kleine Anpassungen vornehmen.
- Einmal zufrieden, Beginnen Sie mit der Design-Stickerei, Entfernen Sie dann nach der Fertigstellung die Heftstiche.
Tipp: Diese Methode eignet sich besonders für dicke oder dehnbare Stoffe, die sich beim Sticken verschieben können.
5. Verwenden Sie ein Laser-Ausrichtungswerkzeug
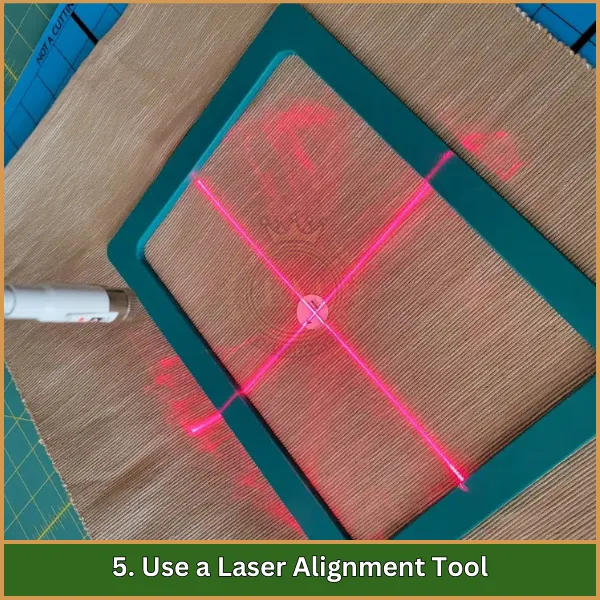
Ein Laserwerkzeug projiziert eine Linie auf Ihren Stoff, Zeigt genau an, wo Ihr Design platziert werden soll. Dieses Werkzeug ist perfekt, um gerade Linien und Winkel richtig zu zeichnen.
Verfahren:
- Richten Sie Ihr Laserausrichtungsgerät so ein, dass es eine Linie oder ein Fadenkreuz auf Ihren Stoff projiziert.
- Positionieren Sie Ihren Stoff unter dem Laser, Passen Sie es an, bis das Fadenkreuz oder die Linie mit der Mitte und den Kanten Ihres Designs übereinstimmt.
- Befestigen Sie den Stoff im Stickrahmen, Überprüfen Sie die Ausrichtung mit den Laserlinien noch einmal.
- Beginnen Sie mit dem Nähen, Verwenden Sie die Laserausrichtung als Richtlinie, um das Design gerade und zentriert zu halten.
Tipp: Diese Methode eignet sich hervorragend zum Ausrichten von Designs auf Stoffen, die nicht markiert werden können, oder für komplexe Designs, die eine hohe Genauigkeit erfordern.
6. Bringen Sie Zielaufkleber an
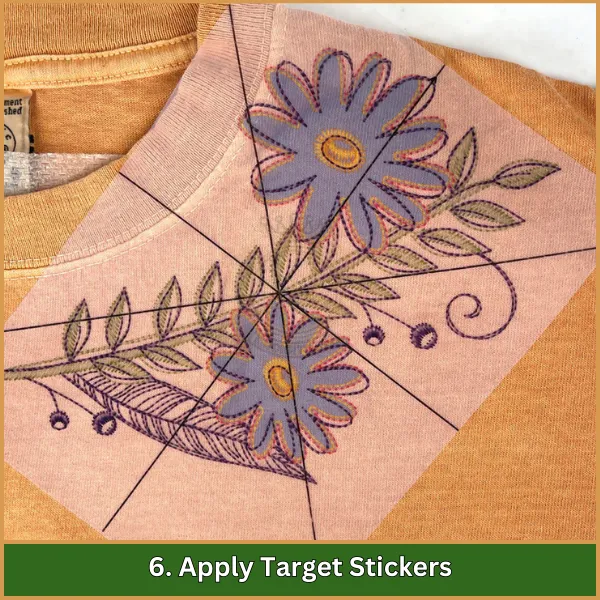
Wenn Sie sich fragen, wie Sie Stickmuster neu ausrichten können, Mithilfe von Zielaufklebern lässt sich ganz einfach markieren, wo mit dem Nähen begonnen werden soll. Sie helfen Ihnen, das Design ohne zusätzliche Markierung an der richtigen Stelle zu platzieren.
Verfahren:
- Platzieren Sie einen Zielaufkleber genau an der Stelle, an der sich die Mitte des Motivs befinden soll.
- Laden Sie Ihr Design in die Stickmaschine und passen Sie die Position des Designs an die Position des Aufklebers an.
- Spannen Sie den Stoff vorsichtig ein, Stellen Sie sicher, dass der Zielaufkleber sichtbar und an der Nadelposition der Maschine ausgerichtet ist.
- Beginnen Sie mit dem Nähen. Entfernen Sie den Aufkleber, sobald Sie sicher sind, wo er angebracht ist.
Tipp: Zielaufkleber können bei sauberer Aufbewahrung mehrmals wiederverwendet werden, Dies macht sie zu einer wirtschaftlichen Ausrichtungsoption.
7. Verlassen Sie sich auf die Zentrierfunktion Ihrer Maschine
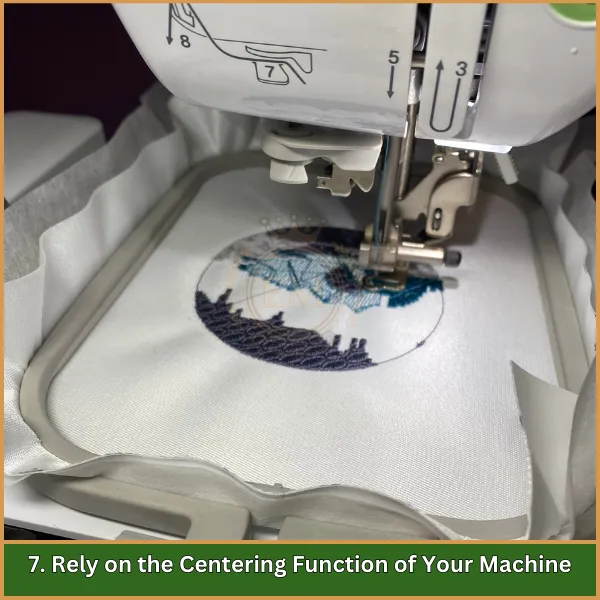
Die meisten Stickmaschinen verfügen über eine Zentrierfunktion, um Motive perfekt zu positionieren. Diese Funktion spart Zeit und gewährleistet eine genaue Platzierung.
Verfahren:
- Laden Sie das Design auf Ihre Stickmaschine und legen Sie den Stoff in den Stickrahmen.
- Nutzen Sie die Zentrierfunktion Ihrer Maschine, um das Design automatisch genau in der Mitte des Stickrahmens zu positionieren.
- Überprüfen Sie die Stoffplatzierung noch einmal und passen Sie sie gegebenenfalls an.
- Beginnen Sie mit dem Nähen, Sie können sicher sein, dass die Maschine das Motiv richtig zentriert hat.
Tipp: Diese Funktion ist besonders hilfreich für Designs, die eine präzise Ausrichtung ohne große manuelle Anpassung erfordern.
8. Mit Sticksoftware ausrichten
Mit einer Sticksoftware können Sie Ihr Design vor dem Sticken digital positionieren. Diese Software hilft Ihnen, Stickmuster neu auszurichten, ohne zu raten.
Verfahren:
- Öffnen Sie Ihr Design in Sticksoftware Dazu gehören Ausrichtungsfunktionen.
- Verwenden Sie die Tools der Software, um das Design genau an der gewünschten Stelle im virtuellen Stickrahmen zu platzieren, Passen Sie es an, bis Sie zufrieden sind.
- Übertragen Sie das Design auf Ihre Stickmaschine, und spannen Sie den Stoff so ein, dass er mit der Platzierung der Software übereinstimmt.
- Beginnen Sie mit dem Nähen, Wenn Sie wissen, dass das Design mit den Einstellungen übereinstimmt, die Sie in der Software vorgenommen haben.
Tipp: Bei einigen Stickprogrammen können Sie eine Vorlage des Designs ausdrucken, die Sie als physische Orientierungshilfe auf dem Stoff verwenden können.
Fazit
Einpacken, Zu wissen, wie man Stickmuster neu ausrichtet, kann einen großen Unterschied machen, wenn es darum geht, ein perfektes Ergebnis zu erzielen, professionelle Ergebnisse. Mit den Methoden, die wir geteilt haben, Sie sind in der Lage, Ausrichtungsherausforderungen souverän anzugehen!
Wenn es darum geht Digitalisierung von Dienstleistungen, Dann sind Sie bei EMdigitizing genau richtig. Wir sind stolz darauf, qualitativ hochwertige Digitalisierung zu unschlagbaren Preisen anzubieten, mit einer superschnellen Abwicklung und einer garantierten Vorschaumöglichkeit für jedes Design.
Plus, if you’;Ich bin Erstkunde, Sie erhalten ein exklusives 50% Rabatt auf Ihre Bestellung! Lassen EMdigitalisieren Helfen Sie dabei, Ihre Stickvision präzise und einfach zum Leben zu erwecken.
